Configure secret scanning
For private repositories with GitHub Advanced Security, secret scanning has a few configurable parameters, such as excluding files from being scanned and configurable notification recipients. Before you can configure secret scanning on a repository, however, you need to enable it.
This unit walks you through the necessary steps to enable secret scanning at the repository and organization level, as well as how you can configure it for your usage.
Enable secret scanning for a repository
Follow these steps to enable secret scanning and push protection on a private repository:
- In your repository, navigate to Settings > Code security and analysis.
- Select the Enable button next to GitHub Advanced Security
- Review the impact of enabling Advanced Security and select Enable GitHub Advanced Security for this repository.
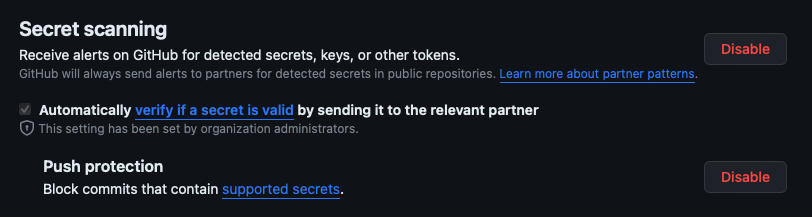
- Select the Enable button next to Secret scanning. If you see a Disable button, it means that secret scanning was already enabled at organization level.
- Select the Enable button next to Push protection.
Enable secret scanning for an organization
Enabling secret scanning at the organization level ensures that secret scanning is enabled by default on all private repositories where GitHub Advanced Security is enabled.
Follow these steps to enable secret scanning and push protection for an organization:
- In your organization, navigate to Settings > Code security and analysis.
- Select the Enable all button next to GitHub Advanced Security.
- Review the impact of enabling Advanced Security on all repositories and select Enable all.
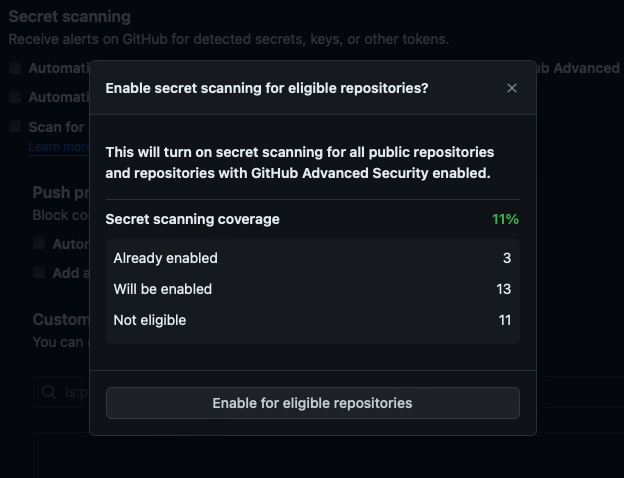
- Select the Enable all button next to Secret scanning and select Enable for eligible repositories.
- (Optional) Select Automatically enable for new public repositories and repositories with GitHub Advanced Security enabled.
- Select the Enable all button next to Push protection and select Enable for eligible repositories.
- (Optional) Select Automatically enable for repositories added to secret scanning.
Exclude files from being scanned
In some cases, you might not want secret scanning to scan certain files in your repositories. For example, test files or files that contain randomly generated content can generate false alerts. You can create a .github/secret_scanning.yml file in your repository that excludes some directories from being scanned.
In the file, use paths-ignore followed by the paths you want to exclude from secret scanning:
paths-ignore:
  - "foo/bar/*.js"
You can use special characters, such as *, to filter paths. A filter pattern cheat sheet is available at the end of the module in the Summary unit.
Note
- If there are more than 1,000 entries in
paths-ignore, secret scanning will only exclude the first 1,000 directories from scans. - If
secret_scanning.ymlis larger than 1 MB, secret scanning will ignore the entire file.
Determine notifications for secret scanning alerts
When a new secret is detected, GitHub notifies all users with access to security alerts for the repository according to their notification preferences. These users include:
- Security managers
- Repository administrators
- Users with custom roles with read/write access
- Organization owners and enterprise owners, if they're administrators of repositories where secrets were leaked
Note
Commit authors who've accidentally committed secrets will be notified, regardless of their notification preferences.
You'll receive an email notification if:
- You're watching the repository.
- You've enabled notifications for All Activity or for custom Security alerts on the repository.
- In your notification settings, under "Subscriptions", then under "Watching", you have selected to receive notifications by email.
Configure recipients of secret scanning alerts
Repository and organization administrators can give view access to security alerts to people or teams who have write access to the repository under Settings > Code security and analysis > Access to alerts:
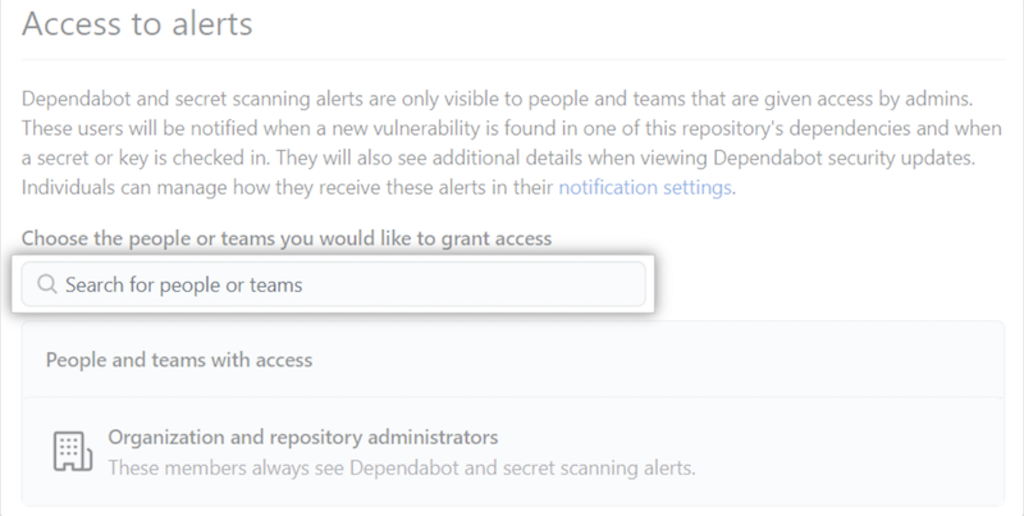
If you want to give view access to security alerts to additional people in your team, type their name in the Search for people of teams field, select their name in the list of matches that appear, and select Save changes.
Alert recipients are notified according to their notification settings.