Exercise - Consume a REST service with HttpClient
As part of the app that engineers use on customer site visits, you need to add a feature that allows an engineer to look up the details of electrical components. This information will be held in a database and accessed through a REST web service. You've also been asked to provide an interface that allows an administrator to create, remove, and modify the details of parts held in the database using the same REST web service.
In this exercise, you'll deploy the REST web service to Azure, then verify that you can access it using a web browser. Then, you'll add functionality to an existing app that uses the REST web service to retrieve, add, delete, and update the details of electrical components.
You'll perform this exercise using the Azure sandbox.
Tip
You can use the Copy button to copy commands to the clipboard. To paste, right-click on a new line in the Cloud Shell terminal and select Paste, or use the Shift+Insert keyboard shortcut (⌘+V on macOS).
Deploy the Parts REST web service
In the Cloud Shell window, run the following command to clone the repo containing the code for this exercise, including the Parts REST web service:
git clone https://github.com/microsoftdocs/mslearn-dotnetmaui-consume-rest-servicesMove to the Consume-REST-services folder:
cd mslearn-dotnetmaui-consume-rest-services/srcRun the following command to deploy the Parts web service using the Azure Cloud Shell sandbox. This command makes the service available through a unique URL. Make a note of this URL when it's displayed. You'll configure the app to connect to the web service using this URL.
bash initenvironment.sh
Examine the code for the web service
Note
You'll perform the remainder of this exercise on your local development computer.
On your computer, open a command prompt window and clone the repository for this exercise. The code is in the net-maui-learn-consume-rest-services repository.
git clone https://github.com/microsoftdocs/mslearn-dotnetmaui-consume-rest-servicesNote
It is best to clone or download the exercise content to a short folder path, such as C:\dev, to avoid build-generated files exceeding the maximum path length.
Go to the src\webservice\PartsServer folder in your clone of the repository, and open the PartsServer.sln solution using Visual Studio or the folder in Visual Studio Code. This solution contains a copy of the code for the web service that you deployed to Azure in the previous procedure.
In the Solution Explorer window, expand the Models folder. This folder contains two files:
Part.cs. The Part class represents a part as provided by the REST web service. The fields include the part ID, part name, part type, the availability date (when the part was first supplied), and a list of suppliers. The Href property returns the relative URI of the part; a REST client can use this URI to reference this specific part in the REST web service. The Suppliers property returns the list of suppliers of the part as a string.
PartsFactory.cs. The PartsFactory class initializes the list of parts provided by the service, using a small set of hard-coded values. In the real world, this data would be retrieved from a database.
In the Solution Explorer window, expand the Controllers folder. This folder contains the following files:
PartsController.cs. The PartsController class implements the web API for the service. It includes methods that enable a client application to retrieve a list of all parts (Get), find the details of a specific part given the part ID (the overloaded version of Get), update the details of a part (Put), add a new part to the list (Post), and remove a part from the list (Delete).
LoginController.cs. The LoginController class implements a simple form of authentication for the web service. An app must send an HTTP GET request to this controller, which returns an authorization token. This authorization token is used to authenticate the requests sent to the PartsController.
BaseController.cs. The BaseController class contains the logic used to authenticate requests. The PartsController class inherits from this class. If the client attempts to call methods in the PartsController class without providing a valid authentication token, the methods return an HTTP 401 (unauthorized) response.
Examine the code for the .NET MAUI client app
This module uses the .NET 8.0 SDK. Ensure that you have .NET 8.0 installed by running the following command in your preferred command terminal:
dotnet --list-sdks
Output similar to the following example appears:
6.0.317 [C:\Program Files\dotnet\sdk]
7.0.401 [C:\Program Files\dotnet\sdk]
8.0.100 [C:\Program Files\dotnet\sdk]
Ensure that a version that starts with 8 is listed. If none is listed or the command isn't found, install the most recent .NET 8.0 SDK.
Close the PartsServer solution, and open the PartsClient solution in the src\client\PartsClient folder in the cloned repository. This solution contains a partial implementation of a .NET MAUI client app that uses the PartsServer web service.
In the Solution Explorer window, expand the Data folder. This folder contains the code for two classes:
PartsManager.cs. The PartsManager class provides the methods that the client app uses to interact with the REST web service. This class is currently incomplete; you'll add the necessary code during this exercise. When complete, the GetClient method connects to the REST web service. The GetAll method returns a list of parts from the REST web service. The Add method adds a new part to the list of parts managed by the REST web service. The Update method modifies the details of a part stored by the REST web service, and the Delete method removes a part.
Part.cs. The Part class models a part stored in the database. It exposes properties that an application can use to access the PartID, PartName, PartAvailableDate, PartType, and PartSuppliers fields. The class also provides a utility method named SupplierString that an application can use to retrieve a formatted string containing the supplier names.
In the Solution Explorer window, expand the Pages folder. This folder contains the markup and code for two pages:
PartsPage.xaml. This page uses a CollectionView layout with a DataTemplate to display the details of the parts available as a list. The DataTemplate uses data binding to connect the data displayed to the parts retrieved from the web service. You can select a row in the CollectionView to edit a part in the AddPartPage, or you can select the Add New Part button to add a new part.
AddPartPage.xaml. This page allows users to enter and save the details for a new part. Users can specify the part name, part type, and an initial supplier. The part ID and part available date are generated automatically.
In the Solution Explorer window, expand the ViewModels folder. This folder contains two classes: AddPartViewModel.cs and PartsViewModel.cs. These are the view models for their respective pages and contain properties and logic the page needs to display and manipulate data.
Sign in to the service
The REST service requires you to sign in first to get an authorization token. There's no user authentication. You call a specific endpoint first to get an authorization token, then you send the token back to the server on each subsequent request in the HTTP header.
Open the PartsManager.cs file in the Data folder.
Add BaseAddress and Url static fields as defined in the following code snippet to the PartsManager class. Replace the text URL GOES HERE with the URL of the REST web service that you noted earlier:
public class PartsManager
{
    static readonly string BaseAddress = "URL GOES HERE";
    static readonly string Url = $"{BaseAddress}/api/";
    ...
}
Add the following field to the class, after the Url field. This field will hold the authorization token returned when the user signs in:
private static string authorizationKey;Find the GetClient method. This method currently throws a NotImplementedException exception. Replace the existing code in this method with the following code. This code creates an HttpClient object, then sends a request to the login endpoint of the REST web service. The service should respond with a message that contains the authorization token. Deserialize this token, and add it as a default Authorization request header for subsequent requests sent using the HttpClient object:
private static async Task<HttpClient> GetClient()
{
    if (client != null)
        return client;

    client = new HttpClient();

    if (string.IsNullOrEmpty(authorizationKey))
    {
        authorizationKey = await client.GetStringAsync($"{Url}login");
        authorizationKey = JsonSerializer.Deserialize<string>(authorizationKey);
    }

    client.DefaultRequestHeaders.Add("Authorization", authorizationKey);
    client.DefaultRequestHeaders.Add("Accept", "application/json");

    return client;
}
Perform a GET operation to retrieve information for parts
In the PartsManager.cs file, find the GetAll method. This is an asynchronous method that returns an enumerable list of parts. This method isn't yet implemented.
In this method, delete the code that throws the NotImplementedException exception.
Check to see if the device has internet connectivity by using the
Connectivityclass. If the internet isn't present, return an emptyList<Part>.if (Connectivity.Current.NetworkAccess != NetworkAccess.Internet) return new List<Part>();Call the GetClient method to retrieve an HttpClient object to work with. Remember that GetClient is asynchronous, so use the await operator to capture the object returned by this method.
Call the GetStringAsync method of the HttpClient object and provide the base URL to retrieve an array of parts from the REST web service. The data is returned asynchronously as a JSON string.
Deserialize the JSON string returned by this method into a list of Part objects using the JsonSerializer.Deserialize method. Return this list to the caller.
The completed method should look like this:
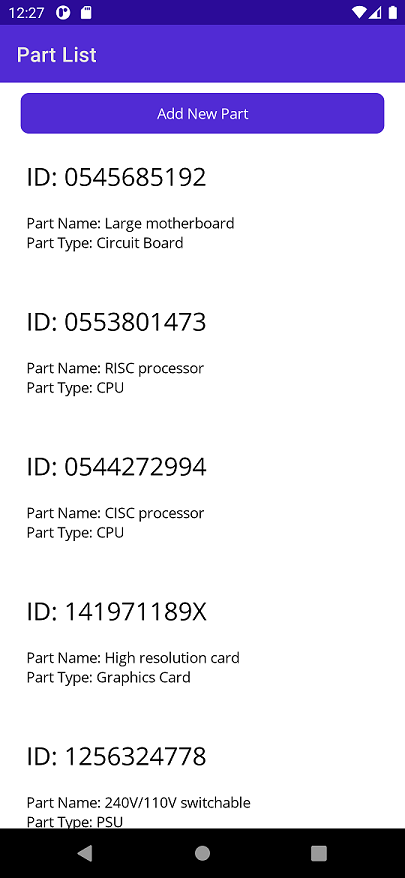
public static async Task<IEnumerable<Part>> GetAll()
{
    if (Connectivity.Current.NetworkAccess != NetworkAccess.Internet)
        return new List<Part>();

    var client = await GetClient();
    string result = await client.GetStringAsync($"{Url}parts");

    return JsonSerializer.Deserialize<List<Part>>(result, new JsonSerializerOptions
        {
            PropertyNameCaseInsensitive = true,
        });
}
Build and run the app. When the app starts, the Part List page will appear and a list of parts retrieved by the GetAll method should appear. The following image shows the app running on Android:
When you've finished browsing the data, close the app and return to Visual Studio or Visual Studio Code.
Perform a POST operation to add a new part to the database
In the PartsManager class, locate the Add method. This method has parameters for the part name, a supplier, and the part type. The method is asynchronous. The method's purpose is to insert a new part into the database and return a Part object representing the newly created item.
Delete the existing code in the method.
Check to see if the device has internet connectivity by using the
Connectivityclass. If the internet isn't present, return an emptyPart.if (Connectivity.Current.NetworkAccess != NetworkAccess.Internet) return new Part();Create a new Part object. Populate the fields with the passed-in data:
- Set the PartID field to an empty string. This ID will be generated by the REST web service.
- Create a new List to hold the name of the supplier.
- Set the PartAvailableDate field to DateTime.Now.
- Get an HTTP client from the GetClient method.
var part = new Part()
{
    PartName = partName,
    Suppliers = new List<string>(new[] { supplier }),
    PartID = string.Empty,
    PartType = partType,
    PartAvailableDate = DateTime.Now.Date
};
Call the GetClient method to retrieve an HttpClient object to work with.
Create an
HttpRequestMessageobject. This object is used to model the request that is sent to the web service. Initiate it with parameters indicating which HTTP verb to use and the URL of the web service to communicate with.var msg = new HttpRequestMessage(HttpMethod.Post, $"{Url}parts");You need to send a payload to the webservice with the Part information to create. This payload will be serialized to JSON. The JSON payload will be added to the
HttpRequestMessage.Contentproperty and it's serialized with theJsonContent.Createmethod.msg.Content = JsonContent.Create<Part>(part);Now send the message to the web service with the
HttpClient.SendAsyncfunction. That function will return aHttpResponseMessageobject that holds information about the operation on the server. Such as HTTP response codes and information passed back from the server.var response = await client.SendAsync(msg); response.EnsureSuccessStatusCode();Note the preceding uses the
response.EnsureSuccessStatusCodemethod. That will throw an error if anything other than a 2xx HTTP status code is returned.If the web service returns information, such as an object serialized in JSON, you can read it out of the
HttpResponseMessage. Then, you can deserialize the JSON usingJsonSerializer.Deserialize.var returnedJson = await response.Content.ReadAsStringAsync(); var insertedPart = JsonSerializer.Deserialize<Part>(returnedJson, new JsonSerializerOptions { PropertyNameCaseInsensitive = true, });Finally, return the new inserted Part.
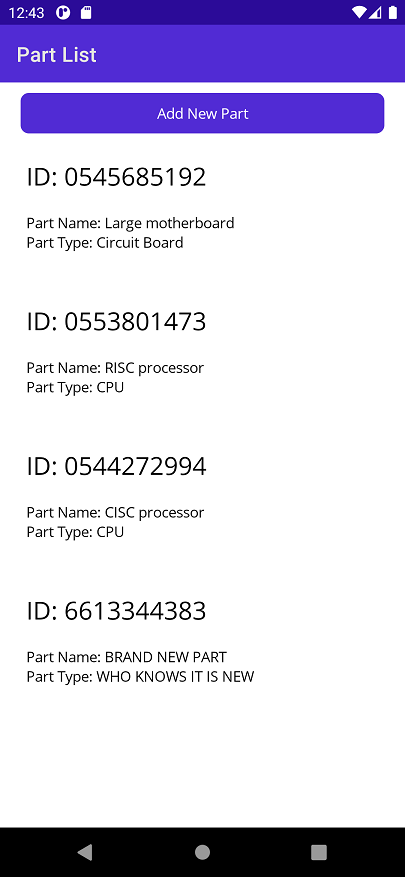
return insertedPart;Build and run the app. Select the Add New Part button and enter a name, type, and supplier to create a new part. Select Save. The Add method in the PartsManager class will get invoked, which creates the new part in the web service. If the operation is successful, the part list page will reappear with the new part at the bottom of the list.
When you've finished browsing the data, close the app and return to Visual Studio or Visual Studio Code.
Perform a PUT operation to update the details for a part in the database
In the PartsManager class, find the Update method. This is an asynchronous method that takes a Part object as the parameter. The method doesn't have an explicit return value. However, the return type is Task so that exceptions are properly returned back to the caller. Let's implement the PUT functionality.
Delete the existing code.
As before, check for an internet connection.
if (Connectivity.Current.NetworkAccess != NetworkAccess.Internet) return;Create a new
HttpRequestMessage, this time specifying a PUT operation and the URL for updating parts.HttpRequestMessage msg = new(HttpMethod.Put, $"{Url}parts/{part.PartID}");Set the
Contentproperty of theHttpRequestMessageusing theJsonContent.Createfunction and the part parameter that was passed into the function.msg.Content = JsonContent.Create<Part>(part);Get an HTTP client from the GetClient method.
var client = await GetClient();Send the request with the
HttpClientand then make sure it was successful.var response = await client.SendAsync(msg); response.EnsureSuccessStatusCode();Build and run the app. Select one of the parts from the list. The AddPart page will appear, this time with the properties already filled in. Update whatever you'd like.
Select Save. This calls the Update method in the PartsManager class to send the changes to the web service. If successful, the parts list page will reappear will your changes reflected.

Note
The part you added in the previous task will not appear on the Part List page. The data the app uses is reset to a list of predefined parts each time the app runs. This is to provide consistency for testing the app.
Perform a DELETE operation to remove the details for a part from the database
In the PartsManager class, find the Delete method. This is an asynchronous method that takes a partId string and returns a Task.
Delete the existing code.
Check for an internet connection.
if (Connectivity.Current.NetworkAccess != NetworkAccess.Internet) return;Create a new
HttpRequestMessageobject. Only now specify the DELETE HTTP verb and the URL to delete a part.HttpRequestMessage msg = new(HttpMethod.Delete, $"{Url}parts/{partID}");Get an HTTP client from the GetClient method.
var client = await GetClient();Send the request to the web service. Check for success after it returns.
var response = await client.SendAsync(msg); response.EnsureSuccessStatusCode();Build and run the app. Select a part from the list and then select Delete on the Add Part page. If successful, the Part List page will reappear and the part you deleted will no longer be visible.