Exercise - Resolve Microsoft Dynamics 365 cases by using knowledge articles
Microsoft Dynamics 365 for Customer Service lets an organization service its customers in many ways, depending on the specific needs of those customers, the organization's service model, and other determining factors. One feature that organizations can take advantage of is the Knowledge Base Search control.
This hands-on-lab will walk you through the process of setting up the feature and putting the Knowledge Base Search control on specific page. You can then use the control to find knowledge articles that can help you resolve cases.
Before you begin
This exercise works best when you have sample data to use. Dynamics 365 lets you add sample data as needed. If no sample data is installed in the environment that you're working in, follow these steps to install some.
- If necessary, on the main application navigation bar, select the drop-down arrow next to Dynamics 365, and then select Dynamics 365 – custom.
- On the navigation bar, select the drop-down arrow next to Settings, and then select Data Management.
- Select Sample Data.
- Select Install Sample Data.
- Close the Sample Data page.
Learning objectives
At the end of this exercise, you'll be able to perform the following tasks:
- Set up the knowledge search feature.
- Change the Knowledge Base Search control settings on a page.
- Use the Knowledge Base Search control to resolve a case.
Estimated time to finish this exercise: 15 to 20 minutes
Scenario
You work for an organization that is starting to use the Dynamics 365 knowledge base, and several articles have recently been created. You've been asked to make sure that agents can use the Knowledge Base Search control from the Case entity. If necessary, agents should be able to change the article language to see whether articles are available in other languages.
High-level steps
- Set up the embedded knowledge search feature.
- Set up the Knowledge Base Search control on the Case page.
- Use the Customer Service Hub to identify any high-priority phone cases.
- Add a phone call follow-up activity to a case.
- Add a child case for an existing case.
- Use an article to resolve a case.
Detailed steps
Set up embedded knowledge search
- On the main application navigation bar, select the drop-down arrow next to Dynamics 365 to show the available application modules.
- Select Dynamics 365 – custom.
- On the navigation bar, select the drop-down arrow next to Settings, and then select Service Management.
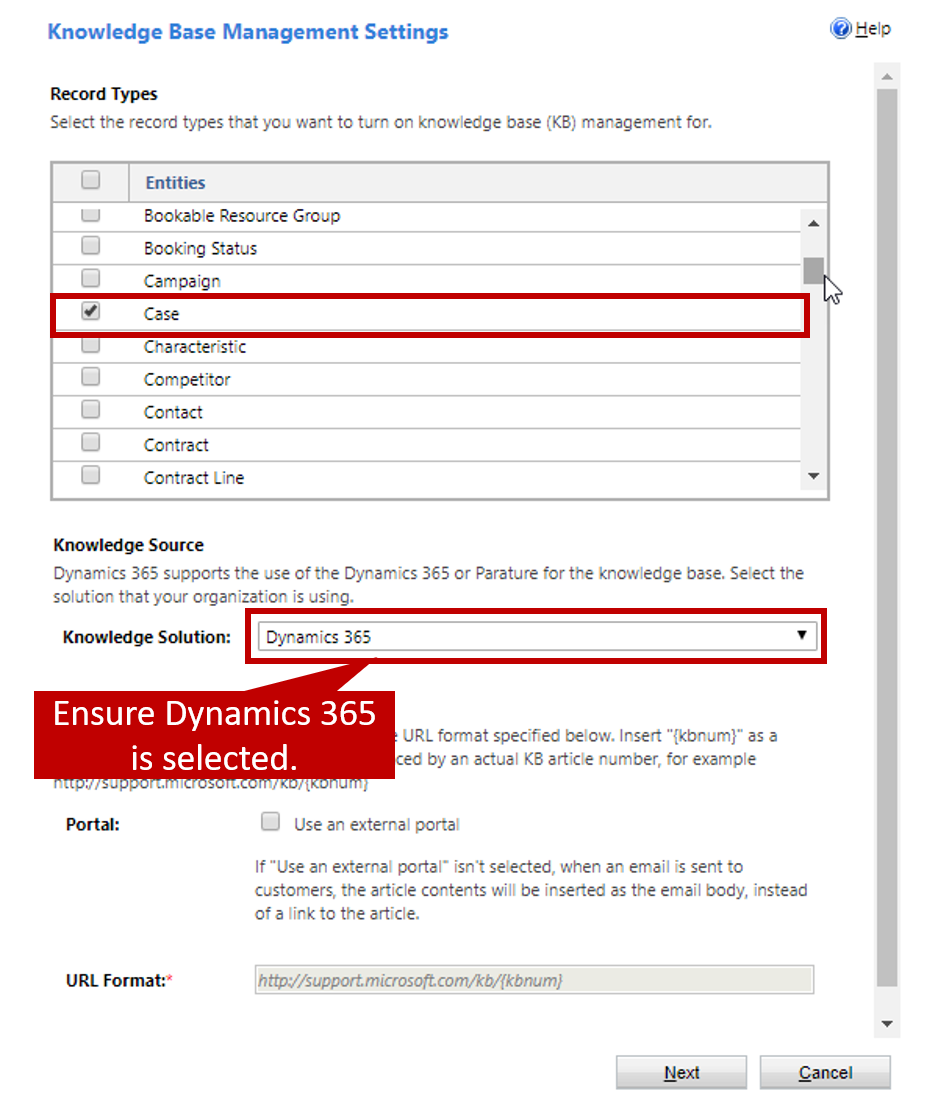
- Under Knowledge Base Management, select Embedded Knowledge Search.
- Under Record Types, make sure that Case is selected. If it isn't, select the check box.
- Under Knowledge Source, make sure that the Knowledge Solution field is set to Dynamics 365.
- Select Next.
- On the confirmation page, select Finish.
Set up the Knowledge Base Search control on the Case page
- On the navigation bar, select the drop-down arrow next to Settings, and then select Customizations > Customize the System.
- In the Default Solution, expand Entities, and then expand the Case entity.
- Select Forms.
- Open the Case for Interactive Experience page.
- Double-click the Related pane to open the properties. (Alternatively, select the pane, and then select Change Properties.)
- Clear the Lock the section on the Form check box.
- Select OK.
- Double-click the Knowledge Base Search control to open the properties. (Alternatively, select the control, and then select Change Properties.)
- Under Name, change value of the Label field to Knowledge Article Search.
- Under Filter Data, select the User can change Language Filter check box under the Set Default Language field.
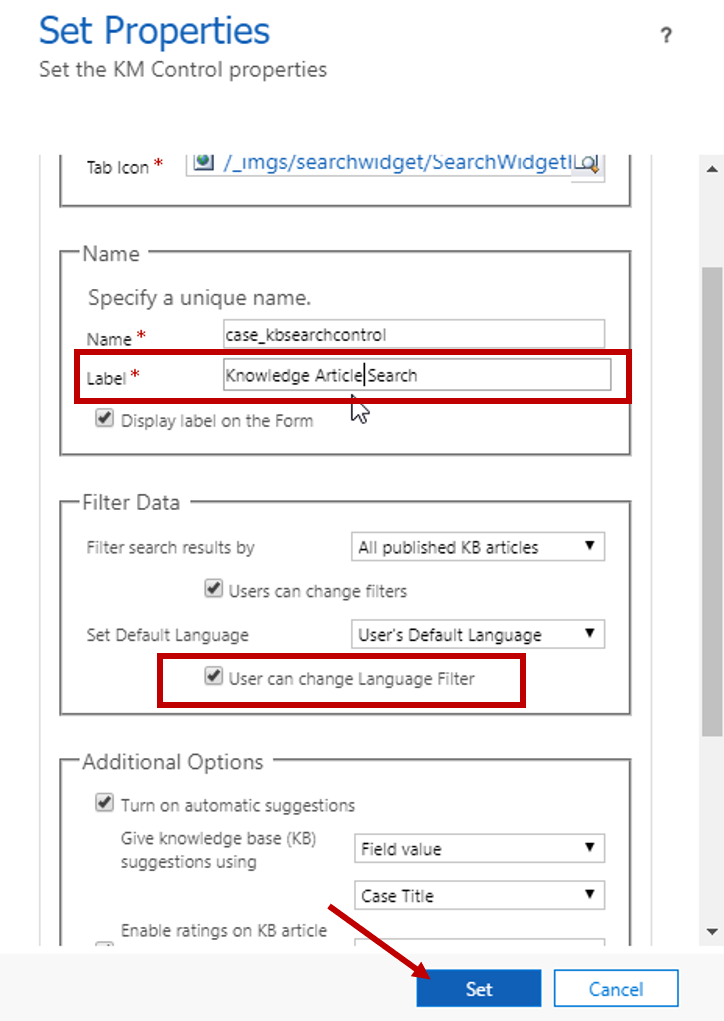
- Select Set.
- Select Save on the Case page.
- Select Publish to publish your customizations.
- Close the Case page, and then close the Solution Explorer window.
Use the Customer Service Hub to identify high-priority cases
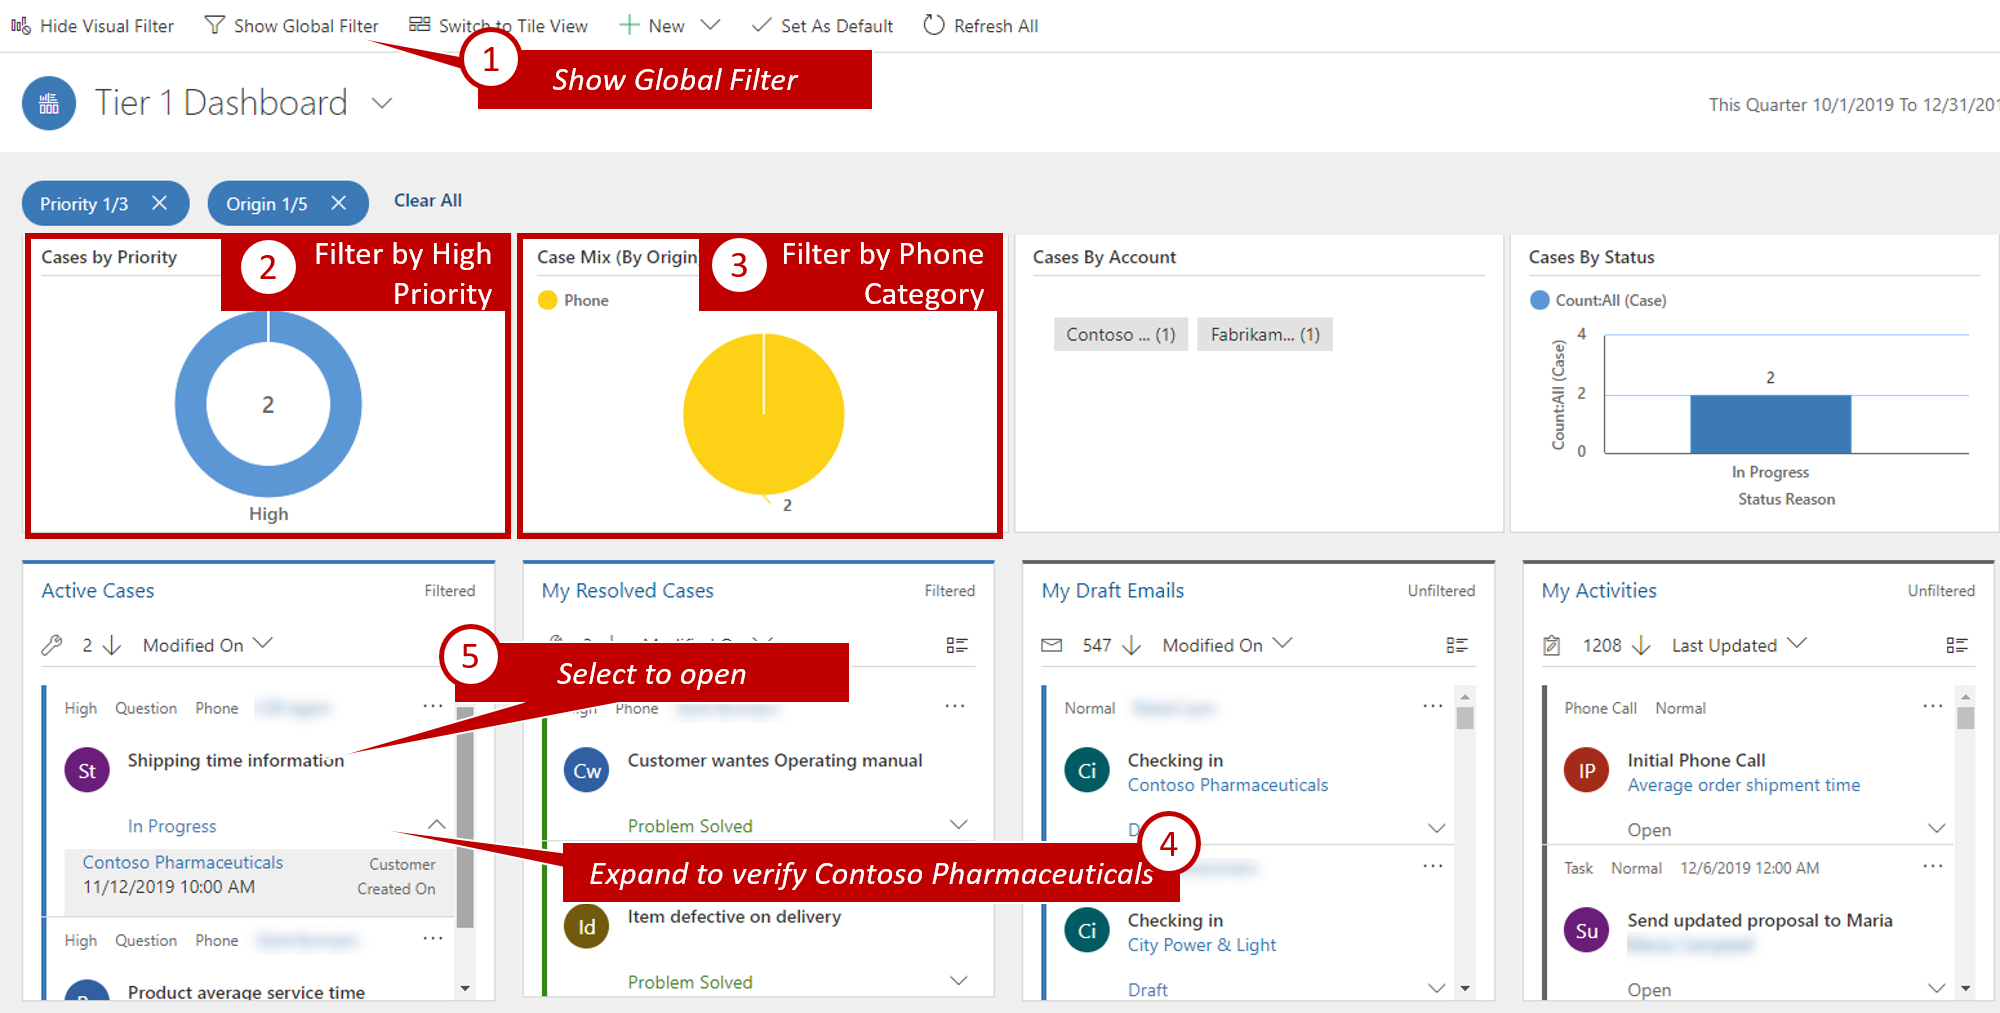
In Customer Service Hub, select the Site Map icon, and then select Dashboards.
Select the down arrow next to this quarter data range, and then select custom period.
Set the period:
- Start Date: 1/1/2018
- End Date: 12/31/2018
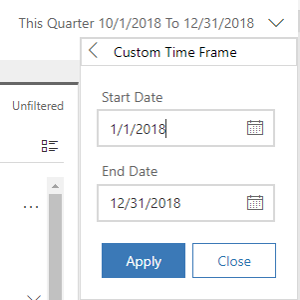
Select Apply.
On the command bar, select Show Global Filter.
Find the Case Mix (By Origin) chart, and select the Phone slice.
In the Cases by Priority chart, select the High category.
Find the Service required (sample) case, select the down arrow, and make sure that the customer is Fourth Coffee (sample).
Select the Service required (sample) case to open it.
In the record timeline, select Add Info and Activities.
Select Phone Call on the menu.
Enter the following information for the phone call:
- Subject: Follow-up call
- Call From: Your user record
- Call To: Yvonne McKay (sample)
- Direction: Outgoing
- Duration: 15 minutes
- Priority: Normal
- Regarding: Service required (sample)
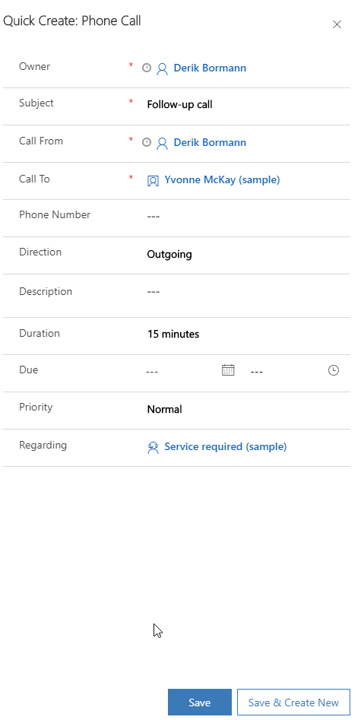
- Select Save to save the activity.
- Close the Service required (sample) case for now.
Create a child case from an existing case
As you're working on this case, Yvonne mentions that it won't be possible to try any of the solutions that you find, because Yvonne also can't sign in. Yvonne needs to have her password reset for this item. You must capture this issue in a child case.
On the command bar, select Create Child Case, and then select Save.
Enter the following information for the child case:
- Case Title: Service required - Password Reset
- Case Type: Problem
- Origin: Phone
Select Save.
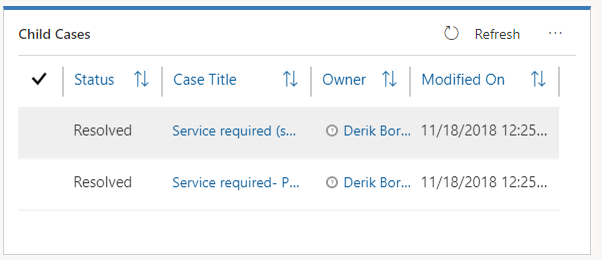
To view child cases, select the Case Relationships tab.
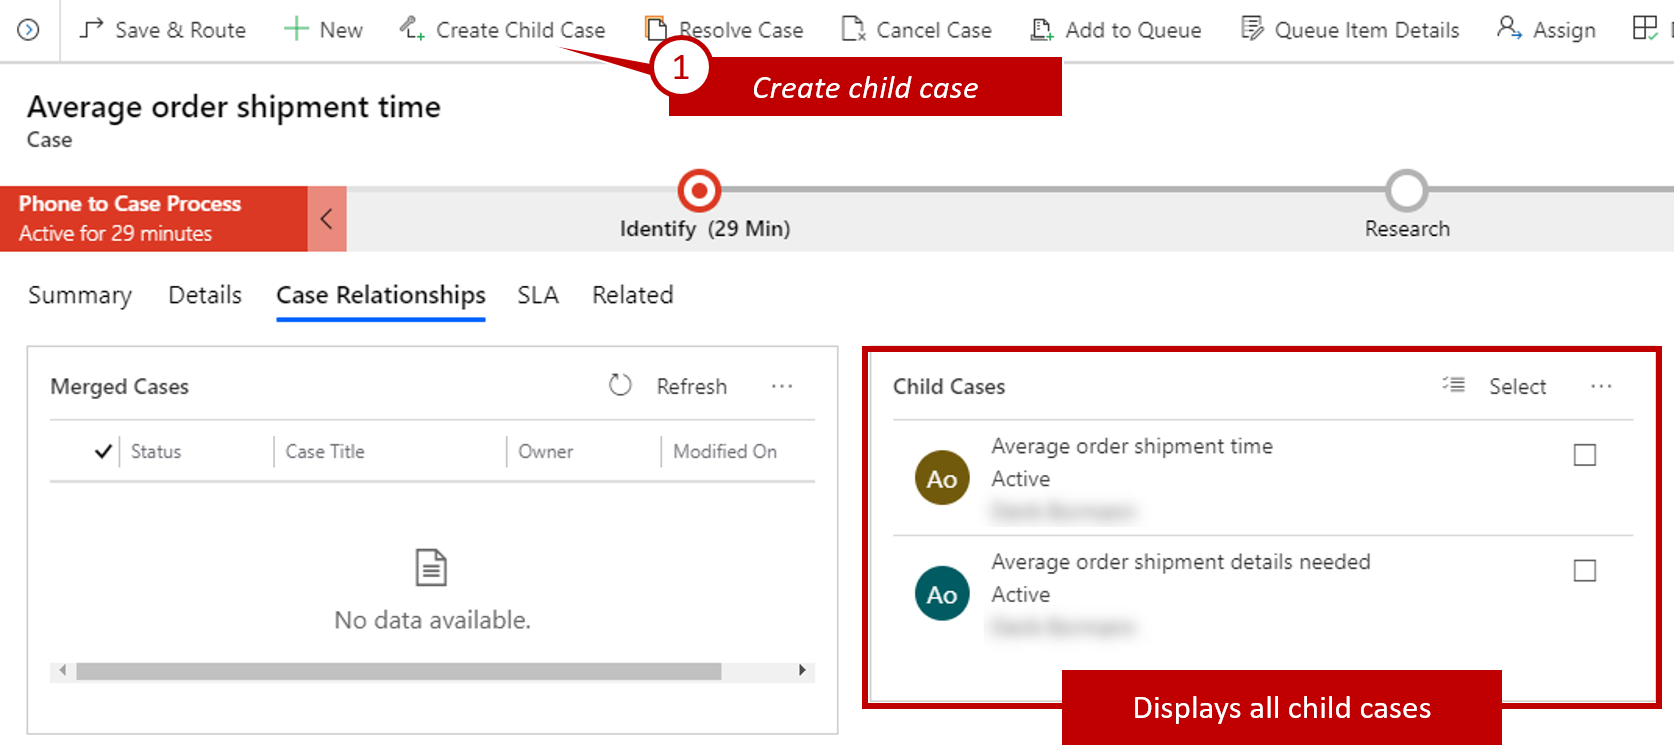
In the Child Cases sub-grid, select the Service required - Password Reset case to open it.
Select the Details tab. The parent case will appear in the Additional Details section.
Go back to the parent case by selecting the link for the Service required (sample) case.
In the Related pane, select the Knowledge Base Search button.
Select one of the suggested articles, and then select the Link button.
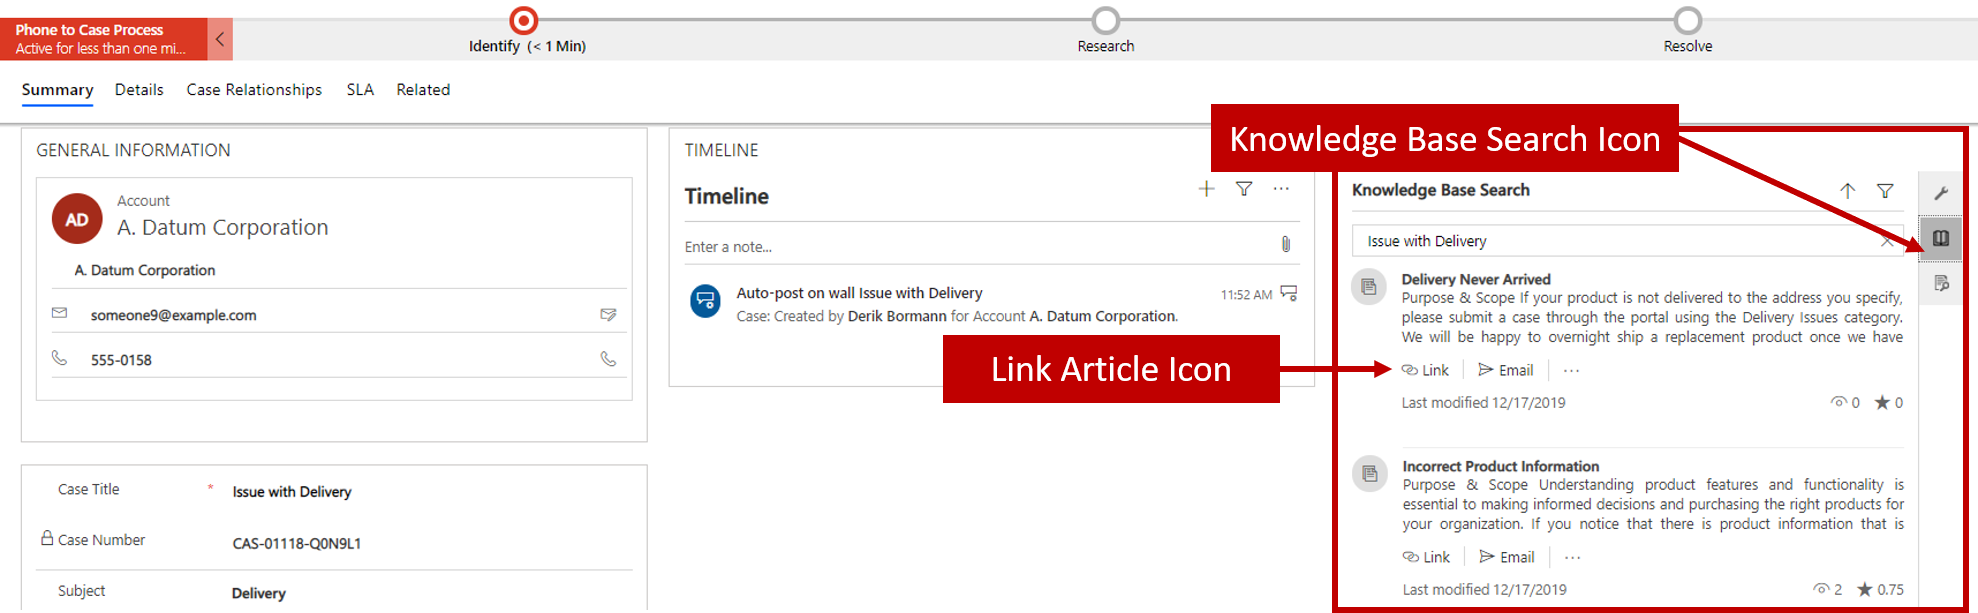
On the Case Relationships tab, make sure that the article that you linked to appears in the Associated Knowledge Records sub-grid.
In the Phone to Case Process flow, select Next Stage until you reach the Resolve stage.
In the Resolve stage, select Finish.
Select Resolve Case to resolve the parent case.
Select Confirm to confirm your decision to resolve the case.
In the Resolve Case dialog box, in the Resolution field, enter Went on site to fix the issue.
Change the value of the Billable Time field to 1 hour.
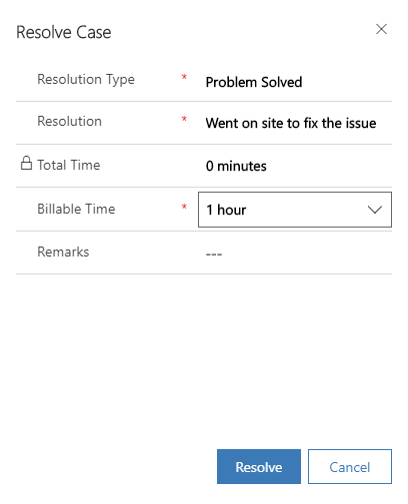
- Select Resolve to resolve the parent case together with all related child cases.
- On the Case Relationships tab, make sure that any child cases are also resolved.