Exercise - Create and use a module
You've been tasked with adding a content delivery network, or CDN, to your company's website for the launch of a toy wombat. However, other teams in your company have told you they don't need a CDN. In this exercise, you'll create modules for the website and the CDN, and you'll add the modules to a template.
During the process, you'll:
- Add a module for your application.
- Create a Bicep template that uses the module.
- Add another module for the CDN.
- Add the CDN module to your template, while making it optional.
- Deploy the template to Azure.
- Review the deployment history.
This exercise uses the Bicep extension for Visual Studio Code. Be sure to install this extension in Visual Studio Code.
Create a blank Bicep file
Open Visual Studio Code.
Create a new file called main.bicep.
Save the empty file so that Visual Studio Code loads the Bicep tooling.
You can either select File > Save As or select Ctrl+S on Windows (⌘+S on macOS). Be sure to remember where you save the file. For example, you might want to create a templates folder to save it in.
Create a module for your application
Create a new folder called modules in the same folder where you created your main.bicep file. In the modules folder, create a file called app.bicep. Save the file.
Add the following content into the app.bicep file:
@description('The Azure region into which the resources should be deployed.')
param location string

@description('The name of the App Service app.')
param appServiceAppName string

@description('The name of the App Service plan.')
param appServicePlanName string

@description('The name of the App Service plan SKU.')
param appServicePlanSkuName string

resource appServicePlan 'Microsoft.Web/serverfarms@2022-03-01' = {
  name: appServicePlanName
  location: location
  sku: {
    name: appServicePlanSkuName
  }
}

resource appServiceApp 'Microsoft.Web/sites@2022-03-01' = {
  name: appServiceAppName
  location: location
  properties: {
    serverFarmId: appServicePlan.id
    httpsOnly: true
  }
}

@description('The default host name of the App Service app.')
output appServiceAppHostName string = appServiceApp.properties.defaultHostName
This file deploys an Azure App Service plan and an app. Notice that the module is fairly generic. It doesn't include any assumptions about the names of resources, or the App Service plan's SKU. This makes it easy to reuse the module for different deployments.
Save the changes to the file.
Add the module to your Bicep template
Here, you add the app module to your Bicep template as a starting point.
Open the main.bicep file.
Add the following parameters and variable to the file:
@description('The Azure region into which the resources should be deployed.')
param location string = 'westus3'

@description('The name of the App Service app.')
param appServiceAppName string = 'toy-${uniqueString(resourceGroup().id)}'

@description('The name of the App Service plan SKU.')
param appServicePlanSkuName string = 'F1'

var appServicePlanName = 'toy-product-launch-plan'
Because this is the template that you intend to deploy for your toy websites, it's a little more specific. The App Service plan name is defined as a variable. The SKU parameter has a default value that makes sense for the toy launch website.
Tip
You're specifying that the
locationparameter should be set towestus3. Normally, you would create resources in the same location as the resource group by using theresourceGroup().locationproperty. But when you work with the Microsoft Learn sandbox, you need to use certain Azure regions that don't match the resource group's location.Below the parameters, create a blank line. Now, type the first line of the app module definition:
module app 'modules/app.bicep' = {As you type, notice that the Bicep extension for Visual Studio Code helps you to scaffold the module declaration. When you type the path to your module and type the equals (
=) character, a pop-up menu appears with several options.Select Required properties from the pop-up menu:
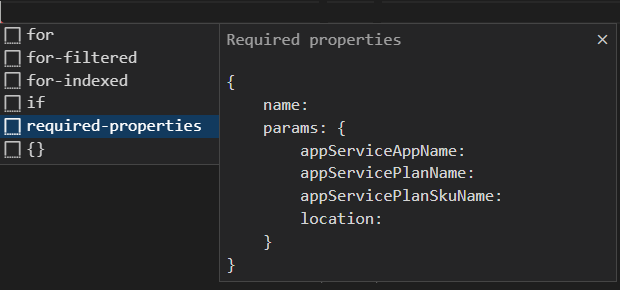
Complete the module declaration:
module app 'modules/app.bicep' = {
  name: 'toy-launch-app'
  params: {
    appServiceAppName: appServiceAppName
    appServicePlanName: appServicePlanName
    appServicePlanSkuName: appServicePlanSkuName
    location: location
  }
}
At the bottom of the file, define an output:
@description('The host name to use to access the website.')
output websiteHostName string = app.outputs.appServiceAppHostName
Save the changes to the file.
Create a module for the content delivery network
In the modules folder, create a file called cdn.bicep. Save the file.
Add the following content into the cdn.bicep file:
@description('The host name (address) of the origin server.')
param originHostName string

@description('The name of the CDN profile.')
param profileName string = 'cdn-${uniqueString(resourceGroup().id)}'

@description('The name of the CDN endpoint')
param endpointName string = 'endpoint-${uniqueString(resourceGroup().id)}'

@description('Indicates whether the CDN endpoint requires HTTPS connections.')
param httpsOnly bool

var originName = 'my-origin'

resource cdnProfile 'Microsoft.Cdn/profiles@2022-11-01-preview' = {
  name: profileName
  location: 'global'
  sku: {
    name: 'Standard_Microsoft'
  }
}

resource endpoint 'Microsoft.Cdn/profiles/endpoints@2022-11-01-preview' = {
  parent: cdnProfile
  name: endpointName
  location: 'global'
  properties: {
    originHostHeader: originHostName
    isHttpAllowed: !httpsOnly
    isHttpsAllowed: true
    queryStringCachingBehavior: 'IgnoreQueryString'
    contentTypesToCompress: [
      'text/plain'
      'text/html'
      'text/css'
      'application/x-javascript'
      'text/javascript'
    ]
    isCompressionEnabled: true
    origins: [
      {
        name: originName
        properties: {
          hostName: originHostName
        }
      }
    ]
  }
}

@description('The host name of the CDN endpoint.')
output endpointHostName string = endpoint.properties.hostName
This file deploys two resources: a CDN profile and a CDN endpoint.
Save the changes to the file.
Add the modules to the main Bicep template
Open the main.bicep file.
Below the
appServicePlanSkuNameparameter, add the following parameter:@description('Indicates whether a CDN should be deployed.') param deployCdn bool = trueBelow the
appmodule definition, define thecdnmodule:module cdn 'modules/cdn.bicep' = if (deployCdn) { name: 'toy-launch-cdn' params: { httpsOnly: true originHostName: app.outputs.appServiceAppHostName } }Notice that the module has a condition so that it's deployed only when the
deployCdnparameter's value is set totrue. Also, notice that the module'soriginHostNameparameter is set to the value of theappServiceAppHostNameoutput from theappmodule.Update the host name output so that it selects the correct host name. When a CDN is deployed, you want the host name to be that of the CDN endpoint.
output websiteHostName string = deployCdn ? cdn.outputs.endpointHostName : app.outputs.appServiceAppHostNameSave the changes to the file.
Deploy the Bicep template to Azure
To deploy this template to Azure, you need to sign in to your Azure account from the Visual Studio Code terminal. Be sure you've installed the Azure CLI, and remember to sign in with the same account that you used to activate the sandbox.
On the Terminal menu, select New Terminal. The terminal window usually opens in the lower half of your screen.
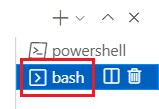
If the shell shown on the right side of the terminal window is bash, the correct shell is open and you can skip to the next section.

If a shell other than bash appears, select the shell dropdown arrow, and then select Git Bash.
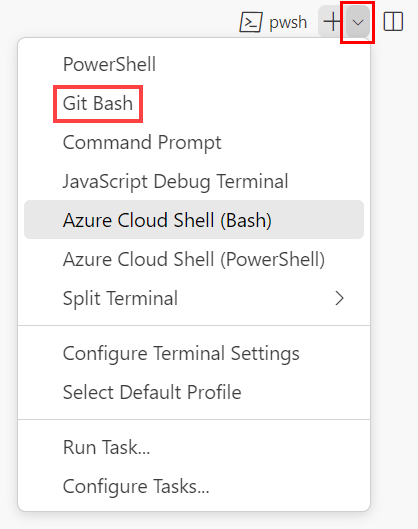
In the list of terminal shells, select bash.
In the terminal, go to the directory where you saved your template. For example, if you saved your template to the templates folder, you can use this command:
cd templates
Install Bicep
Run the following command to ensure you have the latest version of Bicep:
az bicep install && az bicep upgrade
Sign in to Azure
In the Visual Studio Code terminal, sign in to Azure by running the following command:
az loginIn the browser that opens, sign in to your Azure account.
The Visual Studio Code terminal displays a list of the subscriptions associated with this account.
Set the default subscription for all of the Azure CLI commands that you run in this session.
az account set --subscription "Concierge Subscription"Note
If you've used more than one sandbox recently, the terminal might display more than one instance of Concierge Subscription. In this case, use the next two steps to set one as the default subscription. If the preceding command was successful, and only one Concierge Subscription is listed, skip the next two steps.
Get the Concierge Subscription IDs.
 az account list \
   --refresh \
   --query "[?contains(name, 'Concierge Subscription')].id" \
   --output table
Set the default subscription by using the subscription ID. Replace {your subscription ID} with the latest Concierge Subscription ID.
az account set --subscription {your subscription ID}
Set the default resource group
When you use the Azure CLI, you can set the default resource group and omit the parameter from the rest of the Azure CLI commands in this exercise. Set the default to the resource group that's created for you in the sandbox environment.
az configure --defaults group="<rgn>[sandbox resource group name]</rgn>"
Deploy the template to Azure
Run the following code from the terminal in Visual Studio Code to deploy the Bicep template to Azure. This process can take a minute or two to finish, and then you'll get a successful deployment.
az deployment group create --template-file main.bicep
The status Running... appears in the terminal.
To deploy this template to Azure, sign in to your Azure account from the Visual Studio Code terminal. Be sure you've installed Azure PowerShell, and sign in to the same account that activated the sandbox.
On the Terminal menu, select New Terminal. The terminal window usually opens in the lower half of your screen.
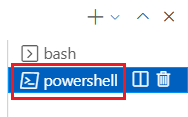
If the shell shown on the right side of the terminal window is powershell or pwsh, the correct shell is open, and you can skip to the next section.

If a shell other than powershell or pwsh appears, select the shell dropdown arrow, and then select PowerShell.
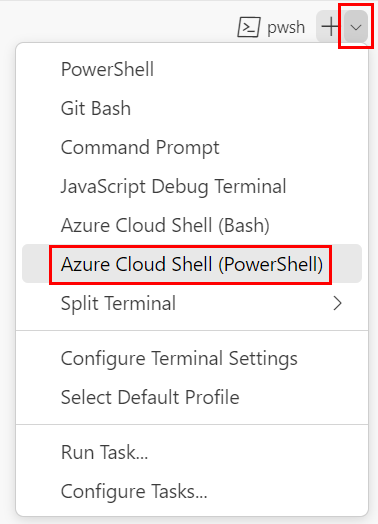
In the list of terminal shells, select powershell or pwsh.
In the terminal, go to the directory where you saved your template. For example, if you saved your template in the templates folder, you can use this command:
Set-Location -Path templates
Install the Bicep CLI
To use Bicep from Azure PowerShell, install the Bicep CLI.
Sign in to Azure by using Azure PowerShell
In the Visual Studio Code terminal, run the following command:
Connect-AzAccountA browser opens so that you can sign in to your Azure account.
After you've signed in to Azure, the terminal displays a list of the subscriptions associated with this account.
If you've activated the sandbox, a subscription named Concierge Subscription is displayed. Use it for the rest of the exercise.
Set the default subscription for all of the Azure PowerShell commands that you run in this session.
$context = Get-AzSubscription -SubscriptionName 'Concierge Subscription'
Set-AzContext $context
Note
If you've used more than one sandbox recently, the terminal might display more than one instance of Concierge Subscription. In this case, use the next two steps to set one as the default subscription. If the preceding command was successful, and only one Concierge Subscription is listed, skip the next two steps.
Get the subscription ID. Running the following command lists your subscriptions and their IDs. Look for
Concierge Subscription, and then copy the ID from the second column. It looks something likecf49fbbc-217c-4eb6-9eb5-a6a6c68295a0.Get-AzSubscriptionChange your active subscription to Concierge Subscription. Be sure to replace {Your subscription ID} with the one that you copied.
$context = Get-AzSubscription -SubscriptionId {Your subscription ID}
Set-AzContext $context
Set the default resource group
You can set the default resource group and omit the parameter from the rest of the Azure PowerShell commands in this exercise. Set this default to the resource group created for you in the sandbox environment.
Set-AzDefault -ResourceGroupName <rgn>[sandbox resource group name]</rgn>
Deploy the template to Azure
Deploy the template to Azure by using the following Azure PowerShell command in the terminal. This can take a minute or two to finish, and then you'll get a successful deployment.
New-AzResourceGroupDeployment -TemplateFile main.bicep
Review the deployment history
Go to the Azure portal and make sure you're in the sandbox subscription:
- Select your avatar in the upper-right corner of the page.
- Select Switch directory. In the list, choose the Microsoft Learn Sandbox directory.
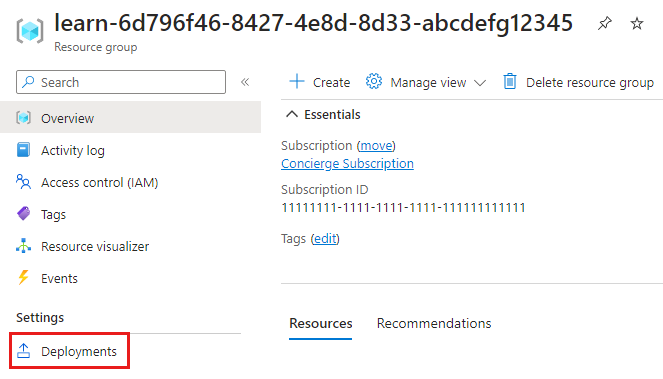
On the left-side panel, select Resource groups.
Select
[sandbox resource group name] .On the left menu, select Deployments.
Three deployments are listed.
Select the main deployment and expand Deployment details.
Notice that both of the modules are listed, and that their types are displayed as
Microsoft.Resources/deployments. The modules are listed twice because their outputs are also referenced within the template.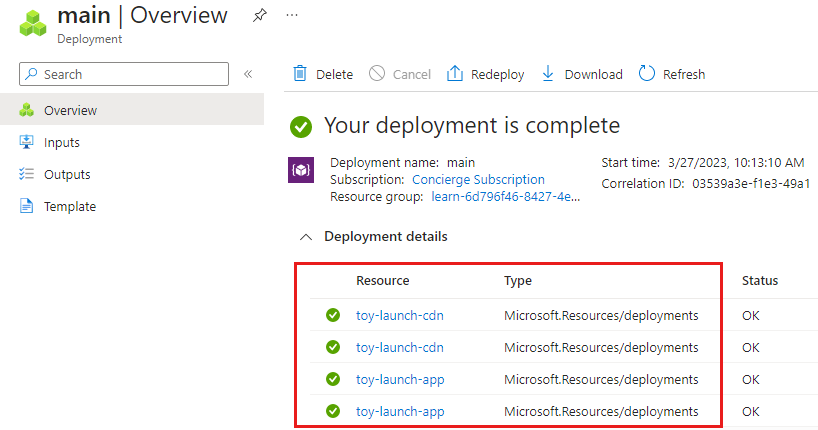
Select the toy-launch-cdn and toy-launch-app deployments and review the resources deployed in each. Notice that they correspond to the resources defined in the respective module.
Test the website
Select the toy-launch-app deployment.
Select Outputs.
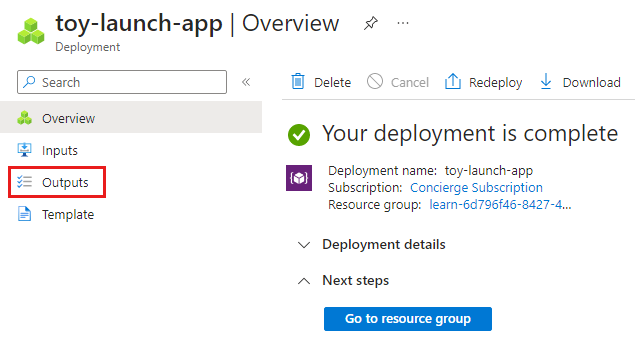
Select the copy button for the
appServiceAppHostNameoutput.On a new browser tab, try to go to the address that you copied in the previous step. The address should begin with
https://.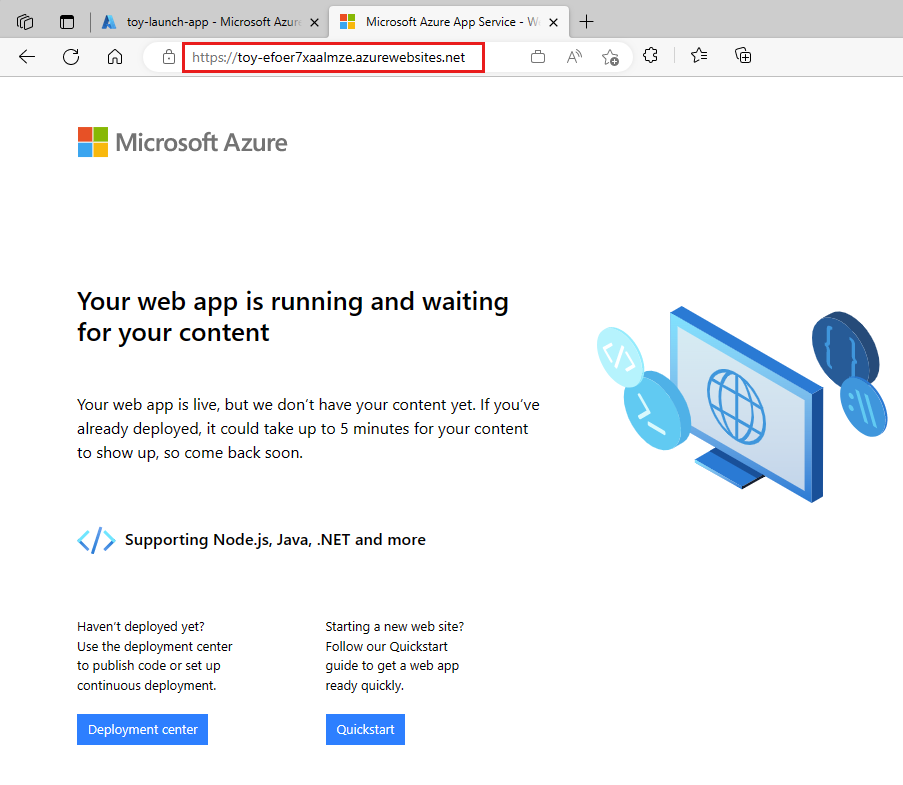
The App Service welcome page appears, showing that you've successfully deployed the app.
Go to the main deployment and select Outputs.
Copy the value of the
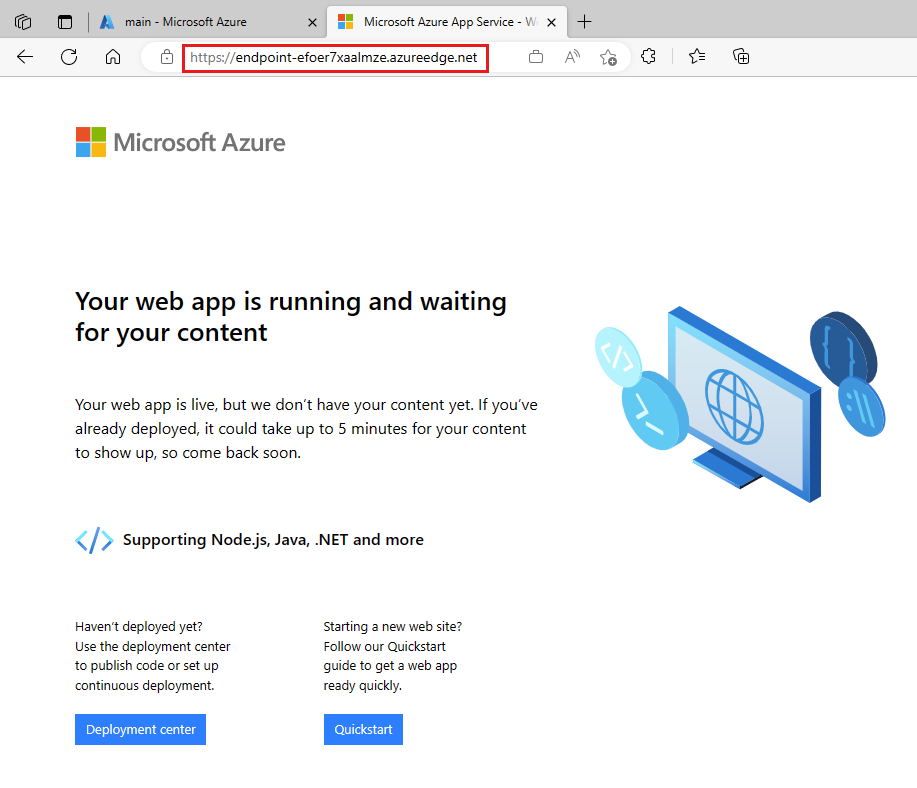
websiteHostNameoutput. Notice that this host name is different, because it's an Azure Content Delivery Network host name.On a new browser tab, try to go to the host name that you copied in the previous step. Add
https://to the start of the address.CDN endpoints take a few minutes to become active. If you get a Page not found error, wait a few minutes and try pasting the link again. Also, ensure that you added
https://to the start of the URL so that you're using HTTPS.When the CDN endpoint is active, you'll get the same App Service welcome page. This time, it has been served through the Azure Content Delivery Network service, which helps improve the website's performance.