Create a Windows Virtual Machine with Azure Image Builder using PowerShell
IT operations staff at Contoso decide to test Azure Image Builder using Azure PowerShell to create a Windows VM. The high-level steps involved are broadly similar to the process discussed in the last unit.
Important
While Azure Image Builder is in preview, you must manually install the required Azure PowerShell modules.
To install the required PowerShell modules, use the following Azure PowerShell command:
'Az.ImageBuilder', 'Az.ManagedServiceIdentity' | ForEach-Object {Install-Module -Name $_ -AllowPrerelease}
When prompted, select Y and select Enter.
Register Azure Image Builder
The first thing you must do to use Azure Image Builder in public preview is to register the features in your Azure subscription. The following steps provide guidance on this process:
Open the Azure portal, and then on the menu, select Cloud Shell.
In Cloud Shell, switch to PowerShell.
Select your Azure subscription by running the following PowerShell command:
 $subscriptionID = (Get-AzContext).Subscription.Id
 Write-Output $subscriptionID
 Set-AzContext -SubscriptionId $subscriptionID
Next, and only if this is your first time using Azure Image Builder, register the new
VirtualMachineTemplatePreviewfeature by running the following PowerShell command:Register-AzProviderFeature -ProviderNamespace Microsoft.VirtualMachineImages -FeatureName VirtualMachineTemplatePreviewCheck the status of the feature registration using the following command:
Get-AzProviderFeature -ProviderNamespace Microsoft.VirtualMachineImages -FeatureName VirtualMachineTemplatePreviewRegister the following resource providers:
- Microsoft.Compute
- Microsoft.KeyVault
- Microsoft.Storage
- Microsoft.VirtualMachineImages
Use the following command to register the resource providers:
Get-AzResourceProvider -ProviderNamespace Microsoft.Compute, Microsoft.KeyVault, Microsoft.Storage, Microsoft.VirtualMachineImages | Where-Object RegistrationState -ne Registered | Register-AzResourceProvider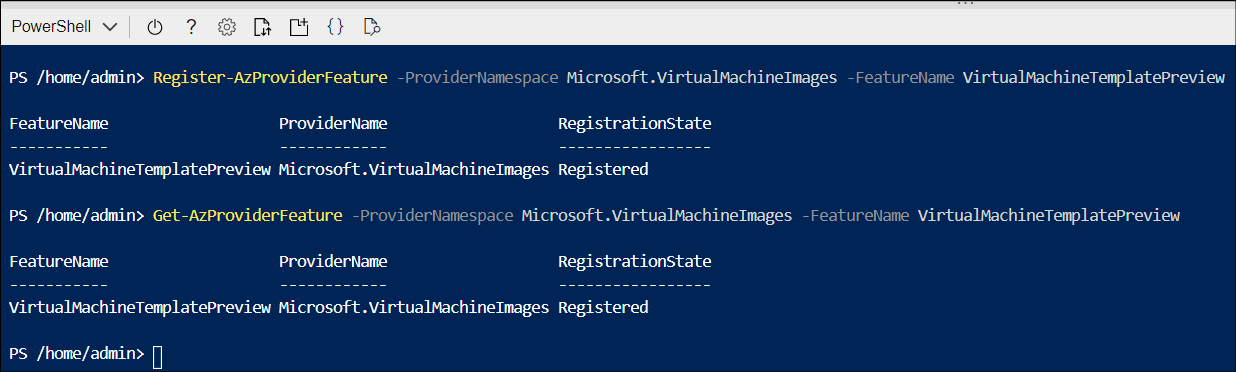
Create an image
The next steps will create an image, and then create the VM from the image. To create an image, perform the following procedure:
Set variables that you'll use during the build process:
# Destination image resource group name
$imageResourceGroup = 'ContosoWinImgBuilderRG'
# Azure region
$location = 'WestUS2'
# Name of the image to be created
$imageTemplateName = 'ContosoWinBuilderImage'
# Distribution properties of the managed image upon completion
$runOutputName = 'ContosoDistResults'
Create a resource group:
New-AzResourceGroup -Name $imageResourceGroup -Location $location.Tip
You can use an existing resource group if you prefer.
Create a user-assigned identity and set role permissions:
[int]$timeInt = $(Get-Date -UFormat '%s')
$imageRoleDefName = "Azure Image Builder Image Def $timeInt"
$identityName = "myIdentity$timeInt"
New-AzUserAssignedIdentity -ResourceGroupName $imageResourceGroup -Name $identityName
$identityNameResourceId = (Get-AzUserAssignedIdentity -ResourceGroupName $imageResourceGroup -Name $identityName).Id
$identityNamePrincipalId = (Get-AzUserAssignedIdentity -ResourceGroupName $imageResourceGroup -Name $identityName).PrincipalId
Assign permissions for the new identity to distribute images:
$myRoleImageCreationUrl =  'https://raw.githubusercontent.com/danielsollondon/azvmimagebuilder/master/solutions/12_Creating_AIB_Security_Roles/aibRoleImageCreation.json'
$myRoleImageCreationPath = "$env:TEMP\myRoleImageCreation.json"

Invoke-WebRequest -Uri $myRoleImageCreationUrl -OutFile $myRoleImageCreationPath -UseBasicParsing

$Content = Get-Content -Path $myRoleImageCreationPath -Raw
$Content = $Content -replace '<subscriptionID>', $subscriptionID
$Content = $Content -replace '<rgName>', $imageResourceGroup
$Content = $Content -replace 'Azure Image Builder Service Image Creation Role', $imageRoleDefName
$Content | Out-File -FilePath $myRoleImageCreationPath -Force
Create the role definition and grant the role definition to the image builder service principal:
 New-AzRoleDefinition -InputFile $myRoleImageCreationPath

 $RoleAssignParams = @{
 ObjectId = $identityNamePrincipalId
 RoleDefinitionName = $imageRoleDefName
 Scope = "/subscriptions/$subscriptionID/resourceGroups/$imageResourceGroup"
 }
 New-AzRoleAssignment @RoleAssignParams
The next step is to create a shared image gallery. Use the following procedure. Create the gallery and a gallery definition by running the following PowerShell commands:
$myGalleryName = 'ContosoImageGallery'
$imageDefName = 'winSvrImages'
New-AzGallery -GalleryName $myGalleryName -ResourceGroupName $imageResourceGroup -Location $location
$GalleryParams = @{
GalleryName = $myGalleryName
ResourceGroupName = $imageResourceGroup
Location = $location
Name = $imageDefName
OsState = 'generalized'
OsType = 'Windows'
Publisher = 'Contoso'
Offer = 'Windows'
Sku = 'Win2019'
}
New-AzGalleryImageDefinition @GalleryParams
Next, you must create an Azure Image Builder source object, a distributor object, and an Image Builder customization object. Run the following PowerShell commands:
$SrcObjParams = @{
  SourceTypePlatformImage = $true
  Publisher = 'MicrosoftWindowsServer'
  Offer = 'WindowsServer'
  Sku = '2019-Datacenter'
  Version = 'latest'
}
$srcPlatform = New-AzImageBuilderSourceObject @SrcObjParams

$disObjParams = @{
  SharedImageDistributor = $true
  ArtifactTag = @{tag='dis-share'}
  GalleryImageId = "/subscriptions/$subscriptionID/resourceGroups/$imageResourceGroup/providers/Microsoft.Compute/galleries/$myGalleryName/images/$imageDefName"
  ReplicationRegion = $location
  RunOutputName = $runOutputName
  ExcludeFromLatest = $false
}
$disSharedImg = New-AzImageBuilderDistributorObject @disObjParams

$ImgCustomParams = @{
  PowerShellCustomizer = $true
  CustomizerName = 'settingUpMgmtAgtPath'
  RunElevated = $false
  Inline = @("mkdir c:\\buildActions", "echo Azure-Image-Builder-Was-Here  > c:\\buildActions\\buildActionsOutput.txt")
}
$Customizer = New-AzImageBuilderCustomizerObject @ImgCustomParams
Create an Azure Image Builder template:
$ImgTemplateParams = @{
 ImageTemplateName = $imageTemplateName
 ResourceGroupName = $imageResourceGroup
 Source = $srcPlatform
 Distribute = $disSharedImg
 Customize = $Customizer
 Location = $location
 UserAssignedIdentityId = $identityNameResourceId
}
New-AzImageBuilderTemplate @ImgTemplateParams
Note
After the image creation completes, Azure Image Builder displays a success message in the console, and creates an Image Builder Configuration Template in the
$imageResourceGroup.Tip
To verify that the template creation process was successful, run the following command:
Get-AzImageBuilderTemplate -ImageTemplateName $imageTemplateName -ResourceGroupName $imageResourceGroup | Select-Object -Property Name, LastRunStatusRunState, LastRunStatusMessage, ProvisioningStateFinally, start the image build:
Start-AzImageBuilderTemplate -ResourceGroupName $imageResourceGroup -Name $imageTemplateName
Build a VM
The final step is to create a VM from the newly built image.
To build the VM, run the following command in PowerShell:
$Cred = Get-Credential
$ArtifactId = (Get-AzImageBuilderRunOutput -ImageTemplateName $imageTemplateName -ResourceGroupName $imageResourceGroup).ArtifactId
New-AzVM -ResourceGroupName $imageResourceGroup -Image $ArtifactId -Name myWinVM01 -Credential $Cred
After you have built your VM, you should verify the customization. You do this by opening an RDP connection to the VM, signing in, and running the following PowerShell command:
Get-Content -Path C:\buildActions\buildActionsOutput.txtReview the output based on the contents of the file created during the image customization process. It should read:
Azure-Image-Builder-Was-Here