Connect to an on-premises VMware vSphere environment
After the Azure VMware Solution is deployed, network connectivity is the next step for a successful deployment. The Azure VMware Solution solution deploys onto dedicated, bare-metal servers. These servers are given to a single customer. The bare-metal servers need to connect to the Azure network backbone so customers use Azure resources. The Azure VMware Solution-provided Azure ExpressRoute circuit helps the environment talk to Azure services. To reach the on-premises environment, a customer-provided ExpressRoute circuit is used, along with an ExpressRoute Global Reach configuration.
Create an Azure Bastion resource
After the Azure VMware Solution is deployed, you'll create an Azure Bastion resource. The Azure Bastion resource provides secure Remote Desktop connectivity to your Azure infrastructure as a service (IaaS) environment. You use Azure Bastion initially to connect to the jump host that will allow you to log in to the Azure VMware Solution vCenter and NSX environments.
When the ExpressRoute circuits and ExpressRoute Global Reach have been configured for hybrid connectivity, you no longer need the Azure Bastion resource. Your company might still want to keep the resource as a backup in case you have connectivity issues with the ExpressRoute circuits in the future.
To create an Azure Bastion resource:
In the Azure portal, search for Bastions.
Select Create in the menu bar.
On the Create a Bastion page, configure a new Azure Bastion resource with the following details:
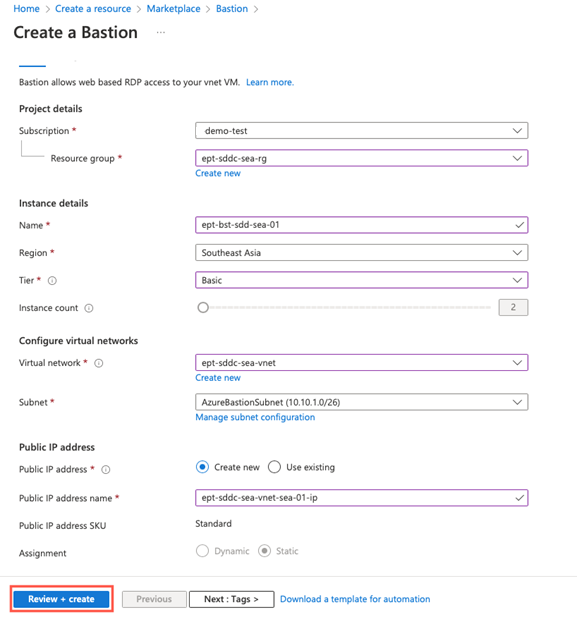
Field Value Subscription Select the same subscription where Azure VMware Solution is deployed. Resource group Select an existing resource group or create a new one. Name Specify a name for the new Bastion resource. Region Select the same region where Azure VMware Solution is deployed. Tier Select Basic. This provides the functionality we need for this example. You can always upgrade Bastion to Standard to have more instance counts. Instance Count Defaults to 2 when Basic is chosen. Virtual network Select the virtual network that was created when you deployed Azure VMware Solution. Subnet Azure Bastion requires a dedicated subnet. For the virtual network created during the Azure VMware Solution deployment, select Manage subnet configuration to create the dedicated subnet. Select +Subnet, and then create a subnet with the name AzureBastionSubnet and at /27 or higher. Public IP address The public IP allows Remote and SSH over port 443 to Azure Bastion. Create a new public IP and place the resource in the same region as both Azure VMware Solution and Azure Bastion. This new public IP is separate from the Azure VMware Solution deployment. Public IP address name Provide a name for the public IP-address resource. Public IP address SKU By default, this setting is prepopulated to Standard because Azure Bastion supports only the Standard Public IP SKU. Assignment By default, this setting is pre-populated to Static. The best practice is to leave assignment at static.
Create an Azure VM to use as a jump host
After Azure VMware Solution and the Azure Bastion resource are deployed, create a jump host to access to the private cloud. The jump host must be located in the same virtual network and subscription as Azure VMware Solution and the Azure Bastion resource. The jump host can be either a desktop or server version of Windows. The jump host will be deployed behind the Azure Bastion resource. You'll use Azure Bastion to access to the jump host via Remote Desktop in the Azure portal over Transport Layer Security (TLS).
Use Azure Bastion and sign in to vCenter and NSX-T Manager
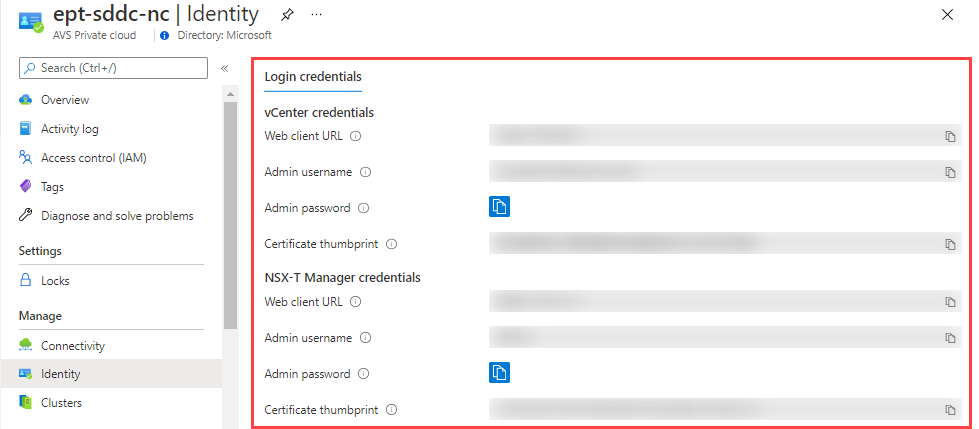
Use Azure Bastion to sign in to the jump-host VM. Then, open a web browser, go to both vCenter and NSX-T Manager, and sign in to each. The Azure portal will provide the vCenter IP address, the NSX-T Manager console's IP addresses, and credentials used for deployment. Accessing the jump host through Azure Bastion will allow you to configure NSX-T and vCenter.
Establish an ExpressRoute Global Reach connection to the on-premises VMware environment
Global Reach will connect your on-premises VMware environment to the Azure VMware Solution private cloud. Connectivity is established between the Azure VMware Solution ExpressRoute circuit and a new or existing ExpressRoute circuit to an on-premises environment.
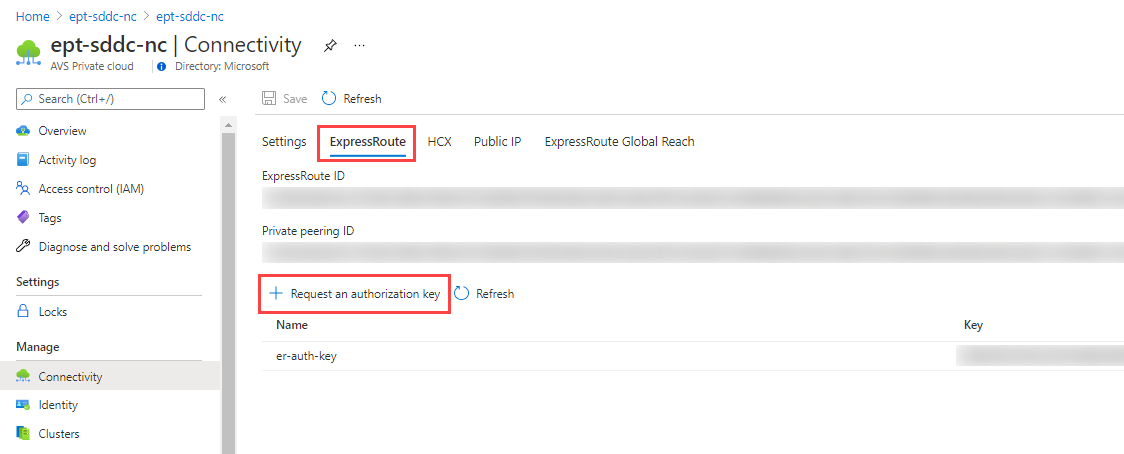
To create an ExpressRoute Global Reach authorization key in the private cloud:
From the Azure VMware Solution private cloud Overview, under Manage, select Connectivity > ExpressRoute > Request an authorization key.
Enter a name for the authorization key.
Select Create.
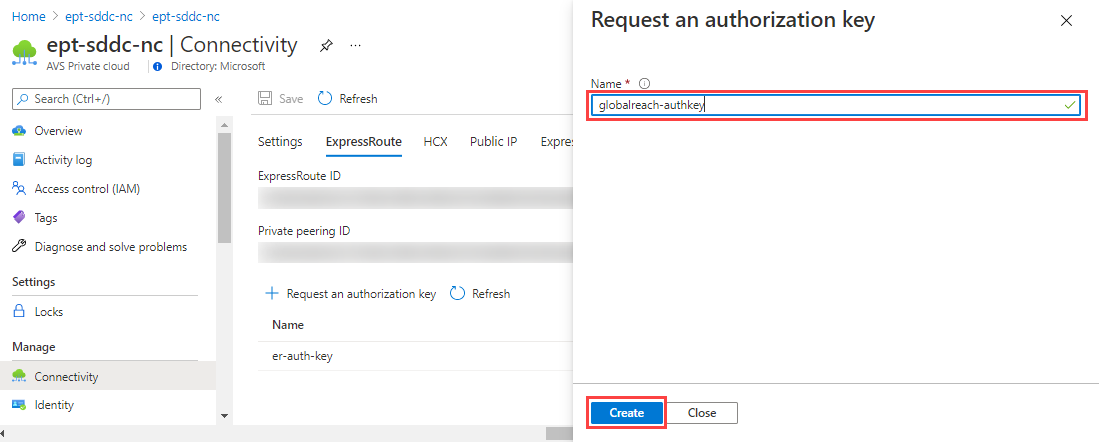
The new key appears in the list of authorization keys for the private cloud:
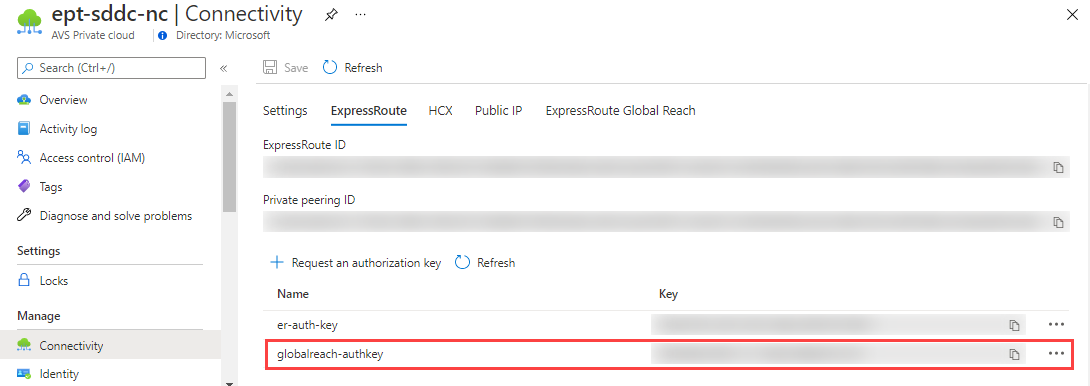
Use the authorization key, ExpressRoute ID, and a /29 address block to complete the peering.
Peer the Azure VMware Solution private cloud to the on-premises environment by using the authorization key
After the authorization key is created, you can peer the Azure VMware Solution ExpressRoute circuit to the on-premises circuit. You can configure the peering by using either the Azure portal or the Azure CLI in Cloud Shell.
For either method, you'll need the resource ID and authorization key of the Azure VMware Solution private-cloud ExpressRoute circuit for peering.
Use the Azure portal to configure peering
To use the Azure portal for peering:
In the Azure portal, select the Azure VMware Solution private cloud.
From the private-cloud Overview, under Manage, select Connectivity > ExpressRoute Global Reach > Add:
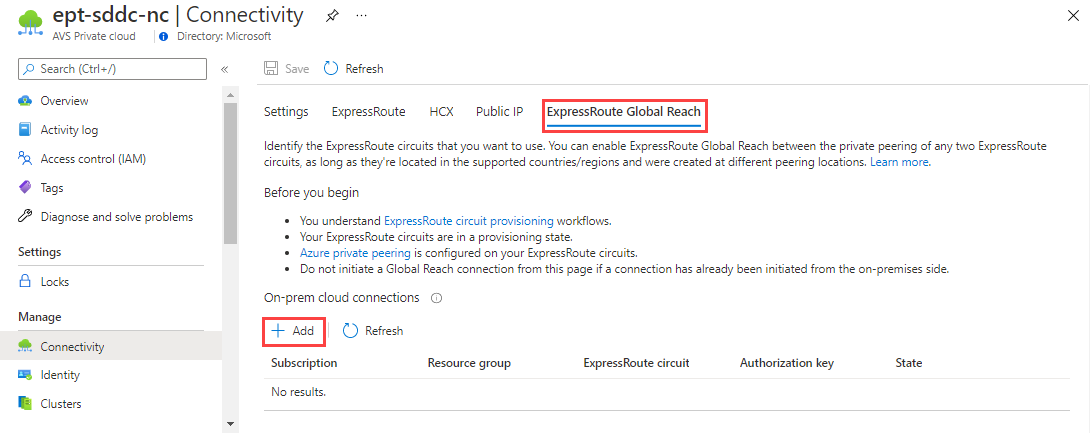
Create an on-premises cloud connection by using one of the following methods:
- Select the ExpressRoute circuit from the list.
- Copy and paste the circuit ID.
Select Connect.
The new connection will appear in the list of on-premises cloud connections.
Use the Azure CLI to configure peering
To use the Azure CLI for peering:
Sign in to the Azure portal by using the same subscription as the on-premises ExpressRoute circuit uses.
Open an Azure CLI in Cloud Shell. Leave the shell as Bash.
Gather your specific information:
- Resource ID
- Authorization key
- /29 CIDR network block
Enter the following Azure CLI command to create the authorization key:
az network express-route auth create --circuit-name <Circuit2Name> -g <Circuit2ResourceGroupName> -n <AuthorizationName>The Azure CLI output will look like this:
{
  "authorizationKey": "<authorizationKey>",
  "authorizationUseStatus": "Available",
  "etag": "W/\"cfd15a2f-43a1-4361-9403-6a0be00746ed\"",
  "id": "/subscriptions/<SubscriptionID>/resourceGroups/<Circuit2ResourceGroupName>/providers/Microsoft.Network/expressRouteCircuits/<Circuit2Name>/authorizations/<AuthorizationName>",
  "name": "<AuthorizationName>",
  "provisioningState": "Succeeded",
  "resourceGroup": "<Circuit2ResourceGroupName>",
  "type": "Microsoft.Network/expressRouteCircuits/authorizations"
}
Make note of the resource ID and authorization key to peer the circuit.
Run the following command against the first circuit, passing in the second circuit's resource ID and authorization key:
az network express-route peering connection create -g <ResourceGroupName> --circuit-name <Circuit1Name> --peering-name AzurePrivatePeering -n <ConnectionName> --peer-circuit <Circuit2ResourceID> --address-prefix <__.__.__.__/29> --authorization-key <authorizationKey>
When this operation is complete, you'll have connectivity between your on-premises environment and Azure VMware Solution through the two ExpressRoute circuits.
In the next unit, we'll walk through how to configure NSX-T networking components in the Azure portal. NSX-T Manager provides the software-defined networking layer for Azure VMware Solution.