Exercise - Clean up your Azure DevOps environment
After completing the assigned tasks for this module, the next steps involve cleaning up your Azure resources, transitioning the work item to the Done state on Azure Boards, and cleaning up your Azure DevOps environment.
Important
Performing this cleanup is essential in order to to prevent incurring charges for Azure resources beyond the completion of this module.
Clean up Azure resources
The easiest way to clean up your Azure resources is to delete their parent resource group. When you delete a resource group, you delete all resources in that group. To delete your resource group:
Navigate to the Azure portal and sign in.
Select Cloud Shell from the menu, and then select Bash.

Run the following command to delete the resource group you created. Type in y when prompted to confirm the deletion.
az group delete --name tailspin-space-game-rgOptionally, after the previous command finishes, you can run the following command to confirm the deletion. You'll notice that the resource group tailspin-space-game-rg no longer appears in the list.
az group list --output table
Move the work item to Done
In this step, you move the work item that you previously assigned to yourself in this module to the Done column. In practice, Done typically means delivering working software to users. However, for the purposes of this learning module, it means that the specific goal was accomplished. To complete the work item:
Navigate to your Azure DevOps project, and then select Boards then Boards.
Move the Create multi-container version of web site orchestrated with Kubernetes work item to the Done column.


Disable the pipeline or delete your project
This learning path provides a template for each module that you can use to create a fresh environment. If you run multiple templates, you end up with multiple Azure Pipelines projects that point to the same GitHub repository. This setup can cause multiple pipelines to run each time you push a change to your GitHub repository, which can create issues. Therefore, before moving to the next module, you should disable or delete the pipeline to avoid losing free build minutes.
Choose one of the following options:
Option 1: Disable the pipeline
Disable the pipeline to stop it from processing new requests. You can choose to re-enable your pipeline later if you wish to. This option is suitable if you want to retain your DevOps project and deployment pipeline for future reference.
To disable the pipeline:
Select Pipelines, and then select your pipeline.
Select Settings from the drop-down menu.
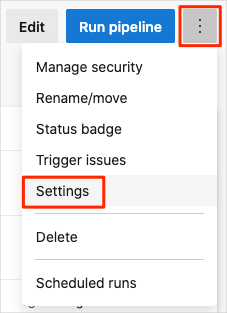
Select Disabled and then select Save.
Option 2: Delete the Azure DevOps project
If you don't need your DevOps project for future reference, you can delete it. For future modules, you can run another template that spins up a new project in the state where this project leaves off. This option is suitable if you're certain you won't need this project again.
To delete the project:
Navigate to your project in the Azure DevOps portal.
Select Project settings from the bottom-left corner.
From the Overview section, scroll all the way down and then select Delete.
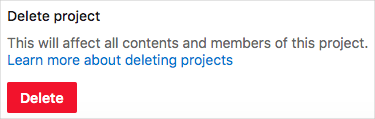
Confirm the project name and then select Delete to delete your project.