Ask Learn
PreviewPlease sign in to use this experience.
Sign inThis browser is no longer supported.
Upgrade to Microsoft Edge to take advantage of the latest features, security updates, and technical support.
This module requires a sandbox to complete. A sandbox gives you access to free resources. Your personal subscription will not be charged. The sandbox may only be used to complete training on Microsoft Learn. Use for any other reason is prohibited, and may result in permanent loss of access to the sandbox.
Microsoft provides this lab experience and related content for educational purposes. All presented information is owned by Microsoft and intended solely for learning about the covered products and services in this Microsoft Learn module.
In this sample scenario, your organization is rolling out a new environment in Azure that uses virtual machines. You've already constructed a virtual machine that contains the software and tools required to support the organization's functions. You need to use this virtual machine to generate a custom image that you can then use to create new virtual machine instances.
In this exercise, you'll create a virtual machine and generalize it. You'll then create an image from the generalized virtual machine, then use this image to create another virtual machine. You can try this with either Windows or Linux (or both) by selecting the platform type in the preceding box.
Activate the Cloud Shell window on the right by signing into the Azure Sandbox.
Set the default resource group to work with by typing the following command into the Cloud Shell on the right. This allows you to omit the resource group name from all the commands.
az configure --defaults group="[Sandbox resource group name]"
In this task, you'll quickly create a virtual machine that runs a simple web app. The web app displays the host machine's name. You'll use this virtual machine as the basis for the rest of the exercise.
In the Azure Cloud Shell, run the following commands to create a Windows Server Datacenter virtual machine that's running IIS. When you're prompted for the azureuser password, enter a password of your choice.
az vm create \
    --name MyWindowsVM \
    --image Win2019Datacenter \
    --admin-username azureuser
When the VM finishes creating, run the following command to install IIS and set up a default webpage:
az vm extension set \
    --name CustomScriptExtension \
    --vm-name MyWindowsVM \
    --publisher Microsoft.Compute \
    --settings '{"commandToExecute":"powershell Add-WindowsFeature Web-Server; Add-Content -Path \"C:\\inetpub\\wwwroot\\Default.htm\" -Value $(hostname)"}'
When IIS finishes installing, run the following command to open port 80 to the web server:
az vm open-port \
    --name MyWindowsVM \
    --port 80
Run the following command to find the public IP address of the new virtual machine:
echo http://$(az vm list-ip-addresses \
             --name MyWindowsVM \
             --query "[].virtualMachine.network.publicIpAddresses[*].ipAddress" \
             --output tsv)
In the web browser, go to the public IP address of the virtual machine. Verify that a webpage that displays the name of the virtual machine (MyWindowsVM) appears.
In the Cloud Shell, run the following commands to create an Ubuntu Server virtual machine that's running Nginx.
az vm create \
    --name MyUbuntuVM \
    --image Ubuntu2204 \
    --generate-ssh-keys

az vm open-port \
    --name MyUbuntuVM \
    --port 80

az vm extension set \
    --publisher Microsoft.Azure.Extensions \
    --name CustomScript \
    --vm-name MyUbuntuVM \
    --settings '{"commandToExecute":"apt-get -y update && apt-get -y install nginx && hostname > /var/www/html/index.html"}'
When the VM finishes creating, run the following command to find the public IP address of the new virtual machine:
echo http://$(az vm list-ip-addresses \
             --name MyUbuntuVM \
             --query "[].virtualMachine.network.publicIpAddresses[*].ipAddress" \
             --output tsv)
In the web browser, go to the public IP address of the virtual machine. Verify that a webpage that displays the name of the virtual machine MyUbuntuVM appears.
Sign in to the Azure portal.
On the Azure portal menu or from the Home page, select Resource groups, and then select the
Select the MyWindowsVM virtual machine.
On the MyWindowsVM page, select Connect, then select the Select button in the Native RDP box.
In the Native RDP window, select Download RDP File.
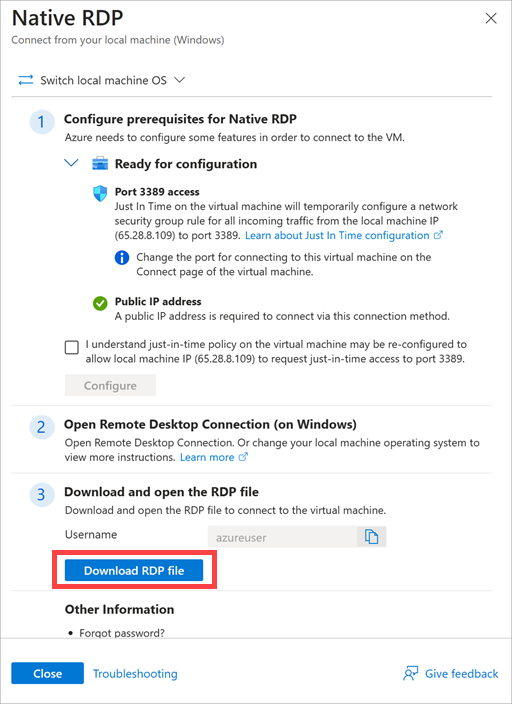
When the RDP file is downloaded, select it to open an RDP connection to the virtual machine.
In the Remote Desktop Connection dialog box, select Connect.
In the Windows Security dialog box, select More choices, and then select Use a different account.
Sign in with the username azureuser, and the admin password that you used when you created the original virtual machine.
In the Remote Desktop Connection dialog box, select Yes to proceed.
On the virtual machine, select the Search button in the lower-left corner of the screen.
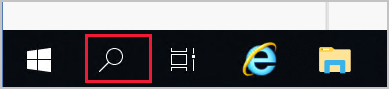
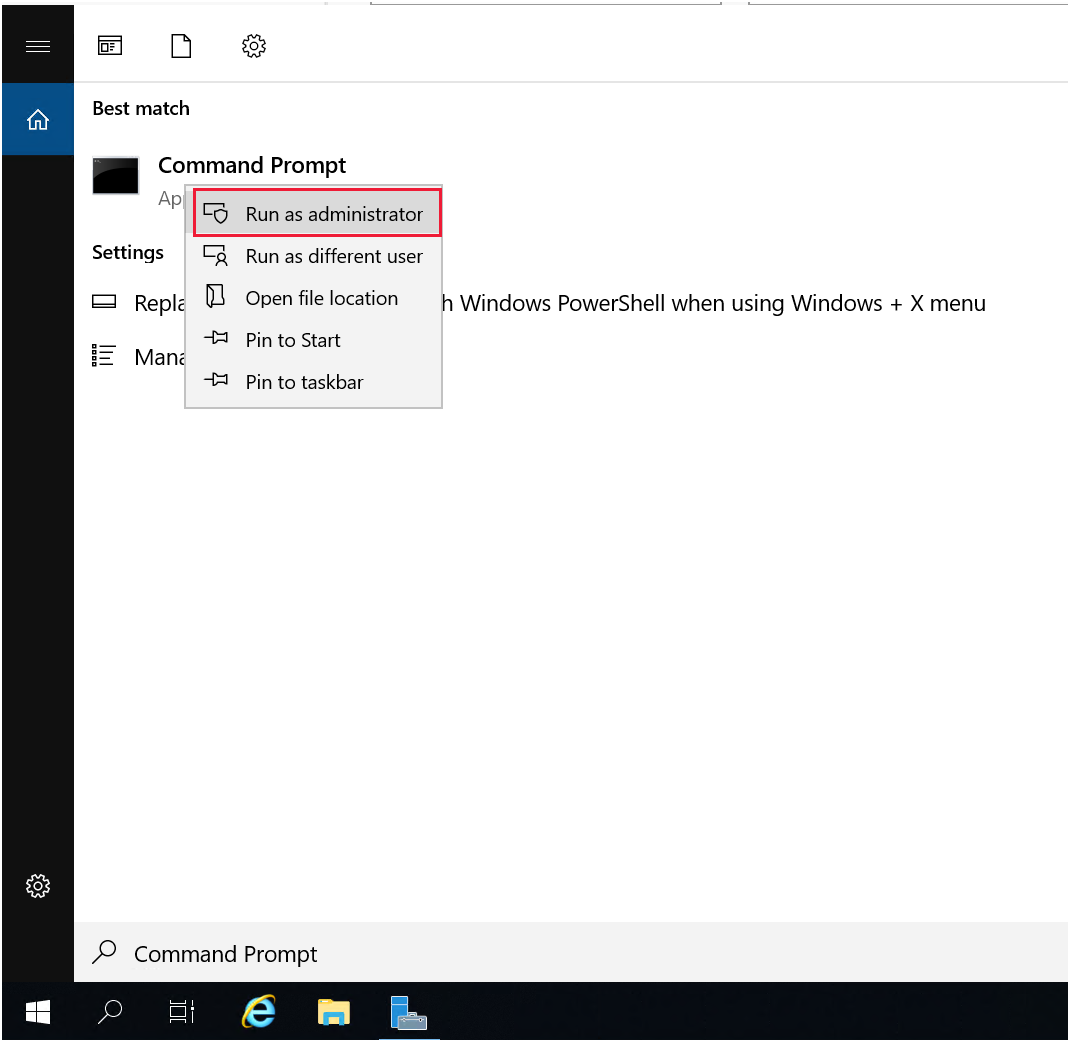
In the Type here to search box, type Command Prompt, but don't select the Enter key.
In the Best match window, right-click the Command Prompt app, and then select Run as administrator.
In the Command Prompt window, use the following command to run the Sysprep tool:
C:\windows\system32\sysprep\sysprep
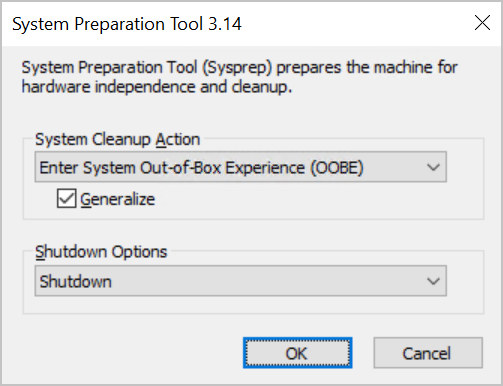
In the System Preparation Tool dialog box, select the following settings, then select OK:
| Property | Value |
|---|---|
| System Cleanup Action | Enter System Out-of-Box Experience (OOBE) |
| Generalize | Select |
| Shutdown Options | Shutdown |
Wait for the Sysprep tool to finish and the connection to the virtual machine to end. Then, in the Remote Desktop Connection message box, select OK.
In the Cloud Shell window, run the following command to deallocate the virtual machine:
az vm deallocate \
    --name MyWindowsVM
When the VM finishes deallocating, run the following command to generalize the virtual machine:
az vm generalize \
    --name MyWindowsVM
In the Cloud Shell window, run the following command to connect to the Ubuntu virtual machine. Replace <ip address> with the public IP address of the virtual machine that you noted during the setup task.
ssh -o StrictHostKeyChecking=no <ip address>
Run the following command to prepare the virtual machine for generalization:
sudo waagent -deprovision+user
At the Do you want to proceed (y/n) prompt, enter y and press Enter.
When the operation has finished, run the following command to end the connection to the virtual machine:
exit
In Cloud Shell, run the following command to deallocate the virtual machine:
az vm deallocate \
    --name MyUbuntuVM
When the VM finishes deallocating, run the following command to generalize the virtual machine:
az vm generalize \
    --name MyUbuntuVM
Run the following command to create a virtual machine image named MyVMImage from the generalized virtual machine:
az image create \
    --name MyVMIMage \
    --source MyWindowsVM
Run the following command to create a virtual machine image named MyVMImage from the generalized virtual machine:
az image create \
    --name MyVMIMage \
    --source MyUbuntuVM
Run the following command to create a new virtual machine by using the MyVMImage image:
az vm create \
  --name MyVMFromImage \
  --computer-name MyVMFromImage \
  --image MyVMImage \
  --admin-username azureuser \
  --generate-ssh-keys
When the VM finishes creating, run the following command to update the default web page with the server name:
    az vm extension set \
    --publisher Microsoft.Azure.Extensions \
    --name CustomScript \
    --vm-name MyVMFromImage \
    --settings '{"commandToExecute":"hostname > /var/www/html/index.html"}'
When the default web page finishes updating, run the following command to open port 80 on the new virtual machine:
az vm open-port \
    --name MyVMFromImage \
    --port 80
Run the following command to find the public IP address of the new virtual machine:
echo http://$(az vm list-ip-addresses \
                --name MyVMFromImage \
                --query "[].virtualMachine.network.publicIpAddresses[*].ipAddress" \
                --output tsv)
In the web browser, go to the public IP address of the new virtual machine. Verify that a webpage displays the name of the virtual machine from which the image was built, MyVMFromImage.
Run the following command to create a new virtual machine by using the MyVMImage image. Enter the azureuser password you used when you created the original virtual machine.
az vm create \
  --name MyVMFromImage \
  --computer-name MyVMFromImage \
  --image MyVMImage \
  --admin-username azureuser
When the VM finishes creating, run the following command update the default web page with the server name:
az vm extension set \
    --name CustomScriptExtension \
    --vm-name MyVMFromImage \
    --publisher Microsoft.Compute \
    --settings '{"commandToExecute":"powershell Clear-Content -Path \"C:\\inetpub\\wwwroot\\Default.htm\"; Add-Content -Path \"C:\\inetpub\\wwwroot\\Default.htm\" -Value $(hostname)"}'
When the default web page finishes updating, run the following command to open port 80 on the new virtual machine:
az vm open-port \
    --name MyVMFromImage \
    --port 80
Run the following command to find the public IP address of the new virtual machine:
echo http://$(az vm list-ip-addresses \
                --name MyVMFromImage \
                --query "[].virtualMachine.network.publicIpAddresses[*].ipAddress" \
                --output tsv)
In the web browser, go to the public IP address of the new virtual machine. Verify that a webpage displays the name of the virtual machine from which the image was built, MyVMFromImage.
The sandbox automatically cleans up your resources when you're finished with this module.
When you're working in your own subscription, it's a good idea at the end of a project to identify whether you still need the resources you created. Resources left running can cost you money. You can delete resources individually or delete the resource group to delete the entire set of resources.
Having an issue? We can help!
Please sign in to use this experience.
Sign in