Exercise - Implement generic views to edit data
To allow users to register new dogs at a shelter, we'll use CreateView.
Update the model to support get_absolute_url
Let's start by updating the model to support get_absolute_url.
Inside Visual Studio Code, open dog_shelters/models.py.
Add the following code underneath the line that reads
# TODO: Import reverseto import thereversefunction.# TODO: Import reverse from django.urls import reverseAdd the following code to the
Dogclass immediately the line that reads# TODO: Add get_absolute_urlto read the dog_detail path from URLconf and pass the ID as the parameter.# TODO: Add get_absolute_url def get_absolute_url(self): return reverse('dog_detail', kwargs={"pk": self.pk})
Important
Remember Python manages enclosures with tabs rather than braces ({ }). Because of this fact, get_absolute_url needs to at the same tab level as the #TODO comment. You can refer to the files in the solution directory to see the completed project.
Create DogCreateView
Let's create DogCreateView to allow someone to register a dog.
Inside Visual Studio Code, open dog_shelters/views.py.
At the end of views.py, add the following code to create
DogCreateView.class DogCreateView(generic.CreateView): model = models.Dog template_name = 'dog_form.html' fields = ['shelter', 'name', 'description']
We set the model to be Dog, our template to be dog_form.html, and the list of fields we want to be editable.
Note
The order in which you list the fields will be the order that they'll be displayed in the form.
Register the route
With our view created, let's register the route in our URLconf.
Inside Visual Studio Code, open dog_shelters/urls.py.
Underneath the line that reads
# TODO: Register create view, add the following code to register the route.# TODO: Register create view path('dog/register', views.DogCreateView.as_view(), name='dog_register'),
Create the HTML template
Let's create the template to host our form.
Inside Visual Studio Code, create a new file inside dog_shelters/templates named dog_form.html.
Add the following code to dog_form.html to create the template to host our form.
{% extends 'base.html' %}

{# TODO: Register crispy_forms_tags #}

{% block title %}
Register dog at shelter
{% endblock %}

{% block content %}
<h2>Register dog at shelter</h2>
<form method="POST">
    {% csrf_token %}

    {{ form.as_p }}

    <button type="submit" class="btn btn-primary">Save</button>
</form>
{% endblock %}
Note
We're adding a note for ourselves to add a library, which we'll do in the next exercise.
Create a link to the registration page
Let's create a link on our shelter list page, which is currently the home page for our application, to the register page we created.
Inside Visual Studio Code, open dog_shelters/templates/shelter_list.html.
Underneath the line that reads
{# TODO: Add link to registration page #}, add the following code to create the link.{# TODO: Add link to registration page #} <div> <a href="{% url 'dog_register' %}">Register a dog available for adoption</a> </div>
Test the page
Let's see our page in action.
Save all files by selecting File > Save All.
In your browser, go to
http://localhost:8000.Select Register a dog available for adoption.
You should now see the form.
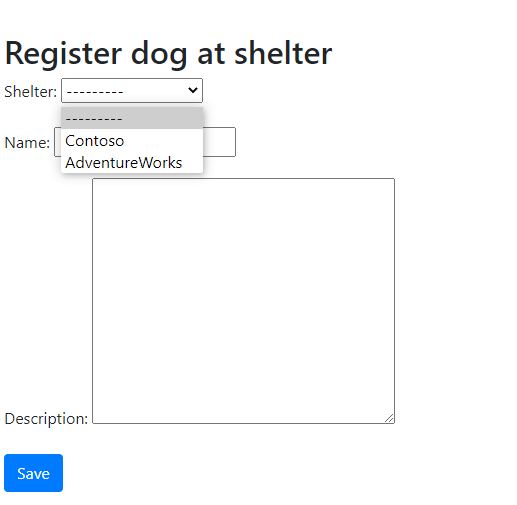
Notice how our foreign key relationship becomes a drop-down list.
Choose a shelter, and add a name and description for a dog.
Select Save.
You're now redirected to the details page for your dog!
You've now created a creation form by using CreateView in Django.