Exercise - Deploy a microservice container to Kubernetes
Kubernetes runs containers for you. You describe what you want Kubernetes to do through a YAML file. This exercise walks you through creating the file so you can deploy and run the backend service on Kubernetes.
Important
Before proceeding, you must be sure you have a Kubernetes implementation installed. We'll be using the k3d implementation running in the codespace. We'll start the lab by installing this implementation.
Install Kubernetes tools and implementation
We need to install both the kubectl tool and the k3d Kubernetes implementation:
In the codespace, switch to the TERMINAL tab and then run these commands to install prerequisites:
sudo apt-get update
sudo apt-get install -y apt-transport-https ca-certificates curl
Next, to download the signing key for the Kubernetes package repositories, run these commands:
sudo mkdir /etc/apt/keyrings
curl -fsSL https://pkgs.k8s.io/core:/stable:/v1.28/deb/Release.key | sudo gpg --dearmor -o /etc/apt/keyrings/kubernetes-apt-keyring.gpg
If you receive an error that the directory already exists, run the
curlcommand separately.Add the Kubernetes repository to your apt configuration:
echo 'deb [signed-by=/etc/apt/keyrings/kubernetes-apt-keyring.gpg] https://pkgs.k8s.io/core:/stable:/v1.28/deb/ /' | sudo tee /etc/apt/sources.list.d/kubernetes.listNow, you can install the kubectl tool:
sudo apt-get update
sudo apt-get install -y kubectl
Finally, install the k3d implementation of Kubernetes and create a cluster:
curl -s https://raw.githubusercontent.com/k3d-io/k3d/main/install.sh | bash
k3d cluster create devcluster --config k3d.yml
Create a deployment file for the backend service
You can create a file manage container deployment into Kubernetes with a YAML file. Let's create a file to deploy the backend service.
Create a new file in the donet-kubernetes folder of the codespace named backend-deploy.yml.
Copy the following text into the file and then save it.
---
apiVersion: apps/v1
kind: Deployment
metadata:
    name: productsbackend
spec:
  replicas: 1
  template:
    metadata:
      labels:
        app: productsbackend
    spec:
      containers:
      - name: productsbackend
        image: [YOUR DOCKER USER NAME]/productservice:latest
        ports:
        - containerPort: 80
        env:
        - name: ASPNETCORE_URLS
          value: http://*:80
  selector:
    matchLabels:
      app: productsbackend
---
apiVersion: v1
kind: Service
metadata:
  name: productsbackend
spec:
  type: NodePort
  ports:
  - port: 80
    targetPort: 80
    nodePort: 32001
  selector:
    app: productsbackend
Replace the placeholder
[YOUR DOCKER USER NAME]with your actual Docker username.
This file does a couple of things.
The first portion defines a deployment spec for the container to be deployed into Kubernetes. It specifies one replica, where to find the container image, which ports to open on the container, and sets some environment variables. This first portion also defines labels and names that can be used to reference the container and spec.
The second portion then defines that the container runs as a Kubernetes NodePort service. For this module, you don't need to understand all of the specifics of NodePorts. However, you should know that this type of service exposes an external IP address so you can test the service from outside the cluster.
Deploy and run the backend microservice
Next, let's deploy and run the microservice.
In the TERMINAL tab, run the following command:
kubectl apply -f backend-deploy.ymlThis command is telling Kubernetes to run the file we created. It downloads the image from Docker Hub and create the container.
The
kubectl applycommand returns quickly. But the container creation might take a while. To view the progress, use the following code.kubectl get podsIn the resulting output, you have a row with productsbackend followed by a string of random characters under the NAME column. When everything is ready, there's a 1/1 under the READY column and Running under the STATUS column.
To test the service, switch to the PORTS tab, near the local address for the Back End port, select the globe icon. The browser opens a new tab at that address.
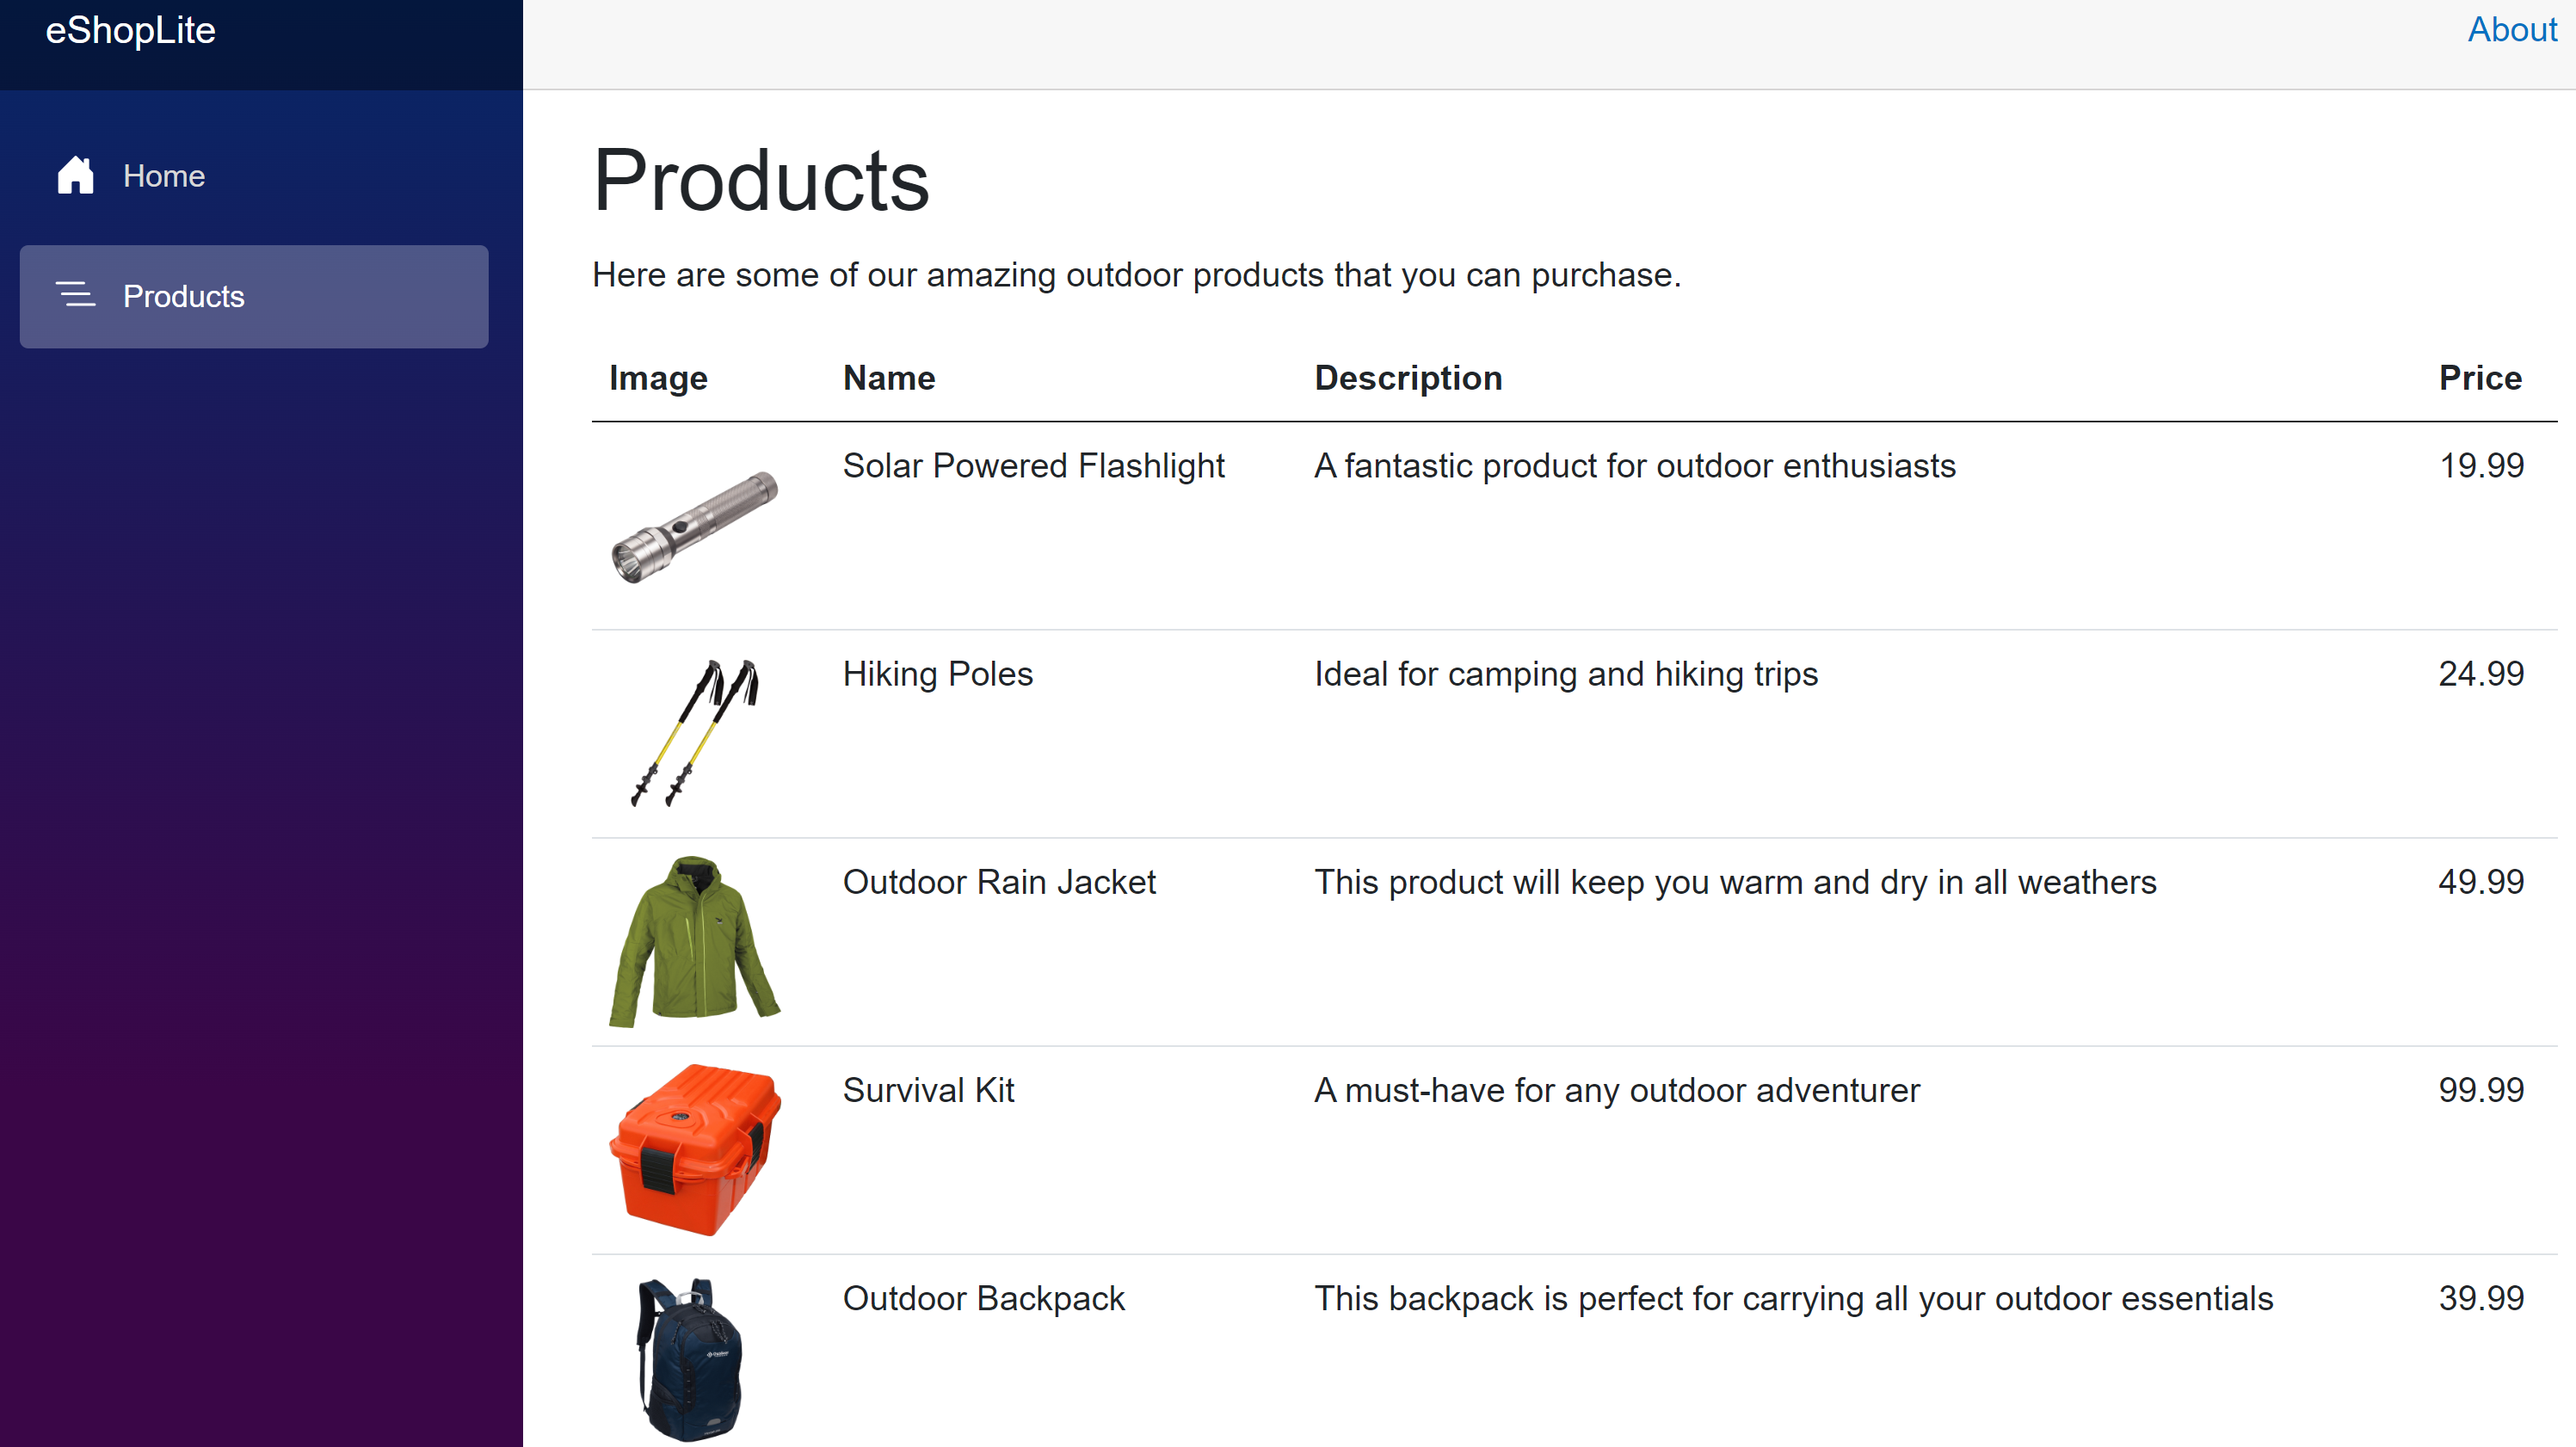
To query some products, append the address with /api/product and then press Enter. You should see some product information listed in JSON format.
[
    {
        "id": 1,
        "name": "Solar Powered Flashlight",
        "description": "A fantastic product for outdoor enthusiasts",
        "price": 19.99,
        "imageUrl": "product1.png"
    },
    {
        "id": 2,
        "name": "Hiking Poles",
        "description": "Ideal for camping and hiking trips",
        "price": 24.99,
        "imageUrl": "product2.png"
    },
    {
        "id": 3,
        "name": "Outdoor Rain Jacket",
        "description": "This product will keep you warm and dry in all weathers",
        "price": 49.99,
        "imageUrl": "product3.png"
    },
    ...
Create a deployment file and run the frontend service
Much like the backend service, we need a deployment file for the frontend as well.
Create a new file in the donet-kubernetes folder named frontend-deploy.yml
Paste the following code into the file:
---
apiVersion: apps/v1
kind: Deployment
metadata:
  name: storefrontend
spec:
  replicas: 1
  template:
    metadata:
      labels:
        app: storefrontend
    spec:
      containers:
      - name: storefrontend
        image: [YOUR DOCKER USER NAME]/storeimage:latest
        ports:
        - containerPort: 80
        env:
        - name: ASPNETCORE_URLS
          value: http://*:80
        - name: ProductEndpoint
          value: http://productsbackend
  selector:
    matchLabels:
      app: storefrontend
---
apiVersion: v1
kind: Service
metadata:
  name: storefrontend
spec:
  type: NodePort
  ports:
  - port: 80
    targetPort: 80
    nodePort: 32000
  selector:
    app: storefrontend
Replace the placeholder
[YOUR DOCKER USERNAME]with your actual Docker username.Notice this file is similar to the one we created for the backend microservice. There are two differences:
- We're specifying a different container to run under the deployment's
spec.template.spec.containers.imagevalue. - There's a new environment variable under the
spec.template.spec.containers.envsection. The code in the storefrontend application calls the backend, but because we didn't specify a fully qualified domain name (FQDN), we don't know the IP address of the backend microservice, we use the name we specified under themetadata.namenode of theDeployment. Kubernetes takes care of the rest.
- We're specifying a different container to run under the deployment's
Deploy the container to Kubernetes with the following command:
kubectl apply -f frontend-deploy.ymlAgain you can use
kubectl get podsto see the status of the deployment. Once the row for storefrontend displays Running under the STATUS column, everything is ready to go.To test the front end service, switch to the PORTS tab, then to the right of the local address for the Front End port, select the globe icon. The browser displays the homepage.
Select Products. The catalog shows Contoso's merchandise.
In this exercise, you created a deployment file that described exactly how you wanted the containers to run within Kubernetes. You then had Kubernetes download the image from Docker Hub and start up the containers.