Entity record routing
To route cases and/or other entities that an organization wants to use in the Omnichannel solution, you will need to create table records. Table records provide you with the ability to route Dataverse records to agents based on table-based work streams and routing rule sets.
The four steps to setting up entity record channels and record routing are:
Create queues and add agents - As with other work items such as conversations, any queues that will be used for routing need to be defined first. Agents will need to be added to the appropriate queues that they will support.
Enable the table for activities and queues - Table routing is built on the Dynamics 365 queue functionality; therefore, any tables that require routing will need to be enabled for activities and queues.
Enable entity routing - For a table to use routing, a table configuration record needs to be added that will enable it for routing and create the supporting work stream.
Create routing rules - After create routing rules is enabled, a routing rule set on the table routing record will provide the logic to route records, such as cases, to the appropriate queues.
Enable a table for activities and queues
While cases are the most common table that is routed to queues, many different scenarios exist where other tables might be enabled for the queue. For example, organizations that are using Connected Field Service to provide proactive support and dispatching might consider enabling the IoT Alert table for routing. As a result, when alerts are generated by devices, those alerts can be distributed to the most appropriate agents for remote troubleshooting. After the alerts have been distributed, they could be converted into cases, if needed, but an agent might be able to resolve the issue without having to create a formalized case.
Tables can be enabled for a queue through the PowerApps maker, which you can access by going to https://make.powerapps.com.
Important
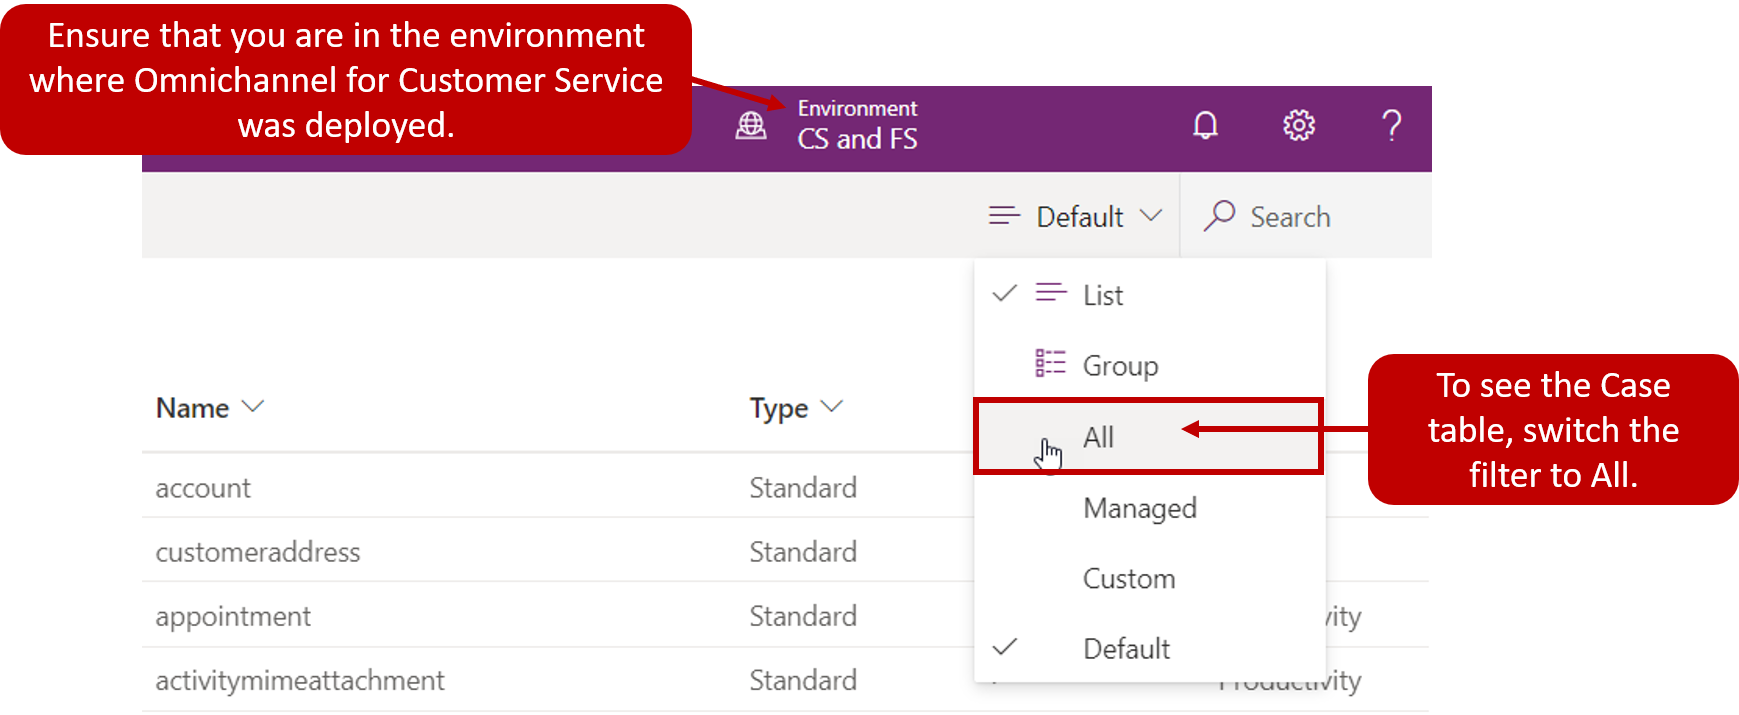
Every tenant has a default environment. Likely, this environment will not be the one that you deployed the Omnichannel solution to. Ensure that you are in the environment that Omnichannel for Customer Service was deployed to.
When you are in the correct environment, expand Data and select Tables. Locate the Case table or whichever table that you want to enable for routing. When you first go to the Tables area, it will likely be filtering on the default tables only. The Case table isn't listed as a default table; it may not show in the list or be available when you search for it. Set the tables filter to All. Then, the table entity will be displayed in the entity list and will be available when you perform a search.
After you have located the Case table, open it and then select the settings icon to open the entity settings. You can enable queues by going to More Settings > Collaboration. By default, the Case entity is enabled; however, you will need to clear the Automatically move records to the owner's default queue when a record is created or assigned check box. After the Case table has been modified, select Done on the menu and then select the Save Table button.

Important
If the Automatically move rows to the owner's default queue when a row is created or assigned option isn't cleared, the table record likely won't be distributed to agents automatically.
Enable a table for routing
After the table has been enabled for queues, and after it has been configured correctly, it is ready to be enabled for routing. Unlike other communication channels where a work stream must be defined first, when configuring table routing, you must enable the table first. You can enable the table through the Omnichannel Administration app by selecting Entity records underneath the Channels heading.
When you are creating a routing record, make sure that you have the following information defined:
Name - The name that will be used to identify the entity rule.
Entity - This field will need to be set to the table that is being enabled.
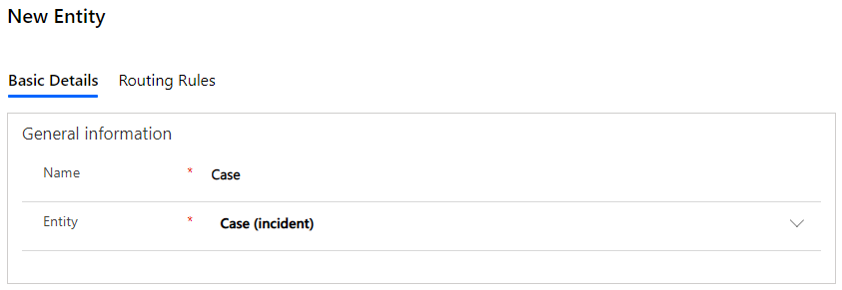
For example, to enable the Case table for routing, the Name field might be set to Case and the Entity field will be set to Case (incident).
After the entity record is saved, a default work stream will be created to distribute these records. The default workstream can be edited later if needed, or additional work streams can be created based on the needs of the organization.

Important
Occasionally, you might receive a Business Process error when attempting to save the table row. This error can occur when the flow that was included in the Omnichannel solution did not update correctly to reflect the environment that it was installed into. A new Microsoft Dataverse connector called Microsoft Dataverse (current environment) helps make it easier for you to transport flows in solutions. The connector includes many new actions that enhance certain capabilities that can be done with a flow such as the ability to call Dynamics 365 actions.
For more information, see Troubleshoot Omnichannel.