Exercise - Explore the Power Platform and Dynamics 365 admin centers
The evolution of an organization adopting the Microsoft Dataverse and the Dynamics 365 model-driven apps starts with the Power Platform Admin center. In this lab, we will explore the admin center and familiarize ourselves with the environments and settings available for configuration.
Learning objectives
At the end of this exercise, you will have navigated throughout the Power Platform Admin center and explored environment settings. At the end of the lab we will add a new currency to a Dataverse environment.
High-level steps
- Access the Power Platform Admin center.
- Explore the environments.
- Identify key environment settings.
- Add a new currency to a Dataverse environment.
Detailed steps
You are a new Dynamics 365 and Power Platform administrator for an organization. They have a currently deployed Dataverse environment. They recently started doing business in a new geographical area and you need to add the new currency to their environment. This is your first time logging into their Power Platform Admin center, so you want to familiarize yourself with their deployment before changing the setting.
Log into the Power Platform Admin Center.
Explore the environments in your Power Platform Admin center by clicking Environments in the left menu.
- View the available environments, including the default environment.
- Practice switching environments by using the drop-down on the top menu to change the environment.
Select one of the environments and open it.

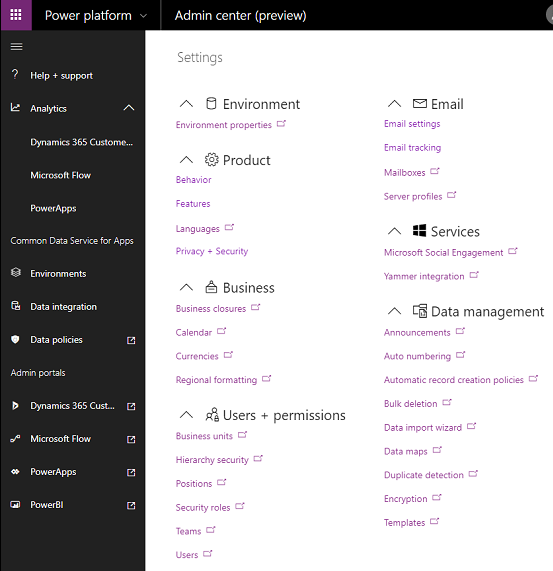
Select Settings. Explore the settings available to configure in the Power Platform Admin center.
- Click on various settings from the Environment, Product, and Business sections. Explore the settings that are available for configuration.
Change the environment Currency.
Go to Settings > Business.
Click Currencies.
Click New.
Fill in the information, as required.
Field Description Currency Type Select System if you want to use the currencies available in model-driven apps in Dynamics 365. To search for a currency, click the Lookup button next to Currency Code. When you select a currency code, Currency Name and Currency Symbol are automatically added for the selected currency. Select Custom if you want to add and configure a new currency. For this exercise, select Standard. Currency Code Short form for the currency. For example, USD for United States Dollar. Currency Precision Type the number of decimals that you want to use for the currency. You can add a value between 0 and 4. If you’ve set a precision value in the System Settings dialog box, that value will appear here. Currency Name If you selected a currency code from the list of available currencies in model-driven apps in Dynamics 365, the currency name for the selected code is displayed here. If you selected Custom as the currency type, type the name of the currency. Currency Symbol If you selected a currency code from the list of available currencies, the symbol for the selected currency is displayed here. If you selected Custom as the currency type, enter the symbol for the new currency. Currency Conversion Type the value of the selected currency in terms of one US dollar. This is the amount at which the selected currency converts to the base currency. Make sure you update this value as frequently as required to avoid any inaccurate calculations in your transactions.
When you’re done, on the command bar, click Save or Save and Close.