Interrupting scenario
In general, an interruption is a disturbance in a process. Similarly, an interrupting scenario causes a break in the flow of the scenario. It allows us to jump between two scenarios.
Initially, the main scenario is where the bot runs. Due to a keyword that it encounters, the bot switches to the subscenario that's defined as a model. After the subscenario is complete, the bot switches back to the main scenario with an interrupt message that's defined during the configuration.
Let's start by creating an interrupting bot. After that, we'll connect it to the main bot by using a keyword that calls the interrupting bot. We can start by selecting New in the top left corner on Scenario Management page.
Create a scenario for an interrupting bot
Configure the scenario with the following details:

- Name: Enter any unique name. We've used Intermediate Bot 1 in this example.
- Description: Enter a description of what the bot does. We've used Simple bot to collect the vitals from patient.
- Scenario ID: Enter a unique ID. We've used vitals.
- Returning Message: Enter a message that appears while the bot is returning to the main flow. We've used Let's continue from here.
- Interrupting scenario: Turn on this toggle.
- Breaking scenario: Turn off this toggle, because we want this bot to return to the main flow.
Select Create.

You can now create a scenario to collect basic information like name, age, height, weight, and temperature from the patient by using what you've learned in the previous modules.

Along with creating a new scenario for the bot, we need to create a new model.
Create a model for the interrupting scenario
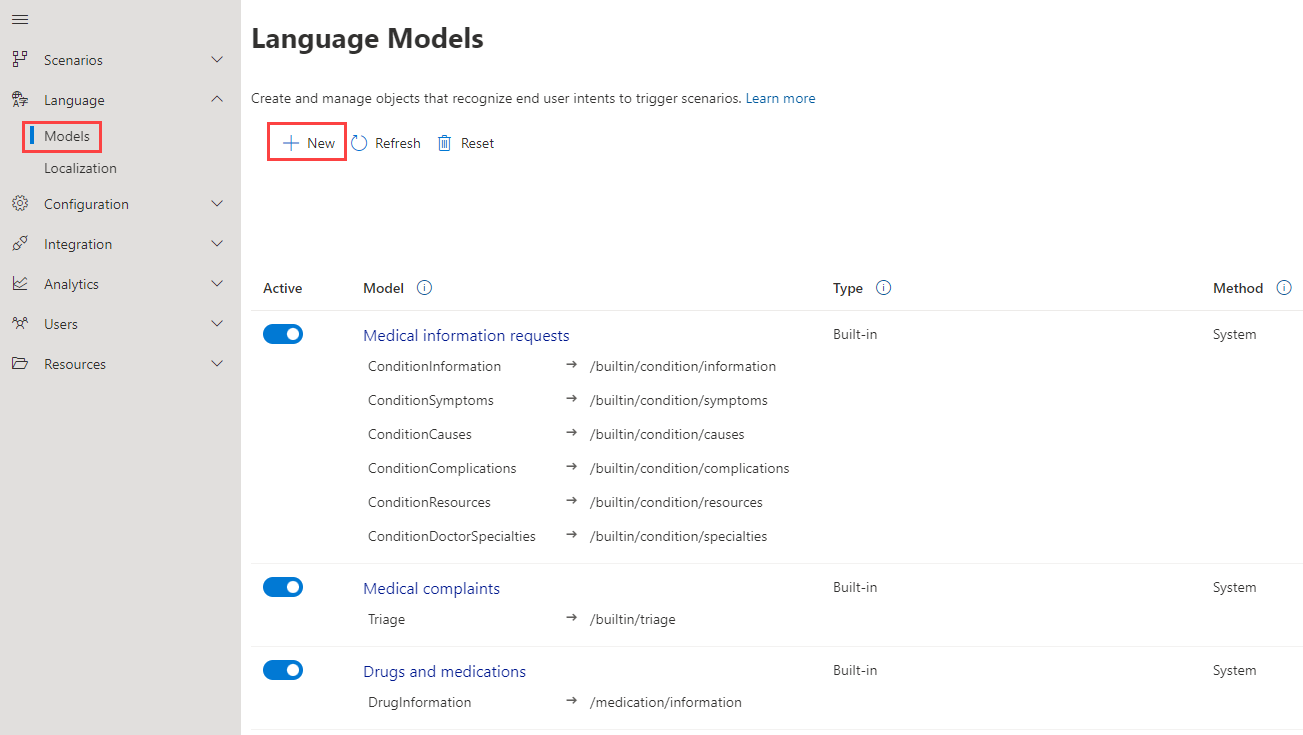
On the menu bar, go to the Language tab. Then select Models.
On the Language models page, select New.
Configure the model with the following details:
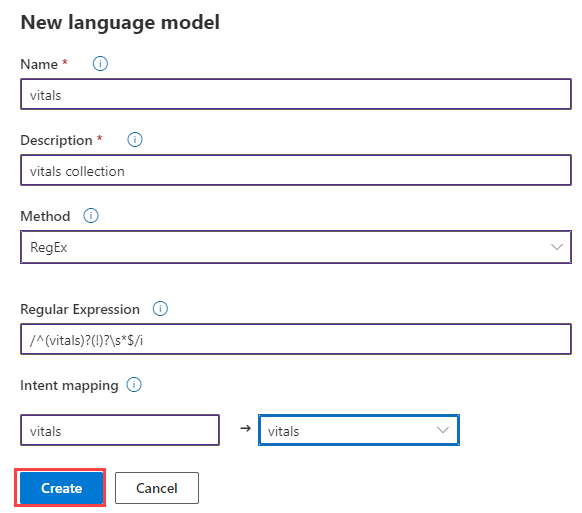
- Name: Provide a name for the model. In this example, we've used vitals.
- Description: Provide a suitable description. We've used vitals collection.
- Method: Three methods are available. For this model, select RegEx.
- Regular Expression: Provide a suitable JavaScript expression. We've used
/^(vitals)?(!)?\s*$/i. - Intent mapping: A unique intention that's triggered when the utterance is matched with the provided RegEx pattern. We've mapped it as shown in the preceding screenshot.
From the dropdown menu, select vitals.
Select Create.
Make changes to the basic bot
In this module, we're using the basic bot scenario that we created earlier to demonstrate the interrupting and breaking scenarios. Before moving ahead, we need to make some changes to the scenario.

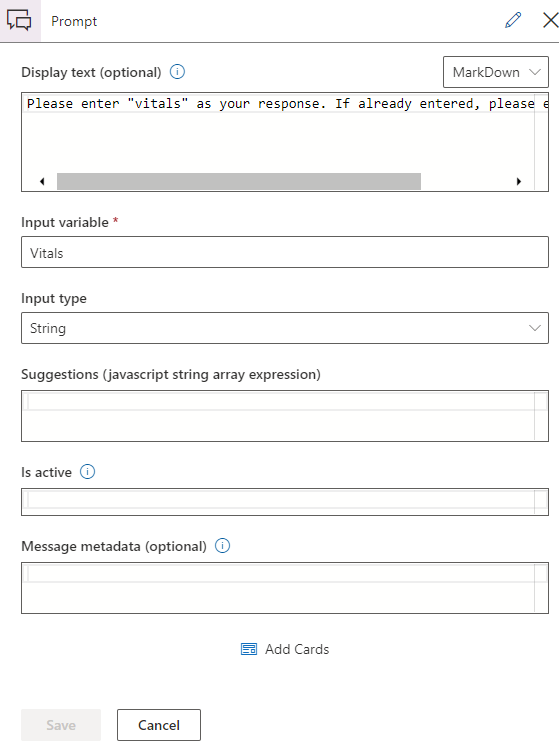
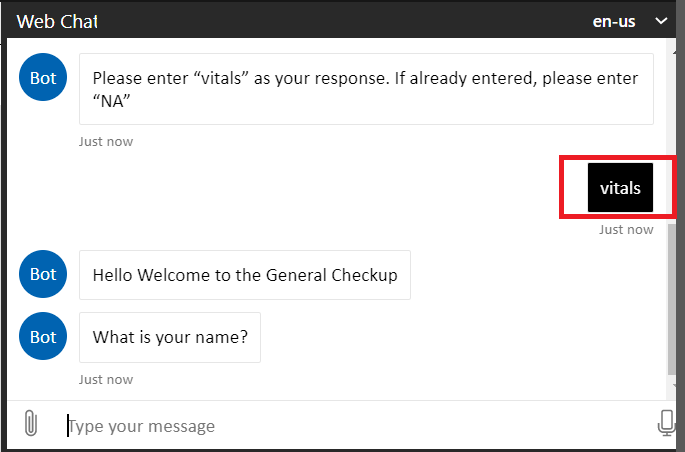
Open the basic bot scenario and add a Prompt item immediately to the right of the switch branches. The prompt asks for the entry of the vitals keyword to record the patient's information. The vitals keyword triggers an interrupting scenario. For the display text, enter:
Please enter "vitals" as your response. If already entered, please enter "NA".
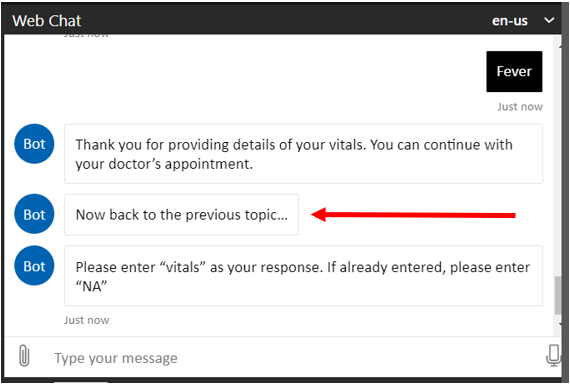
While the main bot is running, this scenario is triggered when the patient enters the word vitals as shown in the following screenshot. The word vitals breaks the current flow of the main bot and takes the patient to the new scenario for recording their information.
After the patient gives all the information that bot asks for, Intermediate Bot 1 returns to the basic bot to continue with the appointment process, with a returning message.