Transferring data with data binding
In this lesson, we explore how you can use data binding for data entry, showing and hiding pieces of UI based on the app's state. You'll also get familiar with the full INotifyPropertyChanged pattern.
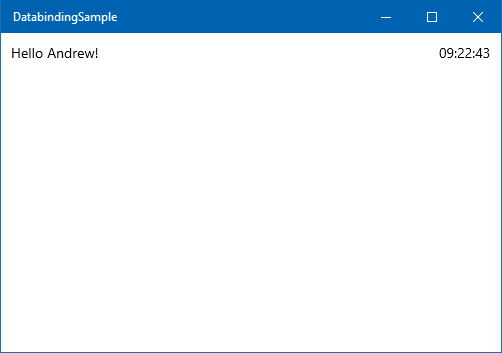
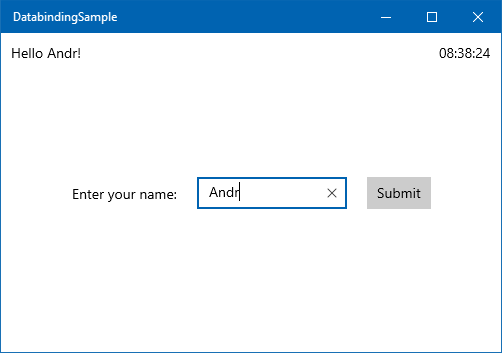
Let's expand our existing demo with a friendly greeting that looks like this.
When you select the Submit button, the app will display a simple greeting at the top.
1. Open the solution
If you don't have Visual Studio open with the project you've created during the last lesson, open it now.
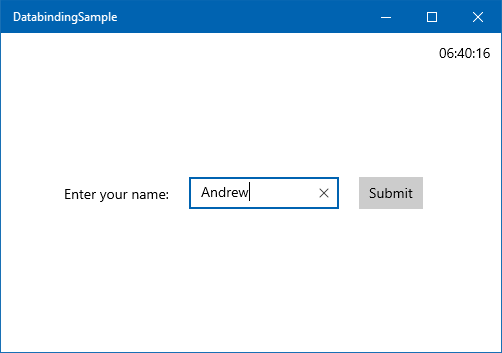
2. Create the data entry UI
The data entry UI is simple: just a TextBlock, a TextBox, and a Button, in a single horizontal layout in the middle of the screen. The simplest way to horizontally place controls is to use a StackPanel, like this.
<StackPanel HorizontalAlignment="Center"
            VerticalAlignment="Center"
            Orientation="Horizontal">
    <TextBlock Margin="10"
               VerticalAlignment="Center"
               Text="Enter your name: "/>
    <TextBox Name="tbUserName"
             Margin="10"
             Width="150"
             VerticalAlignment="Center"/>
    <Button Margin="10"
            VerticalAlignment="Center" >Submit</Button>
</StackPanel>
Copy the preceding code, and paste it inside the Grid tag of MainPage.xaml, below the clock's TextBlock.
3. Implement and bind the UserName property
Let's turn our attention to the code. Open up MainPage.xaml.cs (you can press F7 to switch to the code behind, and Shift+F7 to switch back to the XAML). Create a simple property called UserName.
public string UserName { get; set; }
Going back to the MainPage.xaml, we can create the data binding between this newly created property and the TextBox control. Change the TextBox control by adding the Text attribute, like this:
<TextBox Name="tbUserName"
         Margin="10"
         Width="150"
         VerticalAlignment="Center"
         Text="{x:Bind UserName, Mode=TwoWay}"/>
Note
Be sure not to confuse the TextBlock and the TextBox controls here. They look very similar in XAML, but if you bind the UserName to the TextBlock's text property instead of the TextBox, the app won't work.
With the preceding code, we've created a two-directional binding between the Text property of the TextBox and the UserName property in the code. This means that any time the user enters text (and moves the focus off the TextBox), the UserName property in the code will change. Also, the TextBox's text is set to the value stored in the UserName property upon the app's start, or whenever we raise the NotifyPropertyChanged event with the propertyName parameter "UserName". (We won't do that in this lesson.)
4. Create the Submit button's click handler
Next, in the design surface, double-click the Submit button. This will automatically create and open up a Button_Click event in the code. Button_Click is not a particularly good name, so change the name of the method to a more expressive OnSubmitClicked. When you're finished typing, click the light bulb next to the OnSubmitClicked line. Select Rename 'Button_Clicked' to 'OnSubmitClicked' from the menu. Going back to the XAML, check that the button's XAML now looks like this.
<Button Margin="10"
        VerticalAlignment="Center"
        Click="OnSubmitClicked">Submit</Button>
Going back to the code behind, let's display a simple dialog box when the button has been pressed. Add the following code to the OnSubmitClicked method:
var dlg = new Windows.UI.Popups.MessageDialog($"Hello {UserName}!");
_ = dlg.ShowAsync();
If you're not familiar with the $"Hello {Username}" syntax, it is the equivalent of "Hello " + UserName + "!" or String.Format("Hello {0}!", UserName). This more concise and readable feature is called string interpolation, and was introduced in C# 6.
The _ is a discard variable. It is used to indicate that the return value of the ShowAsync method is not used. The ShowAsync method returns a Task object, which is a placeholder for a task that will be completed in the future. In our case, we don't need to wait for the task to complete, so we can discard the return value.
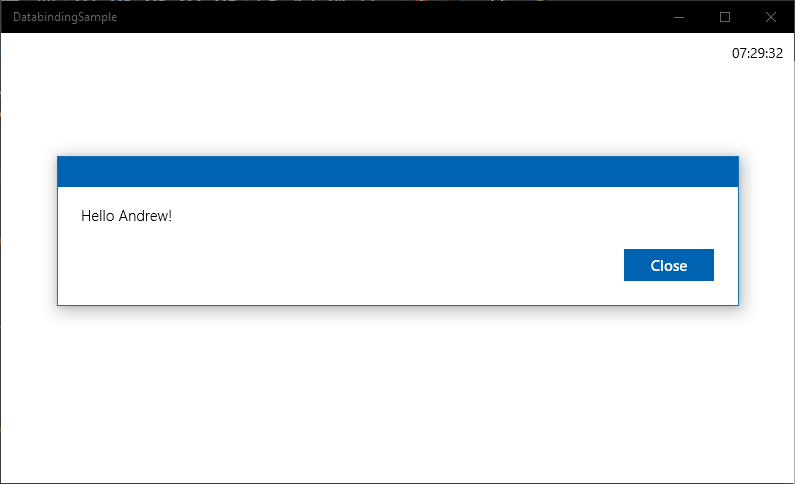
5. Run the app
Let's check out what we did so far! Run the app by pressing F5 or Ctrl+F5. Enter your name, select the Submit button, and a dialog box should greet you.
6. Implement the IsNameNeeded property
If you close the dialog box, you still see the name entry part of the UI displayed. This is not what we want. We need to hide the form once it's successfully filled. So let's do this as the next step by using data binding.
Open MainPage.xaml.cs, and create a property to indicate whether entering the user's name is still needed. Add the following code within the MainPage class:
private bool _isNameNeeded = true;

public bool IsNameNeeded
{
    get { return _isNameNeeded; }
    set
    {
        if (value != _isNameNeeded)
        {
            _isNameNeeded = value;
            PropertyChanged?.Invoke(
                this, new PropertyChangedEventArgs(nameof(IsNameNeeded)));
        }
    }
}
This is a pretty standard Boolean property with a backing field and a default value of true, until we get to the setter. The property setter first verifies whether the new value is the same as the old one. If it is, there's no need to do anything. If nothing has changed, you don't want to embark on a lengthy process of recalculating the layout and re-rendering controls. However, if the value of the property has changed, you do need to tell the UI about that, by using the PropertyChanged event.
In the preceding code, you can see the standard pattern of the INotifyPropertyChanged interface:
- Verify whether the value has changed.
- If it has, set the new value.
- Notify the UI.
After you've notified the UI (assuming the binding mode is set to OneWay or TwoWay), it calls the property's getter, receives the new value, and changes the UI accordingly.
7. Hide the form after the Submit button has been selected
In our case, we want the name entry form to be visible only until the Submit button has been selected. Then it should disappear at the same time the greeting message is shown. Let's change the OnSubmitClicked method, by adding this code at the beginning:
if (string.IsNullOrEmpty(UserName))
{
    return;
}

IsNameNeeded = false;
First, a quick check is performed, as we no longer accept an empty username here. After a name has been entered, IsNameNeeded is set to false, and the app proceeds with displaying the message dialog box. Setting the value of IsNameNeeded raises the NotifyPropertyChanged event and notifies the UI.
We are now done with the code to hide the UI. Let's head back to the XAML!
On the XAML side, we need to hide the TextBlock, the TextBox, and the Button when IsNameNeeded is false. Or we can just hide their container, the StackPanel, in one step. Just add the Visibility attribute to the StackPanel, like this:
Visibility="{x:Bind IsNameNeeded, Mode=OneWay}"
Run the app, enter your name into the TextBox, and verify that the entry form does indeed disappear when you select the Submit button.
8. Use UI-to-UI binding to display the greeting
Let's replace the MessageDialog with a more permanent display: a TextBlock in the top left corner. Add a new TextBlock to the main Grid control in the XAML.
<TextBlock Text="{x:Bind sys:String.Format('Hello {0}!',  tbUserName.Text), Mode=OneWay}"
           HorizontalAlignment="Left"
           VerticalAlignment="Top"
           Margin="10"/>
There's a lot of new things going on here. Let's dissect the Text attribute's binding!
To evaluate the value of the Text property on the TextBlock, the system calls the built-in String.Format method with the format string "Hello {0}". The object to format will be tbUserName.Text (in other words, the Text property on the tbUserName control). The mode of the binding is defined as OneWay, meaning the TextBlock will receive data from the TextBox's Text property.
This is called UI-to-UI binding because both the data binding's source and target are on the UI. To see it in action, you need to define the sys namespace (which contains the System.Format method). Add the following line to the root Page tag in the XAML:
xmlns:sys="using:System"
Now if you run the app, you'll see that the greeting gets updated with every keypress. You don't even need to remove the focus from the TextBox or select the Submit button!
In a real world app, displaying the user's name wouldn't happen through UI-to-UI binding. You'd probably bind to the DisplayName property of a User class, or something similar.
9. Hide the greeting until Submit is selected
As cool as it looks to have the greeting update while typing, the "Hello !" text at startup may appear unprofessional. It would be preferable to have the greeting TextBlock stay invisible until the Submit button has been selected.
To calculate whether the greeting is visible, use a method called GetGreetingVisibility, and add it to the MainPage class.
public Visibility GetGreetingVisibility()
{
    return IsNameNeeded ? Visibility.Collapsed : Visibility.Visible;
}
You might notice that when hiding the StackPanel, we were binding a bool value to the Visibility property (which has a type of UIElement.Visibility). Binding the Visibility to a bool value is so common that Microsoft has created a default conversion between the two, and this is why we didn't get any type conversion errors earlier. However, this automatic conversion only works for properties, so the GetGreetingVisibility() method must return UIElement.Visibility instead of a Boolean value.
As with properties, we need to use the PropertyChanged event to notify the UI when we want it to re-evaluate the method. So let's add this line to the end of the OnSubmitClicked method.
PropertyChanged?.Invoke(this,
    new PropertyChangedEventArgs(nameof(GetGreetingVisibility)));
As a final step, actually perform the binding by adding the Visibility attribute to the greeting TextBlock. In MainPage.xaml, edit the TextBlock so that it looks like this:
<TextBlock Text="{x:Bind sys:String.Format('Hello {0}!',  tbUserName.Text), Mode=OneWay}"
           Visibility="{x:Bind GetGreetingVisibility(), Mode=OneWay}"
           HorizontalAlignment="Left"
           VerticalAlignment="Top"
           Margin="10"/>
Note that we didn't have to add any namespace references to the GetGreetingVisibility() call, because it's a member of the MainPage class itself.
Finally, to stop displaying the MessageDialog, comment out the following lines from the OnSubmitClicked method.
// var dlg = new Windows.UI.Popups.MessageDialog($"Hello {UserName}!");
// dlg.ShowAsync();
Now you're ready to run the app and enjoy your greeting messages.
Summary
In this lesson, you've seen how data binding makes it easier to transfer data between the UI and your code, or between two UI elements. However, there was a lot of code to write, especially when invoking the PropertyChanged event in the property setters. In the next lesson, you'll create a helper class to simplify the use of the INotifyPropertyChanged pattern.

In this lesson, we explore how you can use data binding for data entry, showing and hiding sections of UI based on the app's state. You'll also get familiar with the full INotifyPropertyChanged pattern, and learn more about DataContext.
Let's expand our existing demo with a friendly greeting that looks like this.
When you select the Submit button, the app will display a simple greeting at the top.
1. Create a window-wide DataContext
If you don't have Visual Studio open with the project you've created during the last lesson, open it now.
In the previous lesson, we created a dedicated Clock class that was getting instantiated within the TextBlock that displayed the clock. This Clock class contained the business logic for the clock itself. However, you often need to encompass much more functionality for a screen, and it would be tedious to set the DataContext for each control on the UI.
Fortunately, DataContext is designed so that you can apply it to the entire XAML tree - or just a part of it. A key attribute of DataContext is that it is inherited throughout the XAML tree, but it can be overwritten at any point for a specific subtree.
Let's see this in practice. Create a new class named MainWindowDataContext, and make sure the class and its constructor are public:
namespace DatabindingSampleWPF
{
    public class MainWindowDataContext
    {
        public MainWindowDataContext()
        {
        }
    }
}
Now, set an instance of this class to be the DataContext for the entire Window. In MainWindow.xaml, add this right after the opening Window tag:
<Window.DataContext>
    <local:MainWindowDataContext />
</Window.DataContext>
At this point, Visual Studio may indicate that the class DatabindingSampleWPF.MainWindowDataContext doesn't exist. This is because the project has not been compiled since you've added this class. You can fix this error by compiling your project.
Let's review what we have so far. The DataContext is set at the Window (root) level. This object instance will be the DataContext for every control inside the Window. The only exception is the TextBlock displaying the clock, which already has its own DataContext set, thus overwriting the inherited global DataContext. If this TextBlock had further controls inside it in the hierarchy, those would also inherit the Clock object set on the DataContext of the TextBlock.
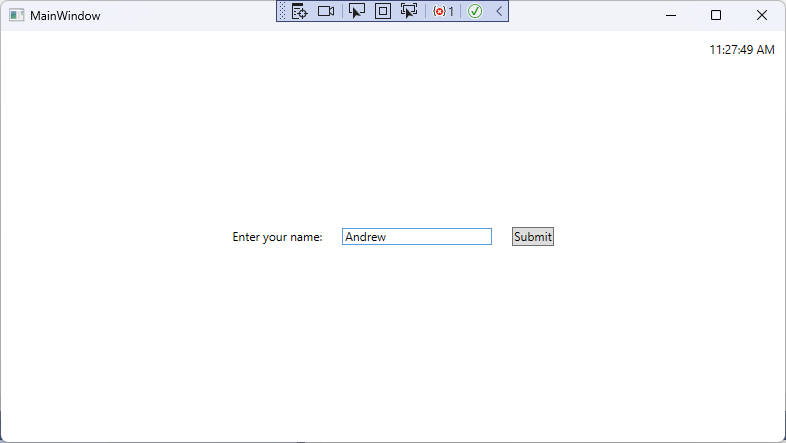
2. Create the data entry UI
The data entry UI is simple: just a TextBlock, a TextBox, and a Button in a single horizontal layout in the middle of the screen. The simplest way to horizontally place controls is to use a StackPanel, like this.
<StackPanel HorizontalAlignment="Center"
            VerticalAlignment="Center"
            Orientation="Horizontal">
    <TextBlock Margin="10"
               VerticalAlignment="Center"
               Text="Enter your name:"/>
    <TextBox Name="tbName"
             Margin="10"
             Width="150"
             VerticalAlignment="Center"/>
    <Button Margin="10"
            VerticalAlignment="Center">Submit</Button>
</StackPanel>
Copy the preceding code, and paste it inside the Grid tag of MainPage.xaml, below the clock's TextBlock.
3. Implement and bind the UserName property
Let's turn our attention to the code. Open MainWindowDataContext.cs, and create a new property called UserName.
public string? UserName { get; set; }
Going back to MainWindow.xaml, we can create the data binding between the UserName property and the TextBox control. Change the TextBox control by adding the Text attribute, like this:
<TextBox Name="tbUserName"
         Margin="10"
         Width="150"
         VerticalAlignment="Center"
         Text="{Binding UserName, Mode=TwoWay}"/>
Note
Be sure not to confuse the TextBlock and the TextBox controls here. They look very similar in XAML, but if you bind the UserName to the TextBlock's text property instead of the TextBox, the app won't work.
With the preceding code, we've created a two-way binding between the Text property of the TextBox and the UserName property in the code. This means that any time the user enters text (and moves the focus off the TextBox), the UserName property in the code will change. Also, the TextBox's text will be set to the value stored in the UserName property upon the app's start, or whenever we raise the NotifyPropertyChanged event with the propertyName parameter "UserName". (We won't do that in this lesson.)
Note
In WPF, the binding mode is automatically determined for the most common situations. For example, if you're binding to the Text property of a TextBox, WPF sets the binding mode to TwoWay by default. This means that we could have even skipped specifying the binding mode here, and could've just written Text={Binding UserName}. Learn more about binding modes here.
4. Create the Submit button's click handler
Next, in the design surface, double-click the Submit button. This will automatically create and a Button_Click event in MainWindow.xaml.cs and open the file. Button_Click is not a very descriptive name, so change the name of the method to OnSubmitClicked. When you're finished typing, click the screwdriver tip next to the OnSubmitClicked line, and select Rename 'Button_Clicked' to 'OnSubmitClicked' from the menu. Return to the XAML and check that the button's XAML now looks like this:
<Button Margin="10"
        VerticalAlignment="Center"
        Click="OnSubmitClicked">Submit</Button>
Going back to the code behind, let's display a simple dialog box when the button has been pressed. Add a convenience property to the top of the MainWindow class that allows us to easily access the MainWindowDataContext object that is set as the DataContext of the entire MainWindow.
private MainWindowDataContext DC => (MainWindowDataContext)DataContext;
Next, add the following code to the OnSubmitClicked method:
MessageBox.Show($"Hello {DC.UserName}!");
The value of the text entered in the TextBox is stored in the MainWindowDataContext.UserName property. The first line stores a reference to the MainWindowDataContext object in a temporary variable. The second line displays a message box with the greeting.
If you're not familiar with the $"Hello {Username}" syntax, it is the equivalent of "Hello " + UserName + "!" or String.Format("Hello {0}!", UserName). This more concise and readable syntax is called string interpolation and was introduced in C# 6.
5. Run the app
Let's test drive what we've done so far! Run the app by pressing F5 or Ctrl+F5. Enter your name, select the Submit button, and a dialog box should greet you.

6. Implement the IsNameNeeded property
Notice that the name entry part of the UI is still displayed after the Submit button has been pressed. We need to hide the form after it's successfully filled. So let's do this as the next step by using data binding.
First, Open MainWindowDataContext.cs, and make MainWindowDataContext inherit from INotifyPropertyChanged, just like we did with the Clock class.
using System.ComponentModel;

public class MainWindowDataContext : INotifyPropertyChanged
{
    public event PropertyChangedEventHandler? PropertyChanged;
Next, create a property to indicate whether entering the user's name is still needed. Add the following code within the MainWindowDataContext class:
private bool _isNameNeeded = true;

public bool IsNameNeeded
{
    get { return _isNameNeeded; }
    set
    {
        if (value != _isNameNeeded)
        {
            _isNameNeeded = value;
            PropertyChanged?.Invoke(
                this, new PropertyChangedEventArgs(nameof(IsNameNeeded)));
        }
    }
}
This is a pretty standard Boolean property with a backing field and a default value of true, until we get to the setter. The property setter first verifies whether the new value is the same as the old one. If it is, there's no need to do anything. If nothing has changed, you don't want to embark on a lengthy process of recalculating the layout and re-rendering controls. However, if the value of the property has changed, you do need to tell the UI about that, by using the PropertyChanged event.
In the preceding code, you can see the standard pattern of the INotifyPropertyChanged interface:
- Verify whether the value has changed.
- If it has, set the new value.
- Notify the UI.
After you've notified the UI (assuming the binding mode is set to OneWay or TwoWay), it calls the property's getter, receives the new value, and changes the UI accordingly.
7. Hide the form after the Submit button has been selected
In our case, we want the name entry form to be visible only until the Submit button has been selected. Then it should disappear at the same time the greeting message is shown. Let's change the OnSubmitClicked method, by adding this code at the beginning:
if (string.IsNullOrWhiteSpace(DC.UserName))
{
    return;
}

DC.IsNameNeeded = false;
First, a quick check is performed, as we no longer accept an empty username here. After a name has been entered, IsNameNeeded is set to false, and the app proceeds with displaying the message dialog box. Setting the value of IsNameNeeded raises the NotifyPropertyChanged event and notifies the UI.
We are now done with the code to hide the UI. Let's head back to the XAML!
On the XAML side, we need to hide the TextBlock, the TextBox, and the Button when IsNameNeeded is false. Or we can just hide their container, the StackPanel, in one step. Add the Visibility attribute to the StackPanel, like this:
Visibility="{Binding IsNameNeeded, Converter={StaticResource BooleanToVisibilityConverter}}"
This binding consists of two parts. The first part specifies the binding path, which points to the IsNameNeeded property of the MainWindowDataContext object that is set as the DataContext of the entire Window.
But the IsNameNeeded property is a Boolean, while Visibility is of type System.Windows.Visibility, which is an enum. We need to do a conversion between the two. This conversion is so common, WPF has a built-in helper class named BooleanToVisibilityConverter. We need to create an instance of this class, and reference it from the binding declaration.
We instantiate this class in XAML, as a resource of the Window object. Every FrameworkElement can have its own resource collection, with a key identifying every resource in the collection. The BooleanToVisibilityConverter in the preceding binding is this key, pointing to a BooleanToVisibilityConverter object inside the resource collection. You can define the resource collection by adding the following code to the Window, right after the opening tag:
<Window.Resources>
    <BooleanToVisibilityConverter x:Key="BooleanToVisibilityConverter"/>
</Window.Resources>
Run the app, enter your name into the TextBox, and verify that the entry form does indeed disappear when you select the Submit button.
8. Use UI-to-UI binding to display the greeting
Let's replace the MessageDialog with a more permanent display: a TextBlock in the top left corner. Add a new TextBlock to the main Grid control in the XAML.
<TextBlock Text="{Binding Text, ElementName=tbName, StringFormat='Hello {0}!'}"
           HorizontalAlignment="Left"
           VerticalAlignment="Top"
           Margin="10"/>
There are several new things introduced in this new TextBlock. Let's dissect the Text attribute's binding!
To evaluate the value of the Text property on the TextBlock, the system calls the built-in String.Format method with the format string "Hello {0}". The object to format will be tbName.Text (in other words, the Text property on the tbName control). The mode of the binding is automatically defined as OneWay, meaning the TextBlock will receive data from the TextBox's Text property.
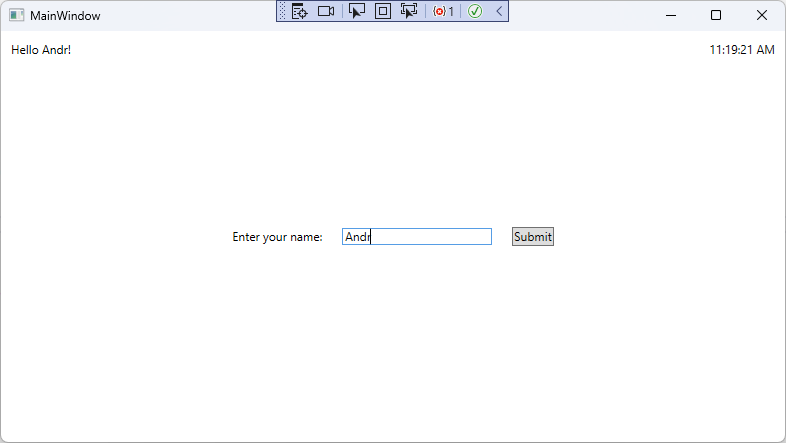
This is called UI-to-UI binding because both the data binding's source and target are on the UI. To see it in action, just run the app. Notice how the greeting gets updated with every keypress. You don't even need to remove the focus from the TextBox or select the Submit button!
In a real world app, displaying the user's name wouldn't happen through UI-to-UI binding. You'd probably bind to the DisplayName property of a User class, or another similar approach.
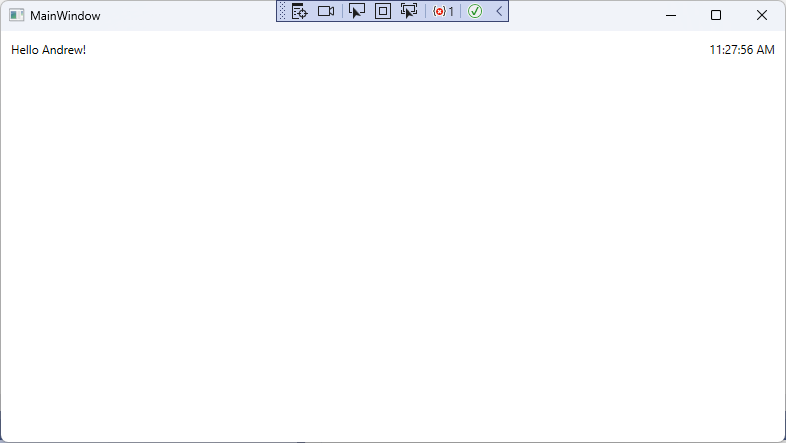
9. Hide the greeting until Submit is selected
As cool as it looks to have the greeting update while typing, the "Hello !" text at startup may appear unprofessional. It would be preferable to have the greeting TextBlock stay invisible until the Submit button has been selected.
To calculate whether the greeting is visible, use a property called GreetingVisibility, and add it to the MainWindowDataContext class.
public Visibility GreetingVisibility => IsNameNeeded ? Visibility.Collapsed : Visibility.Visible;
You'll need to add the System.Windows namespace to the usings in MainWindowDataContext as well.
You might recall that earlier, when we were hiding the StackPanel, we were binding a bool value to the Visibility property (which has a type of System.Windows.Visibility). However, we can skip the BooleanToVisibilityConverter if the binding source is already of the correct data type.
As before, we need to use the PropertyChanged event to notify the UI when we want it to re-evaluate the GreetingVisibility. So let's add this line to the end of the if block in the IsNameNeeded setter.
PropertyChanged?.Invoke(
    this, new PropertyChangedEventArgs(nameof(GreetingVisibility)));
This ensures that whenever IsNameNeeded is changed, there will be two PropertyChanged events raised: one for the IsNameNeeded property itself, and one for the calculated property GreetingVisibility, which depends on IsNameNeeded.
As a final step, perform the binding by adding the Visibility attribute to the greeting TextBlock. In MainWindow.xaml, edit the TextBlock so that it looks like this:
<TextBlock Text="{Binding Text, ElementName=tbName, StringFormat='Hello {0}!'}"
           Visibility="{Binding GreetingVisibility}"
           HorizontalAlignment="Left"
           VerticalAlignment="Top"
           Margin="10"/>
Finally, to stop displaying the MessageBox, comment out the following line from the OnSubmitClicked method in MainWindow.xaml.cs.
// MessageBox.Show($"Hello {DC.UserName}!");
Now you're ready to run the app and enjoy your greeting messages.
Summary
In this lesson, you've seen how data binding makes it easier to transfer data between the UI and your code, or between two UI elements. However, there was a lot of code to write, especially when invoking the PropertyChanged event in the property setters. In the next lesson, you'll create a helper class to simplify the use of the INotifyPropertyChanged pattern.