Investigate and remediate communication compliance alerts
Investigating alerts
The first step to investigate issues detected by your policies is to review alerts generated in the Microsoft Purview compliance portal. Depending on your preference, you can sign into the Communication compliance home page and view alerts in the following locations:
Overview tab: The home page URL defaults to opening the Overview tab which displays the communication compliance dashboard. Here you'll see:
- Alerts needing review listed from high to low severity. Select an alert to launch the alert details page and to start remediation actions.
- Recent policy matches listed by policy name.
- Resolved items listed by policy name.
- Escalations listed by policy name.
- Users with the most policy matches, listed from the most to the least number of matches.
Alerts tab: Navigate to Communication compliance > Alerts to display alerts grouped by matched communication compliance policy. This view allows you to quickly see which communication compliance policies are generating the most alerts ordered by severity. To start remediation actions, expand a policy to select a specific alert and to launch the alert details page.
Policies tab: Navigate to Communication compliance > Policies to display communication compliance policies configured for your Microsoft 365 organization. Each policy listed includes the count of alerts that need review. Selecting a policy displays all the pending alerts for matches to the policy, select a specific alert to launch the policy details page and to start remediation actions.
Using filters
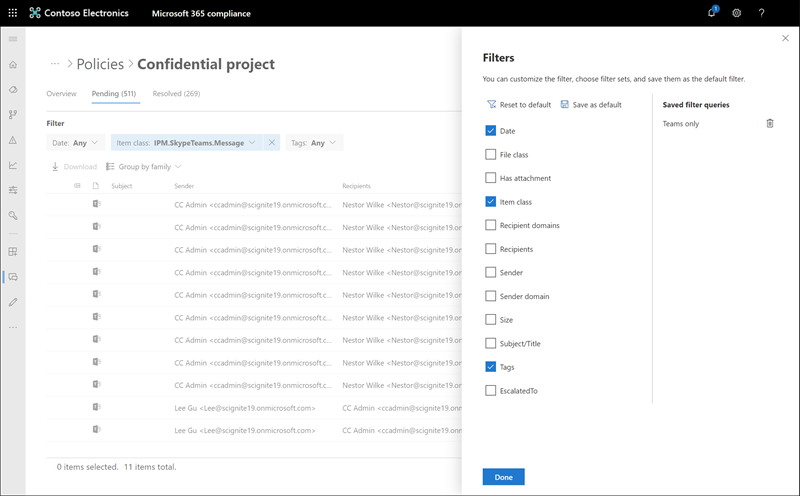
The next step is to sort the messages so that it's easier for you to investigate alerts. Communication compliance supports multi-level filtering for several message fields to help you quickly investigate and review messages with policy matches. Filtering is available for pending and resolved items for each configured policy. You can configure filter queries for a policy or configure and save custom and default filter queries for use in each specific policy. After configuring fields for a filter, you'll see the filter fields displayed on the top of the alert message queue that you can configure for specific filter values.
For a complete list of filters and field details, see the Filters topic.
Using near and exact duplicate analysis
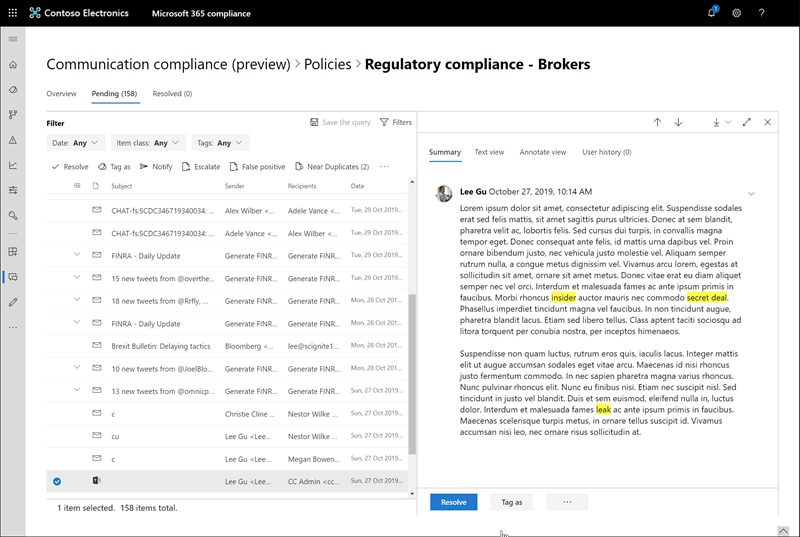
Communication compliance policies automatically scan and pre-group near and exact message duplicates without any additional configuration steps. This view allows you to quickly remediate similar messages one-by-one or as a group, reducing the message investigation burden for reviewers. As duplicates are detected, the Near Duplicates and/or the Exact Duplicates controls are displayed in the remediation action toolbar.
Remediating alerts
No matter where you start to review alerts or the filtering you configure, the next step is to take action to remediate the alert. You can begin your alert remediation using the following workflow on the Policy or Alerts pages:
Examine the message basics: Sometimes it's obvious from the source or subject that a message can be immediately remediated. It may be that the message is actually legitimate or incorrectly matched to a policy and it should be resolved as a false positive. Select the False Positive control to immediately resolve the alert and remove from the pending alert queue. From the source or sender information, you may already know how the message should be routed or handled in these circumstances. Consider using the Tag as or Escalate controls to assign a tag to applicable messages or to send messages to a designated reviewer.
Examine the message details: After reviewing the message basics, it's time to open a message to examine the details and to determine further remediation actions. Select a message to view the complete message header and body information. Several different views are available to help you decide the proper course of action:
- Source view: This view is the standard message view commonly seen in most web-based messaging platforms. The header information is formatted in the normal style and the message body supports embedded graphic files and word-wrapped text.
- Text view: Text view displays a line-numbered text-only view of the message and includes keyword highlighting for terms matched in the associated communication compliance policy. Keyword highlighting can help you quickly scan long messages for the area of interest. Embedded files aren't displayed, and the line numbering view is helpful for referencing pertinent details among multiple reviewers.
- Annotate view: This view allows reviewers to add annotations directly on the message that are saved to the view of the message.
- User history: User history view displays all other alerts generated by any communication compliance policy for the user sending the message.
Decide on a remediation action: Now that you've reviewed the details of the message for the alert, you can choose between the following remediation actions:
- Resolve
- False Positive
- Tag as
- Notify
- Escalate
- Create a case
Determine if message details should be archived outside of communication compliance: Message details can be exported or downloaded if you need to archive the messages in a separate storage solution. Selecting the Download control automatically adds selected messages to a .ZIP file that can be saved to storage outside of Microsoft 365.

