Configure content settings
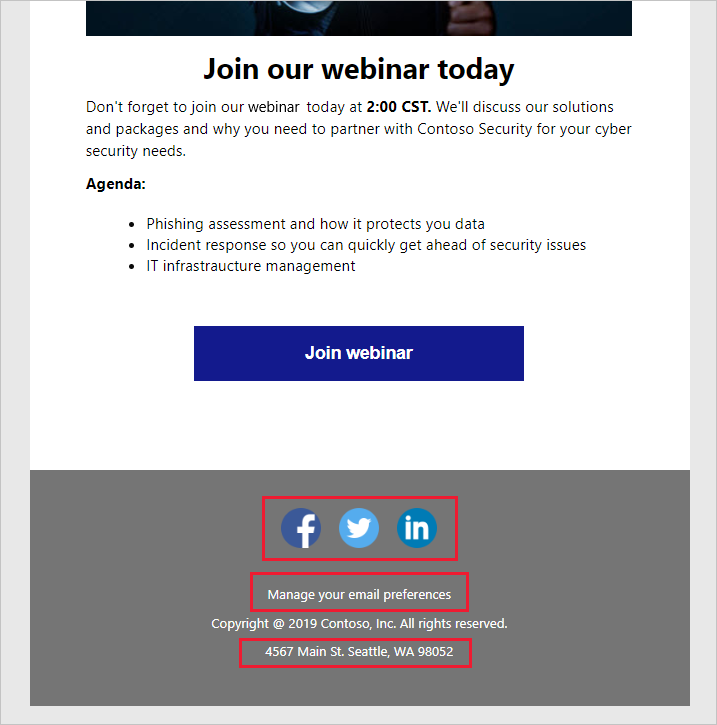
Content settings are sets of standard and required values that are available for use in marketing email messages. Each record includes a subscription-center link, a forward-to-a-friend link, social-media links, your postal address, and other information that can be placed into an email message as dynamic values.
Review, update, and create content settings
To view, edit, or create a content settings record, go to Marketing > Templates > Content settings.
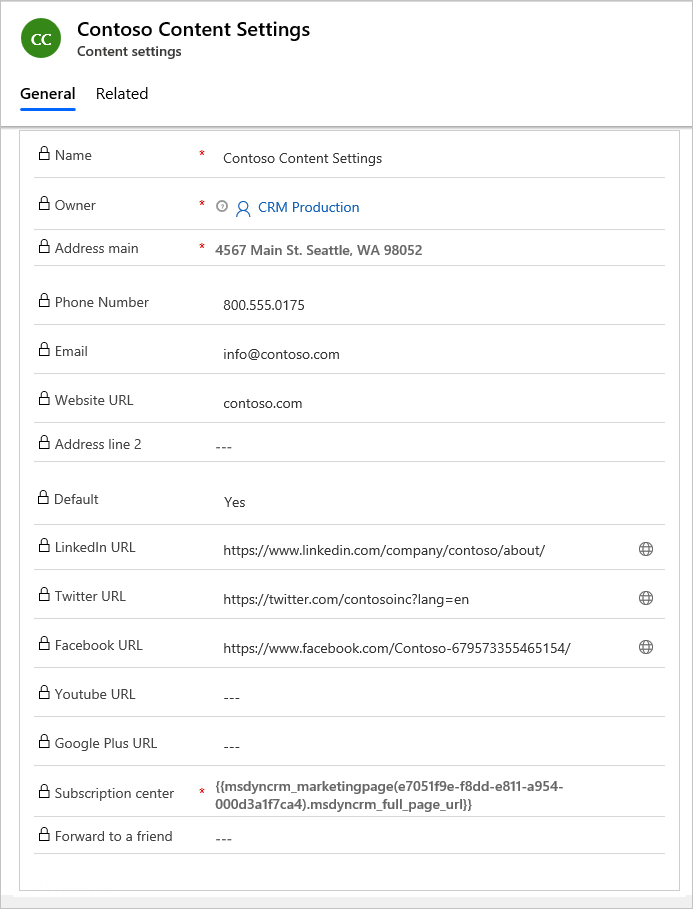
Out of the box, Dynamics 365 Customer Insights - Journeys will come with a default content settings record that is preconfigured to use the default subscription center (also included out of the box). The content settings will also include your organization's primary physical address (identified as part of the initial site setup). You can add more settings such as your company's phone number, the company website, and links to social sites such as Facebook and Twitter. All these values can be pulled into marketing emails as dynamic content and can help you in maintaining consistent standards across all your email messaging, so be sure to review the default settings and update them as needed.
When setting up a customer journey, you'll select a specific content settings record to use, which means that all messages sent by that journey will use the same record. However, each journey can use a different record, which means that you can use an identical marketing email design in two or more customer journeys, each specifying a different content-settings record.
For example, you might have multiple business units that use their own subscription center and social media pages. You might have different geographic offices that want to tailor the address and phone number that is displayed in their email messages.
To create a new content settings record, select +New from the command bar. Fill out the relevant fields along with the required name and physical address fields. Once you are done editing your record, be sure to Check for errors and Go live so that the content settings can be used in customer journeys.
If you are editing a content settings record that was already live, then the record is republished automatically when you save it. It's important the values for content settings are first evaluated at send time of a customer journey, which means that you can edit a content-settings record at any time, and all pending and future email messages will automatically use the latest values of your record.
Tip
If you have other types of values that you often use in email messages, and/or that you want to manage at the customer-journey level, then you can add them as custom fields to the content-settings entity just as you can for other types of entities in Dynamics 365. However, currently, all custom fields for the content-settings entity must be of type text (string). For more information, see Customizing Marketing.
For more information, see Use content settings to set up repositories of standard and required values for email message and Content settings go-live operations and status.
Define content settings in customer journeys
You will define the content settings record on each individual customer journey. As a result, all email marketing messages that are sent by that journey will use that set of settings (for example, physical address, subscription center, social links, and so on). The values for content settings are first evaluated at send time, which means that you can edit a content settings record at any time, and all pending and future email messages will automatically use the latest values.
Note
If you have more than one content settings record, one of them will be the default and will be applied automatically to each new customer journey that you create. You can change this occurrence by updating the Content settings field on the Summary tab of the customer journey. Content settings will be discussed again in the customer journey module.
For more information, see Choose your content settings.