Create a marketing email
Email is a vital marketing channel for modern organizations, and is a core feature of the Dynamics 365 Customer Insights - Journeys application. Dynamics 365 Marketing can send large volumes of personalized marketing emails, monitor how each recipient interacts with them, drive customer journey automation based on these interactions, and present results for individual contacts with aggregate statistical analytics. Emails in Dynamics 365 Customer Insights - Journeys are sent through customer journeys.
Important
One of the most important performance metrics for email marketing is deliverability, which measures the ability of your messages to arrive in recipients' inboxes rather than getting flagged as spam and filtered away, out of sight. Microsoft is dedicated to helping our Dynamics 365 Customer Insights - Journeys customers maximize deliverability. Review Dynamics 365 Customer Insights - Journeys: Set up DKIM for your sending domain to keep up with recent Microsoft 365 changes to learn more.
Design a marketing email
To view, edit, delete, or create a new marketing email, go to Outbound marketing > Marketing execution > Marketing emails.
To create a new marketing email, select + New in the command bar.
Select a template or select Skip to start from scratch.
In Dynamics 365 Customer Insights - Journeys, you can choose from a collection of sample templates or create your own templates. If you choose to start from a template, it will establish the email layout and sample content for you.
Note
When you create a new message from a template, the template content is copied into your new message. The message and template aren't linked, so when you edit the message, the template won't change; likewise, any future changes that you make to a template won't affect any existing messages that were created by using it. For more information, see Work with email, page, and form templates.
When starting from scratch, all design elements (other than section elements) must be placed into a section element. Section elements are provided in the Toolbox panel under the Layout section type. Blank templates provide a one-column section by default, but you can edit its column layout and/or add more section elements as needed.
Update additional settings.
On the top left side above the Designer, enter a descriptive Name for your email. This is used to identify the email in list views and within customer journeys.
Select the Email header (the section of the email that contains From Address and Subject) and update a few key settings, including:
Subject - Enter a subject. This is an extremely important aspect of your email because this is the first thing recipients will see when they receive the email.
Preheader - The preheader shows up next to or below the subject line in the recipient's inbox. The preheader allows you to create custom text that displays in your recipient's inbox before they open the email message.
The send settings area of the email header section is also in the email header of the area and should already show default values that should work fine in most situations. These settings include:
From name - The name that is shown to recipients as the person who sent the email. By default, this setting is the name of the user who created the email. You can edit this setting to use a static value or select the { } Personalization button to define an alternative dynamic value.
From address - The email address that is shown to recipients as the address of the person who sent the email. By default, this setting is the email address of the user who created the message. You can edit this setting to use a static value or select the { } Personalization button to define an alternative dynamic value.
Reply-to email - The email address that reply messages are sent to when you want the messages to go to a different email address than the from address.
The Email Settings area includes:
Email Template - This displays the name of the template you selected when creating the email. You can change the template by selecting the template name.
Important
If you change the template, your current email content won't be preserved (apart from the email header).
Email type - This field affects the requirements for what the message must (and must not) contain. Options in this field include either Commercial or Transactional.
Content type - This can be either a normal email (default content type), or a confirmation request for double opt-in scenarios.
Language - The language your email is in.
The Plain text settings include:
Automatically generate plain text - This option is set to Yes by default. You can, however, set it to No and provide your own plain text version of the email.
Plain text preview - This field shows the preview of the plain text version of your email.
For more information, see Make basic and required settings.
Design your email.
Add, configure, and arrange the various text and graphical elements that your email requires.
Drag design elements from the Toolbox to the canvas or select a design element that already exists in your design.
As you add elements, you can use the pop-up toolbar on the canvas to modify it. The tools that the pop-up toolbar offers vary depending on which type of design element that you've selected. The toolbar typically provides commands to move, copy, or delete the selected element. For text elements, the toolbar offers commands for applying basic text formatting as you would in Microsoft Word.
You can also select an element and then use the Edit options on the right to customize it.
When you add a new section element, you'll have a variety of layouts to choose from. After your element has been placed, you can change the column layout and/or design options.
If you prefer to work directly with HTML code, select the </> HTML icon towards the top right of the page. You might do this to touch up a few properties that you can't get to by using the graphical editor, or you might paste in HTML code that you created by using some other program. You could also add advanced scripts and styling to introduce new functionality.
Note
When pasting HTML code, ensure you don't have nested sections. Nested sections aren't supported in the email designer. For example, you shouldn't paste elements containing "data-section" or "data-container" attributes into elements already containing these attributes. Doing so will result in layout rendering problems. For more information, see Work directly in HTML and Use custom attributes to enable designer features in emails, pages, and forms.
To add styling that applies to the entire email, click anywhere on the outer edges of the email to display the Toolbox and then select the General styles tab. This will display options such as font family, text size, text color and background color that will apply to the entire email.
For more information, see Create a new email and design its content and Design your content.
Important
When you're designing email content, you should always try to minimize the size of your messages as much as you can. When it comes to the text and code content (not including referenced image content), we recommend that you always keep your files under 100 KB for the following reasons:
Emails larger than 100 KB are often flagged as spam by spam filters
Gmail truncates messages after the first 102 KB of source text and coding.
Emails larger than 128 KB can't be delivered by a customer journey (the journey will fail its error check if it includes messages larger than this)
Large emails take longer to load, which may annoy recipients.
Note
Microsoft Outlook supports local customizations and plugins that can affect the way messages are rendered. In some cases, recipients using customized Outlook installations may see odd layouts or repeated page elements when viewing pages designed in Dynamics 365 Customer Insights - Journeys. These effects can't be simulated by the designer. If necessary, you can use test sends to see how your designs look in specific Outlook configurations.
Add dynamic content to your email messages.
The Personalization button { } helps you construct valid dynamic expressions to position field values from recipient contact records, the message content settings, and other database values.
Position your cursor in the field or text element where you want to insert the dynamic text, and then select { } Personalization. The content assist dialog box opens. Follow the prompts to add your desired dynamic content to the email.

Dynamic content is resolved just before a message is sent to a specific individual. You will typically use dynamic content to merge information from the recipient's contact record (such as first and last name), to place special links, and to place information and links from the content settings.
For more information, see Add dynamic content to email messages and Use assist-edit to place dynamic field values.
Add standard, required, and specialized links to your message.
Marketing messages are delivered as HTML and therefore support hyperlinks. Some types of links provide access to special features that are hosted by Dynamics 365 Customer Insights - Journeys, whereas others can simply be standard links to content anywhere on the web.
Text/button/image links can link to:
URL: You can add standard links to any text content by highlighting the link text and selecting Link on the text toolbar. You can also add link URLs to many other types of design elements, including images and buttons. Dynamics 365 Customer Insights - Journeys replaces each link with a unique redirect URL that targets your Dynamics 365 Customer Insights - Journeys server and identifies the message recipient, message ID, and the destination you specified for the link. When a contact clicks a link, Dynamics 365 Customer Insights - Journeys logs the click and then forwards the contact directly to the URL you specified.
Event, Teams check-in, marketing page, or survey: These links go to an event website, Teams check-in, marketing page, or a survey. You can add them as text links in a text element, or as colorful call-to-action buttons or images. To create a button, drag an event, survey, or landing-page element to your email design and then configure which item the element should link to. To create a text link, select some text in a text element, and then use the assist-edit feature.
Other types of links include:
A subscription center, which is a requirement for all commercial email messages. You can add this link by highlighting the link text and selecting Link on the text toolbar. Click the </> assist edit icon to open the Content assist dialog box. Select Dynamic content > ContentSettings > No relationship > SubscriptionCenter then select Insert.
Forward to a friend. This type of link opens a form that contacts can use to forward a marketing email to their own friends or colleagues by entering recipients' email addresses. It's a good idea to include this type of service for your contacts' because messages forwarded by using the forward form are counted correctly in your email results and analytics. You can add this link by highlighting the link text and selecting Link on the text toolbar. Click the </> assist edit icon to open the Content assist dialog box. Select Dynamic content > ContentSettings > No relationship > ForwardToAFriend then select Insert.
View as webpage. This link opens the email in a web browser. You can add this link by highlighting the link text and selecting Link on the text toolbar. Click the </> assist edit icon to open the Content assist dialog box. Select Dynamic content > Message > No relationship > ViewAsWepageURL then select Insert.
For more information, see Add standard, required, and specialized links to your message.
Review required content.
The body of all commercial email messages must include a link to a subscription center and your organization's physical address. Dynamics 365 for Marketing won't let you publish any marketing email without them.
When using an out-of-the-box email template, these attributes will already be included in the footer of your email. These dynamic attributes are defined in your content settings records. Dynamic content is content that is resolved just before a message is sent. Content settings are defined in customer journeys, not in emails. These settings will appear in your email in a similar way as the following example:
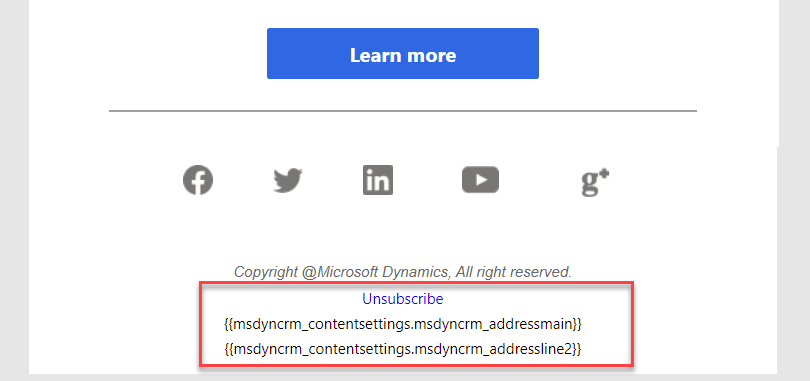
- If you are creating your email from a blank template, the dynamic values for your content setting will need to be incorporated, including physical address and subscription center. For more information, see Use assist-edit to place dynamic field values.
Save your changes.

Important
Domain authentication with DKIM is an increasingly important part of making sure that your messages land in recipients' inboxes rather than being filtered away as junk. DKIM helps prove that messages claiming to come from your organization actually did come from it. It requires that the From address field for each message that you send uses a domain that you've authenticated by using DKIM (email addresses use the form account-name@domain-name). By default, all new Dynamics 365 Customer Insights - Journeys installations come with a pre-authenticated sending domain ending in -dyn365mktg.com. You might also have authenticated one or more of your own sending domains (which we highly recommend).
When you create a new email, the From address field is automatically set to the email address that is registered for your Dynamics 365 Customer Insights - Journeys user account. However, if your email address uses a domain that is not yet authenticated by using DKIM, then the initial From address will be modified to use an authenticated domain. The resulting From address will still show the account-name of the user who created the message, but will now show a DKIM-authenticated domain-name that's registered for your Customer Insights - Journeys instance (for example, \MyName@contoso-dyn365mktg.com), which will provide the deliverability benefit, but likely isn't a valid return address. You can overrule this setting by editing the From address after creating the message, but this will likely lower your deliverability. If you want to send messages that show your real email address as the from address, then we highly recommend that you ask your admin to authenticate your email address domain (if it's not already). For more information, see Authenticate your domains.
For more information, see Create a new email and design its content.
Preview your marketing email
Your marketing email messages will be seen by many potential customers, so you'll want to make sure that they look professional. Dynamics 365 Customer Insights - Journeys provides several tools to help you test and evaluate your design on a variety of device and email clients.
Important
Previews and test sends give you a fast, convenient way to test your design. However, not all features work with previews and test sends. The following limitations apply:
- For-each loops don't render.
- Subscription center links will open the subscription center page, but the page won't function.
- You can't test send confirmation-request messages.
To test these features, create a simple customer journey that targets a small segment (such as one that includes a single contact with your email address) and sends the message that you want to test.
The content designer provides two types of previews for marketing email messages.
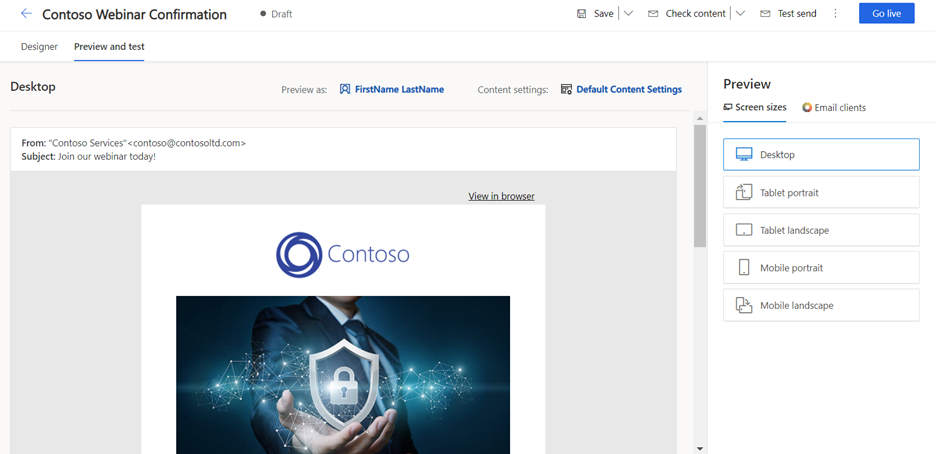
Screen sizes
Within a marketing email, go to the Preview and test tab to see an in-browser preview that simulates how your message will typically be rendered on various form factors (desktop, tablet, or phone) and orientations (portrait or landscape).
Use the following drop-down options at the top of the Preview and test tab to preview the effects of your dynamic content and logic:
Contact - Select a representative contact record to supply field values. Field values from your selected contact, and other dynamic content that reacts to these values, will be shown in your preview.
Content settings - These settings establish a marketing context for your message, and values stored in this list might affect your message content. The content settings also include information about your organization, including its postal address and the ID of a Dynamics 365 Customer Insights - Journeys subscription center page. In a basic setup, you might have only one set of content settings for your entire organization. However, in a more advanced configuration, you might reuse a single marketing email message in several different contexts (such as for different products or different events). Consequently, the content settings can be different for each customer journey where you use the message. For more information, see Use content settings to set up repositories of standard and required values for email messages.
For more information, see Use the basic preview feature.
Email clients
Within a marketing email, go to the Preview and test tab, and in the Preview properties switch to Email clients to see real-world inbox previews that show your design exactly as it'll appear in a wide variety of target email clients and platforms.
The Email clients preview is provided by a Microsoft partner called Litmus Software, Inc. (litmus.com). Your Dynamics 365 Customer Insights - Journeys license includes a limited number of previews each month, and this quota is shared by your entire organization. Litmus must be enabled for your instance before you can use it. For more information, see Configure default marketing settings.
The Email clients tab displays a list of available previews, each labeled with the name of a different destination platform or email client. This tab is categorized into various sections including the most popular previews, previews for Chrome, Windows, and more. Select one of the available email options to generate that preview. Each time that you view a preview, you will receive a pop-up message informing you that the preview will consume one of your Litmus credits. You will need to select Continue before your preview is generated. You'll use one preview from either your organization's or your personal quota. The viewed preview remains available for viewing until you change the design or the Properties (dynamic text) settings, at which time all existing previews will no longer be valid.
For more information, see Use the advanced inbox preview feature.
Check content, test send, and go live
When finished designing and previewing your email, there are a few final steps to get the email ready to send.
First, you need to check content which will run an error check on your email.
Next, we recommend you send a test send of the email to yourself to review your design and double-check all links within the email.
Finally, you must go live with the email to make it available to be added to a customer journey.
When all steps are completed, your email will be ready to be added to a customer journey where you will establish the target segment, delivery schedule, and follow-up actions.
Check content
Before you can go live with or test send your message, it must pass an error check. You can run an error check at any time by selecting Check content at the top of your email design. An error check is also automatically run each time you select Go live or Test send.
All messages must include the following information:
Subscription center link, taken from the content settings as ContentSettings.SubscriptionCenter
Sender's physical address, taken from the content settings as ContentSettings.SenderAddress
A valid Subject or a dynamic expression that resolves to valid text
A valid From name and address, or a dynamic expression that resolves to a valid name and address
An HTML body (your message content)
A plain-text version of the message. This version must exist and must also include a subscription center link and the sender's physical address (this information is usually generated automatically, but you should review it).
The following elements are also confirmed by the check:
All dynamic expressions and HTML code must compile and generate valid values.
All referenced images must exist in Dynamics 365.
The To field must be an expression (not static) that results in a valid email address; this information is normally handled automatically by the customer journey that sends the email, but some advanced scenarios allow for customization in this field.
The from-address should use a domain that is authenticated and registered by using DKIM as belonging to your organization. You can go live with a from-address that uses an unauthenticated domain, but you'll get a warning because this practice isn't recommended. You can't go live with a domain that is authenticated as belonging to another organization (this approach generates an error).
For more information, see Check for errors, go live, and deliver the messages.
Email accessibility checker
Dynamics 365 Customer Insights - Journeys provides an accessibility checker to help you make the content easy for people of all abilities to read. With this feature, you can check the accessibility of emails created using the marketing content designer and receive guidance on suggested fixes. The feature helps you so that you can drill down into any of the accessibility issues that are found to get help on how to fix the issue.
While on your marketing email, click the drop-down arrow next to Check content then select Accessibility checker.

The accessibility checker will generate results to improve the email.

For more information, see Email accessibility checker.
Spam checker
Dynamics 365 Customer Insights - Journeys provides a spam checker to help you check how likely your message is to be flagged as spam. The spam checker feature applies artificial intelligence to analyze the content of each marketing email message. Spam checker then generates a range that predicts how likely the message is to be flagged by content-based spam filters.
There are two ways to view your spam risk:
Automatically - A spam check is always made as part of the standard Check content and Go live processes. Spam risk results are shown together with other results of the error check. Spam risk results are classified as high, medium, or low (lower is better). If you get a high or medium spam risk level, you should consider revising your content.
Manually: As you are designing your email, you can check your spam risk at any time by navigating to the top of your email design, selecting the drop-down arrow next to the Check content button, and selecting Spam checker. This will run a check on your current content. The check may take a couple of minutes but is usually faster. Unlike the automatic error-check results, this display also provides information about which types of issues are most likely responsible for increasing your risk level.
While on your marketing email, click the drop-down arrow next to Check content then select Spam checker.

The Spam checker will produce results to help you determine if you should make changes to your email.

For more information, see Check the spam risk of your email content.
Send a test message
Select the Test send button in the top area of your email design to send your current design to one or more email addresses. This command initiates an error check and then, provided that your message passes the error check, a flyout panel opens asking you to specify the following information:
Email address - Enter one or more target email addresses (comma-separated). You'll typically use your own email address during the test send.
Test contact - Select a contact record to supply values for dynamic content (such as a first name in the salutation). For a live message, these values come from the contact record for each individual recipient.
Test content settings - Select a content-settings record to supply values for dynamic content (such as subscription-center URL or the sender postal address). For a live message, the content-settings record is specified by the customer journey that sends the message.
Select the Save button on the bottom of the flyout panel to send the message to your specified email address(es).
You can test send both draft and live email messages, so you don't have to go live to do a test send.
For more information, see Send a test message.
Go live
To publish a message, open it and select Go live button in the top right-hand corner. Dynamics 365 will run a final validation check and, if it passes, it will publish the message. If errors are returned, read the error message, address the issue, and check for errors again until the message passes validation.
For more information, see Go live and set up a customer journey to deliver your message and Marketing email go-live operations and status.