Exercise - Deploy a web application
At your toy company, your website development team has committed the latest version of the website to your Git repository. Now, you're ready to update your workflow to build the website, and to deploy it to Azure App Service.
In the process, you'll:
- Add a new called workflow for the build job.
- Update the workflow to include the build job.
- Add a new smoke test.
- Update the deployment job to deploy the application.
- Run the workflow.
Add a reusable workflow for the build job
Here, you add a new job definition that contains the steps required to build the website application.
Open Visual Studio Code.
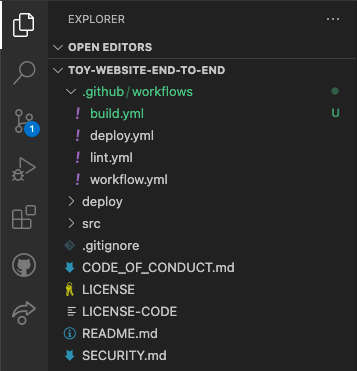
In the .github/workflows folder, create a new file named build.yml.
Add the following content to the build.yml workflow file:
name: build-website

on:
  workflow_call:

jobs:
  build-application:
    name: Build application
    runs-on: ubuntu-latest
    steps:
    - uses: actions/checkout@v3

    - name: Install .NET Core
      uses: actions/setup-dotnet@v3
      with:
        dotnet-version: 3.1

    - name: Build publishable website
      run: |
        dotnet publish --configuration Release
      working-directory: ./src/ToyCompany/ToyCompany.Website

    - name: Zip publishable website
      run: |
        zip -r publish.zip .
      working-directory: ./src/ToyCompany/ToyCompany.Website/bin/Release/netcoreapp3.1/publish

    - name: Upload website as workflow artifact
      uses: actions/upload-artifact@v3
      with:
        name: website
        path: ./src/ToyCompany/ToyCompany.Website/bin/Release/netcoreapp3.1/publish/publish.zip
The job installs the .NET SDK to build the solution. Then, it runs a build step to turn the website application's source code into a compiled file that's ready to run in Azure. The job then compresses the compiled artifact and uploads it as a workflow artifact.
Save your changes to the file.
Add the build job to the workflow
Open the workflow.yml file.
Below the jobs: line, before the lint job, add a new job named build that uses the reusable workflow you just defined:
name: deploy-toy-website-end-to-end
concurrency: toy-company

on:
  push:
    branches:
      - main
  workflow_dispatch:

permissions:
  id-token: write
  contents: read

jobs:

  # Build the application and database.
  build:
    uses: ./.github/workflows/build.yml

  # Lint the Bicep file.
  lint:
    uses: ./.github/workflows/lint.yml
Update the deploy-test job to depend on the new build job:
# Deploy to the test environment.
deploy-test:
  uses: ./.github/workflows/deploy.yml
  needs: [build, lint]
  with:
    environmentType: Test
    resourceGroupName: ToyWebsiteTest
    reviewApiUrl: https://sandbox.contoso.com/reviews
  secrets:
    AZURE_CLIENT_ID: ${{ secrets.AZURE_CLIENT_ID_TEST }}
    AZURE_TENANT_ID: ${{ secrets.AZURE_TENANT_ID }}
    AZURE_SUBSCRIPTION_ID: ${{ secrets.AZURE_SUBSCRIPTION_ID }}
    reviewApiKey: ${{ secrets.REVIEW_API_KEY_TEST }}
Update the deploy-production job to also depend on the build and lint jobs.
# Deploy to the production environment.
deploy-production:
  uses: ./.github/workflows/deploy.yml
  needs:
  - lint
  - build
  - deploy-test
  with:
    environmentType: Production
    resourceGroupName: ToyWebsiteProduction
    reviewApiUrl: https://api.contoso.com/reviews
  secrets:
    AZURE_CLIENT_ID: ${{ secrets.AZURE_CLIENT_ID_PRODUCTION }}
    AZURE_TENANT_ID: ${{ secrets.AZURE_TENANT_ID }}
    AZURE_SUBSCRIPTION_ID: ${{ secrets.AZURE_SUBSCRIPTION_ID }}
    reviewApiKey: ${{ secrets.REVIEW_API_KEY_PRODUCTION }}
Because the production deployment depends on the test deployment, you don't strictly need to specify the dependencies. But, it's a good practice to be explicit, to avoid your workflow running incorrectly if you reorder or remove your jobs or environments.
Notice you're specifying the
needslist in two different ways - your test environment deployment's dependencies are listed on a single line, and your production environment's by using a multiline list. The two approaches are equivalent.Save your changes to the file.
Update the smoke test file
The website developers have added a health endpoint to the website. This endpoint checks that the website is online and that it can reach the database. Here, you add a new smoke test to invoke the health check from your deployment workflow.
Open the Website.Tests.ps1 file in the deploy folder.
Add a new test case that invokes the health check. The test case fails if the response code isn't 200, which indicates success:
param(
  [Parameter(Mandatory)]
  [ValidateNotNullOrEmpty()]
  [string] $HostName
)

Describe 'Toy Website' {

    It 'Serves pages over HTTPS' {
      $request = [System.Net.WebRequest]::Create("https://$HostName/")
      $request.AllowAutoRedirect = $false
      $request.GetResponse().StatusCode |
        Should -Be 200 -Because "the website requires HTTPS"
    }

    It 'Does not serves pages over HTTP' {
      $request = [System.Net.WebRequest]::Create("http://$HostName/")
      $request.AllowAutoRedirect = $false
      $request.GetResponse().StatusCode |
        Should -BeGreaterOrEqual 300 -Because "HTTP is not secure"
    }

    It 'Returns a success code from the health check endpoint' {
      $response = Invoke-WebRequest -Uri "https://$HostName/health" -SkipHttpErrorCheck
      Write-Host $response.Content
      $response.StatusCode |
        Should -Be 200 -Because "the website and configuration should be healthy"
    }

}
Save your changes to the file.
Add output to Bicep file
You'll soon add a deployment step that publishes your website to Azure App Service. The publish step requires the name of the App Service app. Here, you expose the app name as an output from your Bicep file.
Open the main.bicep file in the deploy folder.
At the end of the file contents, add the App Service app's name as an output:
output appServiceAppName string = appServiceApp.name
output appServiceAppHostName string = appServiceApp.properties.defaultHostName
Save your changes to the file.
Update the deployment job to propagate the output
Now, you need to update your deploy job to take the value of the output from the Bicep deployment and make it available to the rest of the workflow.
Open the deploy.yml file in the .github/workflows folder.
In the deploy job's definition, add a new output for the
appServiceAppName:deploy: needs: validate environment: ${{ inputs.environmentType }} runs-on: ubuntu-latest outputs: appServiceAppName: ${{ steps.deploy.outputs.appServiceAppName }} appServiceAppHostName: ${{ steps.deploy.outputs.appServiceAppHostName }} steps:Note
When you start to work with your YAML file in Visual Studio Code, you might see some red squiggly lines telling you there's a problem. This is because the Visual Studio Code extension for YAML files sometimes incorrectly guesses the file's schema.
You can ignore the problems that the extension reports. Or if you prefer, you can add the following code to the top of the file to suppress the extension's guessing:
# yaml-language-server: $schema=./deploy.yml
Add a job to deploy the website
Below the deploy job definition, and above the smoke-test job definition, define a new job to deploy the website to App Service:
deploy-website:
  needs: deploy
  environment: ${{ inputs.environmentType }}
  runs-on: ubuntu-latest
  steps:
  - uses: actions/download-artifact@v3
  - uses: azure/login@v1
    name: Sign in to Azure
    with:
      client-id: ${{ secrets.AZURE_CLIENT_ID }}
      tenant-id: ${{ secrets.AZURE_TENANT_ID }}
      subscription-id: ${{ secrets.AZURE_SUBSCRIPTION_ID }}
  - uses: azure/webapps-deploy@v2
    name: Deploy website
    with:
      app-name: ${{ needs.deploy.outputs.appServiceAppName }}
      package: website/publish.zip
Note
Be careful with the indentation of the YAML file, ensuring that the new job is indented at the same level as the
deployjob. If you're not sure, copy the whole deploy.yml file contents from the example in the next step.Notice that the job depends on the deploy job by using the
needskeyword. This dependency ensures the website isn't deployed until the infrastructure is ready. It also enables the job to access theappServiceAppNameoutput from the deploy job.Also, notice that this job includes steps to download the workflow artifacts and to sign in to Azure. Each job runs on its own runner, so it needs to be self-contained.
Save your changes to the file.
Verify the deploy.yml file contents, and commit your changes
Verify that your deploy.yml file looks like the following example:
name: deploy

on:
  workflow_call:
    inputs:
      environmentType:
        required: true
        type: string
      resourceGroupName:
        required: true
        type: string
      reviewApiUrl:
        required: true
        type: string
    secrets:
      AZURE_CLIENT_ID:
        required: true
      AZURE_TENANT_ID:
        required: true
      AZURE_SUBSCRIPTION_ID:
        required: true
      reviewApiKey:
        required: true

jobs:
  validate:
     runs-on: ubuntu-latest
     steps:
     - uses: actions/checkout@v3
     - uses: azure/login@v1
       name: Sign in to Azure
       with:
         client-id: ${{ secrets.AZURE_CLIENT_ID }}
         tenant-id: ${{ secrets.AZURE_TENANT_ID }}
         subscription-id: ${{ secrets.AZURE_SUBSCRIPTION_ID }}
     - if: inputs.environmentType != 'Production'
       uses: azure/arm-deploy@v1
       name: Run preflight validation
       with:
         deploymentName: ${{ github.run_number }}
         resourceGroupName: ${{ inputs.resourceGroupName }}
         template: ./deploy/main.bicep
         parameters: >
           environmentType=${{ inputs.environmentType }}
           reviewApiUrl=${{ inputs.reviewApiUrl }}
           reviewApiKey=${{ secrets.reviewApiKey }}
         deploymentMode: Validate
     - if: inputs.environmentType == 'Production'
       uses: azure/arm-deploy@v1
       name: Run what-if
       with:
         failOnStdErr: false
         resourceGroupName: ${{ inputs.resourceGroupName }}
         template: ./deploy/main.bicep
         parameters: >
           environmentType=${{ inputs.environmentType }}
           reviewApiUrl=${{ inputs.reviewApiUrl }}
           reviewApiKey=${{ secrets.reviewApiKey }}
         additionalArguments: --what-if

  deploy:
    needs: validate
    environment: ${{ inputs.environmentType }}
    runs-on: ubuntu-latest
    outputs:
      appServiceAppName: ${{ steps.deploy.outputs.appServiceAppName }}
      appServiceAppHostName: ${{ steps.deploy.outputs.appServiceAppHostName }}
    steps:
    - uses: actions/checkout@v3
    - uses: azure/login@v1
      name: Sign in to Azure
      with:
        client-id: ${{ secrets.AZURE_CLIENT_ID }}
        tenant-id: ${{ secrets.AZURE_TENANT_ID }}
        subscription-id: ${{ secrets.AZURE_SUBSCRIPTION_ID }}
    - uses: azure/arm-deploy@v1
      id: deploy
      name: Deploy Bicep file
      with:
        failOnStdErr: false
        deploymentName: ${{ github.run_number }}
        resourceGroupName: ${{ inputs.resourceGroupName }}
        template: ./deploy/main.bicep
        parameters: >
           environmentType=${{ inputs.environmentType }}
           reviewApiUrl=${{ inputs.reviewApiUrl }}
           reviewApiKey=${{ secrets.reviewApiKey }}

  deploy-website:
    needs: deploy
    environment: ${{ inputs.environmentType }}
    runs-on: ubuntu-latest
    steps:
    - uses: actions/download-artifact@v3
    - uses: azure/login@v1
      name: Sign in to Azure
      with:
        client-id: ${{ secrets.AZURE_CLIENT_ID }}
        tenant-id: ${{ secrets.AZURE_TENANT_ID }}
        subscription-id: ${{ secrets.AZURE_SUBSCRIPTION_ID }}
    - uses: azure/webapps-deploy@v2
      name: Deploy website
      with:
        app-name: ${{ needs.deploy.outputs.appServiceAppName }}
        package: website/publish.zip

  smoke-test:
    runs-on: ubuntu-latest
    needs: deploy
    steps:
    - uses: actions/checkout@v3
    - run: |
        $container = New-PesterContainer `
          -Path 'deploy/Website.Tests.ps1' `
          -Data @{ HostName = '${{needs.deploy.outputs.appServiceAppHostName}}' }
        Invoke-Pester `
          -Container $container `
          -CI
      name: Run smoke tests
      shell: pwsh
Save your changes to the file.
In the Visual Studio Code terminal, commit and push your changes to your Git repository by running the following commands:
git add .
git commit -m "Build and deploy website application"
git push
This is the first time you've pushed to this repository, so you might be prompted to sign in.
On Windows, type 1 to authenticate using a web browser, and select Enter.
On macOS, select Authorize.
A browser window appears. You may need to sign in to GitHub again. Select Authorize.
Run the workflow
In your browser, go to Actions.
The first run of your workflow, labeled Initial commit, is shown as a failure. GitHub automatically ran the workflow when you created the repository. It failed because the secrets weren't ready at that time. You can ignore this failure.
Select the deploy-toy-website-end-to-end workflow.
Select the most recent run of your workflow.
Wait until the build job finishes successfully.
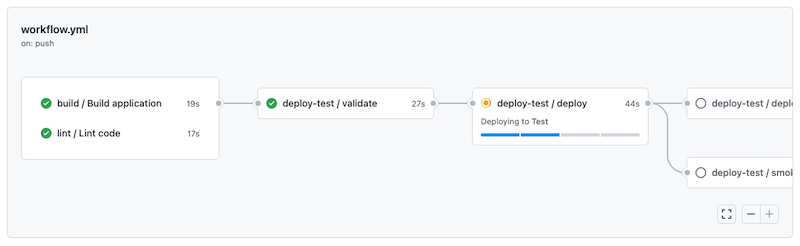
Wait for the deploy-test / deploy job to finish successfully.
Some warnings are listed in the Annotations panel. All of these warnings are because of the way Bicep writes informational messages to the workflow log. You can ignore these warnings.
The workflow then runs the deploy-test / smoke-test job, but the smoke test fails:

Select the deploy-test / smoke-test job to open the workflow log.
Select the Run smoke tests step to view the associated section of the workflow log:
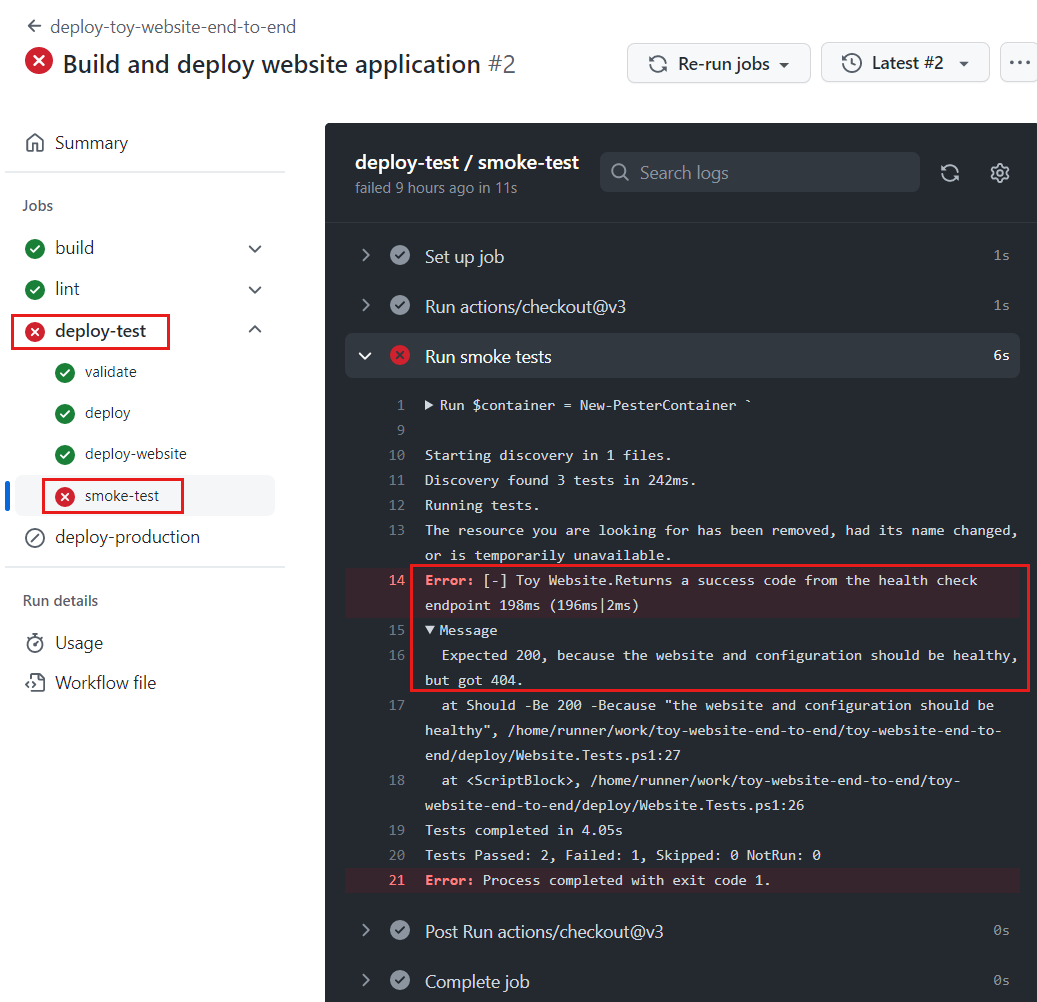
Notice that the workflow log indicates the website and configuration isn't healthy. There's a problem with the application's communication with Azure SQL Database. You haven't yet deployed or configured a database, which is why the website can't access it. You'll fix this problem soon.