Exercise - Create a GitHub action to deploy to AKS
In this exercise, you'll complete the following tasks:
- Enhance the existing GitHub action to include a deployment job.
- Verify that the changes deploy to the Azure Kubernetes Service (AKS) cluster.
- Roll back the deployment.
Update the Kubernetes manifest for the product service
To deploy new versions of the eShop product service, edit the product.yml file to point at the Azure Container Registry (ACR) you used in the previous unit.
In your forked repository, select the code tab, then select the product.yml file.
To edit the file, select the edit icon (pencil).
Edit the line:
containers:
  - image: [replace with your ACR name].azurecr.io/productservice:latest
Replace the
[replace with your ACR name]with the name of your ACR; for example, acseshop186748394.In the top right, select Commit changes... then, in the dialog, select Commit changes.
Create the deployment action
The YAML code adds a GitHub step that:
Has one step that deploys new images. Here's the steps in an ubuntu-latest runner:
- Checks out the repository this file is in.
- Azure Login signs in to Azure with the service principal credentials.
- Set up kubelogin for non-interactive login configures the kubeconfig file for Azure authentication.
- Get K8s context set context sets the Azure Kubernetes Service (AKS) credentials in the runner's .kube/config file.
- Deploys application deploys the application to AKS, using the image built in the previous step and the Kubernetes manifest file you edited earlier.
Complete the following steps to create a GitHub action that deploys the coupon service:
In your forked repository, on the code tab, select the .github/workflows tab.
Select azure-kubernetes-service.yml.
To edit the file, select the edit icon (pencil).
At the bottom of the file, paste the following YAML code into the editor:
  deploy:
    permissions:
      actions: read
      contents: read
      id-token: write
    runs-on: ubuntu-latest
    needs: [buildImage]
    steps:
      # Checks out the repository this file is in
      - uses: actions/checkout@v3

      # Logs in with your Azure credentials
      - name: Azure login
        uses: azure/login@v1.4.6
        with:
          creds: '${{ secrets.AZURE_CREDENTIALS }}'

      # Use kubelogin to configure your kubeconfig for Azure auth
      - name: Set up kubelogin for non-interactive login
        uses: azure/use-kubelogin@v1
        with:
          kubelogin-version: 'v0.0.25'

      # Retrieves your Azure Kubernetes Service cluster's kubeconfig file
      - name: Get K8s context
        uses: azure/aks-set-context@v3
        with:
          resource-group: ${{ env.RESOURCE_GROUP }}
          cluster-name: ${{ env.CLUSTER_NAME }}
          admin: 'false'
          use-kubelogin: 'true'

      # Deploys application based on given manifest file
      - name: Deploys application
        uses: Azure/k8s-deploy@v4
        with:
          action: deploy
          manifests: ${{ env.DEPLOYMENT_MANIFEST_PATH }}
          images: |
            ${{ env.AZURE_CONTAINER_REGISTRY }}.azurecr.io/${{ env.CONTAINER_NAME }}:${{ github.sha }}
          pull-images: false
In the top right, select Commit changes..., then in the dialog select Commit changes.
Trigger a deployment
Updating the azure-kubernetes-service.yml file and committing the changes automatically triggers another deployment. Now see how making a code change triggers another deployment.
You have a new product your marketing team would like to add to the catalog.
In your forked repository, on the code tab, select the Products folder.
Select the Data folder.
Select the ProductDataContext.c file.
To edit the file, select the edit icon (pencil).
At the bottom of the file, add a new product to the products array:
new Product { Name = "Camping Tent 2", Description = "This updated tent is improved and cheaper, perfect for your next trip.", Price = 79.99m, ImageUrl = "product9.png" },In the top right, select Commit changes... then, in the dialog, select Commit changes.
Monitor the deployment
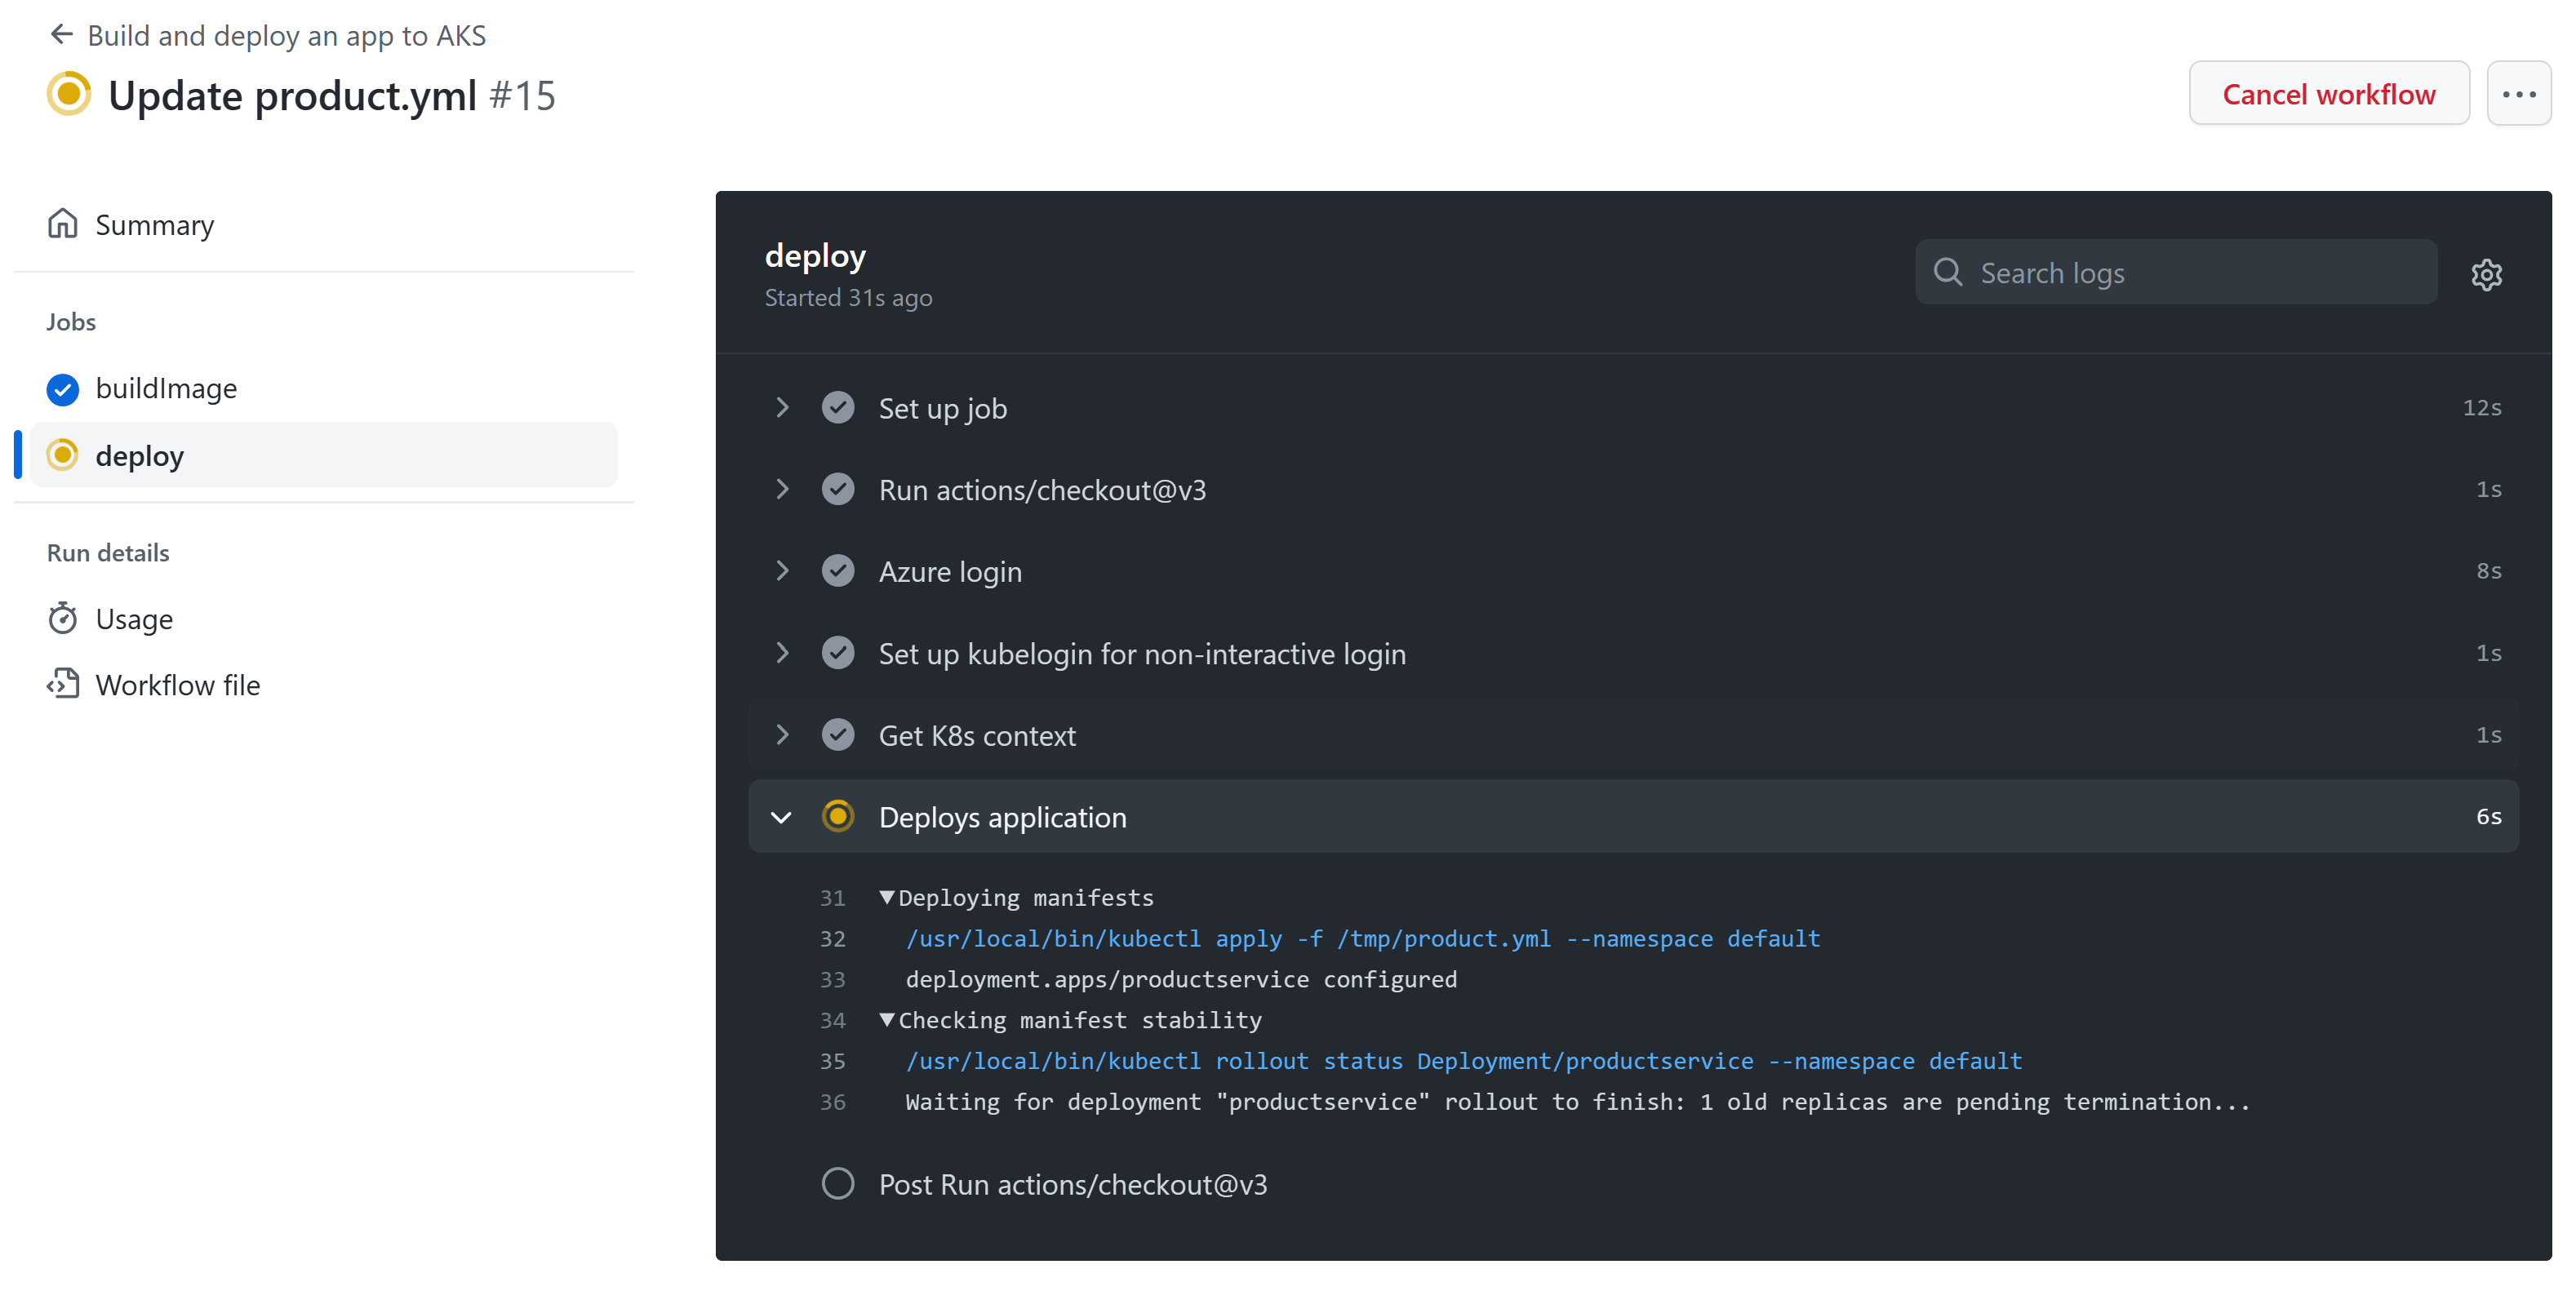
To monitor the deployment's progress, select the Actions tab.
Select the most recent workflow run listed for the Build and deploy an app to AKS workflow. The run's name is the commit message you used in the previous step.
Select the deploy job to see details for this workflow run.
In the terminal, run the following command to monitor the coupon service pods in your AKS cluster. The
--selectorflag filters the list to only pods for the coupon service, and the--watchflag instructskubectlto watch for changes.kubectl get pods --selector=app=productservice --watchDuring the deployment, a variation of the following output appears:
NAME                             READY   STATUS    RESTARTS   AGE
productservice-7979d4c47-xlcrr   1/1     Running   0          17m
productservice-ff98b6d8d-7wmsh   0/1     Pending   0          0s
productservice-ff98b6d8d-7wmsh   0/1     Pending   0          0s
productservice-ff98b6d8d-7wmsh   0/1     ContainerCreating   0          0s
productservice-ff98b6d8d-7wmsh   1/1     Running             0          4s
productservice-7979d4c47-xlcrr   1/1     Terminating         0          19m
In the preceding output, notice that a new productservice pod is created. When the new pod is ready, the old one is terminated. This process makes the transition to the new version as smooth as possible.

Verify the app
Complete the following steps to verify that your app still works:
View the deployed eShop by running this command in the terminal:
echo "http://$(kubectl get services --namespace ingress-nginx ingress-nginx-controller --output jsonpath='{.status.loadBalancer.ingress[0].ip}')"The above command returns the external IP address for the web app. Hold CTRL and select the link to open the app in a new tab.
Go to the products page to view the new tent listed at the bottom of the page.
Roll back the deployment
One common mitigation for production issues is to revert to a known good deployment. Kubernetes maintains a deployment history that you can use to roll back to a previous version of your app.
In your terminal, run this command to remove the new tent you just added to the website:
kubectl rollout undo deployment/productservice
You should see this console message:
deployment.apps/productservice rolled back
Refresh the products page in your browser, and the new tent should no longer be listed.
Note
In a real-life scenario, you deploy the build's artifacts to multiple environments. For example, you might have development, testing, and staging environments. You can trigger deployment workflows by events like merging PRs. You can add quality or approval gates, such as a stakeholder's PR approval, to prevent unexpected deployments to production.