Explore different CI/CD approaches
So far, you've seen two approaches to support CI/CD for your cloud-native app. You manually deployed the app to AKS, and you used GitHub Actions to build and deploy the app. Microsoft supports a third approach, Azure Pipelines. Both the automated approaches are valid; you choose the one that best fits your needs.
How are GitHub actions and Azure Pipelines different?
Let's start by looking at how these two approaches are the same. GitHub Actions and Azure Pipelines are both CI/CD tools. They both support:
- Building and deploying your app.
- YAML files to define the steps to build and deploy your app.
- Triggers to start the build and deploy process.
- Monitoring the build and deploy process.
- Rolling back a deployment.
The different levels of support for features are where the two approaches vary. Let's look at these differences.
| GitHub Actions | Azure Pipelines |
|---|---|
| Free for public repositories | Free for open source projects |
| Free for up to 2000 minutes per month for private repositories | Free for up to 1800 minutes per month for private repositories |
| Limited to 20 concurrent jobs | Limited to 10 concurrent jobs |
Azure Pipelines has an advantage over GitHub Actions as it supports many different source repositories. Azure Pipelines supports GitHub, GitHub Enterprise Server, Bitbucket Cloud, Azure Repos Git and TFVC, Subversion, and External Git. GitHub Actions only support GitHub.
If you have more complex CD/CD workflows, Azure Pipelines can be scaled to support your needs. Azure Pipelines supports multiple stages, multiple jobs, and multiple steps. GitHub Actions only support a single job with multiple steps. This flexibility can be combined with automated testing scenarios.
Note
When you create a new project in DevOps the free Azure Pipeline minutes might not be available. To request a free parallelism grant, fill out the parallelism request form. You'll need to do that before completing the next exercise.
Disable your GitHub Action
After reviewing the differences, you decide to change your app to use Azure Pipelines.
Go to your forked repository, on the Actions tab.
Select the Build and deploy an app to AKS workflow on the left.
Select the more options menu in the top right.
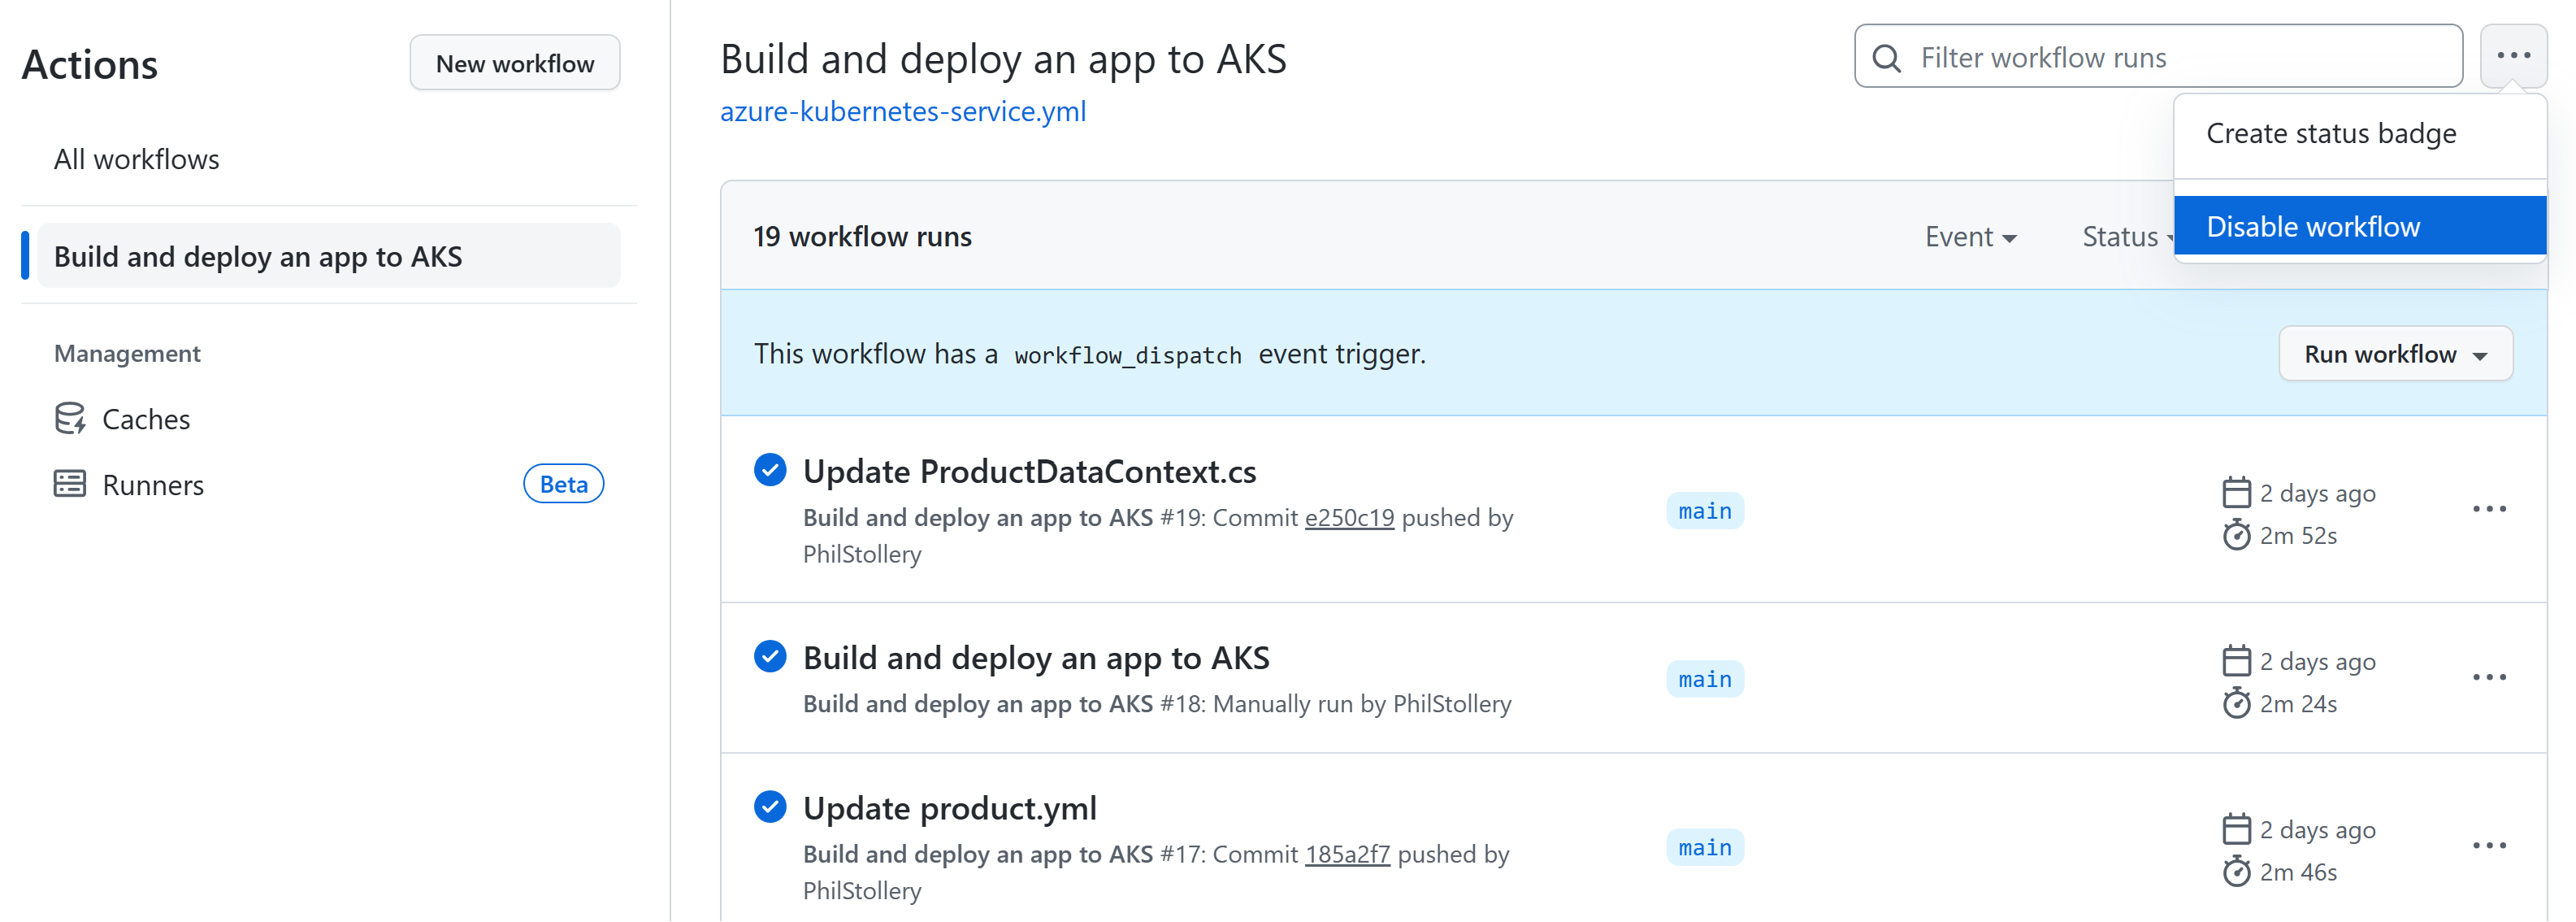
Select Disable workflow.
You've disabled the GitHub Action workflow. You'll now create an Azure Pipeline to build and deploy your app.