Exercise - Add hand interaction with objectmanipulator
The ObjectManipulator script supports the direct manipulation modality of the hands and motion controllers input model. When the script is attached to an object, the user can move, scale, or rotate the object with their hands. In this exercise, you'll create two cubes, attach the necessary scripts to them, and then move the cubes around.
Add and adjust the first cube
In the menu bar, select GameObject > 3D Object > Cube.

The cube's default size is one cubic meter, which is too large for our purposes. We'll scale the size down to 20 cubic centimeters.
Select the cube, and then in the Inspector, change the cube's Scale values in the Transform section to the following:
X = 0.2, Y = 0.2, Z = 0.2
The cube was placed in the scene at the default position of (0,0,0). This means the cube is at the same position as the user's headset, and the user won't be able to see the cube until they move backwards. We'll change the cube's position values so it'll be in a better location for viewing.
In the Inspector, change the cube's Position values in the Transform section to the following:
X = -0.2, Y = 1.6, Z = 0.5

We want to be able to see three sides of the cube, so we'll change the cube's rotation, too.
In the Inspector, change the cube's Rotation values in the Transform section values to the following:
X = 9, Y = 14, Z = 0
Tip
To zoom in on the cube, select it, make sure cursor is hovering over the Scene window, and press the F key. You can zoom in on any object this way.
Add the scripts to the cube
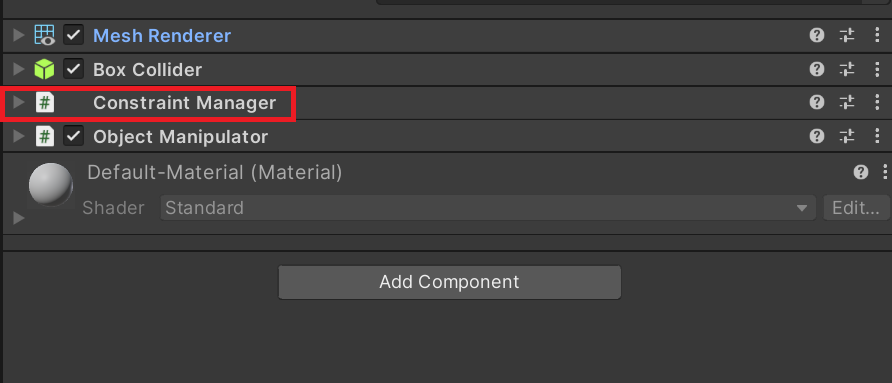
In order for an object to be "grabbable" with tracked hands, it must have three components attached:
- A Collider component (You don't need to do anything here; Unity's cube already has a Box Collider attached by default)
- Object Manipulator (script) component
- Constraint Manager (script) component
With the cube still selected, in the Inspector window, select the Add Component button, and then search for and select the Object Manipulator script.
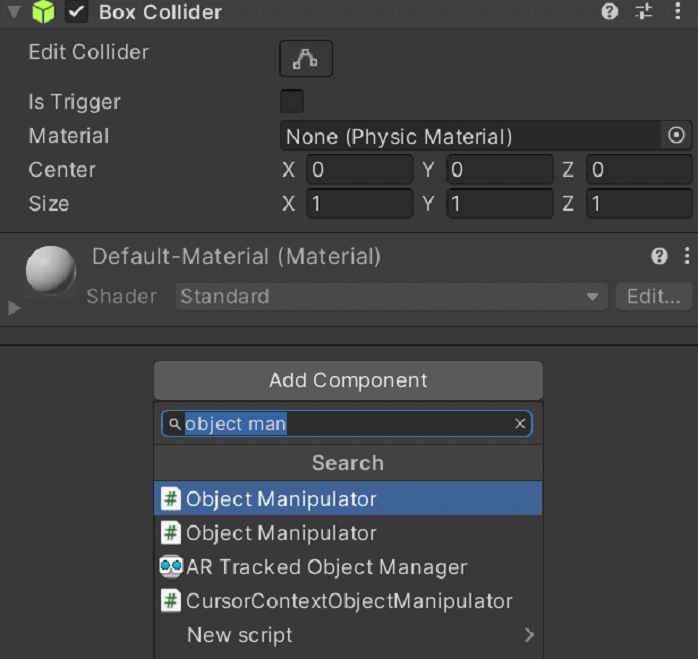
The Object Manipulator script makes an object movable, scalable, and rotatable using one or two hands. When you add the Object Manipulator script, the Constraint Manager script is automatically added as well because the Object Manipulator script depends on it.
Update the cube's material
For performance purposes, we recommend using MRTK materials instead of the default Unity materials.
- With the cube still selected, find and expand the Materials section on the Mesh Renderer component.
- Replace the default material with the MRTK_Standard_White material, located under MRTK Standard Assets > Materials. You can do this by dragging the material directly into the Element field in the Materials section
Add a second cube
In the Hierarchy, right-click the cube and select Duplicate. The duplicated cube appears with the name Cube (1).
Right-click the original cube, select Rename, and name the cube Near Cube.
Right-click the duplicated cube, select Rename, and then name the cube Far Cube.
At the moment, it looks like there's only one cube in the Scene view. That's because Near Cube and Far Cube are in the same exact place. Let's change Far Cube's position and rotation.
With Far Cube still selected, change its values in its Transform component to the following:
Position: X = 0.6, Y = 1.6, Z = 1.1
Rotation: X = 27, Y = 0, Z = 0
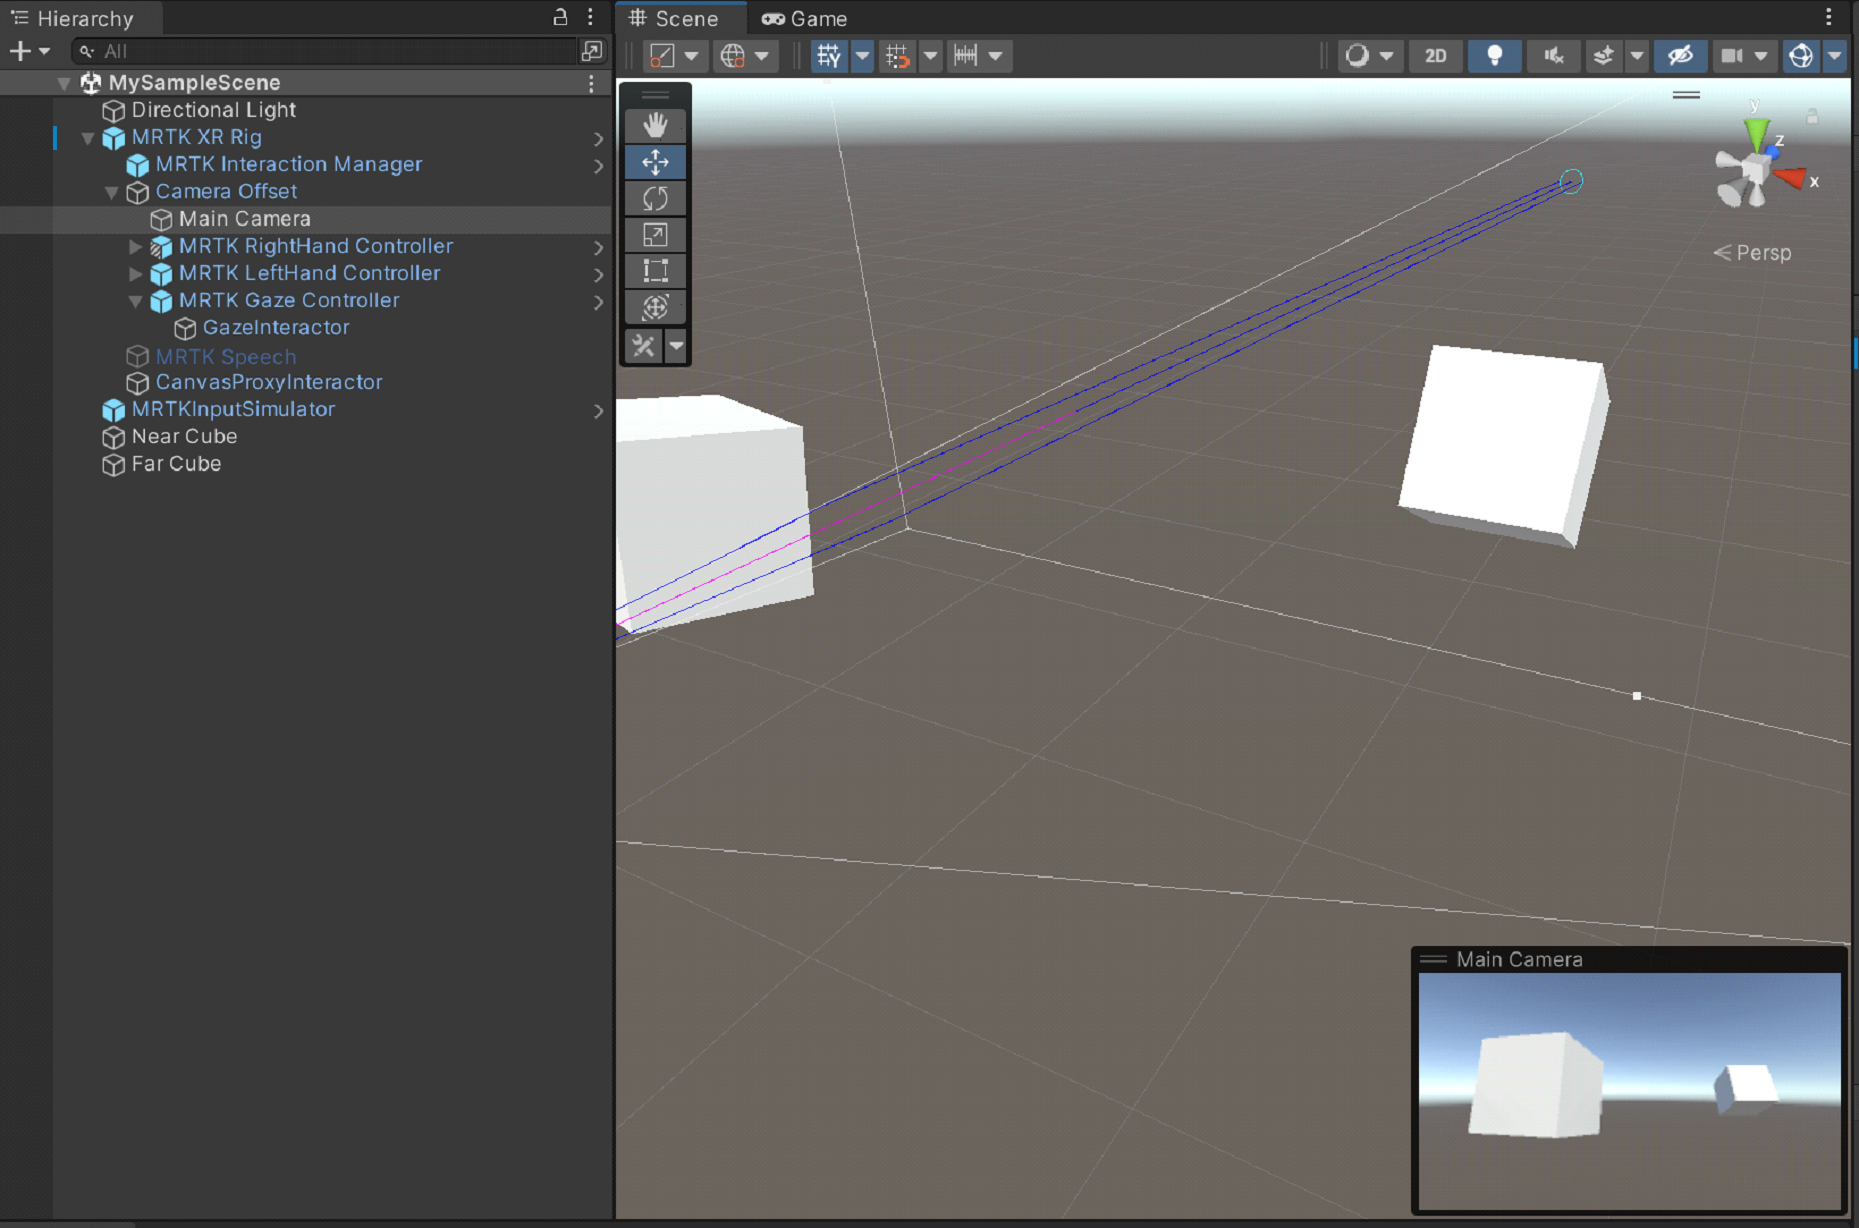
Now the camera should see the Near Cube on the left and the Far Cube a little further away on the right. To confirm this, in the Hierarchy, select Main Camera (under MRTK XR Rig > Camera Offset), then look at the Main Camera window in the Scene window.
Tip
If you want the view in the Scene window to look more like what the camera sees, scroll around in the Scene window. You might have to set the camera's Clear Flags to Skybox if it's not by default.
Grab and move the cubes in Play mode
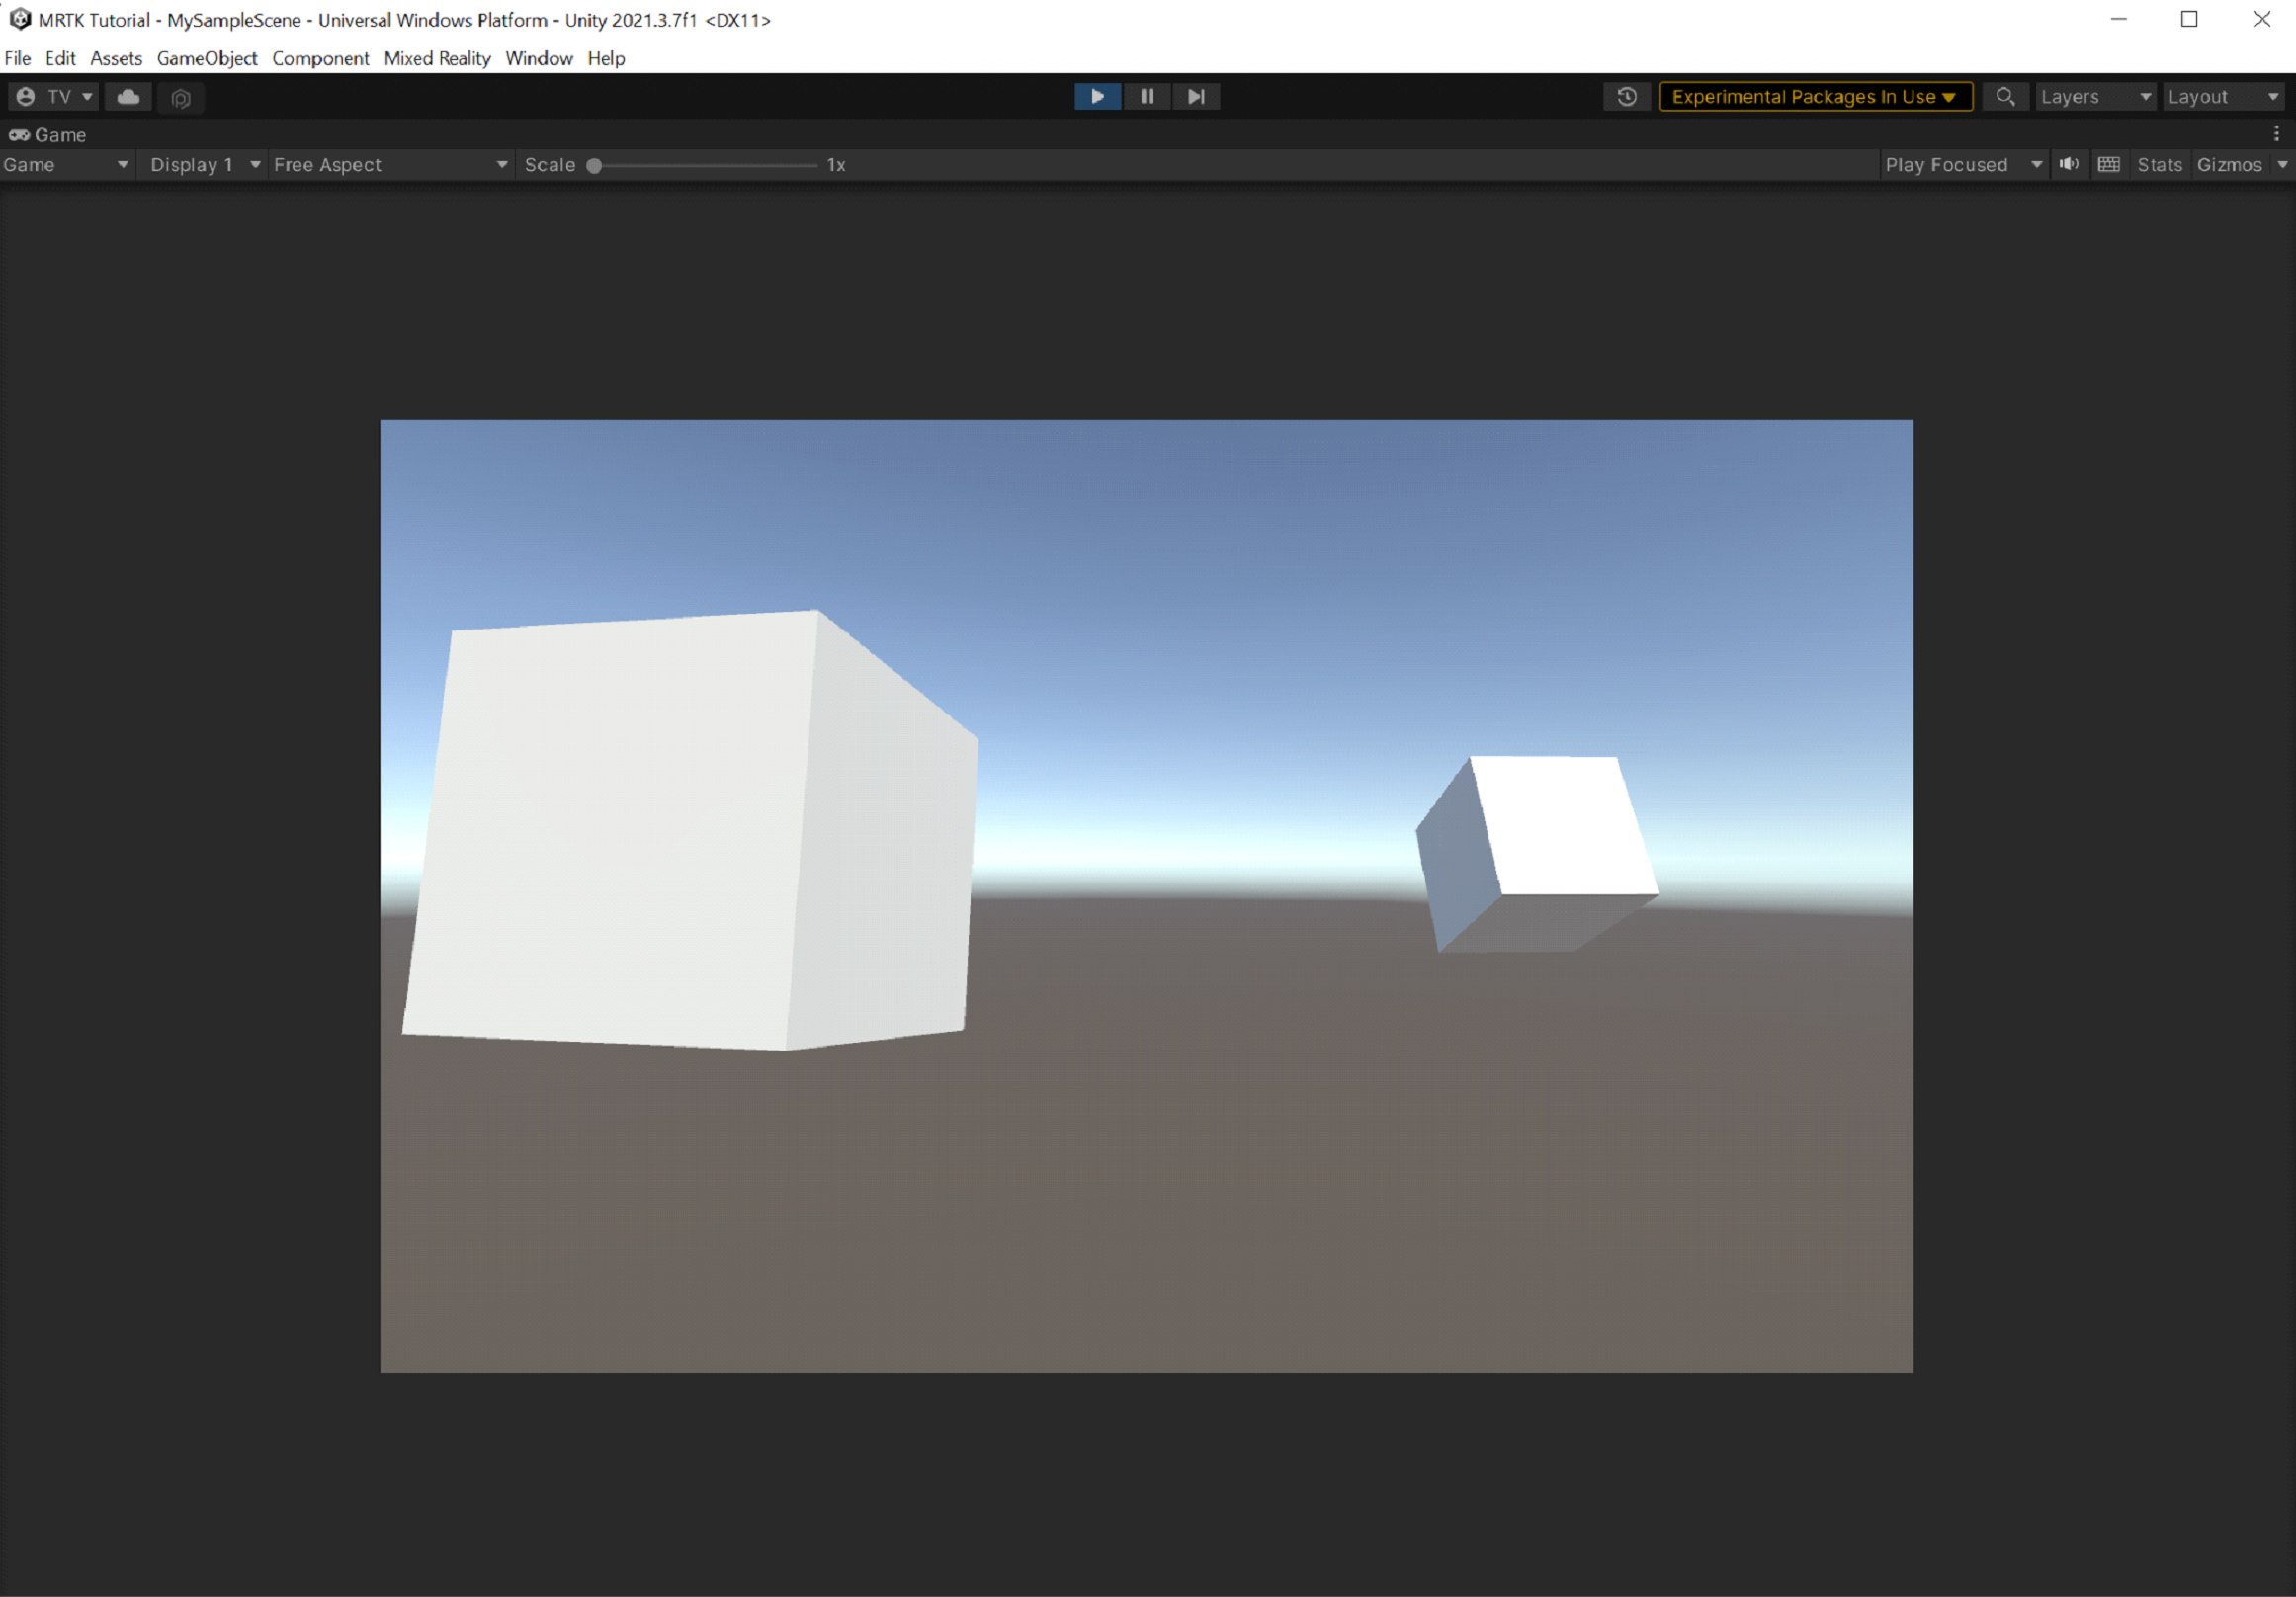
Select the Play button. When the project starts playing, the view switches to the Game window.
Note
Before Playing, confirm that there is a valid Profile set under Project Settings > MRTK3.
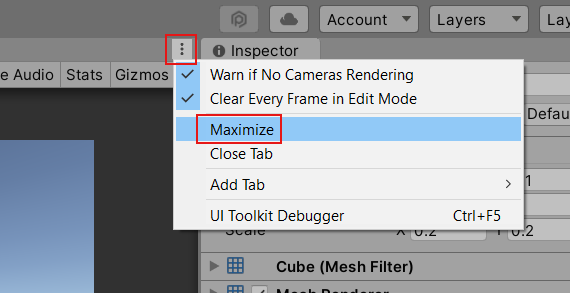
Select the three-dot button above the upper-right corner of the Game window and then select Maximize.
Press and hold the space bar to make the simulated right hand appear in the view.
Move the simulated hand closer to the Near Cube until it touches the cube on the side or bottom.
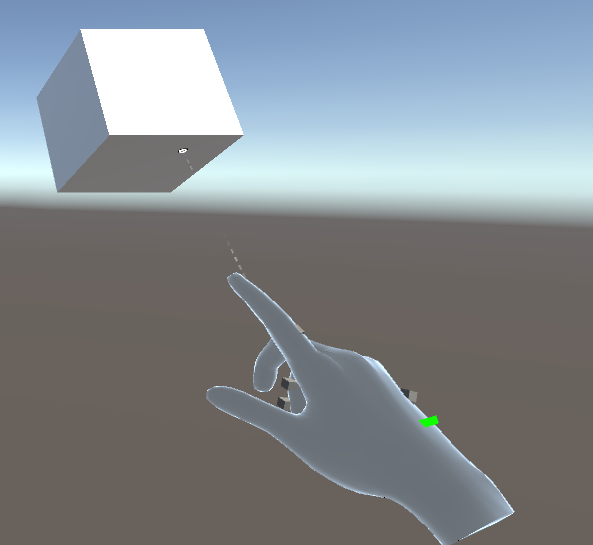
Click the left mouse button (this makes the hand "grab" the cube), then drag the cube around the scene.

To grab and move Far Cube, we'll use the far pointer attached to the simulated hand.
If you need to, press and hold the space bar again to make the simulated right hand appear. Note the far pointer that extends from the end of the hand's index finger.
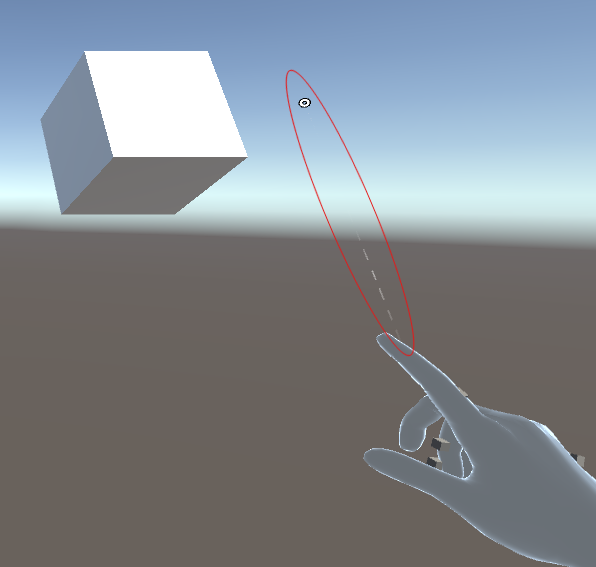
Move the hand closer to Far Cube until you can see the tip of the pointer on the cube. You might have to move the hand around in a circular motion a few times to make the tip of the pointer appear on the cube.
Click the left mouse button (this makes the hand close, taking on what we call the "pinch gesture"), then drag the cube around the scene.
