Exercise - Incorporate the Microsoft Authentication Library into ASP.NET MVC web apps
In this exercise, you'll extend the application from the previous exercise to support authentication with Microsoft Entra ID. This is required to obtain the necessary OAuth access token to call the Microsoft Graph API. In this step, you'll integrate the OWIN middleware and the Microsoft Authentication Library library into the application.
Right-click the graph-tutorial project in Solution Explorer and select Add > New Item....
Select Web Configuration File, name the file PrivateSettings.config and select Add.
Replace its entire contents with the following code:
<appSettings>
    <add key="ida:AppID" value="YOUR APP ID" />
    <add key="ida:AppSecret" value="YOUR APP PASSWORD" />
    <add key="ida:RedirectUri" value="https://localhost:PORT/" />
    <add key="ida:AppScopes" value="User.Read Calendars.Read" />
</appSettings>
Replace YOUR_APP_ID_HERE with the application ID from the Microsoft Entra admin center, and replace YOUR_APP_PASSWORD_HERE with the client secret you generated. If your client secret contains any ampersands (&), be sure to replace them with & in PrivateSettings.config. Also be sure to modify the PORT value for the ida:RedirectUri to match your application's URL.
Important
If you're using source control such as git, now would be a good time to exclude the PrivateSettings.config file from source control to avoid inadvertently leaking your app ID and password.
Update Web.config to load this new file. Replace the <appSettings> (line 7) with the following
<appSettings file="PrivateSettings.config">
Implement sign-in
Start by initializing the OWIN middleware to use Microsoft Entra authentication for the app.
Right-click the App_Start folder in Solution Explorer and select Add > Class.... Name the file Startup.Auth.cs and select Add. Replace the entire contents with the following code.
using Microsoft.Identity.Client;
using Microsoft.IdentityModel.Protocols.OpenIdConnect;
using Microsoft.IdentityModel.Tokens;
using Microsoft.Owin.Security;
using Microsoft.Owin.Security.Cookies;
using Microsoft.Owin.Security.Notifications;
using Microsoft.Owin.Security.OpenIdConnect;
using Owin;
using System.Configuration;
using System.Threading.Tasks;
using System.Web;

namespace graph_tutorial
{
    public partial class Startup
    {
        // Load configuration settings from PrivateSettings.config
        private static string appId = ConfigurationManager.AppSettings["ida:AppId"];
        private static string appSecret = ConfigurationManager.AppSettings["ida:AppSecret"];
        private static string redirectUri = ConfigurationManager.AppSettings["ida:RedirectUri"];
        private static string graphScopes = ConfigurationManager.AppSettings["ida:AppScopes"];

        public void ConfigureAuth(IAppBuilder app)
        {
            app.SetDefaultSignInAsAuthenticationType(CookieAuthenticationDefaults.AuthenticationType);

            app.UseCookieAuthentication(new CookieAuthenticationOptions());

            app.UseOpenIdConnectAuthentication(
                new OpenIdConnectAuthenticationOptions
                {
                    ClientId = appId,
                    Authority = "https://login.microsoftonline.com/common/v2.0",
                    Scope = $"openid email profile offline_access {graphScopes}",
                    RedirectUri = redirectUri,
                    PostLogoutRedirectUri = redirectUri,
                    TokenValidationParameters = new TokenValidationParameters
                    {
                        // For demo purposes only, see below
                        ValidateIssuer = false

                        // In a real multi-tenant app, you would add logic to determine whether the
                        // issuer was from an authorized tenant
                        //ValidateIssuer = true,
                        //IssuerValidator = (issuer, token, tvp) =>
                        //{
                        //  if (MyCustomTenantValidation(issuer))
                        //  {
                        //    return issuer;
                        //  }
                        //  else
                        //  {
                        //    throw new SecurityTokenInvalidIssuerException("Invalid issuer");
                        //  }
                        //}
                    },
                    Notifications = new OpenIdConnectAuthenticationNotifications
                    {
                        AuthenticationFailed = OnAuthenticationFailedAsync,
                        AuthorizationCodeReceived = OnAuthorizationCodeReceivedAsync
                    }
                }
            );
        }

        private static Task OnAuthenticationFailedAsync(AuthenticationFailedNotification<OpenIdConnectMessage,
            OpenIdConnectAuthenticationOptions> notification)
        {
            notification.HandleResponse();
            string redirect = $"/Home/Error?message={notification.Exception.Message}";
            if (notification.ProtocolMessage != null && !string.IsNullOrEmpty(notification.ProtocolMessage.ErrorDescription))
            {
                redirect += $"&debug={notification.ProtocolMessage.ErrorDescription}";
            }
            notification.Response.Redirect(redirect);
            return Task.FromResult(0);
        }

        private async Task OnAuthorizationCodeReceivedAsync(AuthorizationCodeReceivedNotification notification)
        {
            var idClient = ConfidentialClientApplicationBuilder.Create(appId)
                .WithRedirectUri(redirectUri)
                .WithClientSecret(appSecret)
                .Build();

            string message;
            string debug;

            try
            {
                string[] scopes = graphScopes.Split(' ');

                var result = await idClient.AcquireTokenByAuthorizationCode(
                    scopes, notification.Code).ExecuteAsync();

                message = "Access token retrieved.";
                debug = result.AccessToken;
            }
            catch (MsalException ex)
            {
                message = "AcquireTokenByAuthorizationCodeAsync threw an exception";
                debug = ex.Message;
            }

            var queryString = $"message={message}&debug={debug}";
            if (queryString.Length > 2048)
            {
                queryString = queryString.Substring(0, 2040) + "...";
            }

            notification.HandleResponse();
            notification.Response.Redirect($"/Home/Error?{queryString}");
        }
    }
}
Note
This code configures the OWIN middleware with the values from PrivateSettings.config and defines two callback methods, OnAuthenticationFailedAsync and OnAuthorizationCodeReceivedAsync. These callback methods will be invoked when the sign-in process returns from Azure.
Now update the Startup.cs file to call the ConfigureAuth method. Replace the entire contents of Startup.cs with the following code.
using Microsoft.Owin;
using Owin;

[assembly: OwinStartup(typeof(graph_tutorial.Startup))]

namespace graph_tutorial
{
    public partial class Startup
    {
        public void Configuration(IAppBuilder app)
        {
            ConfigureAuth(app);
        }
    }
}
Add an Error action to the HomeController class to transform the message and debug query parameters into an Alert object. Open Controllers/HomeController.cs and add the following function.
public ActionResult Error(string message, string debug)
{
    Flash(message, debug);
    return RedirectToAction("Index");
}
Add a controller to handle sign-in. Right-click the Controllers folder in Solution Explorer and select Add > Controller.... Choose MVC 5 Controller - Empty and select Add. Name the controller AccountController and select Add. Replace the entire contents of the file with the following code.
using Microsoft.Owin.Security;
using Microsoft.Owin.Security.Cookies;
using Microsoft.Owin.Security.OpenIdConnect;
using System.Security.Claims;
using System.Web;
using System.Web.Mvc;

namespace graph_tutorial.Controllers
{
    public class AccountController : Controller
    {
        public void SignIn()
        {
            if (!Request.IsAuthenticated)
            {
                // Signal OWIN to send an authorization request to Azure
                Request.GetOwinContext().Authentication.Challenge(
                    new AuthenticationProperties { RedirectUri = "/" },
                    OpenIdConnectAuthenticationDefaults.AuthenticationType);
            }
        }

        public ActionResult SignOut()
        {
            if (Request.IsAuthenticated)
            {
                Request.GetOwinContext().Authentication.SignOut(
                    CookieAuthenticationDefaults.AuthenticationType);
            }

            return RedirectToAction("Index", "Home");
        }
    }
}
This defines a SignIn and SignOut action. The SignIn action checks if the request is already authenticated. If not, it invokes the OWIN middleware to authenticate the user. The SignOut action invokes the OWIN middleware to sign out.
Save your changes and start the project. Select the Sign In button and you should be redirected to https://login.microsoftonline.com. Log in with your Microsoft account and consent to the requested permissions. The browser redirects to the app, showing the token.
Get user details
Once the user is logged in, you can get their information from Microsoft Graph.
Right-click the Models folder in Solution Explorer and select Add > Class.... Name the class CachedUser and select Add. Replace the entire contents of CachedUser.cs with the following code.
namespace graph_tutorial.Models
{
    // Simple class to serialize user details
    public class CachedUser
    {
        public string DisplayName { get; set; }
        public string Email { get; set; }
        public string Avatar { get; set; }
    }
}
Right-click the graph-tutorial folder in Solution Explorer, and select Add > New Folder. Name the folder Helpers.
Right-click this new folder and select Add > Class.... Name the file GraphHelper.cs and select Add. Replace the contents of this file with the following code.
using graph_tutorial.Models;
using Microsoft.Graph;
using System.Net.Http.Headers;
using System.Threading.Tasks;

namespace graph_tutorial.Helpers
{
    public static class GraphHelper
    {
        public static async Task<CachedUser> GetUserDetailsAsync(string accessToken)
        {
            var graphClient = new GraphServiceClient(
                new DelegateAuthenticationProvider(
                    async (requestMessage) =>
                    {
                        requestMessage.Headers.Authorization =
                            new AuthenticationHeaderValue("Bearer", accessToken);
                    }));

            var user = await graphClient.Me.Request()
                .Select(u => new {
                    u.DisplayName,
                    u.Mail,
                    u.UserPrincipalName
                })
                .GetAsync();

            return new CachedUser
            {
                Avatar = string.Empty,
                DisplayName = user.DisplayName,
                Email = string.IsNullOrEmpty(user.Mail) ?
                    user.UserPrincipalName : user.Mail
            };
        }
    }
}
This implements the GetUserDetailsAsync function, which uses the Microsoft Graph SDK to call the /me endpoint and return the result.
Update the OnAuthorizationCodeReceivedAsync method in App_Start/Startup.Auth.cs to call this function. Add the following using statement to the top of the file.
using graph_tutorial.Helpers;
Replace the existing try block in OnAuthorizationCodeReceivedAsync with the following code.
try
{
    string[] scopes = graphScopes.Split(' ');

    var result = await idClient.AcquireTokenByAuthorizationCode(
        scopes, notification.Code).ExecuteAsync();

    var userDetails = await GraphHelper.GetUserDetailsAsync(result.AccessToken);

    message = "User info retrieved.";
    debug = $"User: {userDetails.DisplayName}, Email: {userDetails.Email}";
}
Save your changes and start the app, after sign-in you should see the user's name and email address instead of the access token.
Storing the tokens
Now that you can get tokens, it's time to implement a way to store them in the app. Since this is a sample app, you'll use the session to store the tokens. A real-world app would use a more reliable secure storage solution, like a database. In this section, you'll:
- Implement a token store class to serialize and store the MSAL token cache and the user's details in the user session.
- Update the authentication code to use the token store class.
- Update the base controller class to expose the stored user details to all views in the application.
Right-click the graph-tutorial folder in Solution Explorer, and select Add > New Folder. Name the folder TokenStorage.
Right-click this new folder and select Add > Class.... Name the file SessionTokenStore.cs and select Add. Replace the contents of this file with the following code.
using graph_tutorial.Models;
using Microsoft.Identity.Client;
using Newtonsoft.Json;
using System.Security.Claims;
using System.Threading;
using System.Web;

namespace graph_tutorial.TokenStorage
{
    public class SessionTokenStore
    {
        private static readonly ReaderWriterLockSlim sessionLock = new ReaderWriterLockSlim(LockRecursionPolicy.NoRecursion);

        private HttpContext httpContext = null;
        private string tokenCacheKey = string.Empty;
        private string userCacheKey = string.Empty;

        public SessionTokenStore(ITokenCache tokenCache, HttpContext context, ClaimsPrincipal user)
        {
            httpContext = context;

            if (tokenCache != null)
            {
                tokenCache.SetBeforeAccess(BeforeAccessNotification);
                tokenCache.SetAfterAccess(AfterAccessNotification);
            }

            var userId = GetUsersUniqueId(user);
            tokenCacheKey = $"{userId}_TokenCache";
            userCacheKey = $"{userId}_UserCache";
        }

        public bool HasData()
        {
            return (httpContext.Session[tokenCacheKey] != null &&
                ((byte[])httpContext.Session[tokenCacheKey]).Length > 0);
        }

        public void Clear()
        {
            sessionLock.EnterWriteLock();

            try
            {
                httpContext.Session.Remove(tokenCacheKey);
            }
            finally
            {
                sessionLock.ExitWriteLock();
            }
        }

        private void BeforeAccessNotification(TokenCacheNotificationArgs args)
        {
            sessionLock.EnterReadLock();

            try
            {
                // Load the cache from the session
                args.TokenCache.DeserializeMsalV3((byte[])httpContext.Session[tokenCacheKey]);
            }
            finally
            {
                sessionLock.ExitReadLock();
            }
        }

        private void AfterAccessNotification(TokenCacheNotificationArgs args)
        {
            if (args.HasStateChanged)
            {
                sessionLock.EnterWriteLock();

                try
                {
                    // Store the serialized cache in the session
                    httpContext.Session[tokenCacheKey] = args.TokenCache.SerializeMsalV3();
                }
                finally
                {
                    sessionLock.ExitWriteLock();
                }
            }
        }

        public void SaveUserDetails(CachedUser user)
        {

            sessionLock.EnterWriteLock();
            httpContext.Session[userCacheKey] = JsonConvert.SerializeObject(user);
            sessionLock.ExitWriteLock();
        }

        public CachedUser GetUserDetails()
        {
            sessionLock.EnterReadLock();
            var cachedUser = JsonConvert.DeserializeObject<CachedUser>((string)httpContext.Session[userCacheKey]);
            sessionLock.ExitReadLock();
            return cachedUser;
        }

        public string GetUsersUniqueId(ClaimsPrincipal user)
        {
            // Combine the user's object ID with their tenant ID

            if (user != null)
            {
                var userObjectId = user.FindFirst("http://schemas.microsoft.com/identity/claims/objectidentifier").Value ??
                    user.FindFirst("oid").Value;

                var userTenantId = user.FindFirst("http://schemas.microsoft.com/identity/claims/tenantid").Value ??
                    user.FindFirst("tid").Value;

                if (!string.IsNullOrEmpty(userObjectId) && !string.IsNullOrEmpty(userTenantId))
                {
                    return $"{userObjectId}.{userTenantId}";
                }
            }

            return null;
        }
    }
}
Add the following using statements to the top of the App_Start/Startup.Auth.cs file.
using graph_tutorial.TokenStorage;
using System.Security.Claims;
Replace the existing OnAuthorizationCodeReceivedAsync function with the following.
private async Task OnAuthorizationCodeReceivedAsync(AuthorizationCodeReceivedNotification notification)
{
    notification.HandleCodeRedemption();

    var idClient = ConfidentialClientApplicationBuilder.Create(appId)
        .WithRedirectUri(redirectUri)
        .WithClientSecret(appSecret)
        .Build();

    var signedInUser = new ClaimsPrincipal(notification.AuthenticationTicket.Identity);
    var tokenStore = new SessionTokenStore(idClient.UserTokenCache, HttpContext.Current, signedInUser);

    try
    {
        string[] scopes = graphScopes.Split(' ');

        var result = await idClient.AcquireTokenByAuthorizationCode(
            scopes, notification.Code).ExecuteAsync();

        var userDetails = await GraphHelper.GetUserDetailsAsync(result.AccessToken);

        tokenStore.SaveUserDetails(userDetails);
        notification.HandleCodeRedemption(null, result.IdToken);
    }
    catch (MsalException ex)
    {
        string message = "AcquireTokenByAuthorizationCodeAsync threw an exception";
        notification.HandleResponse();
        notification.Response.Redirect($"/Home/Error?message={message}&debug={ex.Message}");
    }
    catch (Microsoft.Graph.ServiceException ex)
    {
        string message = "GetUserDetailsAsync threw an exception";
        notification.HandleResponse();
        notification.Response.Redirect($"/Home/Error?message={message}&debug={ex.Message}");
    }
}
Note
The changes in this new version of OnAuthorizationCodeReceivedAsync do the following:
- The code now wraps the
ConfidentialClientApplication's default user token cache with theSessionTokenStoreclass. The MSAL library will handle the logic of storing the tokens and refreshing it when needed. - The code now passes the user details obtained from Microsoft Graph to the
SessionTokenStoreobject to store in the session. - On success, the code no longer redirects, it just returns. This allows the OWIN middleware to complete the authentication process.
Update the SignOut action to clear the token store before signing out. Add the following using statement to the top of Controllers/AccountController.cs.
using graph_tutorial.TokenStorage;
Replace the existing SignOut function with the following.
public ActionResult SignOut()
{
    if (Request.IsAuthenticated)
    {
        var tokenStore = new SessionTokenStore(null,
            System.Web.HttpContext.Current, ClaimsPrincipal.Current);

        tokenStore.Clear();

        Request.GetOwinContext().Authentication.SignOut(
            CookieAuthenticationDefaults.AuthenticationType);
    }

    return RedirectToAction("Index", "Home");
}
Open Controllers/BaseController.cs and add the following using statements to the top of the file.
using graph_tutorial.TokenStorage;
using System.Security.Claims;
using System.Web;
using Microsoft.Owin.Security.Cookies;
Add the following function.
protected override void OnActionExecuting(ActionExecutingContext filterContext)
{
    if (Request.IsAuthenticated)
    {
        // Get the user's token cache
        var tokenStore = new SessionTokenStore(null,
            System.Web.HttpContext.Current, ClaimsPrincipal.Current);

        if (tokenStore.HasData())
        {
            // Add the user to the view bag
            ViewBag.User = tokenStore.GetUserDetails();
        }
        else
        {
            // The session has lost data. This happens often
            // when debugging. Log out so the user can log back in
            Request.GetOwinContext().Authentication.SignOut(CookieAuthenticationDefaults.AuthenticationType);
            filterContext.Result = RedirectToAction("Index", "Home");
        }
    }

    base.OnActionExecuting(filterContext);
}
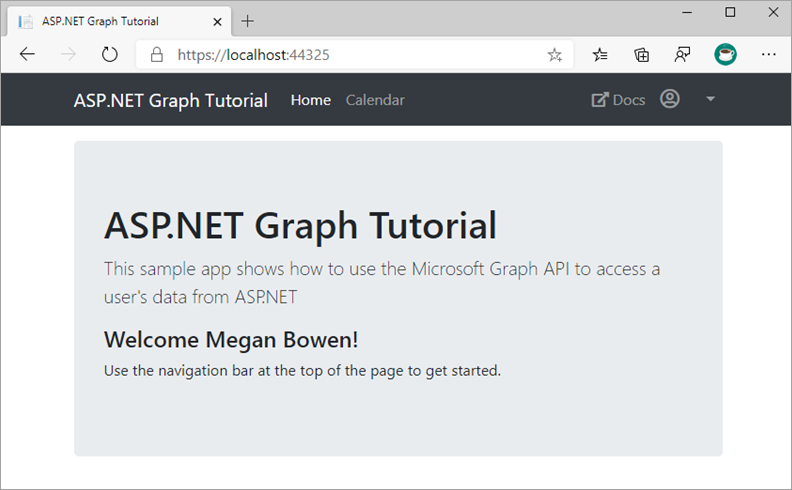
Start the server and go through the sign-in process. You should end up back on the home page, but the UI should change to indicate that you're signed-in.
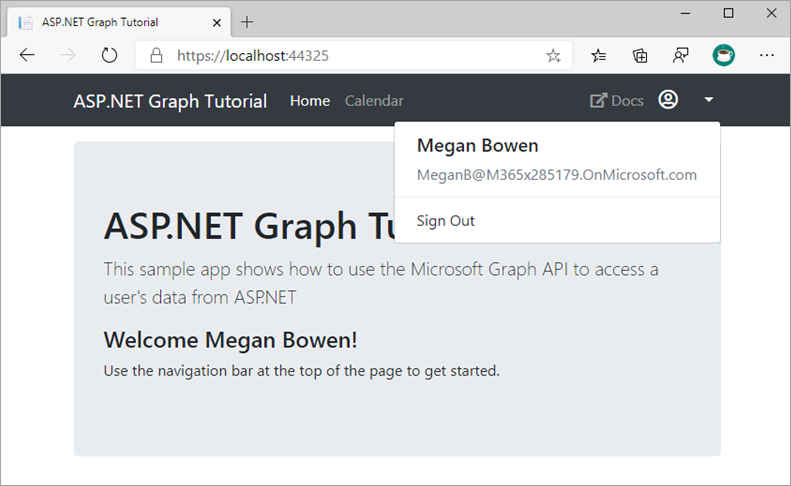
Select the user avatar in the top-right corner to access the Sign Out link. Selecting Sign Out resets the session and returns you to the home page.
Refreshing tokens
At this point, your application has an access token, which is sent in the Authorization header of API calls. This is the token that allows the app to access Microsoft Graph on the user's behalf.
However, this token is short-lived. The token expires an hour after it's issued. This is where the refresh token becomes useful. The refresh token allows the app to request a new access token without requiring the user to sign in again.
Because the app is using the MSAL library and serializing the TokenCache object, you don't have to implement any token refresh logic. The ConfidentialClientApplication.AcquireTokenSilentAsync method does all of the logic for you. It first checks the cached token, and if it isn't expired, it returns it. If it's expired, it uses the cached refresh token to obtain a new one. You'll use this method in a later exercise.
Summary
In this exercise, you extended the application from the previous exercise to support authentication with Microsoft Entra ID. This is required to obtain the necessary OAuth access token to call the Microsoft Graph API. In that step, you integrated the OWIN middleware and the Microsoft Authentication Library library into the application.