Manage tiered storage using Azure tools
You can configure and manage Azure Storage by using various Azure UI and command-line tools.
In our manufacturing-company example, your next step as project lead in planning your company's storage tier strategy is to review the Azure tool options and decide which are most appropriate for particular scenarios.
In this unit, you compare the methods for configuring and managing storage tiers using Azure tools.
Azure Tools
There are several tools available that you can use to manage Azure Storage:
- Azure portal
- Azure Storage Explorer
- Azure CLI
- Azure PowerShell
Azure portal
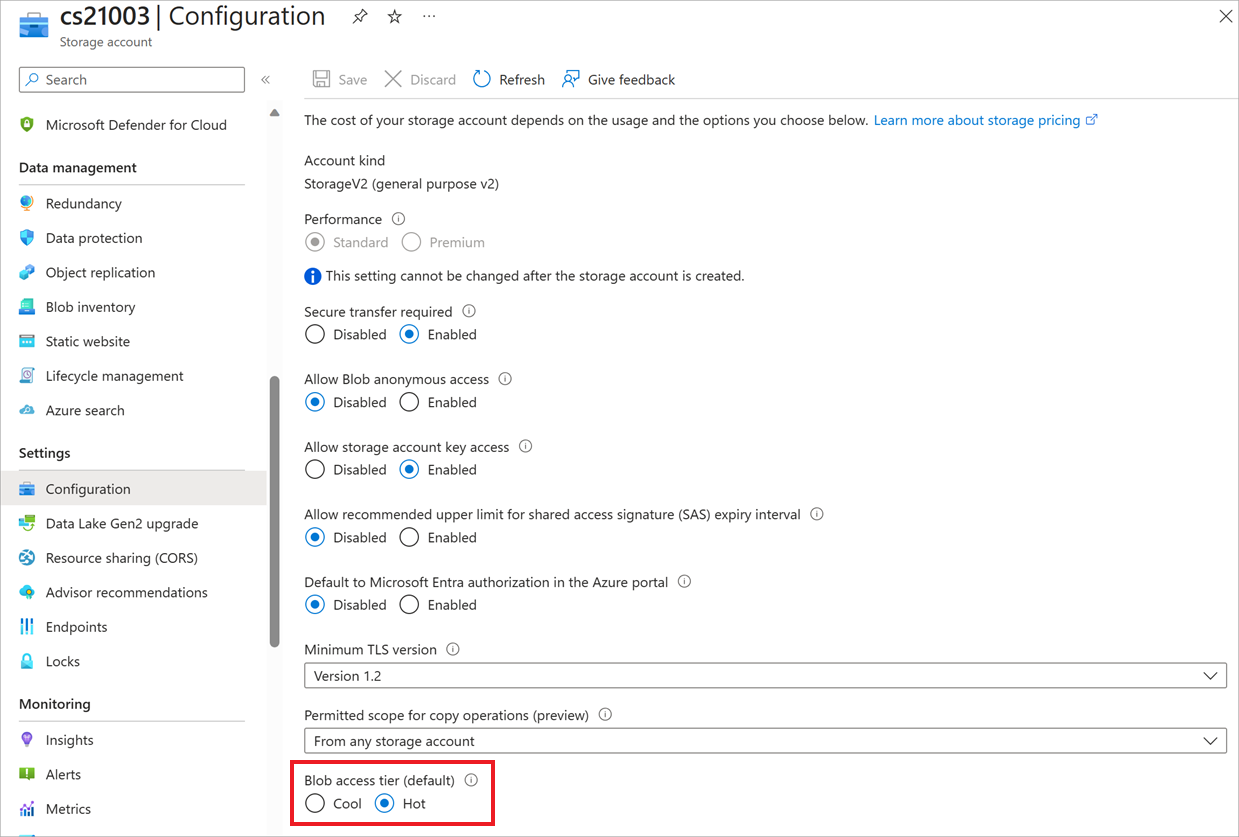
Using the Azure portal, you can amend the access tier for the storage account from Hot to Cool, or change the Replication options.
To manage storage tiers in the Azure portal, select Storage accounts.
Select one of your storage accounts in the displayed list.
Select Configuration under the Settings heading on the left menu.
You can also amend the access tier at the blob level.
In the storage account, select Containers under Data storage.
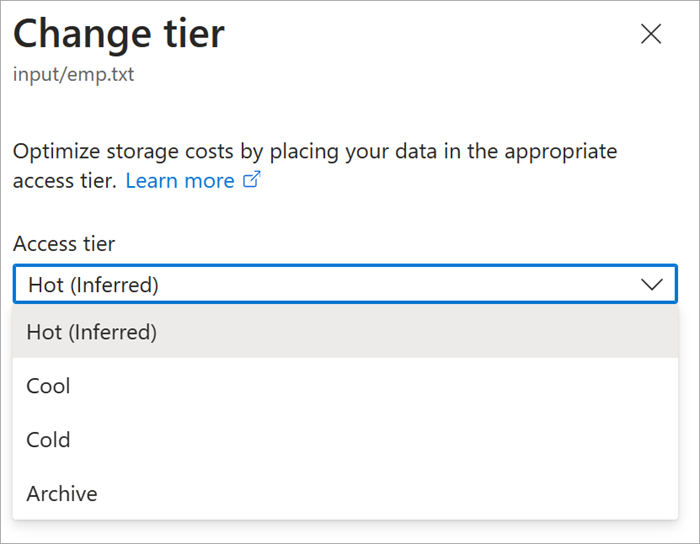
Select Change tier in the menu bar.
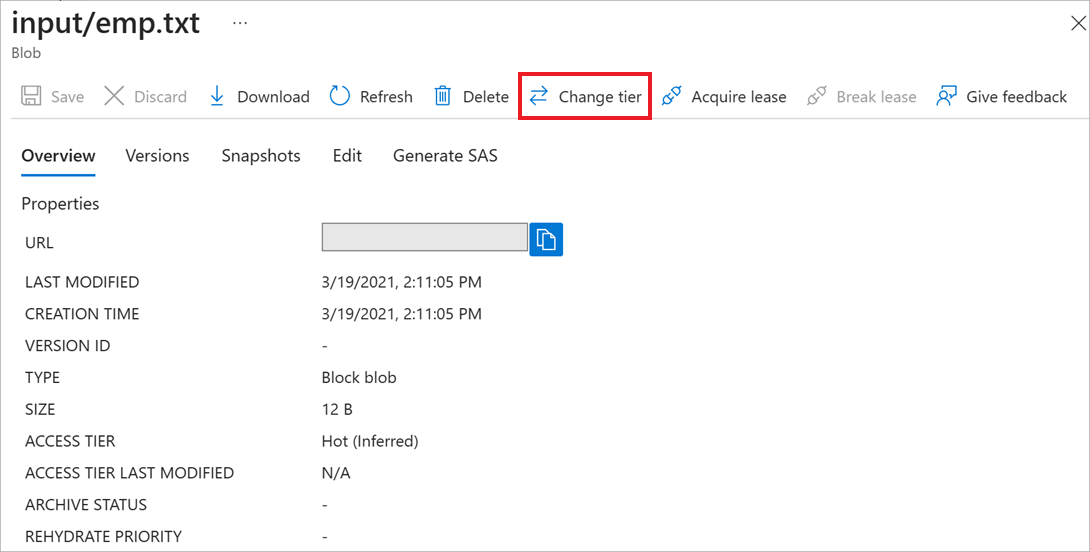
Select the access tier you want to use in the drop-down list.
Azure Storage Explorer
You can use Azure Storage Explorer to upload and download Blobs from Azure Storage. There are two versions of Storage Explorer, the Azure portal Storage Explorer and the standalone Storage Explorer.
To use the Azure portal tool, go to your storage account and select Storage browser:

Select Blob containers to view a list of your containers.
Select a container. You can see the access tier for each blob listed.

To change the access tier, select the blob you want to change, then select Change tier in the menu bar.
Select the access tier you want to use in the drop-down list.
Azure PowerShell
You can use PowerShell to manage the access tier for a storage account or for a blob. Some of the cmdlets you can use to manage storage include:
| Cmdlet | Description |
|---|---|
Add-AzureRMAccount |
Adds an authenticated account to use for Azure Resource Manager cmdlet requests. |
Get-AzureStorageAccount |
Gets the storage accounts for the current Azure subscription. |
Set-AzureRmStorageAccount -AccessTier |
Sets the access tier for a storage account. |
Here's an example command for changing the access tier on a storage account:
Set-AzureRmStorageAccount -ResourceGroupName "TestGroup" -AccountName "StorageAccountName" -AccessTier Cool
Here's another example, this time for changing the access tier for multiple blobs in a container:
$Storage = "StorageAccountName"

$Key = "StorageAccountKey"

$Container = "BlobContainer"

$blobs = Get-AzureStorageBlob -Container $Container

$blob.icloudblob.setstandardblobtier("Cool")
Azure CLI
You can also use Azure CLI to manage access tiers on storage accounts. Here are some of the cmdlets you can use:
az storage blob upload

az storage blob list

az storage blob download

az storage blob set-tier
Here's an example code; this one changes a blob's access tier to Cool:
az storage blob set-tier --name BlobName --container-name BlobContainer --account-name StorageAccountName --tier Cool