Create a Kubernetes cluster on Windows
To help you to understand the requirements for orchestrating Contoso workloads in a Kubernetes cluster, the following high-level steps describe how to create a simple, two-node Kubernetes cluster.
Create a Kubernetes cluster
The computers required to run the cluster can be physical or virtual, and are configured as listed in the following table.
| Computer | Machine name | OS |
|---|---|---|
| Administrator workstation | ADM | Windows Server 2019 |
| Master/control-plane node | K8S-M | Linux Ubuntu |
| Worker node | K8S-W | Windows Server 2019 Core |
To create a Kubernetes cluster, you can connect ADM to the node machines by using the Remote Desktop Protocol (RDP) or Secure Shell (SSH):
Open the network ports required for communication on both the master node and the worker node.
Install a container runtime on each of the nodes. For example:
For the worker node (a Windows node), install Docker Enterprise Edition (EE) from the Microsoft PowerShell (PS) Gallery by using the following Windows PowerShell commands:
# add the Docker EE repository from PSGallery
Install-Module -Name DockerMsftProvider -Repository PSGallery -Force

# install Docker EE from the PSGallery Docker repository
Install-Package -Name docker -ProviderName DockerMsftProvider -Force
For the master node (a Linux node), install Docker Enterprise Edition (EE) by using the Advanced Package Tool and appropriate Bash commands in a terminal window.
Add the necessary Kubernetes packages to the master by using the Advanced Package Tool in a terminal window to install kubeadm, kubelet, and kubectl. The following is a simplified version of the required commands:
sudo apt-get install kubelet kubeadm kubectlIn a terminal window, initialize a Kubernetes cluster with kubeadm on the master by using the following command:
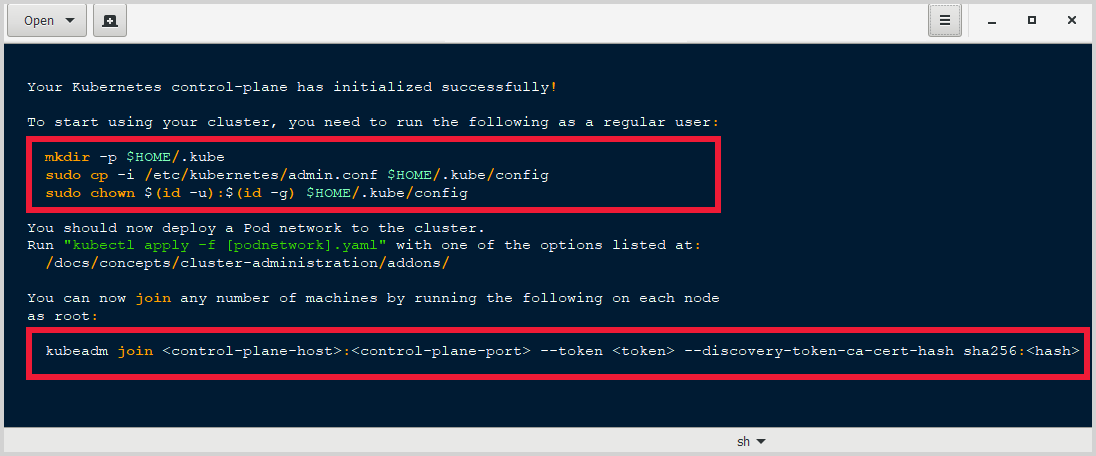
kubeadm initAfter the cluster initializes, follow the instructions in the terminal output to copy the Kubernetes configuration (config) file.
- Make a note of the
kubeadm joincommand in the terminal output because you'll use thekubeadm joincommand in a later step to join the worker node to the cluster. The following image is an example of the terminal output from the commandkubeadm init:

- Make a note of the
Install a pod network for the cluster by adding a suitable network plug-in configuration manifest .yaml file such as Flannel. For example, in a terminal window on the master, add the file network-plug-in.yaml by using the following command :
kubectl apply -f <network-plug-in.yaml>Add the worker node to the cluster by copying the Kubernetes config file from K8S-M to K8S-W.
In a terminal window on K8S-W, join the worker node to the cluster by running the
kubeadm joincommand that you noted previously. The commandkubeadm joinshould be similar to the following:kubeadm join --token <token> <control-plane-host>:<control-plane-port> --discovery-token-ca-cert-hash sha256:<hash>In a terminal window on the master, verify the installation by running the command
kubectl get nodes. The output from the commandkubectl get nodesshould be similar to the following:user@K8S-M:~$ kubectl get nodes NAME STATUS ROLES AGE VERSION K8S-M Ready master 12m v1.15.3 K8S-W Ready <none> 25m v1.15.3