Exercise - Create a Holographic Remoting PC application
In this tutorial, you'll learn how to create a PC app for Holographic Remoting that lets you connect to HoloLens 2 at any time, providing a way to visualize 3D content in Mixed Reality.
Configure the capabilities
Select Player in the Project Settings window, expand the Publishing Settings, then scroll down to the Capabilities section and then select the following:
- InternetClientServer
- PrivateNetworkClientServer

In this section, you'll configure your project to stream your Mixed Reality experience to your HoloLens 2 device from your PC in real-time over a Wi-Fi connection.
Configuring your scene for holographic remoting
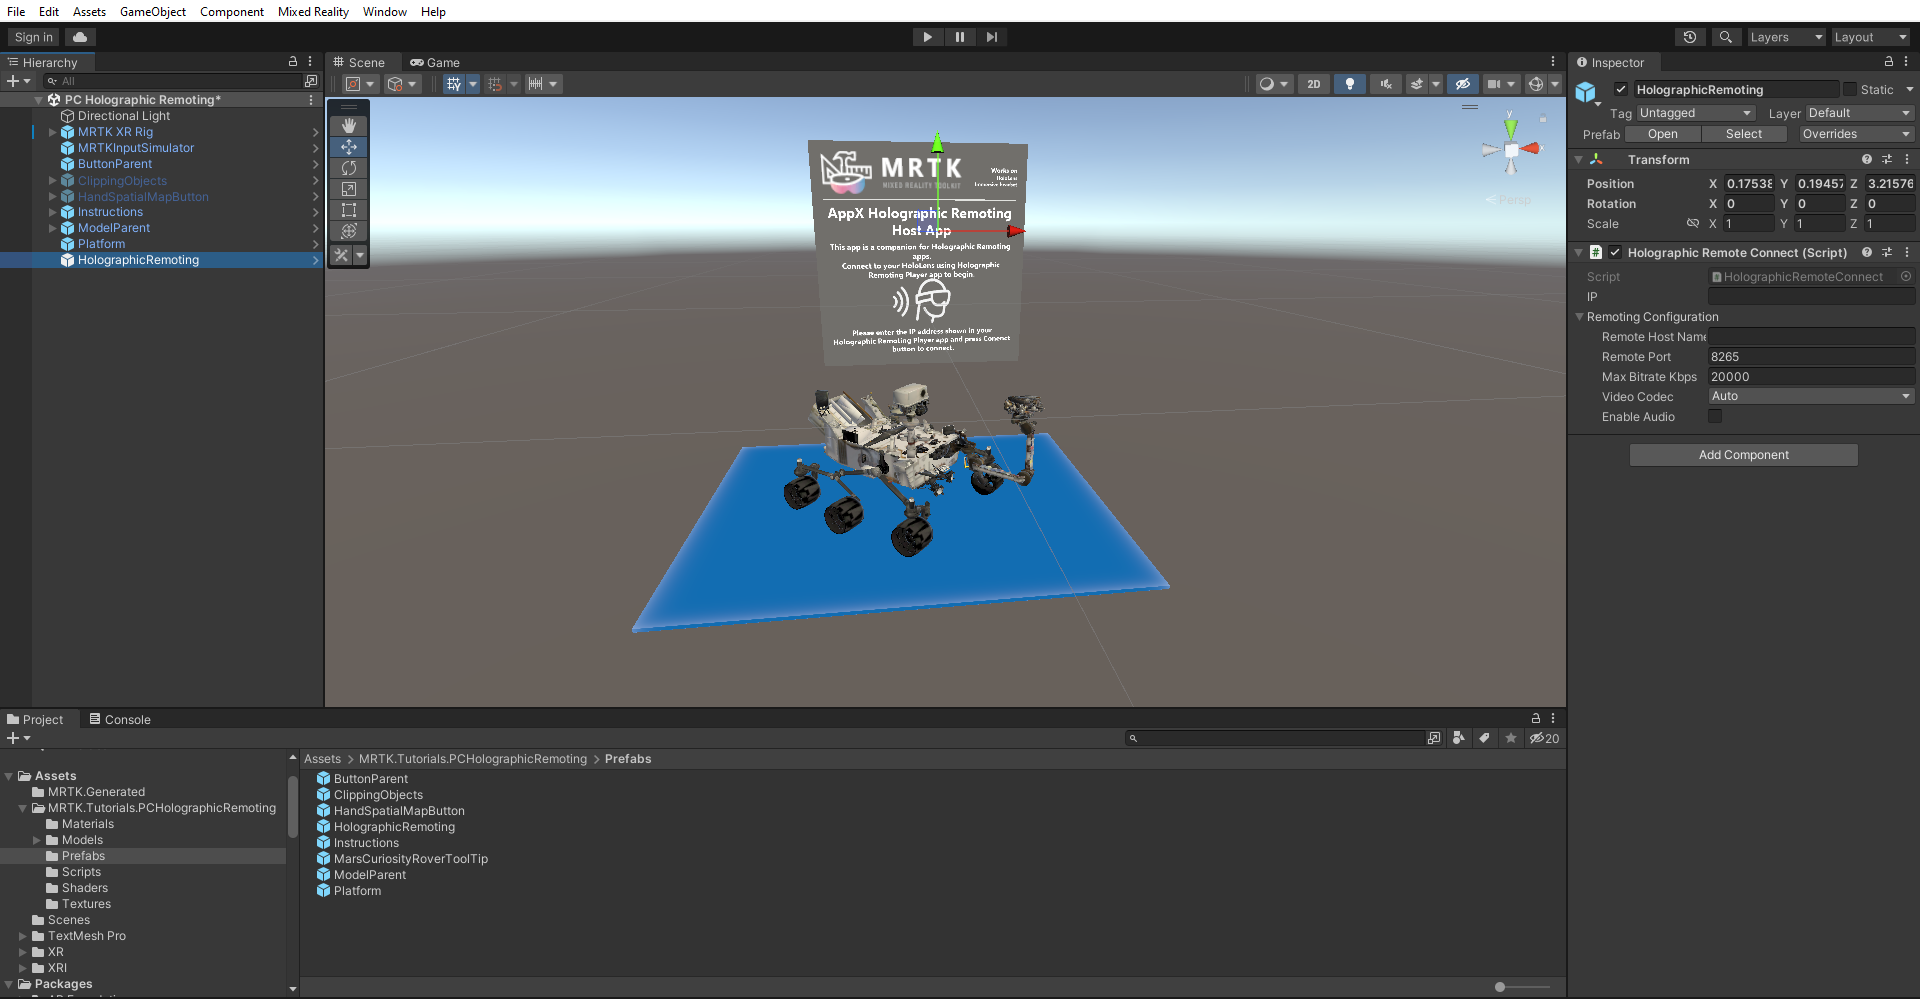
In the Project window, navigate to the Assets > MRTK.Tutorials.PCHolograhicRemoting > Prefabs folder, and select and drag HolographicRemoting prefab into your scene.

Build your application to pc
Your Holographic Remoting app is now ready to build on your PC. Follow the below steps and make these changes to build this application on to your PC.
1. Add HolographicRemoteConnect Script
Add the HolographicRemoteConnect script to an object in the scene, such as the MRTK XR Rig. This script provides a minimalistic UI for entering the IP address of the HoloLens at runtime, and a button to connect and disconnect. It is intended as an example for how to connect from C# code in builds. See also the section later about connecting in play mode for faster testing.
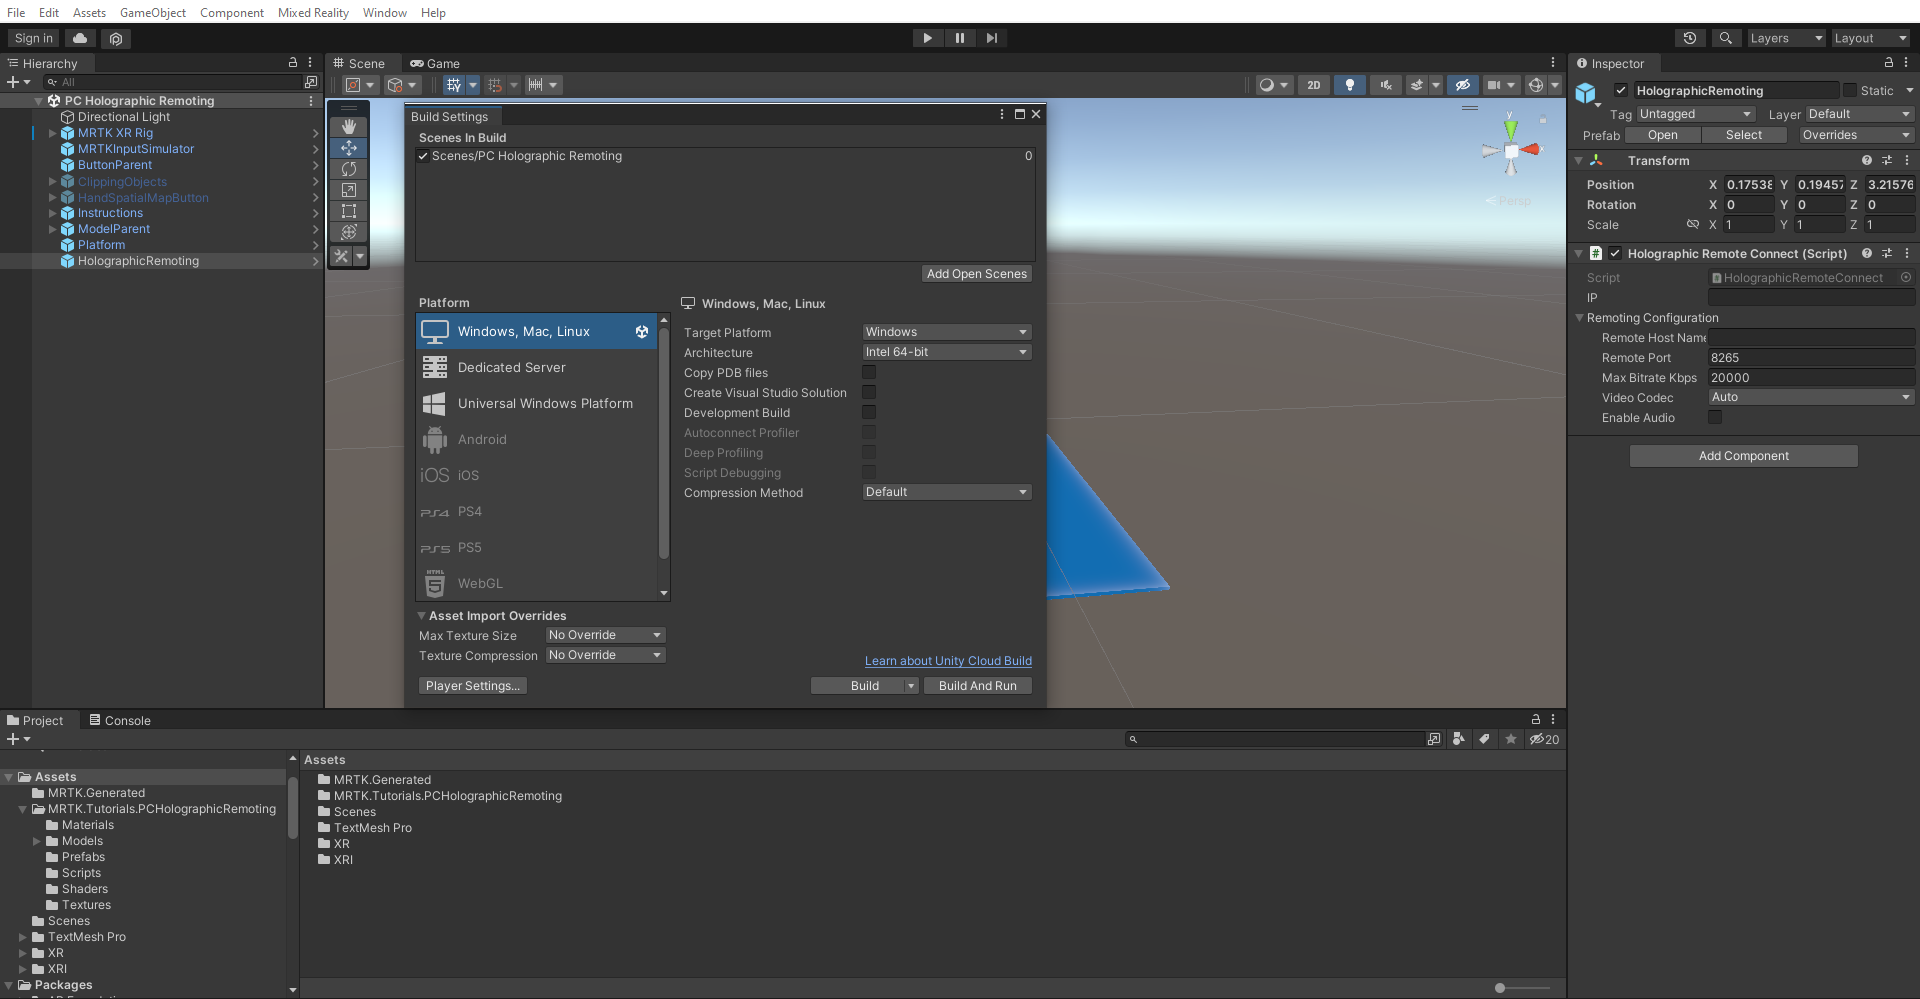
2. Switch build platform
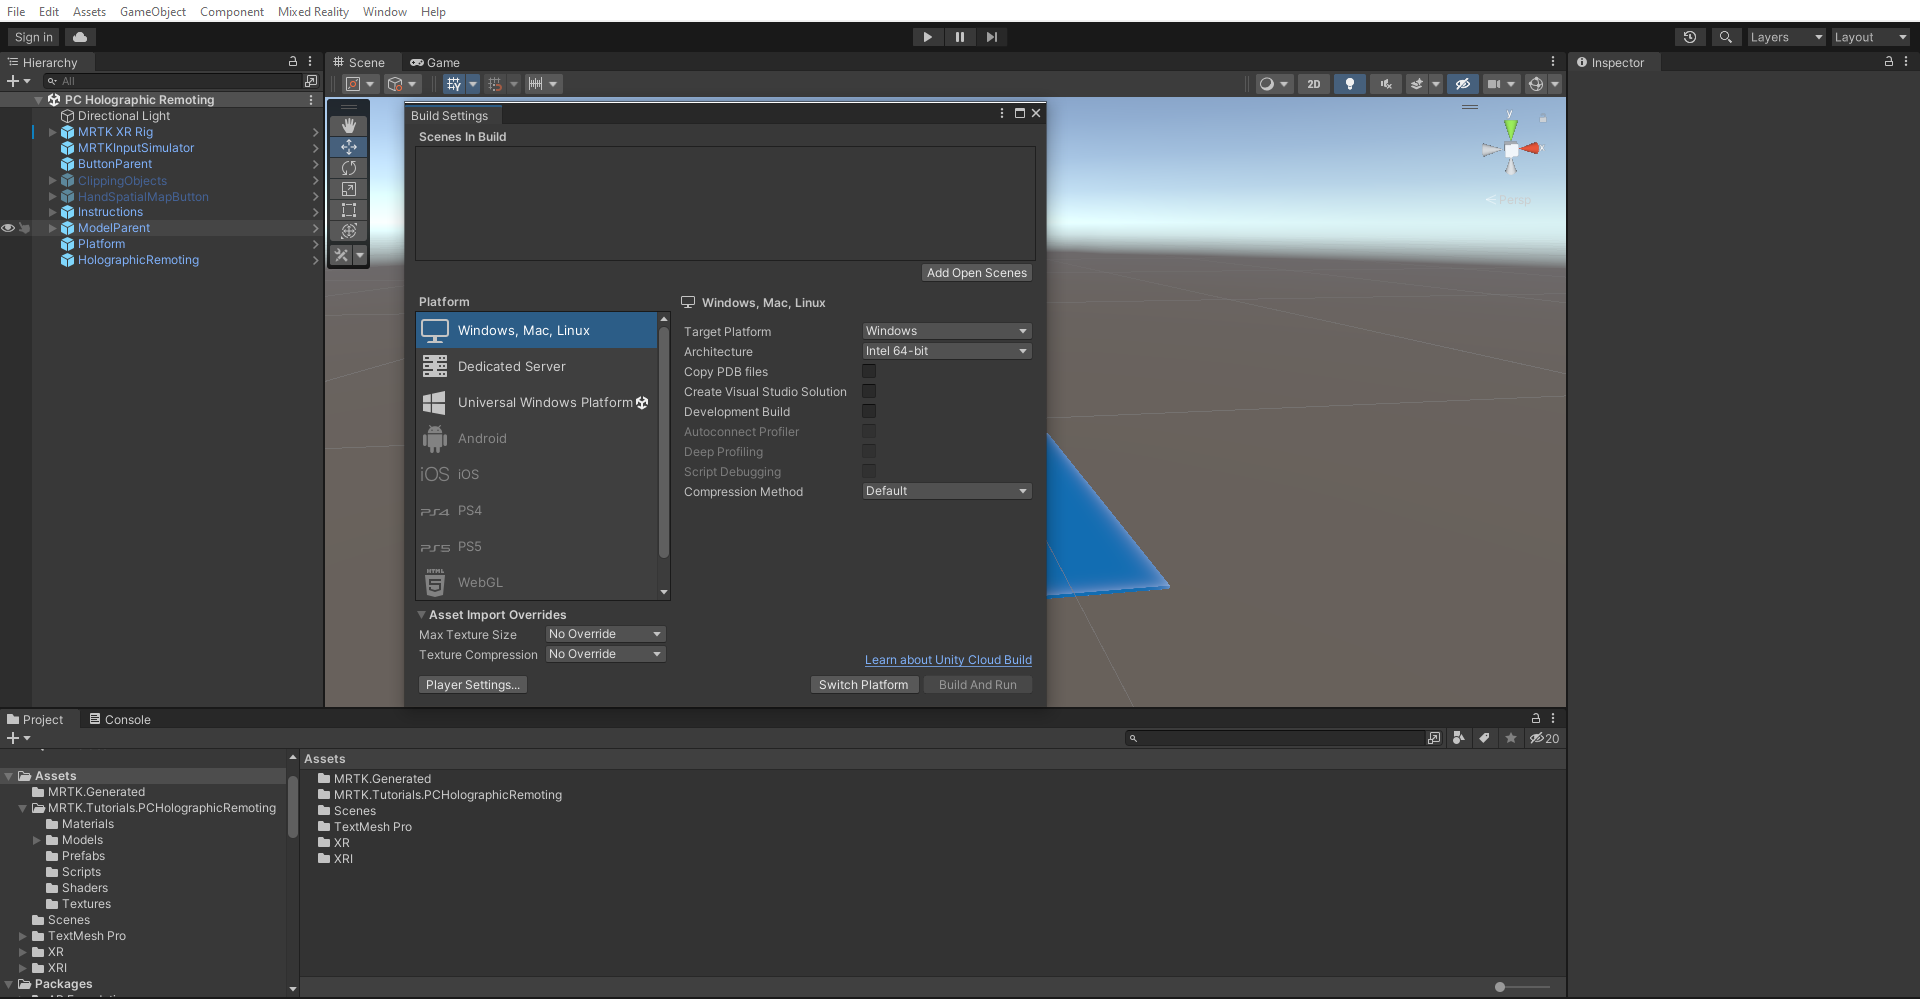
In the menu bar, select File > Build Settings.
In the Build Settings window, select PC, Mac & Linux Standalone Platform and select the Switch Platform button to change the Build Platform:

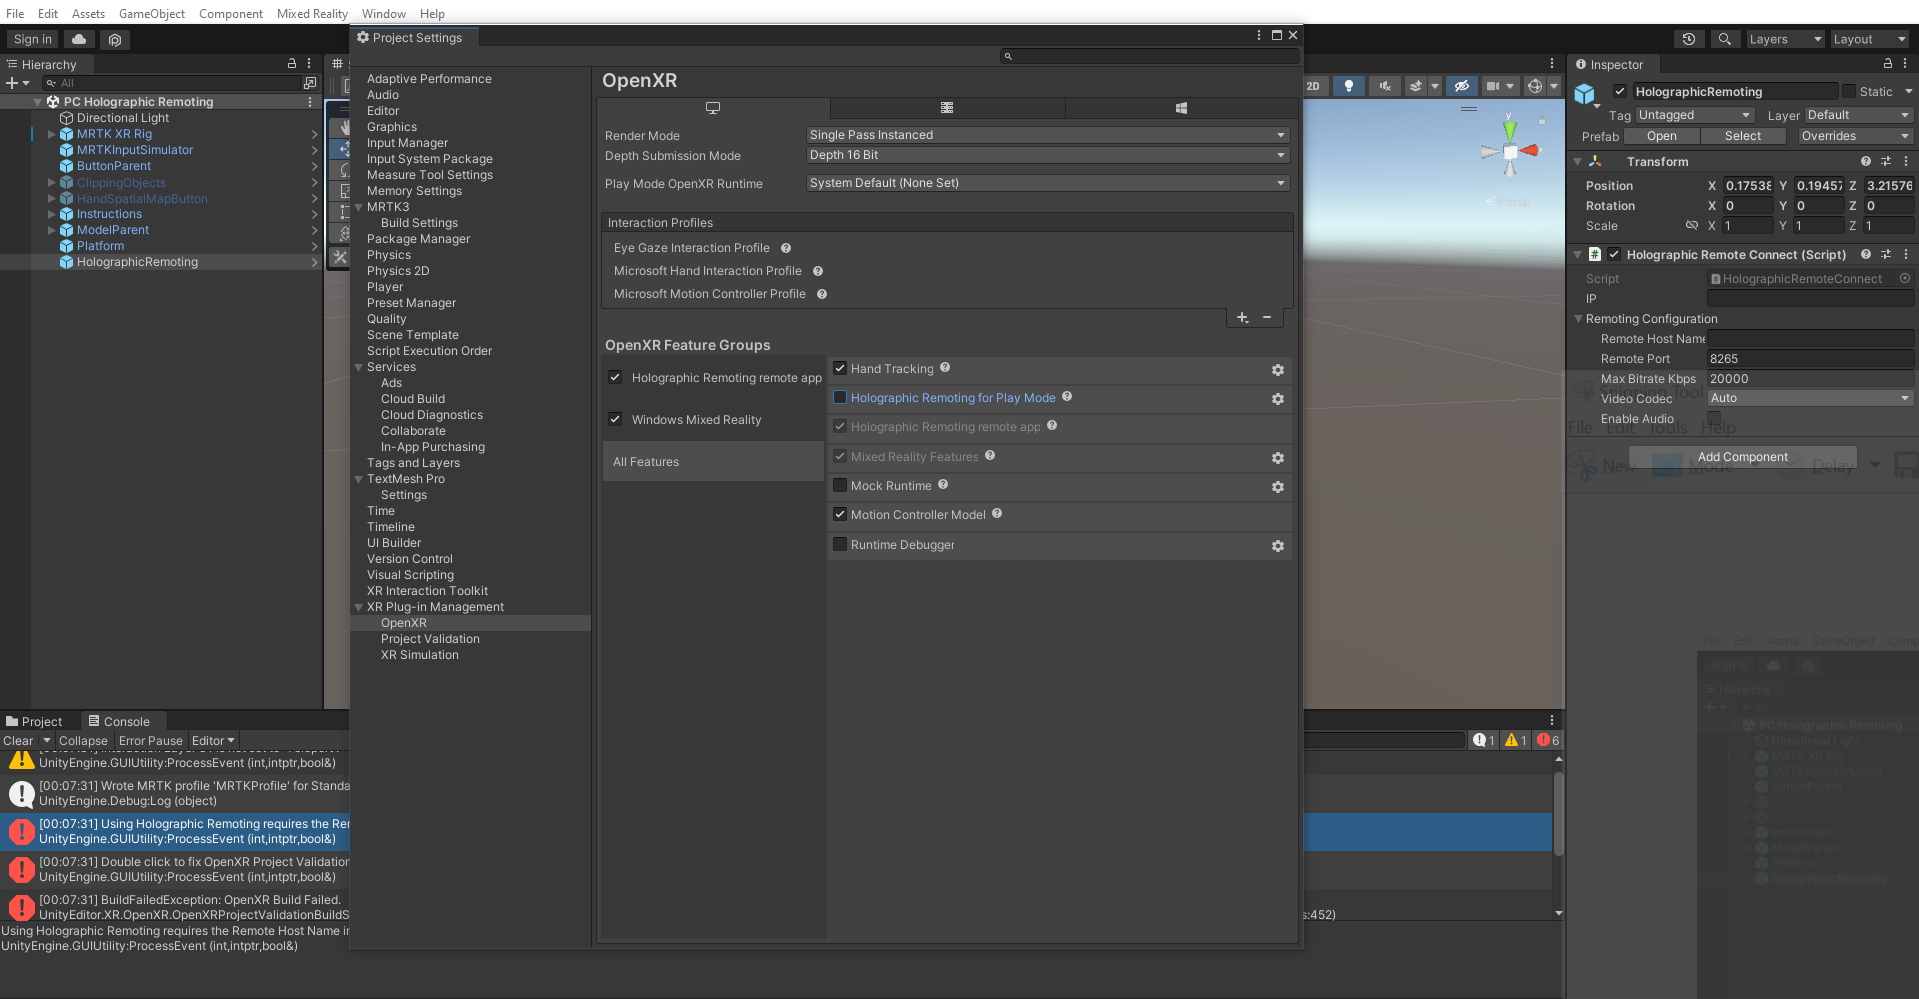
3. Set the project settings
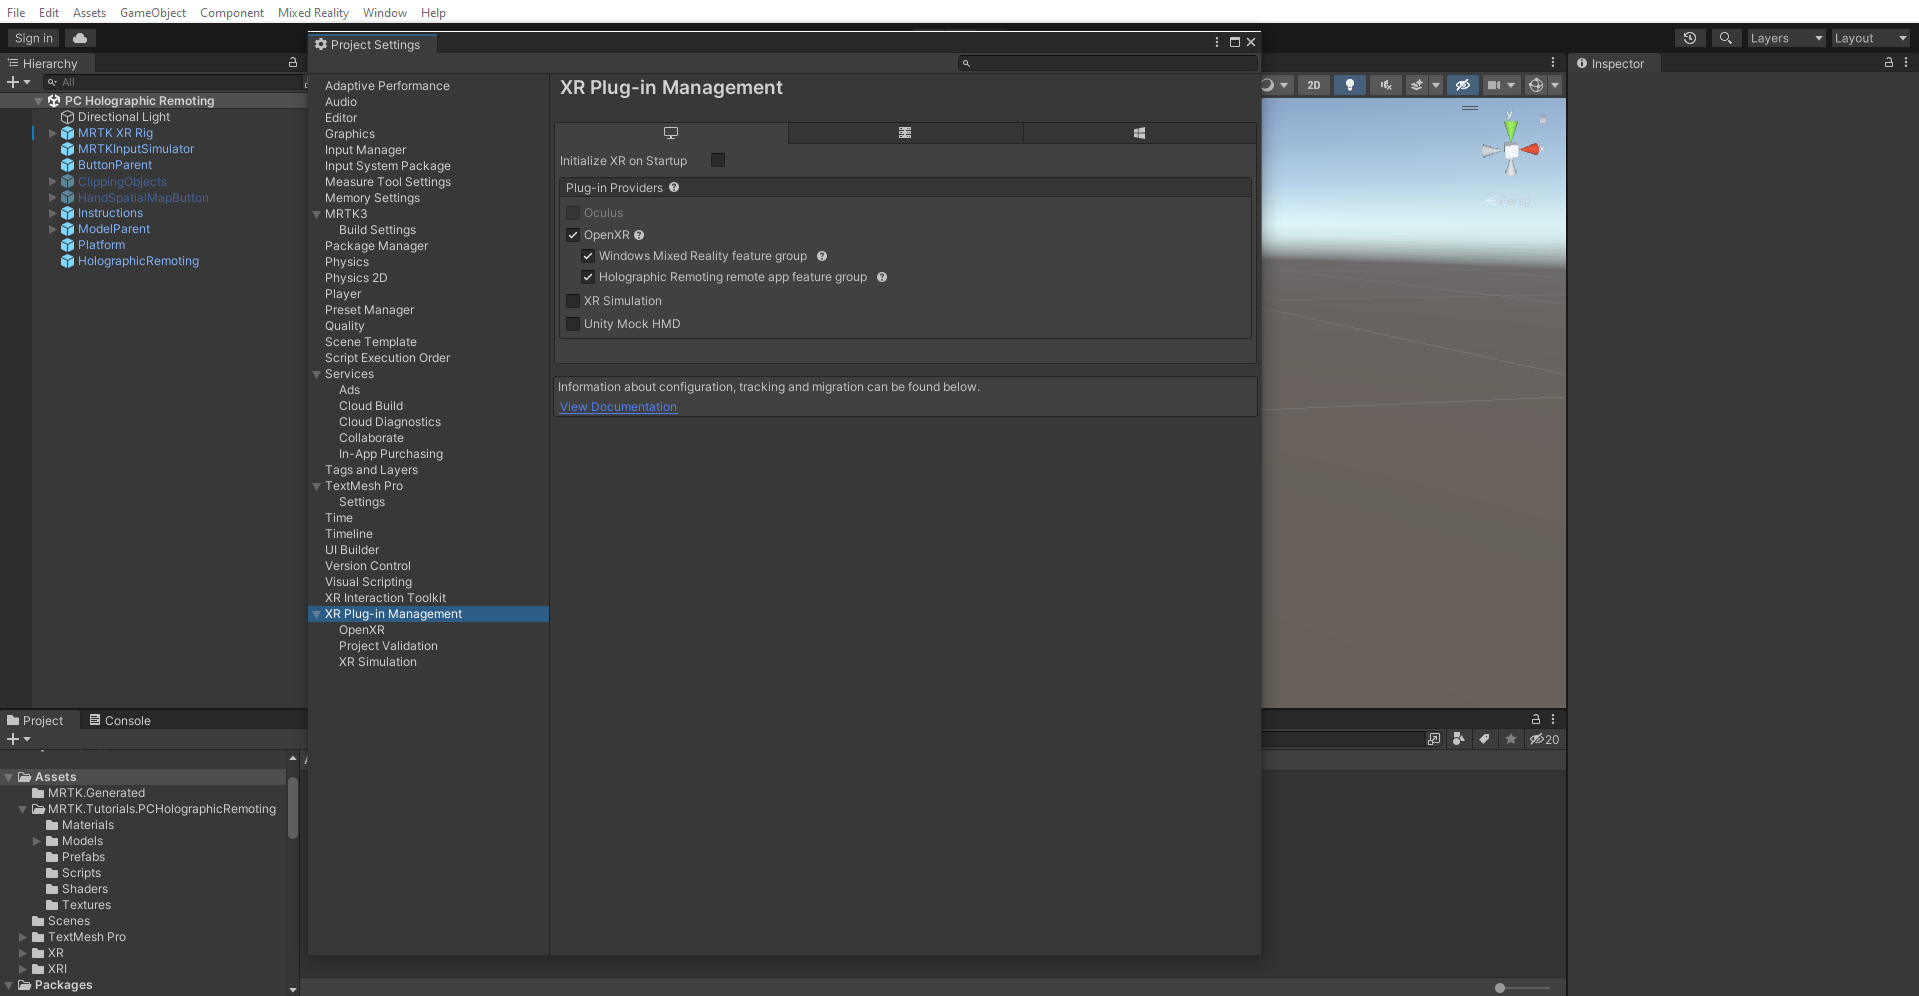
In the menu bar, select Edit > Project Settings > XR Plug-in Management. Ensure that you're in the Windows Standalone tab and then select OpenXR, Windows Mixed Reality feature and Holographic Remoting remote app feature group.
In the Project Settings window, select OpenXR. Ensure that you're in the Windows Standalone tab, and then change the Depth submission mode from None to Depth 16 Bit.
Add Eye Gaze Interaction Profile and Microsoft Hand Interaction Profile by clicking on the plus sign ("+") button in the Interaction Profiles tab.
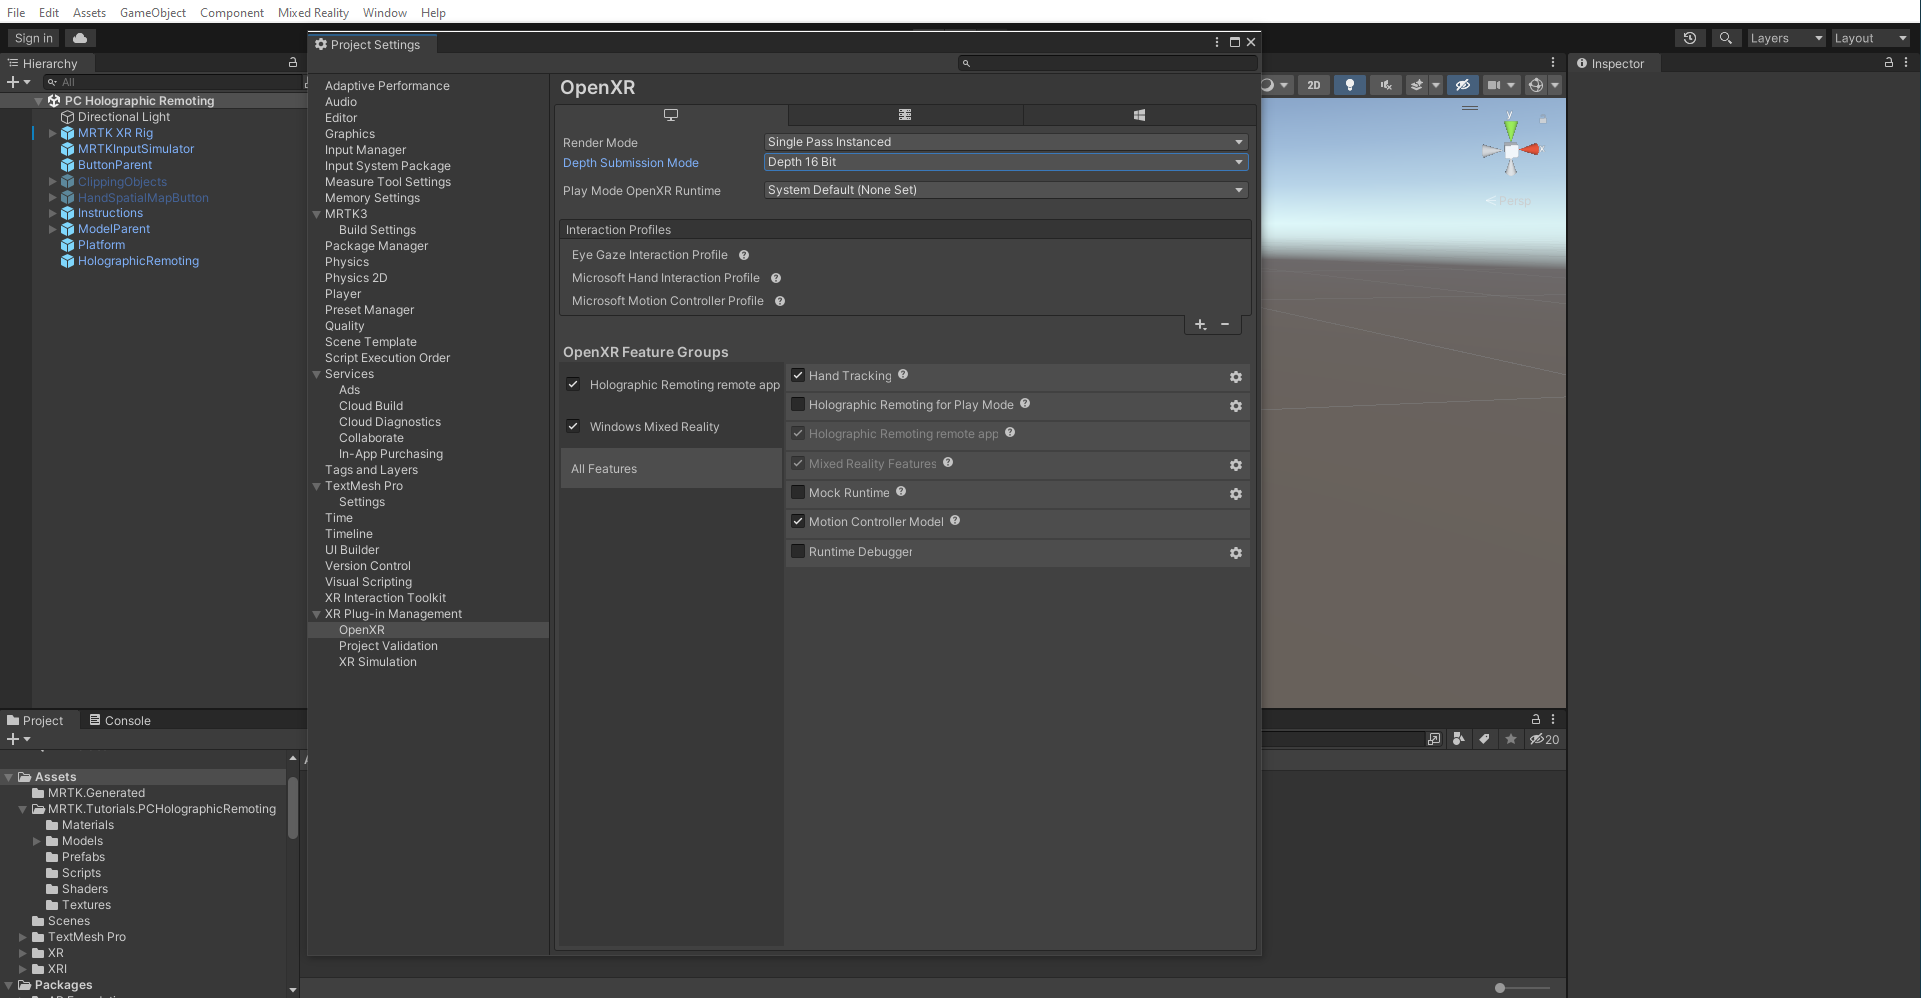
Under Open XR feature groups > All features, select Holographic App Remoting.


4. Build the Unity project
In the menu bar, select File > Build Settings.
Select Add Open Scenes to add your current scene to the Scenes list in the Build Settings window. Then, in the Build list, select the Build button:
Choose a suitable location to store your build--for example, Documents\MixedRealityLearning. Create a new folder and give it a proper name--for example, PCHolographicRemoting--and then select the Select Folder button to start the build process:
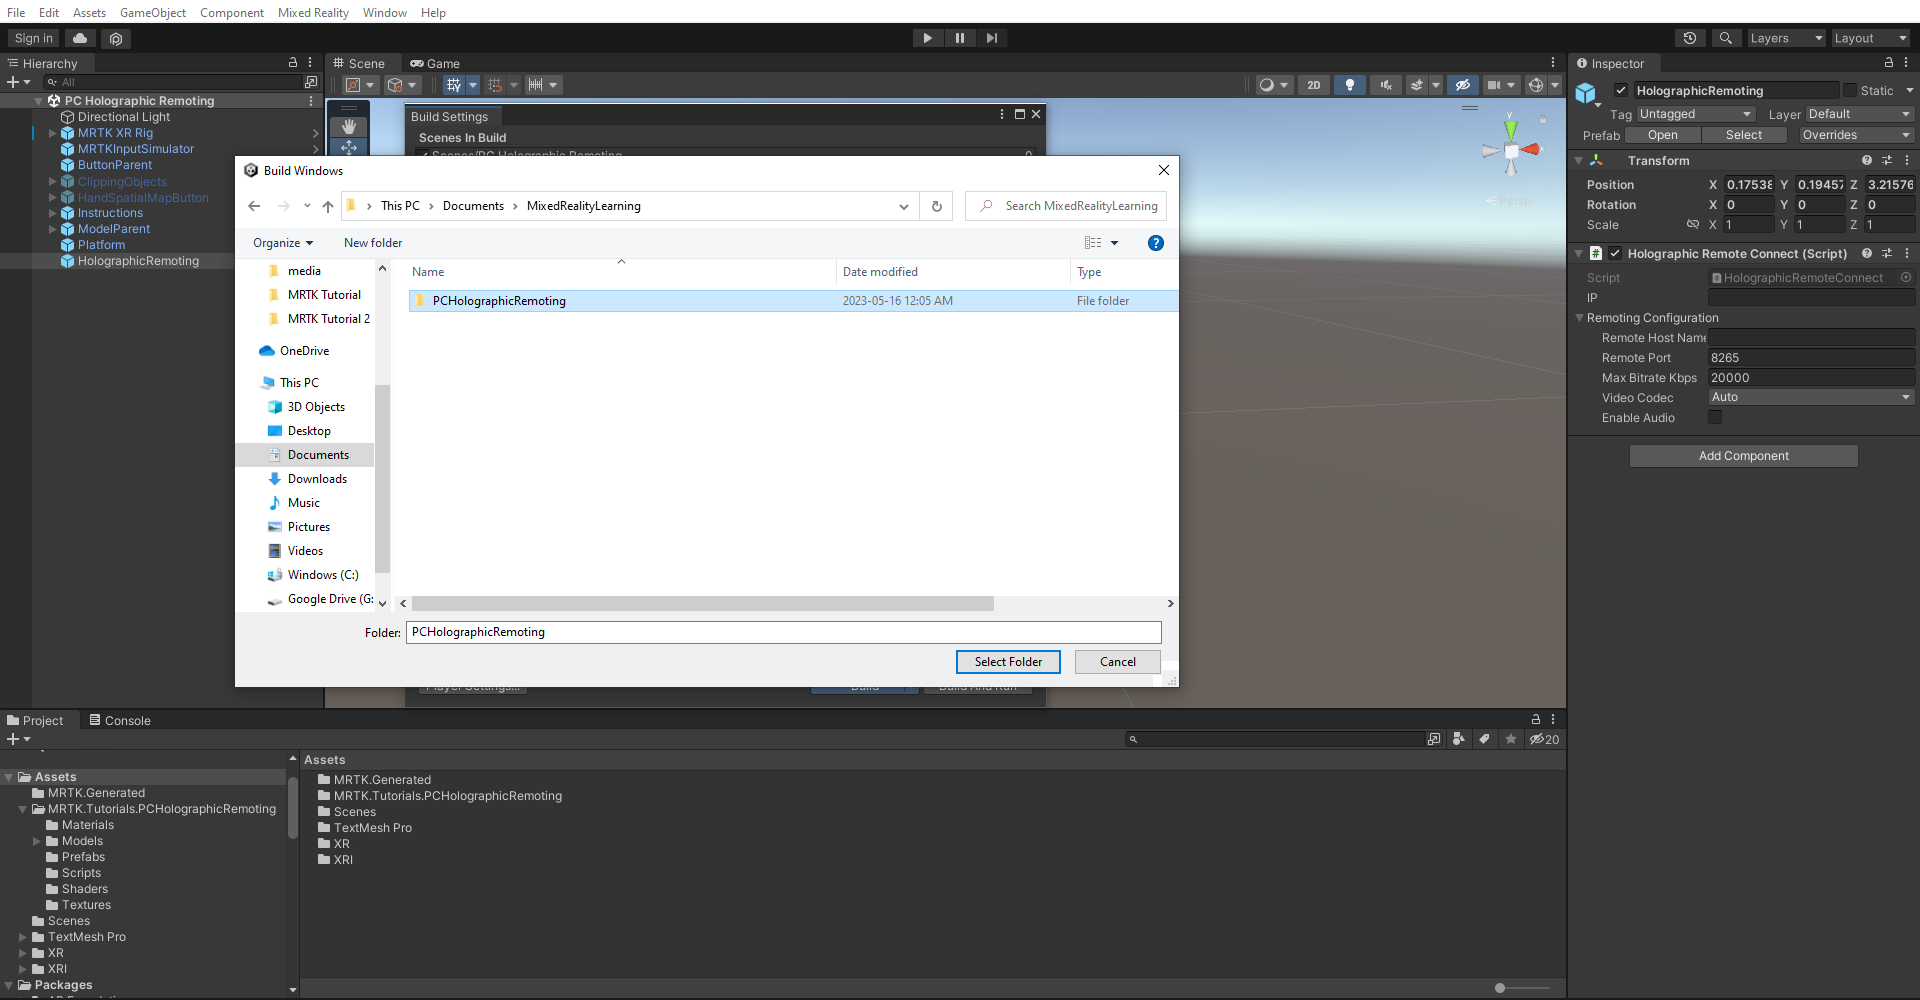
Wait for Unity to finish the build process.

Double-click the Executable file to open the PC Holographic Remoting Application on your PC.
Note
Due to some known issues in building the Holographic Remoting app for UWP, we're building as Windows Standalone for OpenXR.


Test holographic remoting remote application
Note
Building and testing on HoloLens 2 is not mandatory. Alternatively, you can test on the HoloLens 2 Emulator if you don't have a device. You can purchase devices at HoloLens.com.
To connect your PC application to your HoloLens 2:
1. Install the remoting player application on HoloLens 2 device
- On your HoloLens 2, visit the Store app and search for Holographic Remoting Player.
- Select the Holographic Remoting Player app.
- Select Install to download and install the app.
2. Connect the holographic remoting pc app to the remoting player
- Start the Holographic Remoting Player on your HoloLens.
- Take note of the HoloLens IP address. The Holographic Remoting Player will display it as a hologram as soon as it launches.
- Open the Holographic Remoting PC application on your PC.
- Once the application is launched, enter the IP address and select the Connect button to connect.
Holographic Remoting For Play Mode
In MRTK 3, you can skip the step of making a build in order to speed up your development iterations by going back to the Project Settings > XR Plug-in Management > OpenXR menu and selecting the checkbox for Holographic Remoting for Play Mode.

After enabling this option, you'll most likely get a Project Validation error:

This is because the IP address of your HoloLens must be set before playing. To set the IP address, go to Mixed Reality > Remoting > Holographic Remoting for Play Mode and enter the IP address shown in the Holographic Remoting Player into the Remote Host Name field.
