Investigate a file
Investigate the details of a file associated with a specific alert, behavior, or event to help determine if the file exhibits malicious activities, identify the attack motivation, and understand the potential scope of the breach.
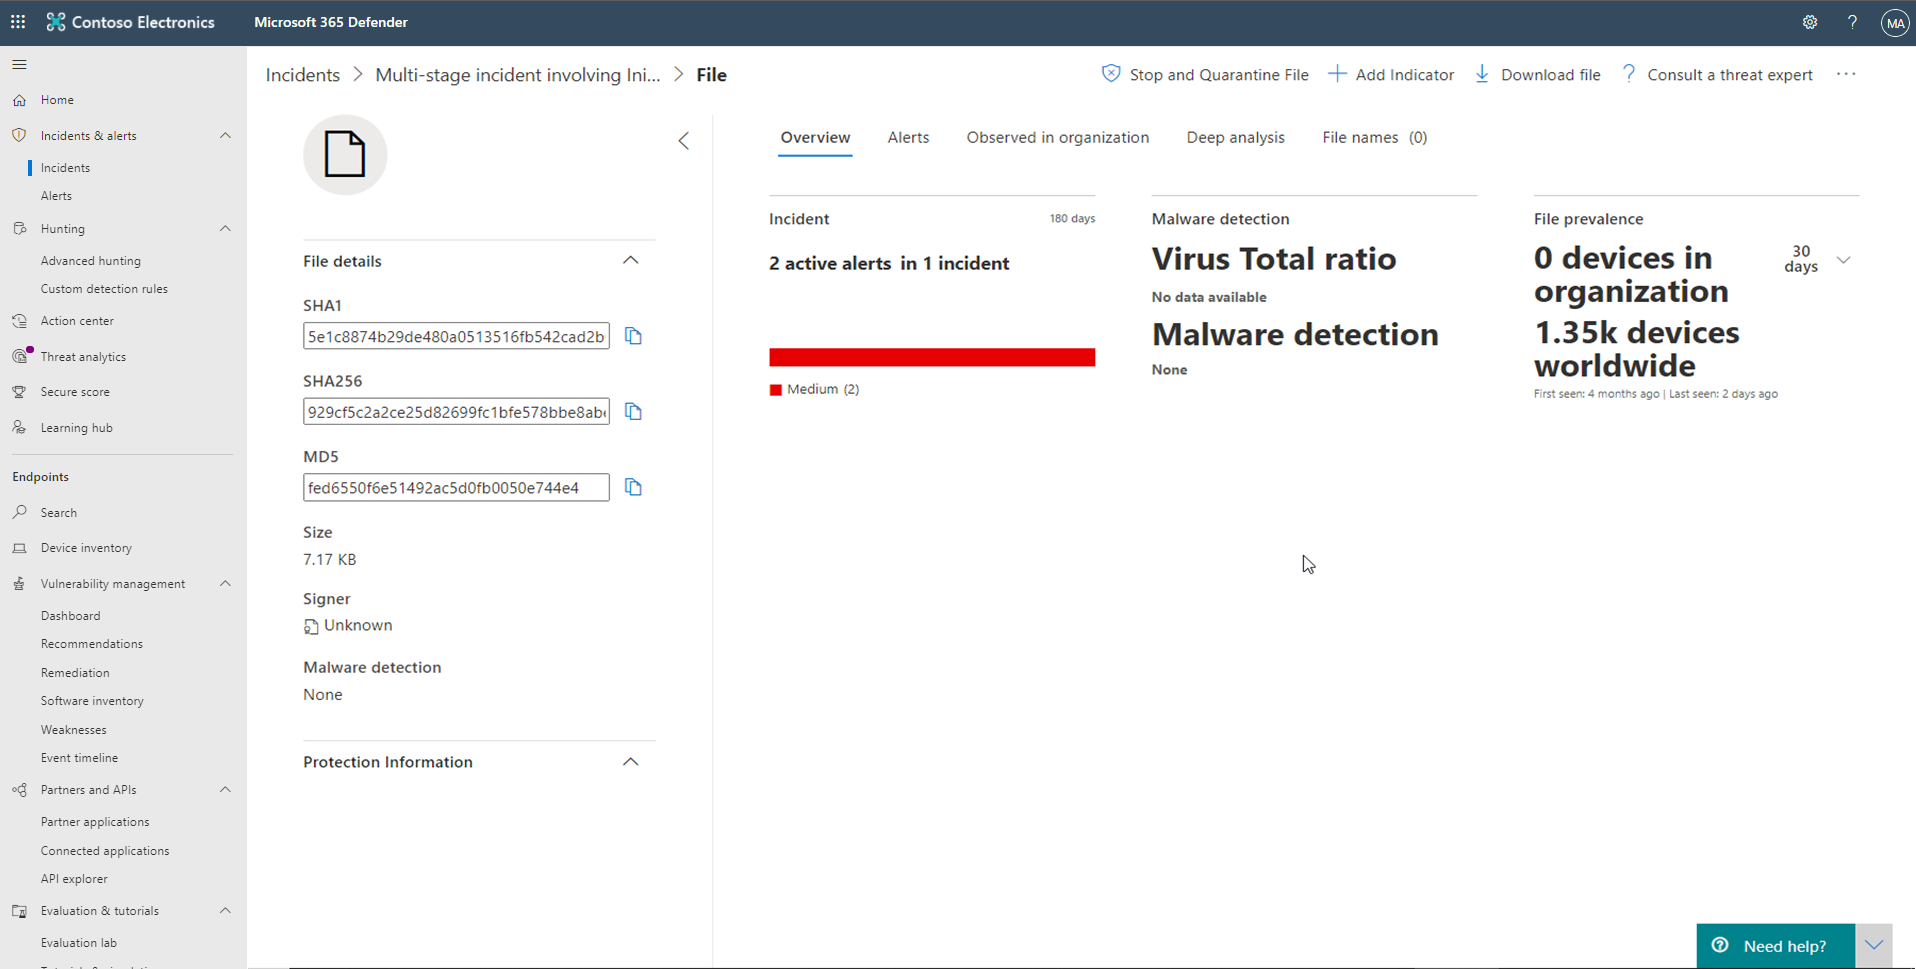
There are many ways to access the detailed profile page of a specific file. For example, you can use the search feature, select a link from the Alert process tree, Incident graph, Artifact timeline, or select an event listed in the Device timeline. You can get information from the following sections in the file view:
File details, Malware detection, File prevalence
File details, malware detection, and file prevalence
Alerts
Observed in organization
Deep analysis
File names
Along the top of the profile page, above the file information cards. Actions you can perform here include:
Stop and quarantine
Add/edit indicator
Download file
Consult a threat expert
Action center
Detailed profile page
File details, malware detection, and file prevalence
The file details, incident, malware detection, and file prevalence cards display various attributes about the file. You'll see details such as the file’s MD5, the Virus Total detection ratio, and Microsoft Defender AV detection if available, and the file’s prevalence, both worldwide and within your organizations.
Alerts
The Alerts tab provides a list of alerts that are associated with the file. This list covers much of the same information as the Alerts queue, except for the device group that the affected device belongs to, if applicable. You can choose what kind of information is shown by selecting Customize columns from the toolbar above the column headers.
Observed in organization
The Observed in the organization tab allows you to specify a date range to see which devices have been observed with the file. This tab will show a maximum of 100 devices. To see all devices with the file, export the tab to a CSV file, by selecting Export from the action menu above the tab's column headers.
Use the slider or the range selector to quickly specify a time period that you want to check for events involving the file. You can specify a time window as small as a single day. This will allow you to see only files that communicated with that IP Address at that time, drastically reducing unnecessary scrolling and searching.
Deep analysis
The Deep analysis tab allows you to submit the file for deep analysis to uncover more details about the file's behavior and its effect within your organizations. After you submit the file, the deep analysis report will appear in this tab once the results are available. If deep analysis didn't find anything, the report will be empty, and the results space will remain blank.
File names
The File names tab lists all names the file has been observed to use within your organizations.
Deep file analysis
Cyber security investigations are typically triggered by an alert. Alerts are related to one or more observed files that are often new or unknown. Clicking a file takes you to the file view, where you can see the file's metadata. To enrich the data related to the file, you can submit the file for deep analysis.
The Deep analysis feature executes a file in a secure, fully instrumented cloud environment. Deep analysis results show the file's activities, observed behaviors, and associated artifacts, such as dropped files, registry modifications, and communication with IPs. Deep analysis currently supports extensive analysis of portable executable (PE) files (including .exe and .dll files).
Deep analysis of a file takes several minutes. Once the file analysis is complete, the Deep Analysis tab will update to display the date and time of the latest results available, and a summary of the report itself.
The Deep analysis summary includes a list of observed behaviors, some of which can indicate malicious activity, and observables, including contacted IPs and files created on the disk. If nothing was found, these sections will display a brief message.
The deep analysis results are matched against threat intelligence, and any matches will generate appropriate alerts.
Use the deep analysis feature to investigate the details of any file, usually during an investigation of an alert or for any other reason where you suspect malicious behavior. This feature is available within the Deep analysis tab on the file's profile page.
Submit for deep analysis is enabled when the file is available in the Defender for Endpoint backend sample collection, or if it was observed on a Windows 10 device that supports submitting to deep analysis. You can also manually submit a sample through the Microsoft Security Center Portal if the file wasn't observed on a Windows 10 device and wait for Submit for deep analysis button to become available.
When the sample is collected, Defender for Endpoint runs the file in a secure environment and creates a detailed report of observed behaviors and associated artifacts, such as files dropped on devices, communication to IPs, and registry modifications.
Submit files for deep analysis:
Select the file that you want to submit for deep analysis. You can select or search a file from any of the following views:
Alerts - select the file links from the Description or Details in the Artifact timeline
Devices list - select the file links from the Description or Details in the Device in the organization section
Search box - select File from the drop–down menu and enter the file name
In the Deep analysis tab of the file view, select Submit.
Only PE files are supported, including .exe and .dll files. A progress bar is displayed and provides information on the different stages of the analysis. You can then view the report when the analysis is done.
View deep analysis reports
View the deep analysis report that Defender for Endpoint provides to see the details of the deep analysis conducted on the file you submitted. This feature is available in the file view context.
You can view the comprehensive report that provides details on the following sections:
Behaviors
Observables
The details provided can help you investigate if there are indications of a potential attack.
Select the file you submitted for deep analysis.
Select the Deep analysis tab. If there are any previous reports, the report summary will appear in this tab.
Troubleshoot deep analysis
If you encounter a problem when trying to submit a file, try each of the following troubleshooting steps.
Ensure that the file in question is a PE file. PE files typically have .exe or .dll extensions (executable programs or applications).
Ensure the service has access to the file, that it still exists, and hasn't been corrupted or modified.
You can wait a short while and try to submit the file again if the queue is full or there was a temporary connection or communication error.
If the sample collection policy isn't configured, then the default behavior is to allow sample collection. If it's configured, then verify the policy setting allows sample collection before submitting the file again. When sample collection is configured, then check the following registry value:
Path: HKLM\SOFTWARE\Policies\Microsoft\Windows Advanced Threat Protection
Name: AllowSampleCollection
Type: DWORD
Hexadecimal value:
Value = 0 – block sample collection
Value = 1 – allow sample collection
Change the organizational unit through the Group Policy.
File response actions
Quickly respond to detected attacks by stopping and quarantining files or blocking a file. After taking action on files, you can check activity details in the Action center. Response actions are available on a file's detailed profile page.
Response actions run along the top of the file page and include:
Stop and Quarantine File
Add Indicator
Download file
Action center
Stop and quarantine file
You can contain an attack in your organization by stopping the malicious process and quarantining the file where it was observed.
You can only take this action if:
The device you're taking action on is running Windows 10, version 1703 or later
The file doesn't belong to trusted third-party publishers or not signed by Microsoft
Microsoft Defender Antivirus must at least be running on Passive mode.
The Stop and Quarantine File action includes stopping running processes, quarantining the files, and deleting persistent data, such as any registry keys. The stop and quarantine file action is limited to a maximum of 1000 devices. To stop a file on a larger number of devices, see Add indicator to block or allow file.
Stop and quarantine files
Select the file you want to stop and quarantine. You can select a file from any of the following views or use the Search box:
Alerts - select the corresponding links from the Description or Details in the Artifact timeline
Search box - select File from the drop-down menu and enter the file name
Go to the top bar and select Stop and Quarantine File.
Specify a reason, then select Confirm.
The Action center shows the submission information:
- Submission time - Shows when the action was submitted.

- Success - Shows the number of devices where the file has been stopped and quarantined.

- Failed - Shows the number of devices where the action failed and details about the failure.

- Pending - Shows the number of devices where the file is yet to be stopped and quarantined from. This can take time for cases when the device is offline or not connected to the network.
Select any of the status indicators to view more information about the action. For example, select Failed to see where the action failed. When the file is removed from a device, the user receives a notification.
A new event is added for each device in the device timeline where a file was stopped and quarantined. For files widely used throughout an organization, a warning is shown before action is taken to validate that the operation is intended.
Restore file from quarantine
You can roll back and remove a file from quarantine if you’ve determined that it’s clean after an investigation. Run the following command on each device where the file was quarantined.
Open an elevated command-line prompt on the device:
Go to Start and type cmd.
Right-click Command prompt and select Run as administrator.
Enter the following command, and press Enter:
“%ProgramFiles%\Windows Defender\MpCmdRun.exe” –Restore –Name EUS:Win32/CustomEnterpriseBlock –All
Add indicator to block or allow a file
You can prevent further propagation of an attack in your organization by banning potentially malicious files or suspected malware. If you know a potentially malicious portable executable (PE) file, you can block it. This operation will prevent it from being read, written, or executed on devices in your organization.
Enable the block file feature
To start blocking files, you first need to turn the Block or allow feature on in Settings.
Allow or block file
When you add an indicator hash for a file, you can choose to raise an alert and block the file whenever a device in your organization attempts to run it. Files automatically blocked by an indicator won't show up in the files' Action center, but the alerts will still be visible in the Alerts queue. See manage indicators for more details on blocking and raising alerts on files. To stop blocking a file, remove the indicator. You can do so via the Edit Indicator action on the file's profile page. This action will be visible in the same position that the Add Indicator action was before adding the indicator. You can also edit indicators from the Settings page, under Rules > Indicators. Indicators are listed in this area by their file's hash.
Download file
Selecting Download file from the response actions allows you to download a local, password-protected .zip archive containing your file. When you select this action, a fly-out will appear. From the fly-out, you can record a reason as to why you're downloading the file. You can also set a password to open the file. If a file isn't already stored by Defender for Endpoint, you can't download it. Instead, you'll see a Collect file button in the same location. If a file hasn't been seen in the organization in the past 30 days, Collect file will be disabled.
Check activity details in the action center
The Action center provides information on actions that were taken on a device or file. You’ll be able to view the following details:
Investigation package collection
Antivirus scan
App restriction
Device isolation
All other related details are also shown, for example, submission date/time, submitting user, and if the action succeeded or failed.