Exercise - Publish the function to Azure
The app and Azure Functions are now complete and running locally. In this unit, you'll publish the function to Azure to run in the cloud.
You'll publish your function from Visual Studio. This is a great way to get started for proof-of-concepts, prototypes, and learning, but for a production-quality app you should not use this method. You should use some form of CI-based deployment. You can read more about doing this in the Azure Functions Deployment docs.
Publishing your app to Azure
Azure Functions can be published to Azure from inside Visual Studio.
Stop the local Azure Functions runtime if it's still running from the previous unit.
Right-click on the
ImHere.Functionsapp in the solution explorer and select Publish....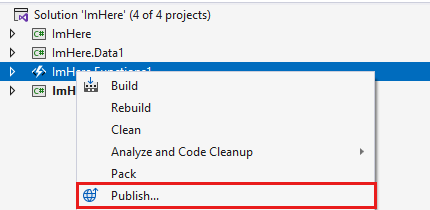
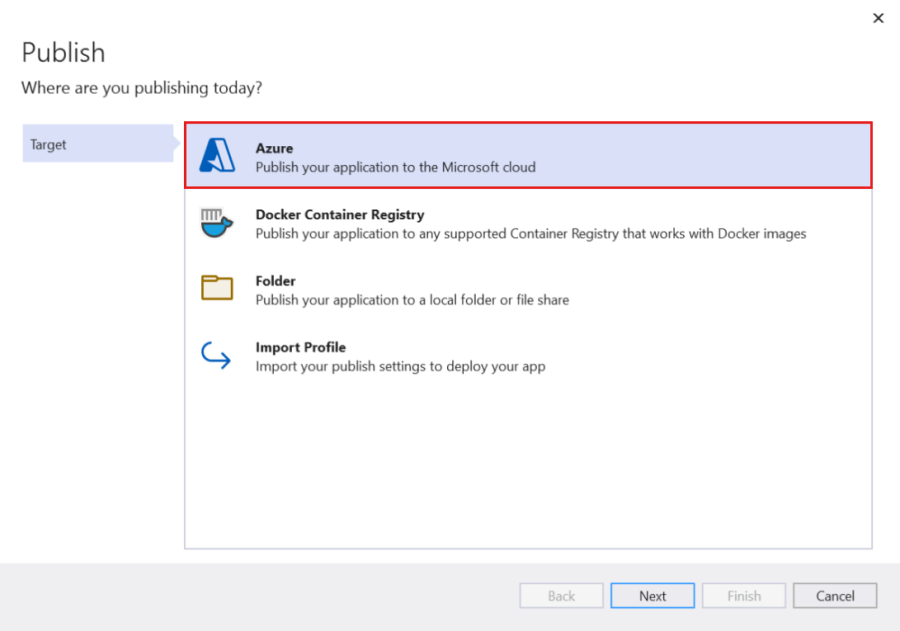
From the Publish dialog, select Azure, and then select Next.
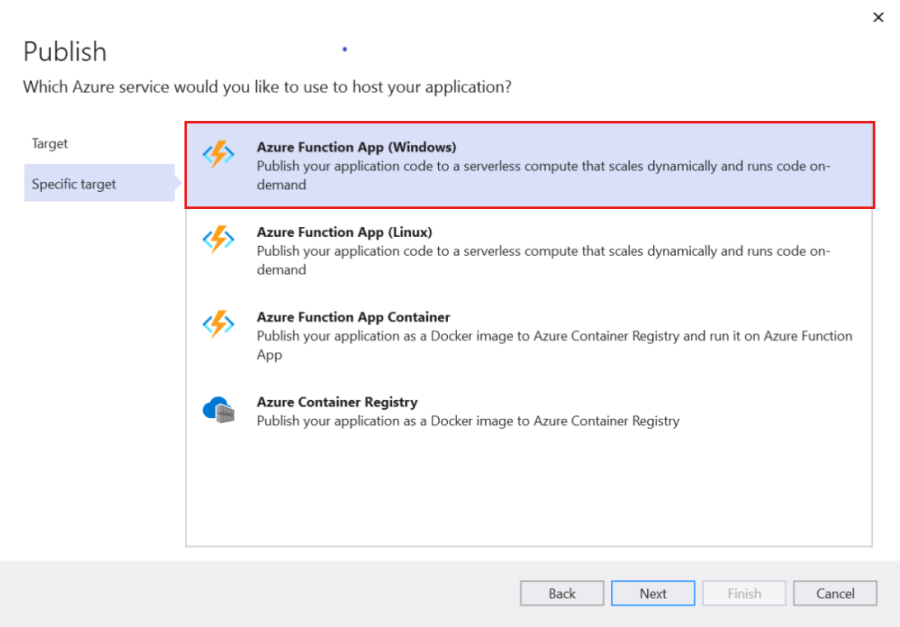
For the Specific Target, select Azure Functions App (Windows). Select Next.
Sign in to your Azure account.
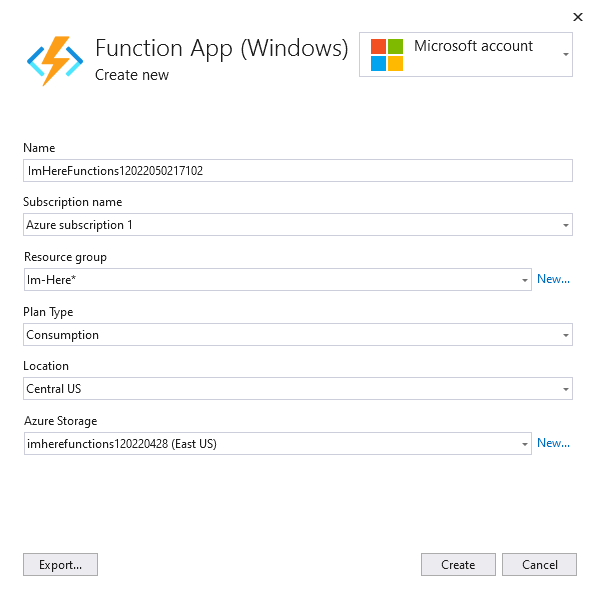
Select the + button next to Function Apps to create a new Azure Function.
Enter a name for your app.
Select your Subscription, Resource Group, Plan Type, Location, and Azure Storage.
Select Create to provision all the resources on Azure and publish your Azure Functions app.
You might be asked if you want to update the functions version on Azure. If this dialog appears, select Yes to ensure your function app is published with the latest Azure Functions runtime version.

Provisioning will take a couple of minutes to complete. The following resources will be provisioned:
- A storage account to store the files needed for the Azure Functions app
- An App Service plan to manage the compute resources needed by the Azure Functions app
- The App Service that runs the Azure Functions
The function will now be published and available to call at https://<your-app-name>.azurewebsites.net/api/SendLocation.
Configuring your app
When the Azure Functions was running locally, it was using Twilio credentials that were stored in a local.settings.json file. As the name suggests, this file is for local settings, not Azure settings. Before the Azure Functions can be called inside Azure, the TwilioAccountSid and TwilioAuthToken settings need to be configured.
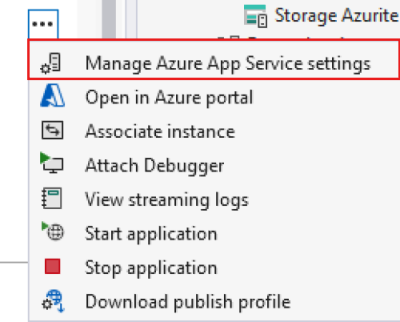
From the Publish tab, select the ellipsis (...) next to Hosting and select Manage Azure App Service Settings.
The Application Settings dialog will show application settings with both a local and remote value - the local coming from your
local.settings.jsonfile, and the remote value is the one your function will use when it's hosted in Azure. Copy the values from the Local to the Remote boxes for the TwilioAccountSid and TwilioAuthToken values.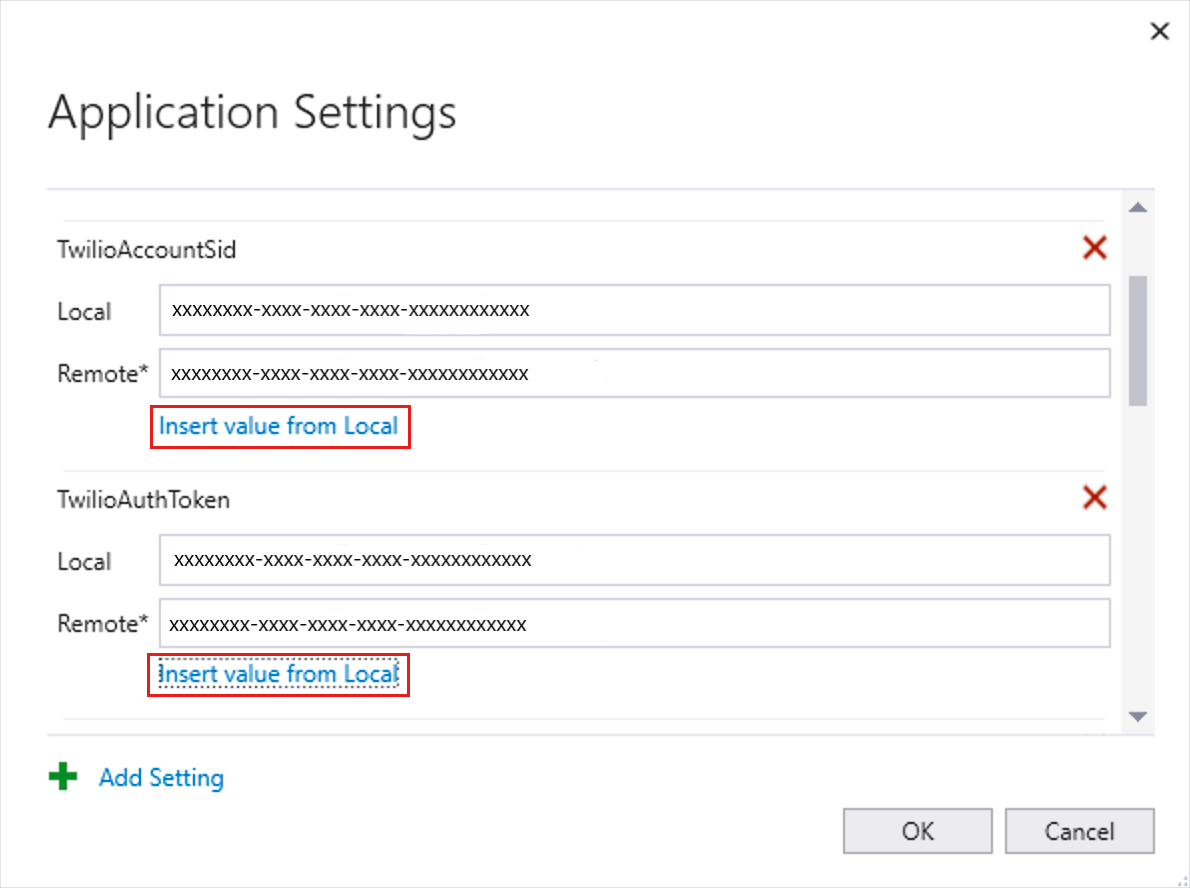
Select OK. This will publish the values to the Azure Functions app.
Pointing the mobile app to Azure
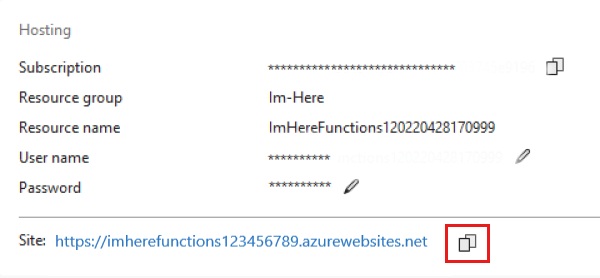
From the Publish tab, copy the Site URL using the Copy to clipboard button next to the value.
Open the
MainViewModelfrom theImHereproject.Update the value of the
baseUrlfield to be the site URL copied from the Publish tab.
Test it out
Set the
ImHere.UWPapp as the startup app and run it.Enter a phone number and select the Send Location button.
You should receive the location as an SMS message.
If you get back a Service Unavailable error, check what version of the "Microsoft.Azure.WebJobs.Extensions.Twilio" NuGet package your functions app is using, it should be 3.0.0-rc1.
Summary
In this unit, you learned how to publish an Azure Functions project to Azure from inside Visual Studio and configure application settings.