Exercise - Testing with the hosted SharePoint Workbench
In this exercise, you'll test your web part in the hosted workbench, and you'll explore the different modes of the built-in gulp serve task.
Open Visual Studio Code and then open the SharePoint Framework web part project you created in the previous exercise.
The different modes of the gulp serve task
The SharePoint Framework's gulp serve task with the nobrowser switch will build the project and start a local web server. After running the gulp serve task, you need to manually navigate to the hosted workbench to test your web part. This is how you've used the gulp serve task so far.
But what if you want the browser to open the hosted workbench for you automatically? In that case, you can use a configuration setting to tell the gulp serve task what to do.
Locate and open the file config/serve.json
In the serve.json file, locate the initialPage setting. It's currently configured with a placeholder URL.
"initialPage": "https://{tenantDomain}/_layouts/workbench.aspx",
The {tenantDomain} string is replaced automatically by the gulp serve task using an environment variable on your workstation. Set the environment variable SPFX_SERVE_TENANT_DOMAIN to the domain of your hosted SharePoint Online site you want to use for testing.
Tip
Learn more how to set environment variables on your development platform of choice:
Windows: set (environment variable) macOS: Use environment variables in Terminal on Mac
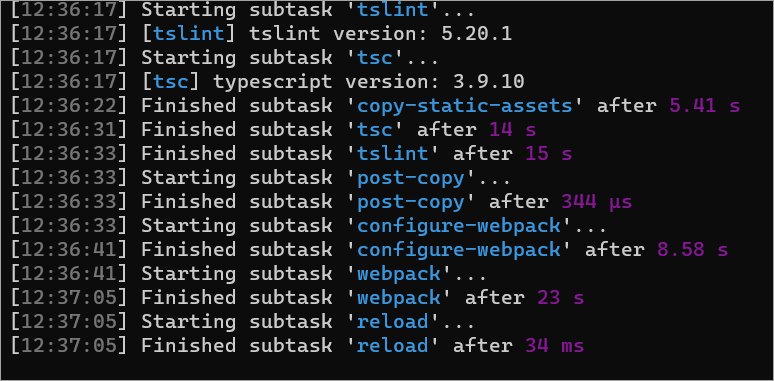
Start the local web server using the provided gulp serve task without the nobrowser switch. This will build the project, start a local web server, and load the hosted workbench at the URL configured in serve.json in combination with your environment variable.
gulp serve
Wait for the reload subtask to finish executing. At this point, the web part will be ready for testing.
Testing with the SharePoint Online Hosted Workbench
Select the web part icon button to open the list of available web parts.
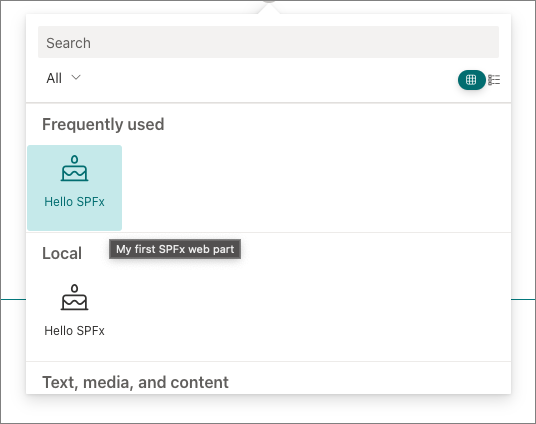
Add the web part to the page.
Locate the web part file src/webparts/helloWorld/HelloWorldWebPart.ts.
Now locate the render() method and add the following line to the top of it, right after the method declaration:
const siteTitle : string = this.context.pageContext.web.title;
Add the following line just after the line that displays the web part property value:
<div>Site title: <strong>${escape(siteTitle)}</strong></div>
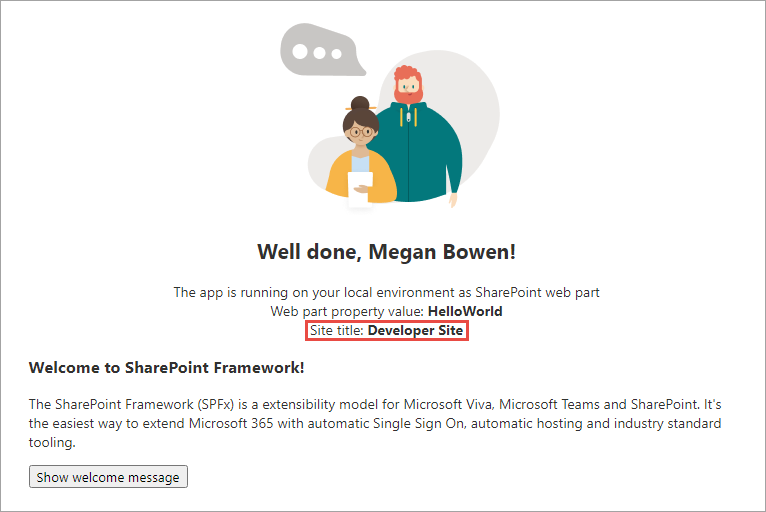
Wait a few seconds for the project to rebuild, and then refresh the hosted workbench. Notice that the title of the site is being displayed:
Now, open a new browser tab and navigate to a different site. Append the following to the end of the site's URL: /_layouts/workbench.aspx.
Add the web part to the page.
Notice that the title of the second site is being displayed:
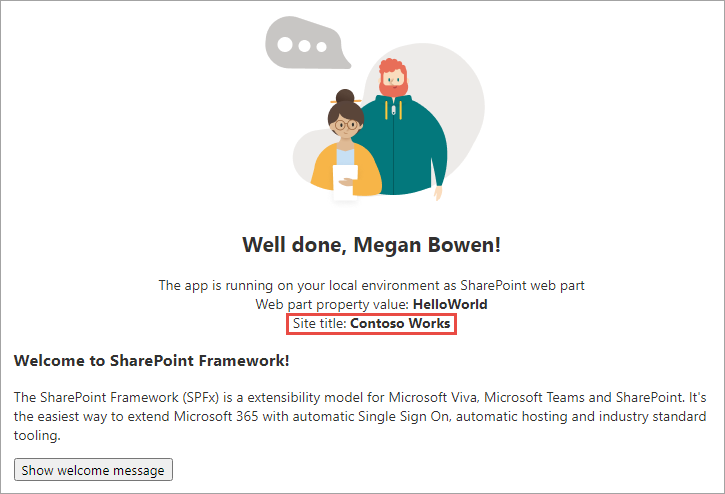
This is a simple demonstration of how the hosted workbench exposes the context of the current SharePoint site.
Close the browser tabs containing the hosted workbench and stop the local web server by pressing CTRL+C in the command prompt.
Summary
In this exercise, you tested your web part in the hosted workbench, and you explored the different modes of the built-in gulp serve task.