Exercise - Add lint and validate stages to your pipeline
You've spoken to your team and have decided to further automate your deployments by using a pipeline. You want to build more confidence in what you deploy.
In this exercise, you'll add validation stages to your pipeline. You'll then run the linter and preflight validation before each deployment.
During the process, you'll:
- Update your existing pipeline to add two new stages to lint and validate your Bicep code.
- Run your pipeline.
- Fix any issues that your pipeline detects.
Update your pipeline to prepare for stages
First, you need to update your pipeline file to define a stage. Azure Pipelines automatically creates a single stage for you, but because you'll add more stages soon, you need to update your pipeline to explicitly define stages.
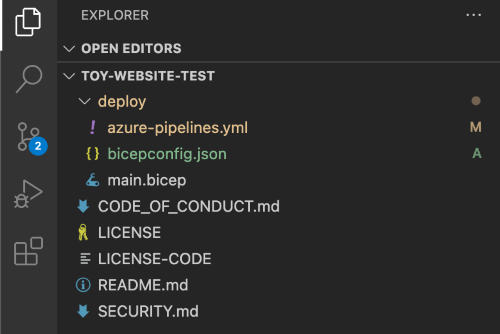
In Visual Studio Code, open the azure-pipelines.yml file in the deploy folder.
Remove everything in the file from line 14 to the bottom of the file. Be sure to also remove the
jobs:line.At the bottom of the file, add the following code:
stages:

- stage: Deploy
  jobs:
  - job: Deploy
    steps:
      - task: AzureResourceManagerTemplateDeployment@3
        name: Deploy
        displayName: Deploy to Azure
        inputs:
          connectedServiceName: $(ServiceConnectionName)
          deploymentName: $(Build.BuildNumber)
          location: $(DeploymentDefaultLocation)
          resourceGroupName: $(ResourceGroupName)
          csmFile: deploy/main.bicep
          overrideParameters: >
            -environmentType $(EnvironmentType)
Tip
YAML files are sensitive to indentation. Whether you type or paste this code, make sure your indentation is correct. In the next section, you'll see the complete YAML pipeline definition so that you can verify that your file matches.
Add lint and validation stages to your pipeline
Below the
stages:line, add a lint stage:- stage: Lint jobs: - job: LintCode displayName: Lint code steps: - script: | az bicep build --file deploy/main.bicep name: LintBicepCode displayName: Run Bicep linterThis stage defines a single step that runs the
az bicep buildcommand to lint the Bicep file.Below the lines that you just added, add a validation stage:
- stage: Validate
  jobs:
  - job: ValidateBicepCode
    displayName: Validate Bicep code
    steps:
      - task: AzureResourceManagerTemplateDeployment@3
        name: RunPreflightValidation
        displayName: Run preflight validation
        inputs:
          connectedServiceName: $(ServiceConnectionName)
          location: $(deploymentDefaultLocation)
          deploymentMode: Validation
          resourceGroupName: $(ResourceGroupName)
          csmFile: deploy/main.bicep
          overrideParameters: >
            -environmentType $(EnvironmentType)
This stage defines a single step that runs the preflight validation. Notice that this step includes a reference to your service connection, because the preflight validation process requires communicating with Azure.
Your pipeline definition now has three stages. The first runs the linter on your Bicep file, the second performs a preflight validation, and the third performs the deployment to Azure.
Save the file.
Configure the linter
By default, the Bicep linter provides a warning when it detects a problem with your file. Azure Pipelines doesn't treat linter warnings as problems that should stop your pipeline. To customize this behavior, you create a bicepconfig.json file that reconfigures the linter.
Add a new file in the deploy folder and name it bicepconfig.json.
Copy the following code into the file:
{
  "analyzers": {
    "core": {
      "enabled": true,
      "verbose": true,
      "rules": {
        "adminusername-should-not-be-literal": {
          "level": "error"
        },
        "max-outputs": {
          "level": "error"
        },
        "max-params": {
          "level": "error"
        },
        "max-resources": {
          "level": "error"
        },
        "max-variables": {
          "level": "error"
        },
        "no-hardcoded-env-urls": {
          "level": "error"
        },
        "no-unnecessary-dependson": {
          "level": "error"
        },
        "no-unused-params": {
          "level": "error"
        },
        "no-unused-vars": {
          "level": "error"
        },
        "outputs-should-not-contain-secrets": {
          "level": "error"
        },
        "prefer-interpolation": {
          "level": "error"
        },
        "secure-parameter-default": {
          "level": "error"
        },
        "simplify-interpolation": {
          "level": "error"
        },
        "protect-commandtoexecute-secrets": {
          "level": "error"
        },
        "use-stable-vm-image": {
          "level": "error"
        }
      }
    }
  }
}
Save the file.
Verify and commit your pipeline definition
Verify that your azure-pipelines.yml file looks like the following file:
trigger:
  batch: true
  branches:
    include:
    - main

pool:
  vmImage: ubuntu-latest

variables:
  - name: deploymentDefaultLocation
    value: westus3

stages:

- stage: Lint
  jobs:
  - job: LintCode
    displayName: Lint code
    steps:
      - script: |
          az bicep build --file deploy/main.bicep
        name: LintBicepCode
        displayName: Run Bicep linter

- stage: Validate
  jobs:
  - job: ValidateBicepCode
    displayName: Validate Bicep code
    steps:
      - task: AzureResourceManagerTemplateDeployment@3
        name: RunPreflightValidation
        displayName: Run preflight validation
        inputs:
          connectedServiceName: $(ServiceConnectionName)
          location: $(deploymentDefaultLocation)
          deploymentMode: Validation
          resourceGroupName: $(ResourceGroupName)
          csmFile: deploy/main.bicep
          overrideParameters: >
            -environmentType $(EnvironmentType)

- stage: Deploy
  jobs:
  - job: Deploy
    steps:
      - task: AzureResourceManagerTemplateDeployment@3
        name: Deploy
        displayName: Deploy to Azure
        inputs:
          connectedServiceName: $(ServiceConnectionName)
          deploymentName: $(Build.BuildNumber)
          location: $(DeploymentDefaultLocation)
          resourceGroupName: $(ResourceGroupName)
          csmFile: deploy/main.bicep
          overrideParameters: >
            -environmentType $(EnvironmentType)
If it doesn't, update it to match this example, and then save it.
Commit and push your changes to your Git repository by running the following commands in the Visual Studio Code terminal:
git add .
git commit -m "Add lint and validation stages"
git push
Immediately after you push, Azure Pipelines starts a new pipeline run.
View the pipeline run
In your browser, go to Pipelines.
Select the most recent run of your pipeline.

If the pipeline is still running, wait until it's finished. Although Azure Pipelines automatically updates the page with the latest status, it's a good idea to refresh your page occasionally.
Notice that the pipeline run now shows the three stages that you defined in the YAML file. Also notice that the Lint stage has failed.
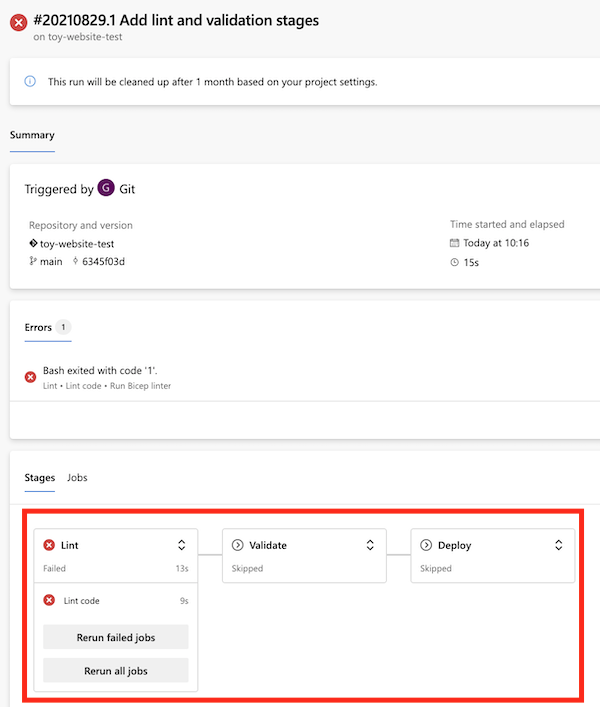
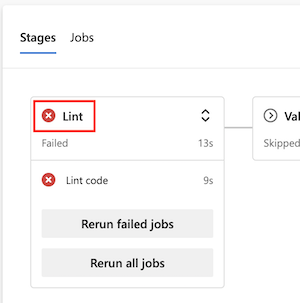
Select the Lint stage to see its details.
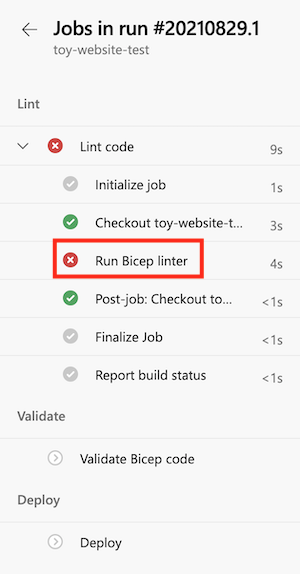
Select the Run Bicep linter step to view the pipeline log.
Notice that the error displayed is similar to the following one:
Error no-unused-params: Parameter "storageAccountNameParam" is declared but never used.
This error indicates that the linter found a rule violation in your Bicep file.
Fix the linter error
Now that you've identified the problem, you can fix it in your Bicep file.
In Visual Studio Code, open the main.bicep file in the deploy folder.
Notice that the Bicep linter has also detected that the
storageAccountNameParamparameter isn't used. Visual Studio Code indicates the unused parameter with a squiggly line. Normally, the line would be yellow to indicate a warning. But because you customized the bicepconfig.json file, the linter treats the code as an error and displays the line in red.param storageAccountNameParam string = uniqueString(resourceGroup().id)Delete the
storageAccountNameParamparameter.Save the file.
Commit and push your changes to your Git repository by running the following commands in the Visual Studio Code terminal:
git add .
git commit -m "Remove unused parameter"
git push
Once again, Azure Pipelines automatically triggers a new run of your pipeline.
View the pipeline run again
In your browser, go to your pipeline.
Select the most recent run.
Wait until the pipeline run is finished. Although Azure Pipelines automatically updates the page with the latest status, it's a good idea to refresh your page occasionally.
Notice that the Lint stage finished successfully, but now the Validate stage has failed.
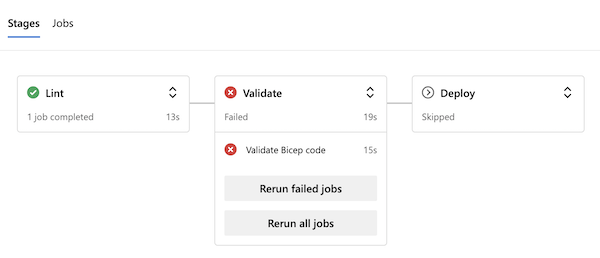
Select the Validate stage to see its details.
Select the Run preflight validation step to view the pipeline log.

Notice that the error displayed in the log includes the following message:
mystorageresourceNameSuffix is not a valid storage account name. Storage account name must be between 3 and 24 characters in length and use numbers and lower-case letters only.
This error indicates that the storage account name isn't valid.
Fix the validation error
You've found another problem in the Bicep file. Here, you'll fix the problem.
In Visual Studio Code, open the main.bicep file in the deploy folder.
Look at the definition of the
storageAccountNamevariable:var appServiceAppName = 'toy-website-${resourceNameSuffix}' var appServicePlanName = 'toy-website' var applicationInsightsName = 'toywebsite' var logAnalyticsWorkspaceName = 'workspace-${resourceNameSuffix}' var storageAccountName = 'mystorageresourceNameSuffix'There seems to be a typo, and the string interpolation hasn't been configured correctly.
Update the
storageAccountNamevariable to use string interpolation correctly:var storageAccountName = 'mystorage${resourceNameSuffix}'Save the file.
Commit and push your changes to your Git repository by running the following commands in the Visual Studio Code terminal:
git add .
git commit -m "Fix string interpolation"
git push
View the successful pipeline run
In your browser, go to your pipeline.
Select the most recent run.
Wait until the pipeline run is finished. Although Azure Pipelines automatically updates the page with the latest status, it's a good idea to refresh your page occasionally.
Notice that all three stages of the pipeline have finished successfully:

You now have a pipeline that successfully detects errors in your Bicep code early in your deployment process, and then deploys to Azure if there are no errors.