Configure Unity for Windows Mixed Reality development
The first step to creating an immersive experience for Windows Mixed Reality requires configuring your Unity project for Windows Mixed Reality development. Configuring Unity for Windows Mixed Reality development is a manual process, which must be completed whenever you create a new Unity project or open a project that's shared with you. After your project is configured, your app will be able to do basic holographic rendering and spatial input.
To configure Unity for Windows Mixed Reality development, follow these steps:
Go to File > Build Settings to switch Build Platform to Universal Windows Platform.
In the Build Settings window, select Player Settings. In the Player section, expand XR Settings. Enable Virtual Reality Supported, and add the Windows Mixed Reality SDK.

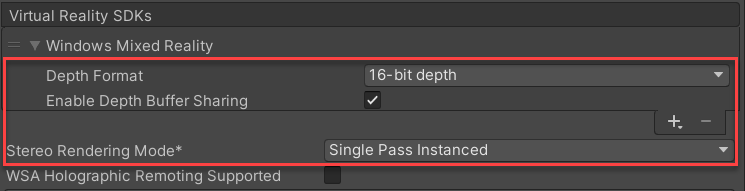
Optimize Cross Reality (XR) settings as follows:
- Set Windows Mixed Reality Depth Format to 16-bit depth.
- Select the Windows Mixed Reality Enable Depth Buffer Sharing checkbox.
- Set Stereo Rendering Mode to Single Pass Instanced.
Add MRTK to the scene and configure
Typically, if you were to start this project from scratch, you'd need to use the Mixed Reality Feature Tool to import the Mixed Reality Toolkit (MRTK) Foundation package. However, this sample project contains the MRTK Foundation package.
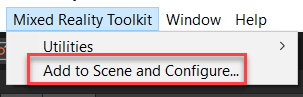
Before you can use the MRTK features, you'll need to add MRTK to the scene, and configure it.
On the Unity menu, select Mixed Reality Toolkit > Add to Scene and Configure to add MRTK to your current scene.
Two new objects are added to the hierarchy: MixedRealityToolkit and MixedRealityPlayspace.
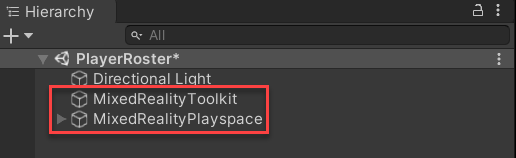
The MixedRealityToolkit object contains the toolkit itself. The MixedRealityPlayspace object ensures that the headset, controllers, and other required systems are managed correctly in the scene.
The Main Camera object is moved as a child to the MixedRealityPlayspace object. This allows the playspace to manage the camera simultaneously with the SDKs.
Select the configuration profile
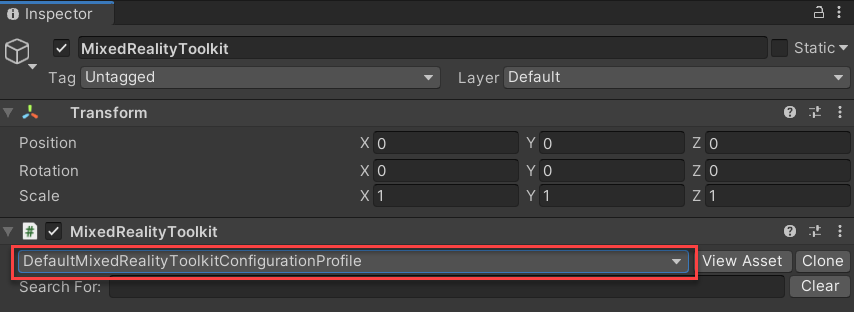
One of the main ways that MRTK is configured is through the many profiles available in the Foundation package. Profiles configure the behavior of MRTK core components. The MixedRealityToolkit object contains the active profile, and you can view it in the Inspector window.
When MRTK is added to the scene, DefaultMixedRealityToolkitConfigurationProfile is preselected.
MRTK provides additional default profiles, which cover most platforms and scenarios that MRTK supports. Because DefaultMixedRealityToolkitConfigurationProfile is a general use profile, it isn't optimized for any particular use case. If you want to use settings optimized for a specific platform, consider selecting the respective default profile.
Note
This module uses DefaultHoloLens2ConfigurationProfile.
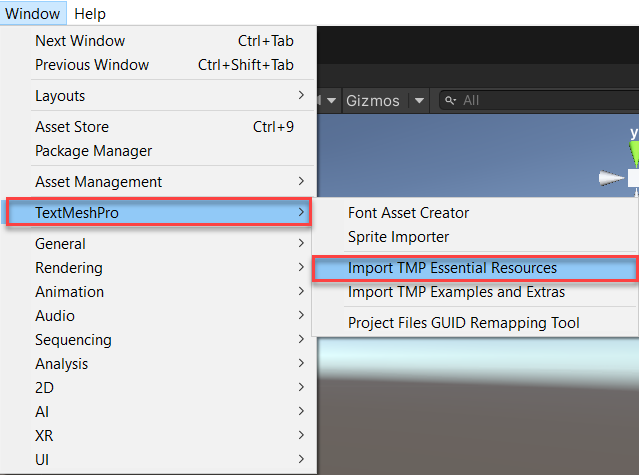
Import TextMesh Pro Essential Resources
Some MRTK prefabs and assets require TextMesh Pro. TextMesh Pro is Unity's default text component. It uses advanced text rendering techniques and a set of custom shaders to deliver visual quality improvements. It also provides greater flexibility for text styling and texturing. The TextMesh Pro assets must be added to your project by importing its essential resources.
In the Unity menu, select Window > TextMeshPro > Import TMP Essential Resources.
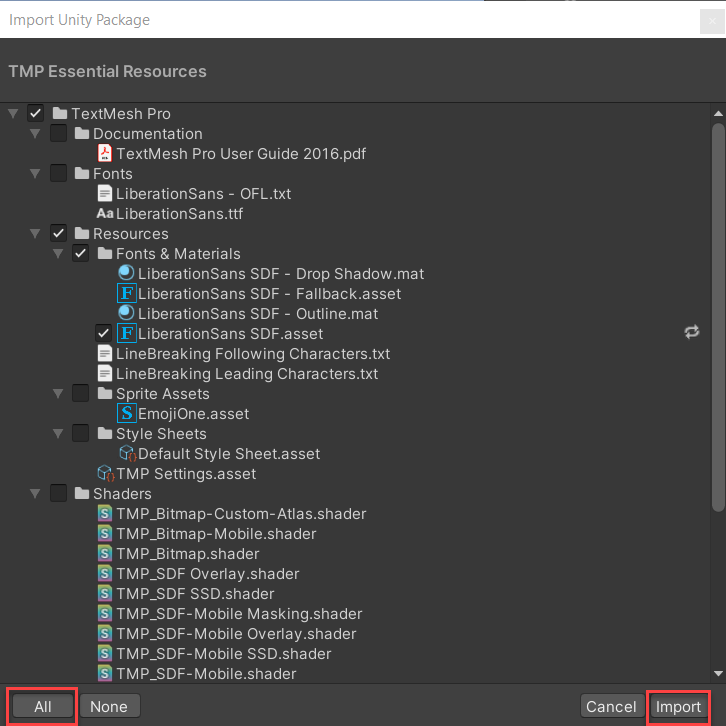
In the Import Unity Package window, select All to ensure that all the assets are selected. Then select Import.
© 2021 Warner Bros. Ent. All Rights Reserved.