Elevate cubes to buttons with MRTK scripts
The button UI is dynamic in the sense that the values for each text field come from the PlayerDataStats.json file. Rather than hard-code the data for each player onto the game object, you can use a JSON file and Unity's utility functions for working with JSON data. This is called JSONUtility.
You only need to create the UI objects and place wherever you'd like the text to appear.
Create the player name object
In the Hierarchy window, right-click the PlayerButton object and select 3D Object > Text - TextMeshPro. This creates a text object that you'll use for the player's name.
Ensure that the Text (TMP) object is created as a child of the PlayerButton object.
Select the Text (TMP) object in the Hierarchy window. In the Inspector window, rename the object PlayerName.
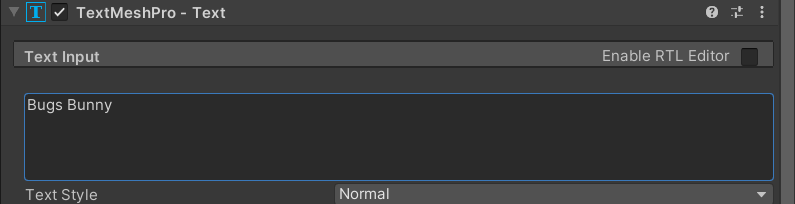
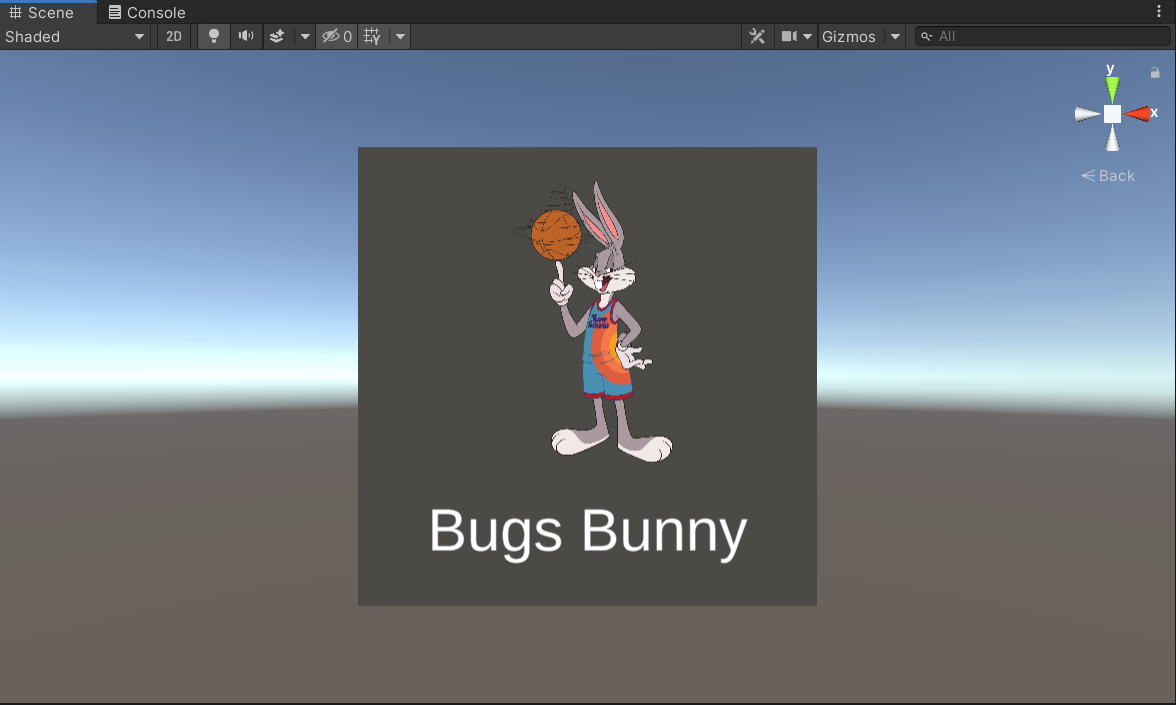
You'll now modify parameters for the TextMeshPro - Text properties. In TextMeshPro - Text, enter Bugs Bunny. Although the data will pull from the JSON file, it's helpful to have sample text for placement purposes.
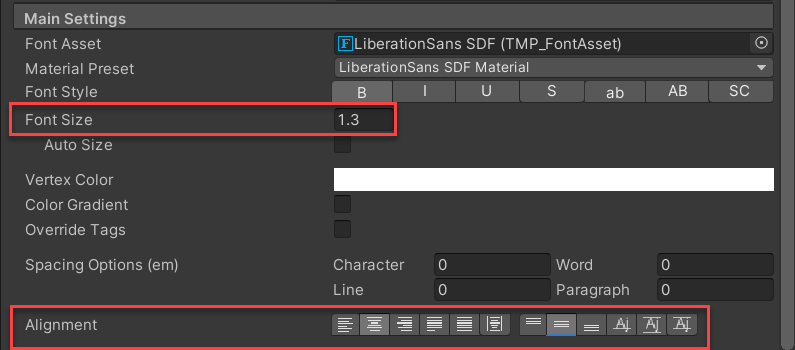
In the Main Settings properties, modify the following to adjust the size and text placement:
- Font Size: 1.3
- Alignment: Center
- Alignment: Middle
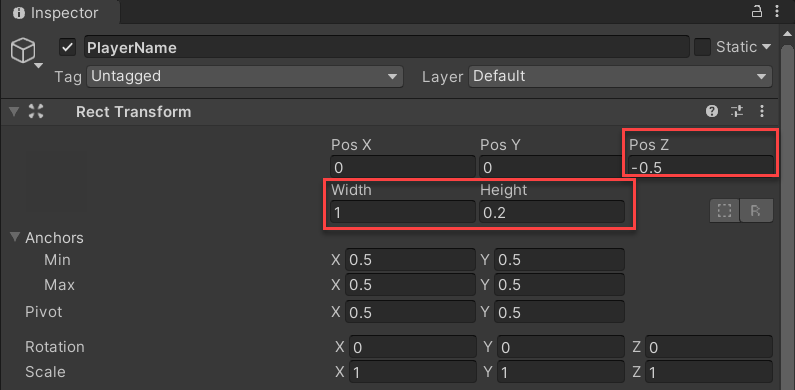
In the Rect Transform properties, modify the following to adjust the text box size and position of the text:
- Pos Z: -0.5
- Width: 1
- Height: 0.2
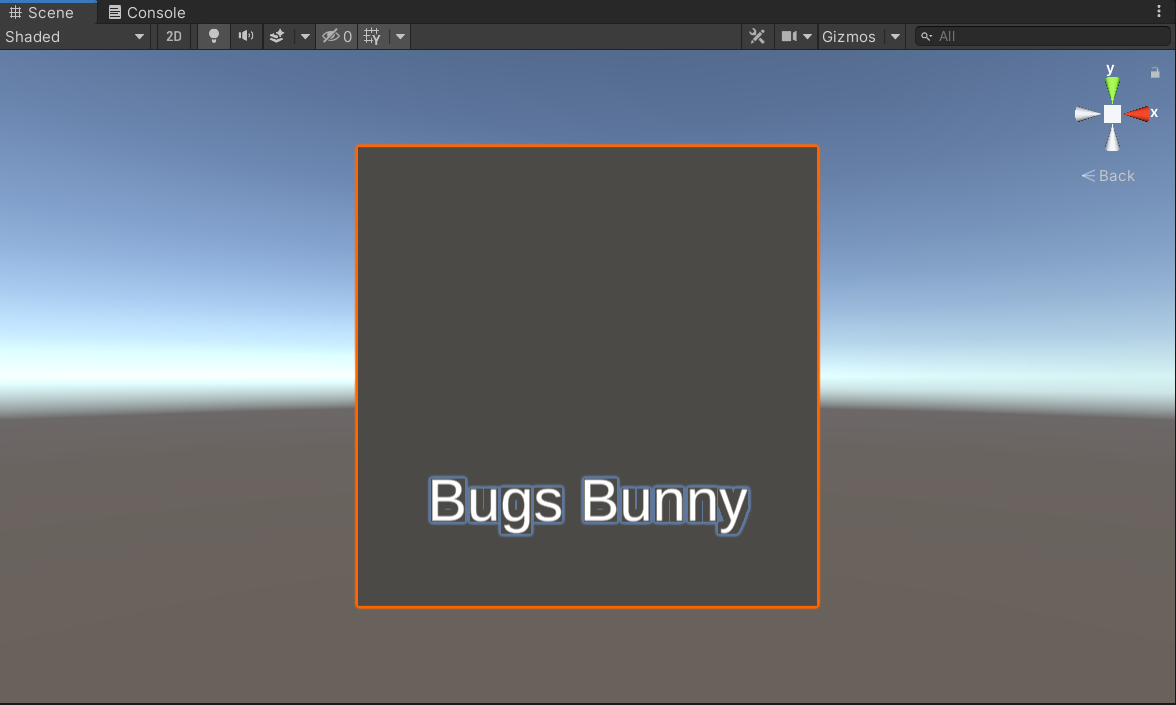
Using the Move Tool, select the up and down arrows to drag the text onto the bottom-middle of the cube.
Create the player image object
In the Hierarchy window, right-click the PlayerButton object, and select 2D Object > Sprite. This creates an object for a 2D graphic.
Ensure that the New Sprite object is created as a child of the PlayerButton object.
Select the New Sprite object in the Hierarchy window. In the Inspector window, rename the object PlayerImage.
All character images are created as a sprite (a 2D graphic). The sprites are within the Resources folder of the project. In the Project window, go to the Resources folder, and drag the BugsBunny sprite to the Sprite property for the SpriteRenderer component.

You'll use this sprite for placement purposes.
You'll now modify parameters for the Transform properties. In Transform, change the Position to 0, 0.12, -0.5. This places the image above the PlayerName object, and slightly in front of the cube.
Next, change the Scale to 0.025, 0.025, 0.025. This sets the size for all sprites to a smaller version that fits properly within the cube.
Feel free to adjust the PlayerImage position and scale as needed.
You should now have a completed PlayerButton object that includes a picture of a player and their name.
© 2021 Warner Bros. Ent. All Rights Reserved.