Add players to the scene
Now that you've configured the PlayerContainer object with the appropriate button functionality and UI for a player, you can create the object as a prefab. Then you can use the object for all players on the Tune Squad.
Rather than duplicate a PlayerContainer object for each player, you can create an instance of the object (or instantiate) for each player when the scene starts. This requires script logic that creates (or spawns) a PlayerContainer object for all players listed in the players.json file. Furthermore, you need script logic to relate the JSON data to the text and sprite objects within the PlayerContainer object. Such scripts have been provided for you in the project folder.
Assign objects to JSON data
For each text and sprite object created in the PlayerContainer object, you must make a link to its corresponding value in the players.json file. The Player.cs script helps establish the connection.
In the Hierarchy, select the PlayerButton object.
In the Inspector window, add the Player.cs script as a component for the PlayerButton object.
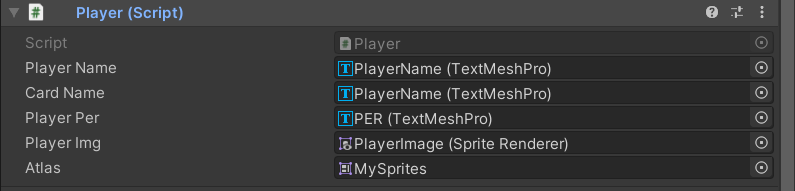
In the Inspector window, assign the following for each property of the Player (Script) component:
- Player Name: PlayerName (child of PlayerButton)
- Card Name: PlayerName (child of Background)
- Player PER: PER (child of Background)
- Player Img: PlayerImage (child of PlayerButton)
- Atlas: MySprites (in Assets)
Create a prefab
For better project organization, place all your prefabs into a Prefabs folder. Then you can drag objects from the Hierarchy window into the Project window to create a prefab.
In the Project window, select Assets, and select the + button. Next, select Folder, and name the folder Prefabs.
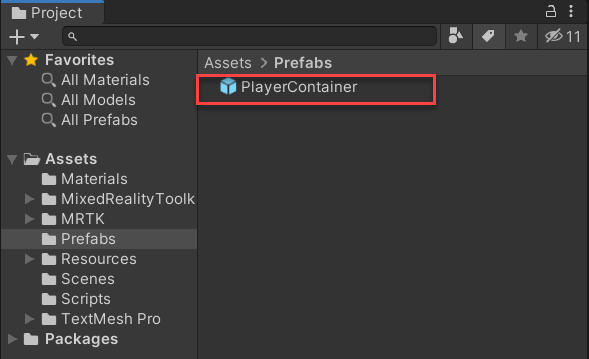
In the Hierarchy window, drag the PlayerContainer object into the Prefabs folder. When an object is created as a prefab, a blue box icon appears next to the object.
Note
You can edit a prefab by opening it. To open a prefab, double-click the prefab within the Project window. The prefab then appears in Prefab Mode. Any edits made to the prefab will update for all instances of the prefab within your scene.
Delete the PlayerContainer object from the scene. Your scene should now only consist of the following objects:
Directional LightMixedRealityToolkitMixedRealityPlayspace
Create the PlayerParent object
As mentioned, when the scene starts, a button for each player should be instantiated with the respective player data. To better organize the placement of each button, you can use an MRTK Object Collection script. These scripts help lay out an array of objects in predefined three-dimensional shapes.
For this project, you'll arrange the buttons into a grid by using the GridObjectCollection.cs script. To use this script, all objects to be arranged must be children of the same parent. Therefore, each instantiated PlayerContainer prefab must be the child of the same parent object. To resolve for this, you can use script logic to create all players as the child of a defined object.
In the Hierarchy, select the + button, and select Create Empty.
Select the GameObject in the Hierarchy window. In the Inspector window, rename the object PlayerParent.
In the Inspector window, select the triple dots to the right of the Transform component, and select Reset. This resets the position of the object to 0, 0, 0.
In the Inspector window, add the GridObjectCollection.cs script as a component for the PlayerParent object.
In the Inspector window, change the GridObjectCollection (Script) properties to the following:
- Layout: Column Then Row
- Num Columns: 4
- Cell Width: 0.32
- Cell Height: 0.32

At the bottom of the GridObjectCollection (Script) component, select Update Collection.
Create the PlayerLoader object
The final step for this project is to create an object that loads the scene. This object consists of a script that will spawn each PlayerContainer prefab into the scene. The script also tells Unity to arrange the instantiated children within the PlayerParent object into a grid collection defined by the PlayerParent object.
In the Hierarchy, select the + button, and select Create Empty.
Select the GameObject in the Hierarchy window. In the Inspector window, rename the object PlayerLoader.
In the Inspector window, select the triple dots to the right of the Transform component, and select Reset. This resets the position of the object to 0, 0, 0.
In the Inspector window, change the ParentLoader object Position to 0, 0, 0.5.
In the Inspector window, add the SpawnPlayer as a component for the PlayerLoader object.
In the Inspector window, assign the following for each property of the SpawnPlayer component:
- Parent: PlayerParent
- Player Prefab: PlayerContainer
- Collection: PlayerParent

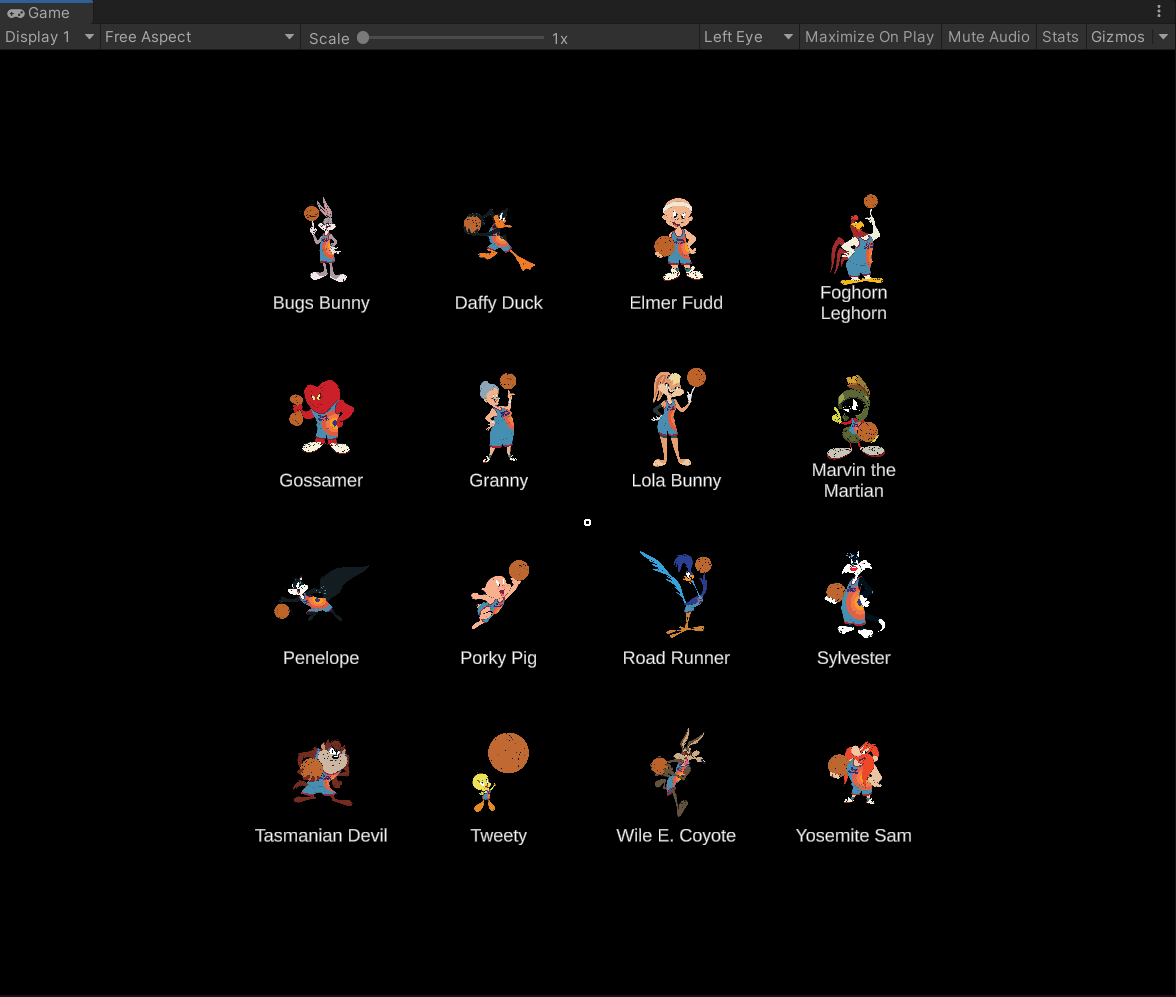
Now that the scene is configured, enter into Play mode to test out the app. At the start, a button is spawned for each player into a grid.
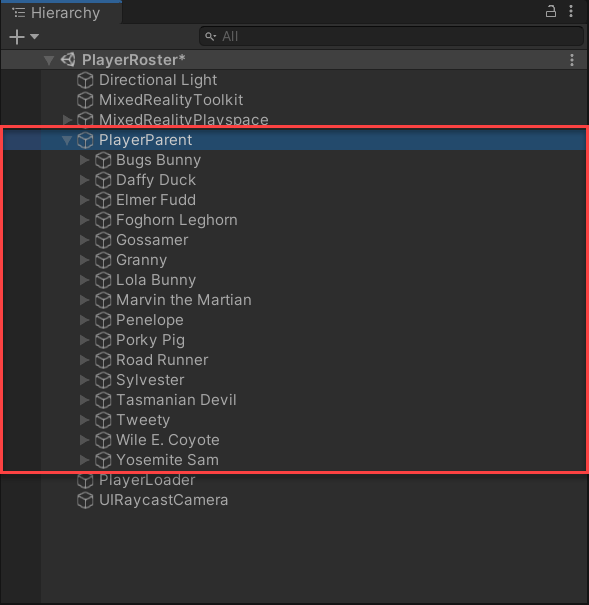
You'll notice that the PlayerParent object now has a child object for each Tune Squad player.
Give the app a try, and view the PER for each Tune Squad player:
Congratulations! You've created a mixed reality app that displays the Tune Squad player roster and their respective PER stats!
© 2021 Warner Bros. Ent. All Rights Reserved.