Exercise - Change navigation in your Blazor app by using the @page directive
Blazor has a navigation state helper that helps C# code manage an app's URIs. There's also a NavLink component that's a drop-in replacement for the <a> element. One of NavLink's features is adding an active class to HTML links for an app's menus.
Your team has made a start on the Blazing Pizza app and have built Blazor components to represent pizzas and orders. The app now needs to have checkout and other order-related pages.
In this exercise, you'll add a new checkout page, add a top navigation to the app, and then use a Blazor NavLink component to improve your code.
Clone your team's existing app
Note
This module uses the .NET command-line interface (CLI) and Visual Studio Code for local development. After you finish this module, you can apply the concepts by using Visual Studio (Windows) or Visual Studio for Mac (macOS). For continued development, use Visual Studio Code for Windows, Linux, and macOS.
This module uses the .NET 6.0 SDK. Ensure that you have .NET 6.0 installed by running the following command in your preferred terminal:
dotnet --list-sdks
Output similar to the following appears:
3.1.100 [C:\program files\dotnet\sdk]
5.0.100 [C:\program files\dotnet\sdk]
6.0.100 [C:\program files\dotnet\sdk]
Ensure that a version that starts with 6 is listed. If none is listed or the command isn't found, install the most recent .NET 6.0 SDK.
If you haven't created a Blazor app before, follow the setup instructions for Blazor to install the correct version of .NET and check that your machine is set up correctly. Stop at the Create your app step.
Open Visual Studio Code.
Open the integrated terminal from Visual Studio Code by selecting View. Then on the main menu, select Terminal.
In the terminal, go to where you want the project to be created.
Clone the app from GitHub.
git clone https://github.com/MicrosoftDocs/mslearn-blazor-navigation.git BlazingPizzaSelect File, and then select Open folder.
In the Open dialog, go to the BlazingPizza folder, and choose Select Folder.
Visual Studio Code might prompt you about unresolved dependencies. Select Restore.
Run the app to check everything is working correctly.
In Visual Studio Code, select F5. Or on the Run menu, select Start Debugging.
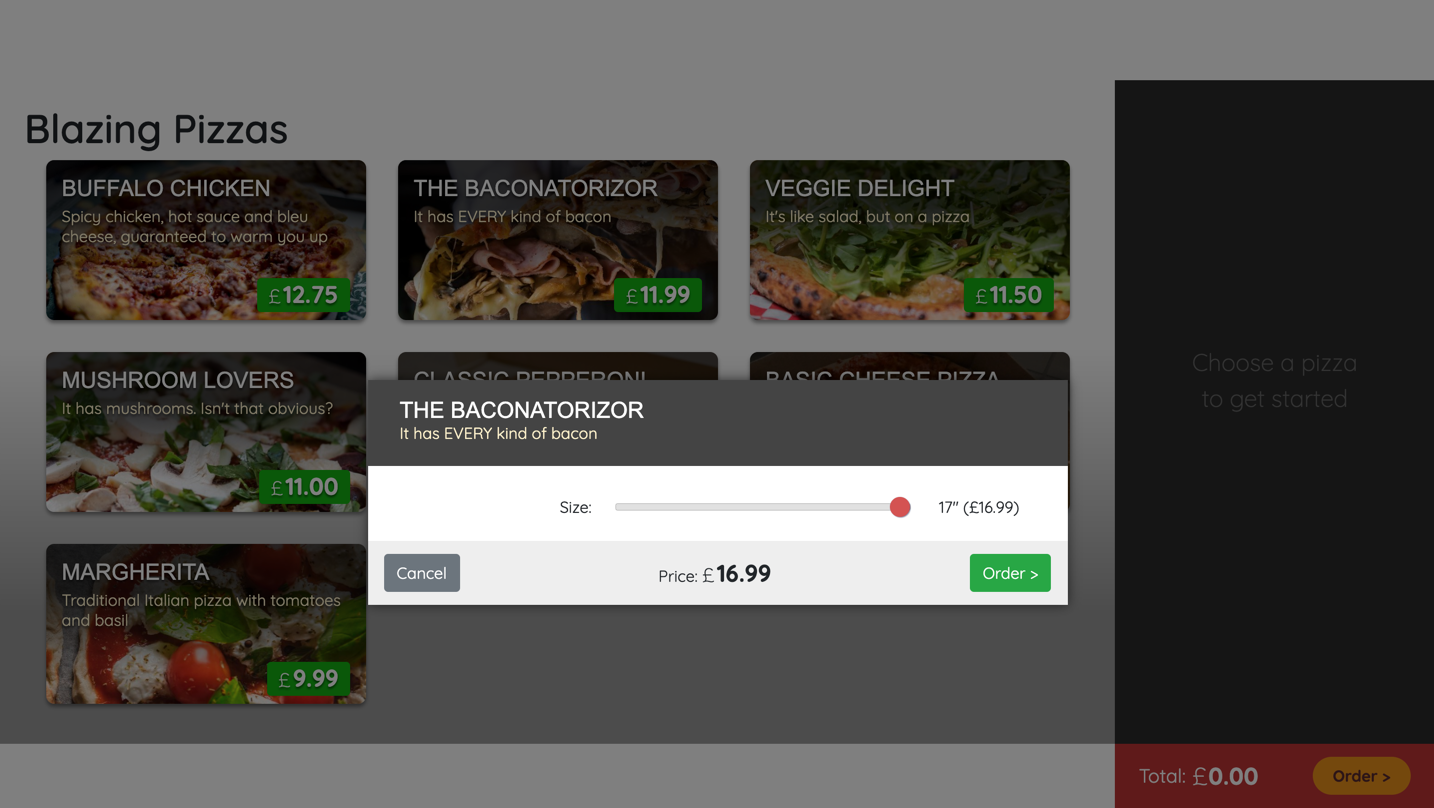
Configure some pizzas and add them to your order. Select Order > at the bottom of the page. You'll see the default "404 not found" message because the team hasn't made a checkout page yet.
Select Shift + F5 to stop the app.
Add a checkout page
In Visual Studio Code, in the file explorer, select App.razor.
<Router AppAssembly="@typeof(Program).Assembly" PreferExactMatches="@true">
    <Found Context="routeData">
        <RouteView RouteData="@routeData" />
    </Found>
    <NotFound>
        <LayoutView>
            <p>Sorry, there's nothing at this address.</p>
        </LayoutView>
    </NotFound>
</Router>
The
<NotFound>code block is what customers will see if they try to go to a page that doesn't exist.In the file explorer, expand Pages, right-click the folder, and select New File.
Name the new file Checkout.razor. In this file, write the following code:
@page "/checkout"
@inject OrderState OrderState
@inject HttpClient HttpClient
@inject NavigationManager NavigationManager

<div class="top-bar">
    <a class="logo" href="">
        <img src="img/logo.svg" />
    </a>

    <a href="" class="nav-tab">
        <img src="img/pizza-slice.svg" />
        <div>Get Pizza</div>
    </a>

</div>

<div class="main">
    <div class="checkout-cols">
        <div class="checkout-order-details">
            <h4>Review order</h4>
            @foreach (var pizza in Order.Pizzas)
            {
                <p>
                    <strong>
                        @(pizza.Size)"
                        @pizza.Special.Name
                        (£@pizza.GetFormattedTotalPrice())
                    </strong>
                </p>
            }

            <p>
                <strong>
                    Total price:
                    £@Order.GetFormattedTotalPrice()
                </strong>
            </p>
        </div>
    </div>

    <button class="checkout-button btn btn-warning">
        Place order
    </button>
</div>

@code {
    Order Order => OrderState.Order;
}
This page builds on the current app and makes use of the app state saved in
OrderState. The firstdivis the app's new header navigation. Let's add this to the index page.In the file explorer, expand Pages, and then select index.razor.
Above the
<div class="main">class, add thetop-barhtml.<div class="top-bar"> <a class="logo" href=""> <img src="img/logo.svg" /> </a> <a href="" class="nav-tab" > <img src="img/pizza-slice.svg" /> <div>Get Pizza</div> </a> </div>When we're on this page, it would be nice to show the customers by highlighting the link. The team has already created an
activecss class, so addactiveto theclassattribute that already contains thenav-tabstyle.<div class="top-bar"> <a class="logo" href=""> <img src="img/logo.svg" /> </a> <a href="" class="nav-tab active" > <img src="img/pizza-slice.svg" /> <div>Get Pizza</div> </a> </div>In Visual Studio Code, select F5. Or on the Run menu, select Start Debugging.
The app now has a nice menu bar at the top, which includes the company's logo. Add some pizzas, and progress the order to the checkout page. You'll see the pizzas listed and the active indicator missing from the menu.

Select Shift + F5 to stop the app.
Allow customers to place an order
At the moment, the checkout page doesn't allow customers to place their orders. The logic of the app needs to store the order to send to the kitchen. After the order is sent, let's redirect customers back to the home page.
In the file explorer, expand Pages, and select Checkout.razor.
Modify the button element with to call a
PlaceOrdermethod. Add the@onclickanddisabledattributes as shown:<button class="checkout-button btn btn-warning" @onclick="PlaceOrder" disabled=@isSubmitting> Place order </button>We don't want customers placing duplicate orders, so we disable the Place order button until the order is processed.
In the
@codeblock, add this code under theOrder Order => OrderState.Order;code.bool isSubmitting; async Task PlaceOrder() { isSubmitting = true; var response = await HttpClient.PostAsJsonAsync(NavigationManager.BaseUri + "orders", OrderState.Order); var newOrderId= await response.Content.ReadFromJsonAsync<int>(); OrderState.ResetOrder(); NavigationManager.NavigateTo("/"); }The preceding code will disable the Place order button, post JSON that will be added to pizza.db, clear the order, and use
NavigationManagerto redirect customers to the home page.You need to add code to handle the order. You'll add an OrderController class for this task. If you look at PizzaStoreContext.cs, you'll see that there's only entity framework database support for
PizzaSpecials. Let's fix that first.
Add entity framework support for orders and pizzas
In the file explorer, select PizzaStoreContext.cs.
Replace the
PizzaStoreContextclass with this code:public class PizzaStoreContext : DbContext { public PizzaStoreContext( DbContextOptions options) : base(options) { } public DbSet<Order> Orders { get; set; } public DbSet<Pizza> Pizzas { get; set; } public DbSet<PizzaSpecial> Specials { get; set; } public DbSet<Topping> Toppings { get; set; } protected override void OnModelCreating(ModelBuilder modelBuilder) { base.OnModelCreating(modelBuilder); // Configuring a many-to-many special -> topping relationship that is friendly for serialization modelBuilder.Entity<PizzaTopping>().HasKey(pst => new { pst.PizzaId, pst.ToppingId }); modelBuilder.Entity<PizzaTopping>().HasOne<Pizza>().WithMany(ps => ps.Toppings); modelBuilder.Entity<PizzaTopping>().HasOne(pst => pst.Topping).WithMany(); } }This code adds entity framework support for the app's order and pizza classes.
In Visual Studio Code, on the menu, select File > New Text File.
Select the C# language, and enter this code:
using Microsoft.AspNetCore.Mvc;
using Microsoft.EntityFrameworkCore;

namespace BlazingPizza;

[Route("orders")]
[ApiController]
public class OrdersController : Controller
{
    private readonly PizzaStoreContext _db;

    public OrdersController(PizzaStoreContext db)
    {
        _db = db;
    }

    [HttpGet]
    public async Task<ActionResult<List<OrderWithStatus>>> GetOrders()
    {
        var orders = await _db.Orders
 	    .Include(o => o.Pizzas).ThenInclude(p => p.Special)
 	    .Include(o => o.Pizzas).ThenInclude(p => p.Toppings).ThenInclude(t => t.Topping)
 	    .OrderByDescending(o => o.CreatedTime)
 	    .ToListAsync();

        return orders.Select(o => OrderWithStatus.FromOrder(o)).ToList();
    }

    [HttpPost]
    public async Task<ActionResult<int>> PlaceOrder(Order order)
    {
        order.CreatedTime = DateTime.Now;

        // Enforce existence of Pizza.SpecialId and Topping.ToppingId
        // in the database - prevent the submitter from making up
        // new specials and toppings
        foreach (var pizza in order.Pizzas)
        {
            pizza.SpecialId = pizza.Special.Id;
            pizza.Special = null;
        }

        _db.Orders.Attach(order);
        await _db.SaveChangesAsync();

        return order.OrderId;
    }
}
The preceding code allows our app to get all the current orders and place an order. The
[Route("orders")]Blazor attribute allows this class to handle incoming HTTP requests for /orders and /orders/{orderId}.Save your changes with Ctrl+S.
For the filename, use OrderController.cs. Make sure you save the file in the same directory as OrderState.cs.
In the file explorer, select OrderState.cs.
At the bottom of the class under the
RemoveConfiguredPizzamethod, modifyResetOrder()to reset the order:public void ResetOrder() { Order = new Order(); }
Test the checkout functionality
In Visual Studio Code, select F5. Or on the Run menu, select Start Debugging.
The app should compile, but if you create an order and try to checkout, you'll see a runtime error. The error occurs because our pizza.db SQLLite database was created before there was support for orders and pizzas. We need to delete the file so that a new database can be created correctly.
Select Shift + F5 to stop the app.
In the file explorer, delete the pizza.db file.
Select F5. Or on the Run menu, select Start Debugging.
As a test, add pizzas, go to the checkout, and place an order. You'll be redirected to the home page and see that the order is now empty.
Select Shift + F5 to stop the app.
The app is improving. We have pizza configuration and a checkout. We want to allow customers to see the status of their pizza order after they place it.
Add an orders page
In the file explorer, expand Pages, right-click the folder, and select New File.
Name the new file MyOrders.razor. In this file, write the following code:
@page "/myorders" @inject HttpClient HttpClient @inject NavigationManager NavigationManager <div class="top-bar"> <a class="logo" href=""> <img src="img/logo.svg" /> </a> <a href="" class="nav-tab"> <img src="img/pizza-slice.svg" /> <div>Get Pizza</div> </a> <a href="myorders" class="nav-tab active"> <img src="img/bike.svg" /> <div>My Orders</div> </a> </div> <div class="main"> @if (ordersWithStatus == null) { <text>Loading...</text> } else if (!ordersWithStatus.Any()) { <h2>No orders placed</h2> <a class="btn btn-success" href="">Order some pizza</a> } else { <div class="list-group orders-list"> @foreach (var item in ordersWithStatus) { <div class="list-group-item"> <div class="col"> <h5>@item.Order.CreatedTime.ToLongDateString()</h5> Items: <strong>@item.Order.Pizzas.Count()</strong>; Total price: <strong>£@item.Order.GetFormattedTotalPrice()</strong> </div> <div class="col"> Status: <strong>@item.StatusText</strong> </div> @if (@item.StatusText != "Delivered") { <div class="col flex-grow-0"> <a href="myorders/" class="btn btn-success"> Track > </a> </div> } </div> } </div> } </div> @code { List<OrderWithStatus> ordersWithStatus = new List<OrderWithStatus>(); protected override async Task OnParametersSetAsync() { ordersWithStatus = await HttpClient.GetFromJsonAsync<List<OrderWithStatus>>( $"{NavigationManager.BaseUri}orders"); } }The navigation needs to change on all the pages we have now to include a link to the new My orders page. Open Checkout.razor and Index.razor and replace the navigation with this code:
<div class="top-bar">
    <a class="logo" href="">
        <img src="img/logo.svg" />
    </a>

    <a href="" class="nav-tab active" >
        <img src="img/pizza-slice.svg" />
        <div>Get Pizza</div>
    </a>

    <a href="myorders" class="nav-tab" >
        <img src="img/bike.svg" />
        <div>My orders</div>
    </a>

</div>
By using
<a>elements, we can manage which is the active page manually by adding theactivecss class. Let's update all the navigation to use a NavLink component instead.On all three of the pages with navigation (Index.razor, Checkout.razor, and MyOrders.razor), use the same Blazor code for navigation:
<div class="top-bar">
    <a class="logo" href="">
        <img src="img/logo.svg" />
    </a>

    <NavLink href="" class="nav-tab" Match="NavLinkMatch.All">
        <img src="img/pizza-slice.svg" />
        <div>Get Pizza</div>
    </NavLink>

    <NavLink href="myorders" class="nav-tab">
        <img src="img/bike.svg" />
        <div>My Orders</div>
    </NavLink>
</div>
The
activecss class is now added automatically to pages by the NavLink component. You don't have to remember to do it on each page the navigation is on.The last step is to change
NavigationManagerto redirect to the myorders page after an order is placed. In the file explorer, expand Pages, and then select Checkout.razor.Change the
PlaceOrdermethod to redirect to the correct page by passing/myorderstoNavigationManager.NavigateTo():async Task PlaceOrder() { isSubmitting = true; var response = await HttpClient.PostAsJsonAsync($"{NavigationManager.BaseUri}orders", OrderState.Order); var newOrderId = await response.Content.ReadFromJsonAsync<int>(); OrderState.ResetOrder(); NavigationManager.NavigateTo("/myorders"); }In Visual Studio Code, select F5. Or on the Run menu, select Start Debugging.
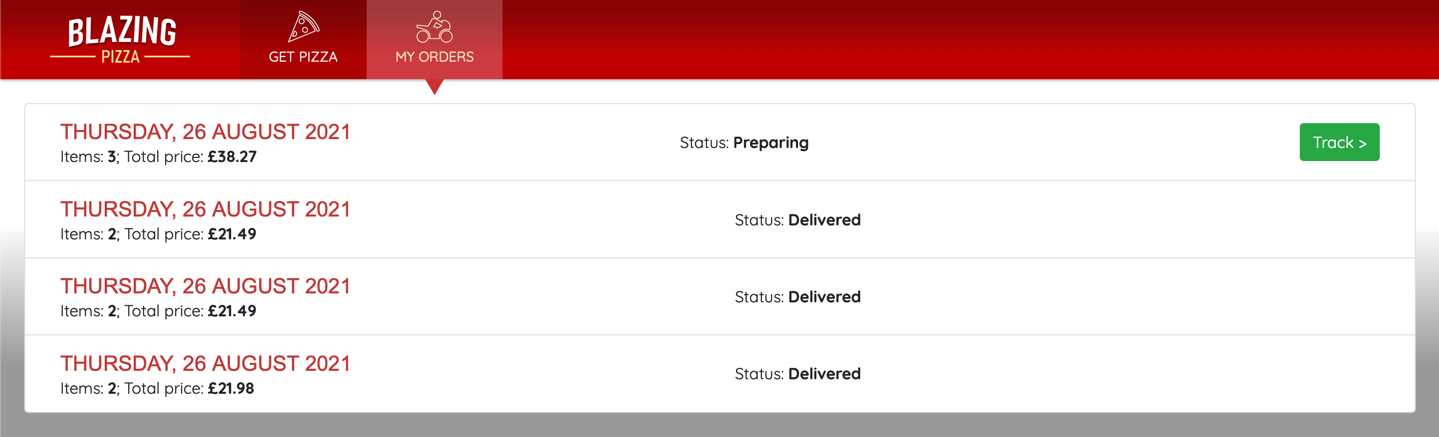
You should be able to order some pizzas and then see the orders currently in the database.
Select Shift + F5 to stop the app.