Auditing changes
A common problem in many financial systems is to locate the origin of errors and changes in data. There are several ways to audit changes in Business Central. You can set up the change log and you can monitor sensitive fields.
Set up the change log
The change log lets you track all direct modifications a user makes to data in the database. You must specify each table and field that you want the system to log, and then you must activate the change log.
Tracking changes can impact performance, which can cost you time, and increase the size of your database, which might cost you money. To reduce those costs, consider the following:
Use caution when choosing the tables and operations.
Don't add ledger entries and posted documents. Instead, prioritize system fields such as Created By and Created Date.
Try to avoid using the All Fields tracking type. Instead, select Some Fields and track only the most important fields.
In the Change Log Setup page, if you choose the Tables action, you can specify which tables you want to track changes for, and which changes to track. Business Central also tracks the following system tables.
Access Control
Change Log Setup
Change Log Setup (Table)
Change Log Setup (Field)
Permission
Permission Set
User
User Property
To activate the change log, select the search for page icon in the top-right corner of the page, enter Change Log Setup, and then select the related link.

When a user activates or deactivates the change log, this activity is logged, so you can always see which user deactivated or reactivated the change log.
To specify which tables you want to track changes for, choose Setup and then Tables on the Change Log Setup page.

For each table, you can log the insertion, modification, or deletion of fields. By clicking on the Log Insertion, Log Modification, or Log Deletion field, you can select one of the following options:
Some Fields
All Fields
If you select Some Fields, you can choose the AssistEdit action to view the list of fields of the table that you are setting up. There you can select the fields you want to log.

After you have set up the change log, activated it, and made a change to data, you can view and filter the changes on the Change Log Entries page.

The Change Log Entries page contains the fields shown in the following table:
Date and Time - Specifies the date and time when this change log entry was created.
User ID - Specifies the ID of the user who posted the entry, to be used, for example, in the change log entry.
Table Caption - Specifies the name of the table containing the changed field.
Primary Key Field 1/2/3 Value - Specifies the value of the first/second/third primary key for the changed field.
Field Caption - Specifies the field caption of the changed field.
Type of Change - Specifies the type of change made to the changed field.
Old Value / Old Value (Local) - Specifies the value that the field had before a user made changes to the field.
New Value / New Value (Local) - Specifies the value that the field had after a user made changes to the field.
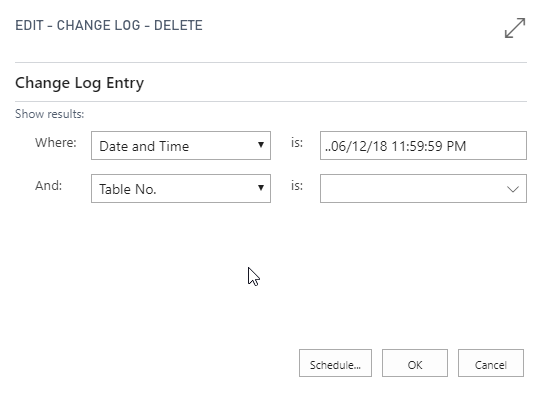
If you want to delete entries, you can do that on the Delete Change Log Entries page, where you can set filters based on date and time.
A user's changes are not visible in the Change Log Entries until the user's session is restarted, which happens in the following cases:
The session expired and was refreshed.
The user selected another company or Role Center.
The user signed out and back in.
Monitor sensitive fields
Keeping sensitive data secure and private is a core concern for most businesses. To add a layer of security, you can monitor important fields and be notified by email when someone changes a value. For example, you might want to be notified if someone changes your company's IBAN number.
You can use the Monitor Field Change Setup assisted setup guide to specify the fields that you want to monitor based on filter criteria, such as the data sensitivity classification for the fields. The guide also lets you specify the person who will receive an email notification when a change occurs, and the email account that will send the notification email. You must specify both the user notify and the account from which to send the notification. After you finish the guide, you can manage settings for field monitoring on the Field Monitoring Setup page.
To run the Monitor Field Change Setup assisted setup guide, follow these steps:
Select the search for page icon in the top-right corner of the page, enter assisted setup, and then select the related link.
On the Assisted Setup page, locate Set up field monitoring and click on the Title field to start the wizard.
After reading the welcome text, click Next.
In the following step, you can choose if you want to add fields based on their classification (sensitive, personal, company confidential). By choosing the View Data Classification Worksheet link, you can check these fields and their classification.

Click Next to move to the next step, where you can specify the notification recipient and the notification email account.
Select Next to move to the last step and finish the wizard.

After you finish the guide, you can manage settings for field monitoring on the Field Monitoring Setup page.
You can manage settings for field monitoring, such as whether to send an email notification or just log the change, for each field on the Monitored Fields Worksheet page. The page is also where you can add or remove fields to monitor.

The Monitored Fields Worksheet contains lines for both the change log and monitoring functions.
On the worksheet, you can do the following:
Add fields to be monitored.
Delete fields that you don't want to monitor anymore.
Set fields for notification. By selecting multiple lines and then select Set for Notification, the Notify fields for the selected lines is enabled. Changes in these fields are now notified by email.
Clear fields for notification if you don't want to be notified anymore by email.
Access the Field Monitoring Setup page.
Access the Field Change Entries page.
To check fields that are changed, you can choose Field Change Entries on the Monitored Fields Worksheet or use the search for page to search for the Monitored Field Log Entries page.

Entries contain information such as the field for which the value was changed, the original and new values, and who made the change and when they did so. If you click the Table No. field, the page where the change was made will open.
Over time, the list of entries on the Monitored Fields Log Entries page will grow. To reduce the number of entries you can create a retention policy that will delete entries after a specified period.
Set up retention policies
Administrators can define retention policies to specify how frequently they want Business Central to delete outdated data in tables that contain log entries and archived records. For example, cleaning up log entries can make it easier to work with the data that is relevant. Policies can include all data in the tables that is past the expiration date, or you can add filter criteria that will include only certain expired data in the policy.

Before you can set up retention policies, you must set up retention periods as follows:
Select the search for page icon in the top-right corner of the page, enter retention policies, and then choose the related link.
On the Retention Policies page, choose Navigate and the Retention Periods.
Select New and enter a code. For example, 10 MONTHS.
Enter a description.
In the Retention Period field, select a period. In this example, Custom, because there is no predefined retention period for 10 months.
In the Ret. Period Calculation field, enter a date formula. For this example, -10M. If you select a predefined retention period, the date formula is entered automatically.

Additionally, you must have the SUPER user permissions or the Retention Policy Setup permission set. Users who are granted the Retention Policy Setup permission set can define retention policies for tables, even if they don't have Read and Delete permissions for those tables. The job queue entry must run as a user with permissions to read and delete the data. We recommend that you don't grant the Retention Policy Setup permission set to users who shouldn't be allowed to delete data.
To set up a retention policy, follow these steps:
Select the search for page icon in the top-right corner of the page, enter retention policies, and then choose the related link.
On the Retention Policies page, select New.
In the Table ID field, enter the table for which you want to set up a retention policy. Microsoft provides a list of the tables that can be included in retention policies. However, if you want to add tables from an extension to a retention policy, a developer must add their tables to the list.
In the Retention Period field, select the period you want to use for this policy.
Select the Manual field if the retention policy can only be run manually.
Select the Apply to all records field if the retention policy applies to all records in the table. If you want to specify criteria for the records to delete, this toggle must be turned off. By turning the toggle off, the Record Retention Policy FastTab appears.
Select Enable to start using the retention policy.

You can use a job queue entry to apply retention policies to delete data automatically, or you can manually apply policies.
To apply a retention policy automatically, just create and enable a policy. When you enable a policy, a job queue entry that will apply retention policies according to the retention period you specify is created automatically. All retention policies will use the same job queue entry. By default, the job queue entry applies the policy every day at 0200 hours. You can change the default, but it's recommended that it runs outside business hours.
You can manually apply a policy by using the Apply Manually action on the Retention Policies page. If you want to always apply a policy manually, turn on the Manual toggle. The job queue entry will disregard the policy when it runs.
You can view activity related to retention policies in the Retention Policy Log page. For example, entries are created when a policy is applied, or if errors occurred when that happened.