Exercise - Creating an IoT alert
Exercise 1: Register a device
Note
As of the writing of these exercises Microsoft Flow has been renamed Power Automate. Power Automate is the name of the collection of automations that include flow. Expect some of the screen images here to transition to the new naming over time. Functionality should still be as expected.
Task 1: Create a flow
In this task, you will create a flow that will register a device.
Navigate to Power Apps and make sure you are in the correct environment.
Select Apps and click to open the Connected Field Service application.
Select Customer Assets.
Click Flow and select Create a flow.
Click Sign in.
Provide your credentials if required.
Select My Flows, click New, and select + Instant - from blank.
Click Skip.
Search for When a Record is Selected and select When a Record is Selected (Microsoft Dataverse).
Select Default for Environment, Customer Assets for Entity Name, and click + New Step.
Search for Create a Device and select Create a Device Azure IoT Central action.
Click Sign in.
Sign in with the credentials that you used to create the Azure IoT Central application and Accept the required permission.
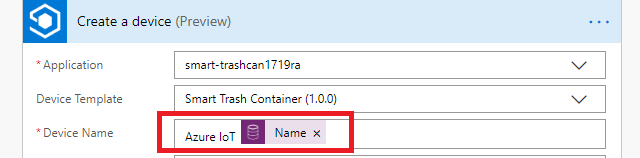
Select smart-trashcan (Name of the IoT Central Application created by you) for Application, select the template you created, click the Device Name enter Azure IoT and select Name from the Dynamic Content window.
Select Yes for Device Simulated.
Click + New Step.
Search for Create a New Record and select Create a New Record (Dataverse).
Select Current for Environment, select IoT Devices for Entity Name, click on the Name field, and select Device Name from the Create a Device action in the Dynamic Content pane.
Click on the ... Menu button and select Rename.
Rename the step Create Device and click Show Advanced Options.
Click on the Device ID field, type Azure IoT and select Device ID from the Create a Device action in the Dynamic Content pane.
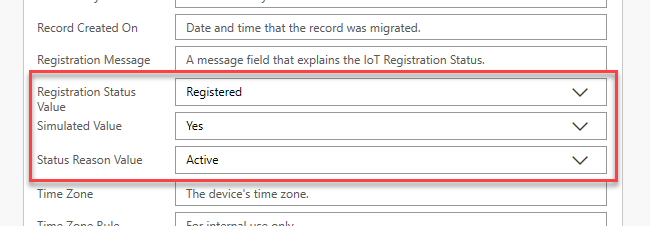
Set Registration Status Value to Registered, set Simulation Value to Yes, and set Status Reason Value to Active.
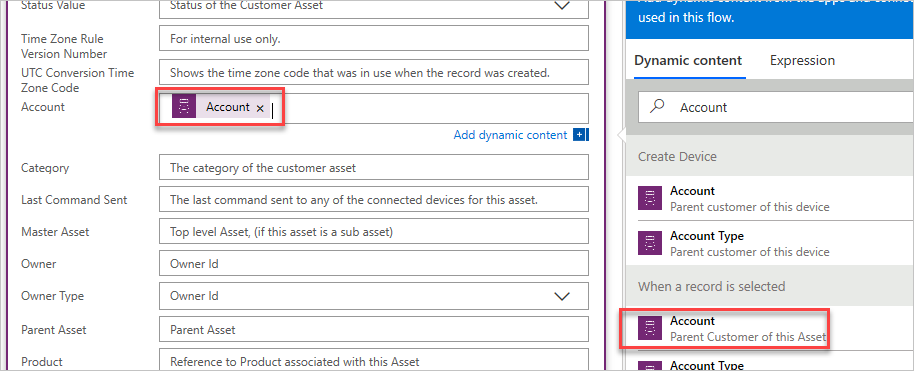
Click on the Account field, select Account from the When a record is created action in the Dynamic Content pane, and click Hide Advanced Options.
Click + New Step.
Search for List Records and select List Records (Dataverse).
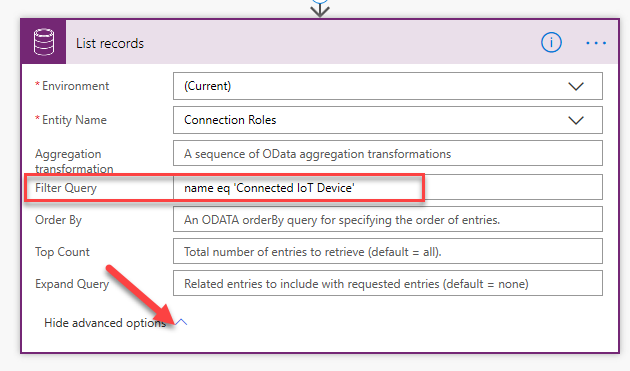
Select Current for Environment, select Connection Roles for Entity Name, and click Show Advanced Options.
Enter name eq 'Connected IoT Device' for Filter Query and click Hide Advanced Options.
Click + New Step.
Search for Create a new record and select Create a New Record (Dataverse).
Select Current for Environment and select Connections for Entity Name.
Rename the step Create Connection and click Show Advanced Options.
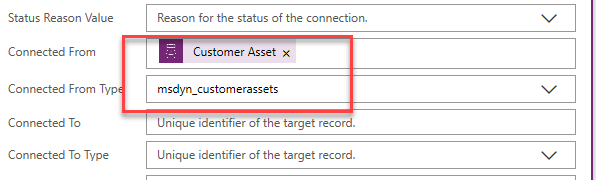
Click on the Connected From field and select Customer Asset from the When a record is selected action in the Dynamic Content pane.
Select msdyn_customerassets for Connected From Type.
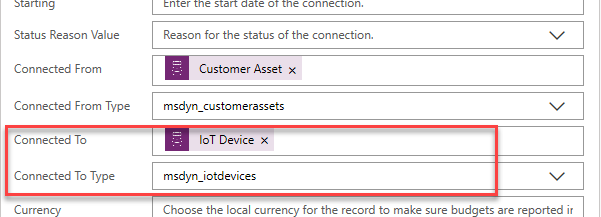
Click on the Connected To field and select IoT Device from the Create Device action in the Dynamic Content pane.
Select msdyn_iotdevices for Connected To Type.
Click on the Role To field and select Connection Role from the List Records action in the Dynamic Content pane.
Your step will get wrapped in Apply to Each. Click Add an Action.
Search for Update a Record and select Update a Record (Dataverse).
Select Current for Environment, select Customer Assets for Entity Name, click on the Record Identifier field and select Customer Asset from the When a record is selected action in the Dynamic Content pane.
Click Show Advanced Options.
Click on the Account field and select Account from the When a record is selected action in the Dynamic Content pane.
Click Hide Advanced Options.
Rename the step Update Customer Asset.
Scroll up and rename the flow Register Device.

Save the flow.
Task 2: Test registering device
Go back to your Connected Field Service application and navigate to Customer Assets.
Click New.
Enter Test Device for Name and click Save.
Click Flow and select the flow you created.
Click Continue.
Click Sign in if prompted and Continue.
Sign in with your Azure credentials.
Click Run Flow.
Click Done.
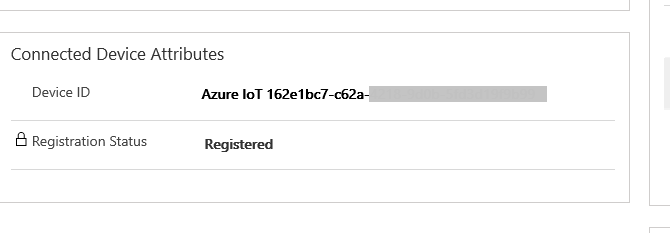
Refresh the page.
The flow should populate the Connect Device Attributes.
Exercise 2: Create IoT alerts
In this exercise, you will create IoT alert for the trash container pickup request.
Prerequisite: Make sure that you have CDS provisioned in the Default Environment.
Task 1: Create pickup request alert
Go to your Azure IoT Central and open the left navigation.
Select Devices.
Open the device created by the flow.
Select the Rules tab, you can't directly add new rule to a device. Click Device Templates.
Open the Device Template you created.
Select the Rules tab, click + New, and select Event.
Enter Pickup Requested for Name and click + to Add Condition.
Select Ready for Pickup for Measurement and click Save.
Click + to add an Action.
Select Microsoft Flow.
Click New and select Automated - from blank.
Enter Create Alerts for Name, search for IoT Central, select When a rule is fired, and click Create.

Click Sign in.
Provide your credentials.
Select smart-trashcan (Name of the IoT Central Application created by you) for Application, Pickup Requested for Rule and click New Step.
Search for Microsoft Dataverse and select List records.
Select the correct environment, select Customer Assets for Entity Name, and click Show Advanced Options.
Type msdyn_deviceid eq 'Azure IoT ' and place your curser inside after the IoT.
Select Device ID.
Click + New Step.
Select Apply to Each.
Select Value.
Click Add an Action.
Search for Microsoft Dataverse and select Create a New Record.
Select the correct environment, select IoT Alerts for Entity Name, and click on the Description field.
Select Device Name from the "When a rule is fired" action in the Dynamic Content and type - to the end of it.
Select Rule Name from the "When a rule is fired" action in the Dynamic Content and click Show Advanced Options.
Select the Alert Data field and click the Expression tab.
Type utcNow() and click OK.
Select the Alert Time field and select Timestamp.
Locate the Device ID field and select Device ID from the When a rule is fired action in the Dynamic Content pane.
Locate the Customer Asset field and select Customer Asset.
Click Hide Advanced Options.
Click Save.
Click Done.
Task 2: Test alerts
Select Devices and open the Test Device created by the Flow.
Select the Rules tab and select the Pickup Requested rule.
The simulator should generate new Pickup Request every few minutes.
Go to your Connected Field Service application.
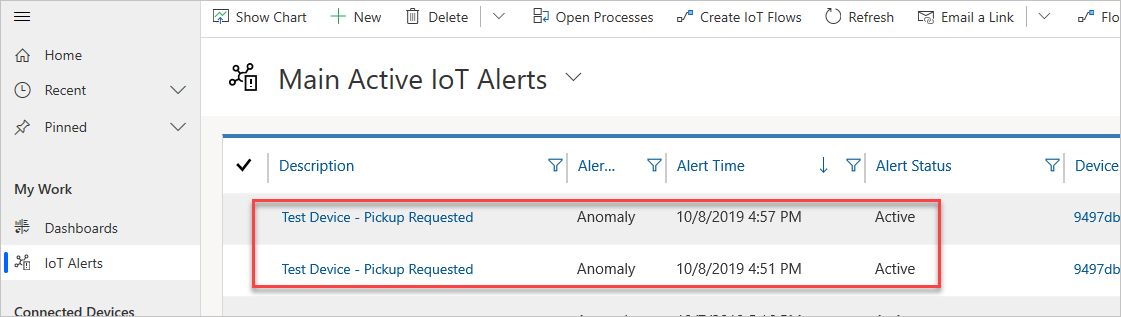
Select IoT Alerts.
You should see the alerts generated by the simulator. The alert Description will be a concatenation of Device Name and Rule Name.