Exercise - Bind data to forms
Here you'll update a fictitious application that allows users to book cruises into space. You'll add a form to allow someone to book a trip to the moon.
Clone the starter repository and explore the code
This module has an associated starter repository. This starter allows you to focus on only the concepts in this module.
You'll need Git and Visual Studio Code installed. In Visual Studio Code, you'll need the Live Server extension.
Clone the starter repository and open the folder in Visual Studio Code by running the following code.
git clone https://github.com/MicrosoftDocs/mslearn-vue-data-events
cd mslearn-vue-data-events/starter
code .
The starter application already contains the core data model you'll use. The product has information about the cruise itself, including the list of available cabins. You'll use the booking object to store the options the user selects for the reservation. You can see the setup in the index.js file.
Create the form
Create the form the user will use to set up the reservation:
In Visual Studio Code, open the index.html file.
On the line after the
TODO: Add booking formcomment, add the following HTML.<!-- TODO: Add booking form --> <form v-show="!booking.completed"> <h2>Book now!</h2> <div class="row"> <label for="product-cabin">Select class:</label> <select id="product-cabin" v-model="booking.cabinIndex"> <option v-for="(cabin, index) in product.cabins" :value="index"> {{ cabin.name }} $ {{ cabin.price.toLocaleString('en-US') }} </option> </select> </div> <div class="row"> <label for="notes">Notes:</label> <textarea v-model="booking.notes" rows="3"></textarea> </div> <div class="row"> <!--TODO: Add button later --> </div> </form>
Break down the code
Let's explore the HTML code you added to the page.
The form element
<form v-show="!booking.completed">
The form element is a normal HTML form element. The key attribute you added is v-show, which allows you to toggle the display of an item in Vue.js. In this design, you want to display the item if the booking is incomplete. By setting v-show to !booking.completed, you indicate that the form will display while the booking is ! (not) completed.
The select element for cabins
<select id="product-cabin" v-model="booking.cabinIndex">
    <option v-for="(cabin, index) in product.cabins" :value="index">
        {{ cabin.name }} $ {{ cabin.price.toLocaleString('en-US') }}
    </option>
</select>
You display the list of available cabins by using a select element. You want to bind the selected value, which will be the index, to booking.cabinIndex.
The list of available cabins is in product.cabins, so you use v-for to create the list of options for the drop-down list. You set the value of each option to the index. And you create a display of the name of the cabin and its price.
The text area element for notes
<textarea v-model="booking.notes" rows="3"></textarea>
You bind the booking.notes option to a textarea. You set the size by setting the rows attribute to 3.
The todo comment
Notice the TODO reminder to add a button. After you learn to create event handlers later in this module, you'll place the button here.
Tip
TODO comments are a great way to make notes about tasks you need to complete.
Test the results
Let's see your updated page!
- Save all files by selecting File > Save all.
- Open the command pallet by selecting Ctrl+Shift+P. On a Mac, select Cmd+Shift+P.
- Ensure Live Server is running by typing Live Server and then selecting Live Server: Open with Live Server.
- In a browser, go to
http://localhost:5500.
You see that the page displays the following image:
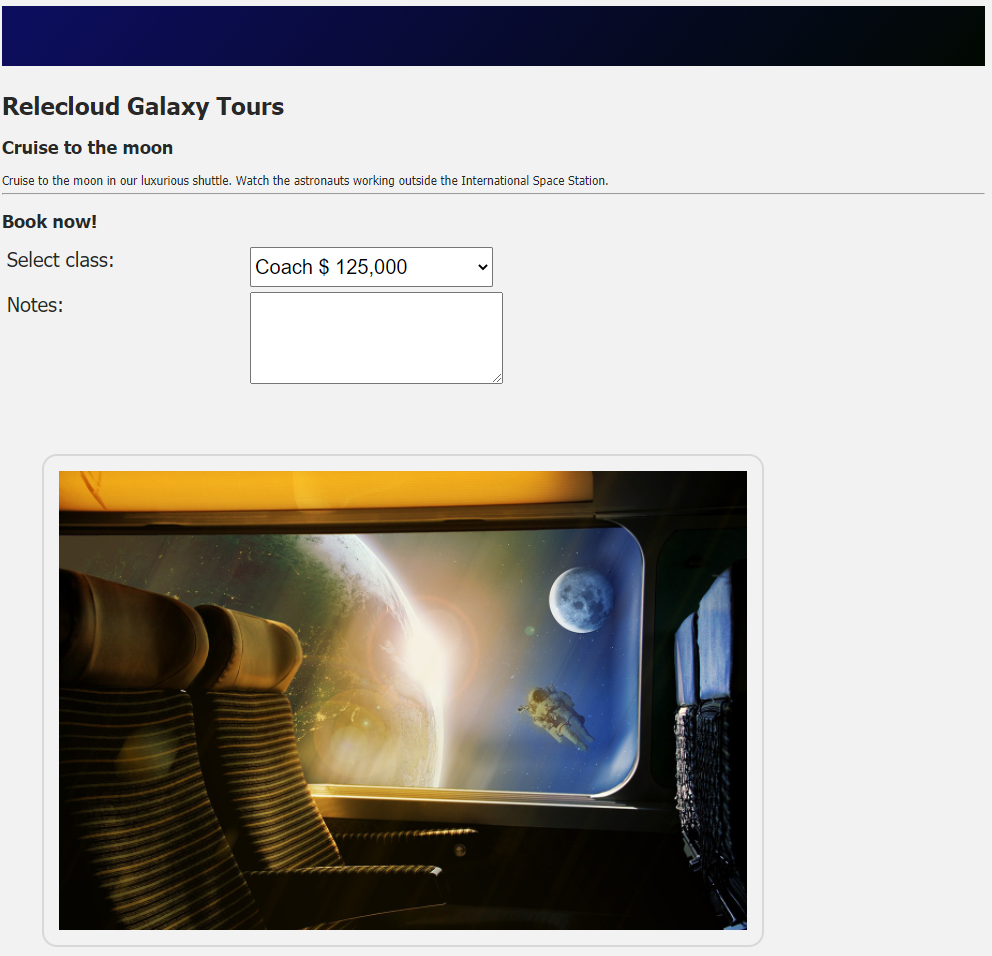
You have now bound Vue data to a form.