LinkedIn Learning and Azure AD SSO Implementation Guide
SSO Implementation Overview
This document shows you how to integrate LinkedIn Learning with Azure Active Directory (Azure AD). When you integrate LinkedIn Learning with Azure AD, you can perform the following tasks:
- Control in Azure AD who has access to LinkedIn Learning.
- Enable your users to be automatically signed-in to LinkedIn Learning with their Azure AD login.
- Automate user management in one central location - the Azure portal.
Prerequisites
To get started, you need the following:
- An Azure AD account
- A LinkedIn Learning enterprise account
- Full administrator privileges in both platforms
Why you Should Use Single Sign-On
- Leverage your existing company's authentication
- Better security when employees use your company's established password protocols rather than their individual accounts
- Easier user management when employees leave your company with automatic provisioning and de-provisioning
Scenario Description
In this guide, you can configure SSO in your Azure AD environment.
- LinkedIn Learning supports SP- and IDP- initiated SSO.
- LinkedIn Learning supports Just In Time (JIT) user provisioning.
- LinkedIn Learning supports Automatic Provisioning (SCIM).
For more information about Single Sign-on authentication, review our LinkedIn Learning Single Sign-on Implementation Guide.
Configure LinkedIn Learning SSO
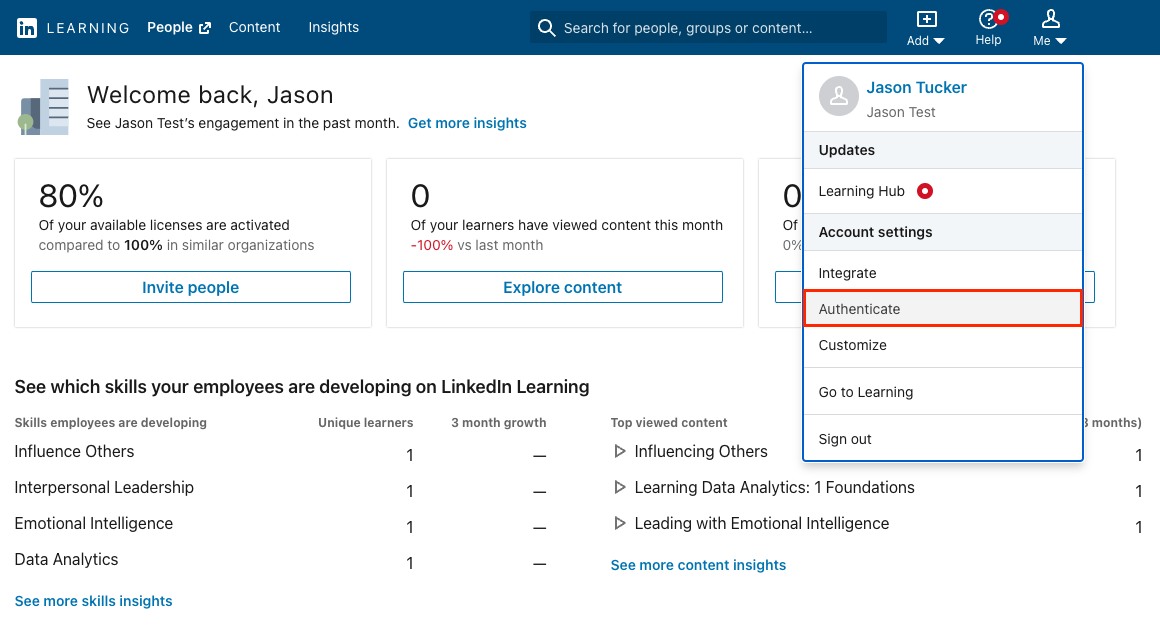
After you log in to LinkedIn Learning, if you are not already in the Admin screen, select Go to Admin, then click Me > Authenticate.
Select Configure single sign-on under Authenticate and click Add new SSO.
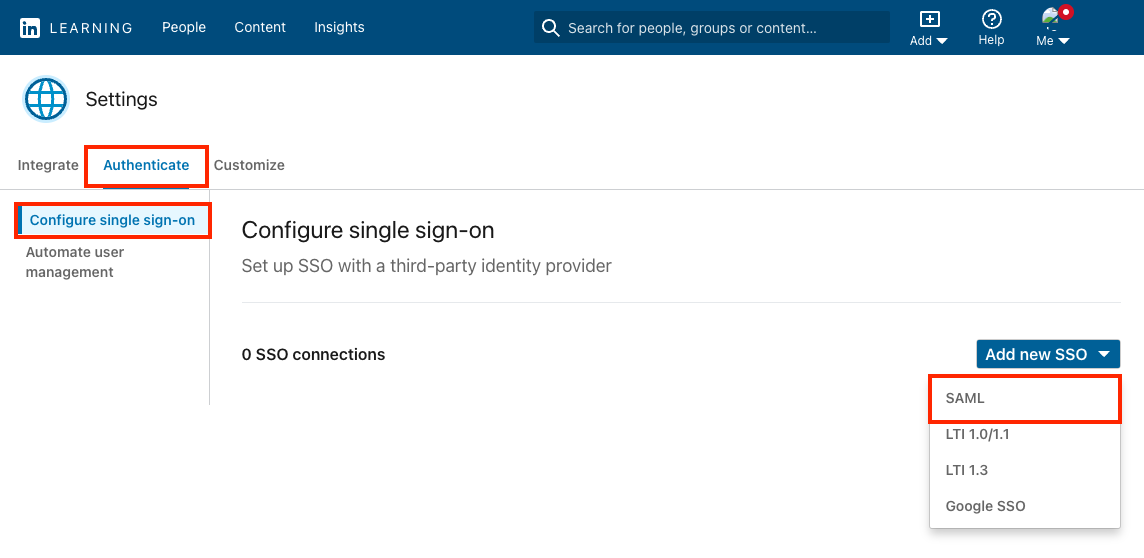
Select SAML from the Add new SSO drop down.
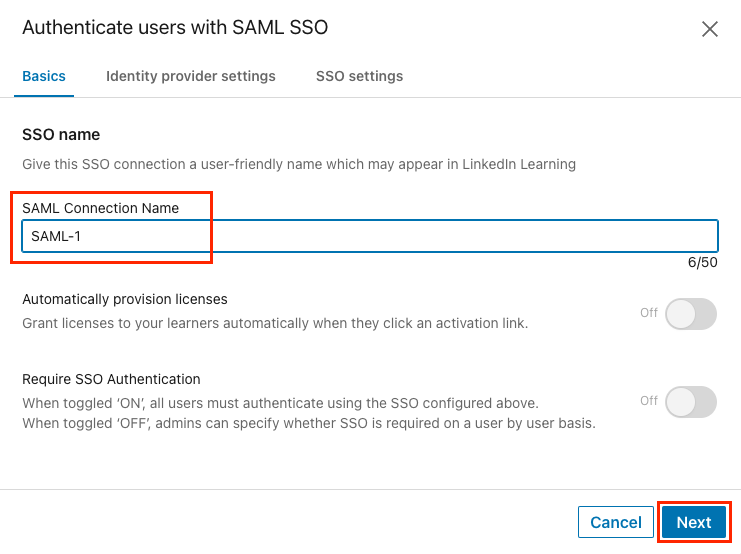
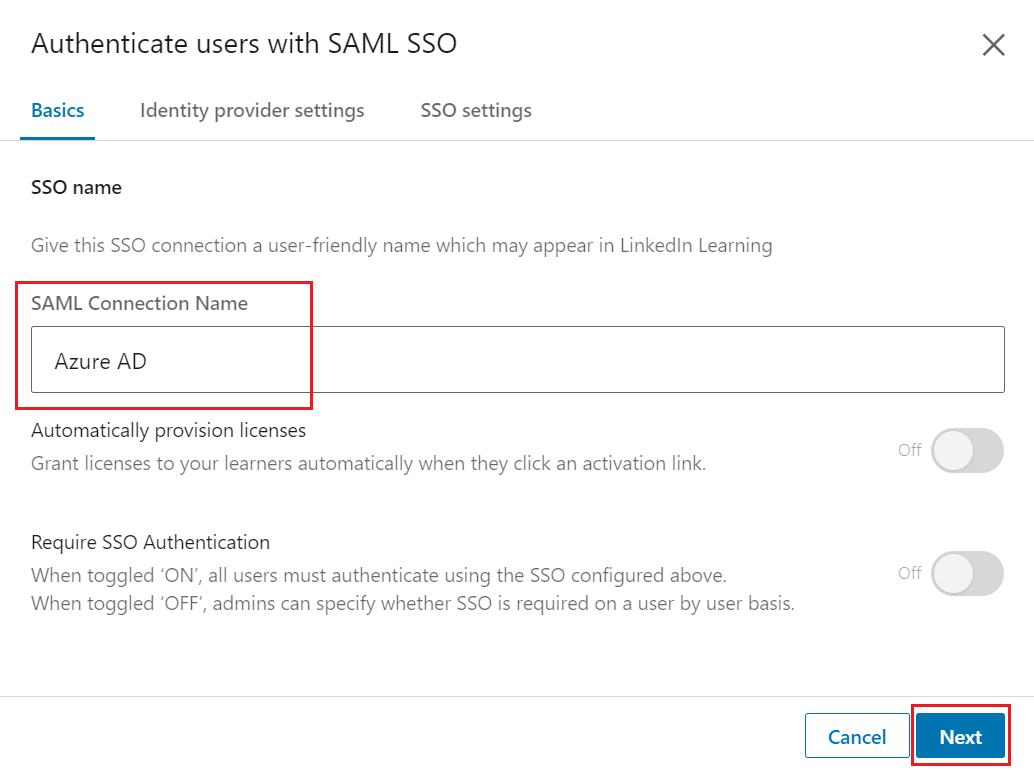
Under Basics tab, give your SSO connection a name (ex: Azure AD SSO) and click Next.
Navigate to Identity provider settings tab, click Load and copy information from fields to copy the required fields (Entity ID and Assertion Consumer Service (ACS) URL) and save them for use in the next section.
Configure Azure AD SSO
Follow these steps to enable Azure AD SSO in the Azure portal.
Sign into your Azure admin portal.
Navigate to Azure Active Directory.
In the left-hand navigation pane, select Enterprise Applications.
To add new application, select New application.
In Search box above the gallery, enter "LinkedIn Learning".
Select LinkedIn Learning from results panel and then click Create to add the application. Wait a few seconds while the app is added to your tenant.
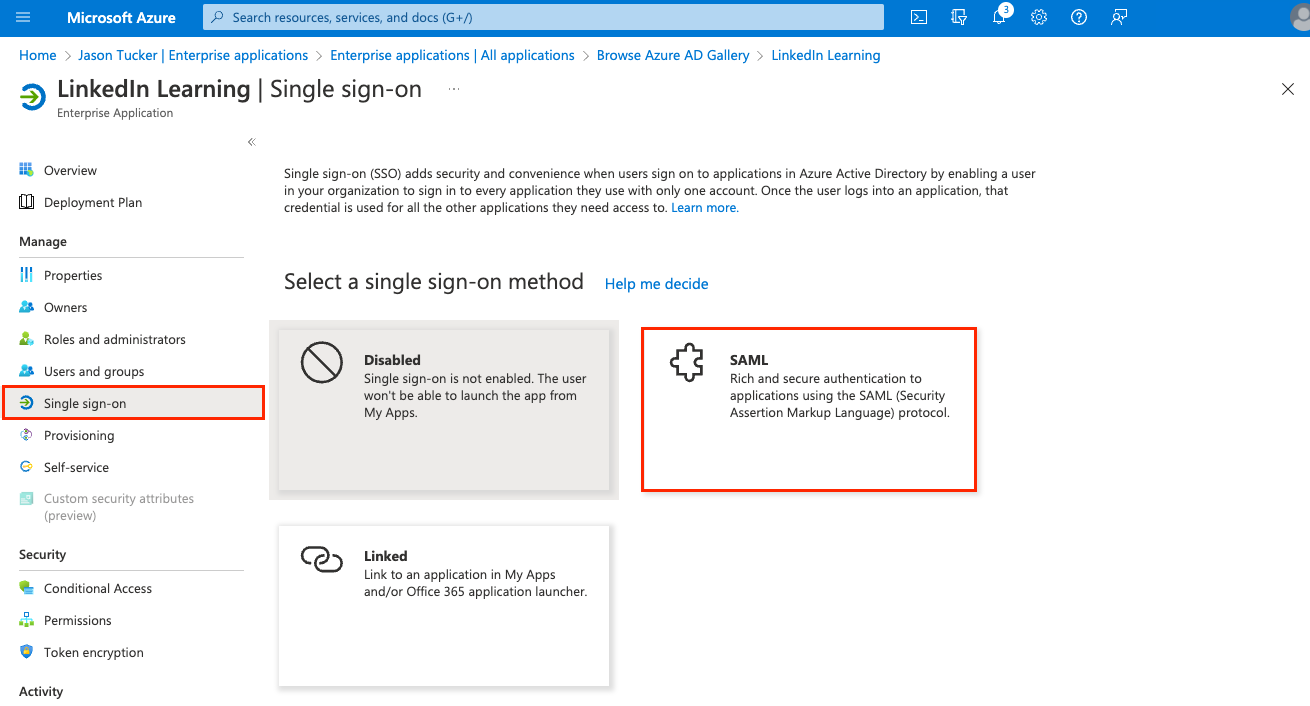
On the next screen, click Single sign-on, then select SAML.
Select the Edit icon in the Basic SAML Configuration box to edit the settings.
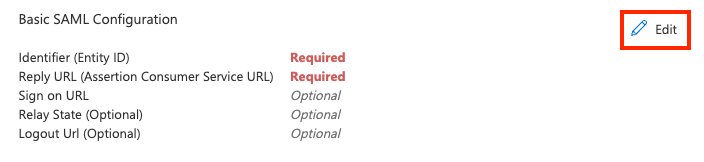
In the Basic SAML Configuration section, perform the following steps:
In the Identifier (Entity ID) section, click Add identifier and enter the Entity ID previously copied from the LinkedIn Learning Portal.
In the Reply URL section, enter the Assertion Consumer Service (ACS) URL previously copied from the LinkedIn Learning Portal.
In the Sign on URL section, paste the Assertion Consumer Service (ACS) URL value again and replace
/saml/with/login/. Once you have completed this task, the Sign-on URL should follow this format:https://www.linkedin.com/checkpoint/enterprise/login/<AccountId>?application=learning&applicationInstanceId=<InstanceId>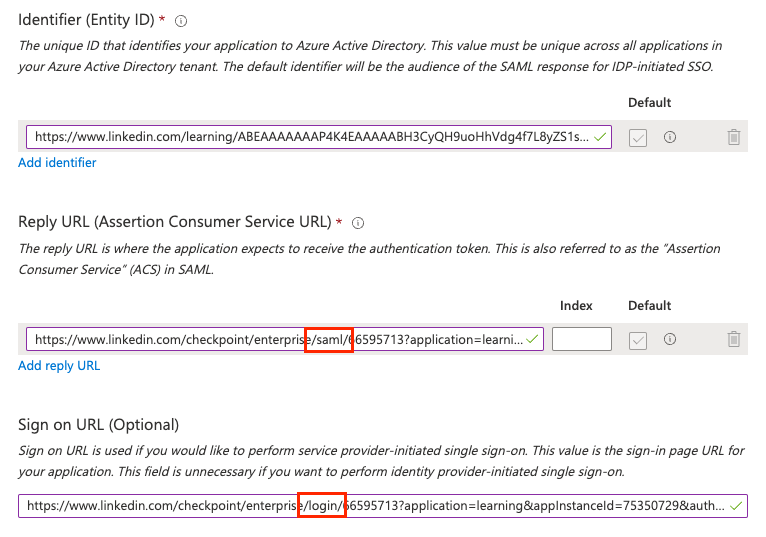
Click Save.
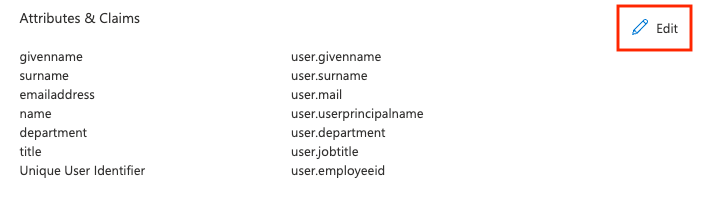
In the Attributes & Claims section, you can add or edit the user attributes that are passed to LinkedIn Learning. If you add custom attributes not included in the default list, you may need to map the custom attributes in LinkedIn Learning.
Note
By default, the Unique User Identifier is mapped to user.userprincipalname. If user.userprincipalname is not a unique, immutable value in your organization, you may want to change the source attribute to user.employeeid.
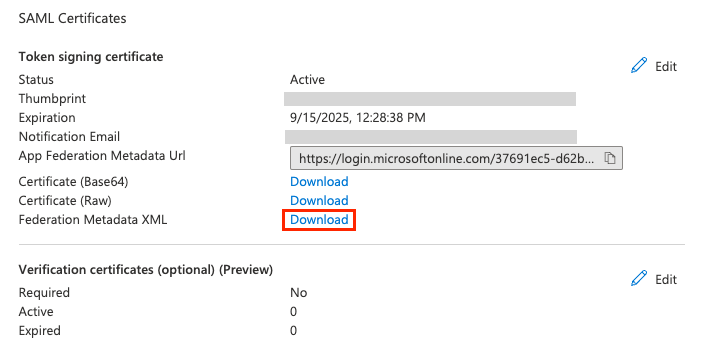
In the SAML Certificate section, find Federation Metadata XML and select Download to download the SAML metadata XML file and save it on your computer.
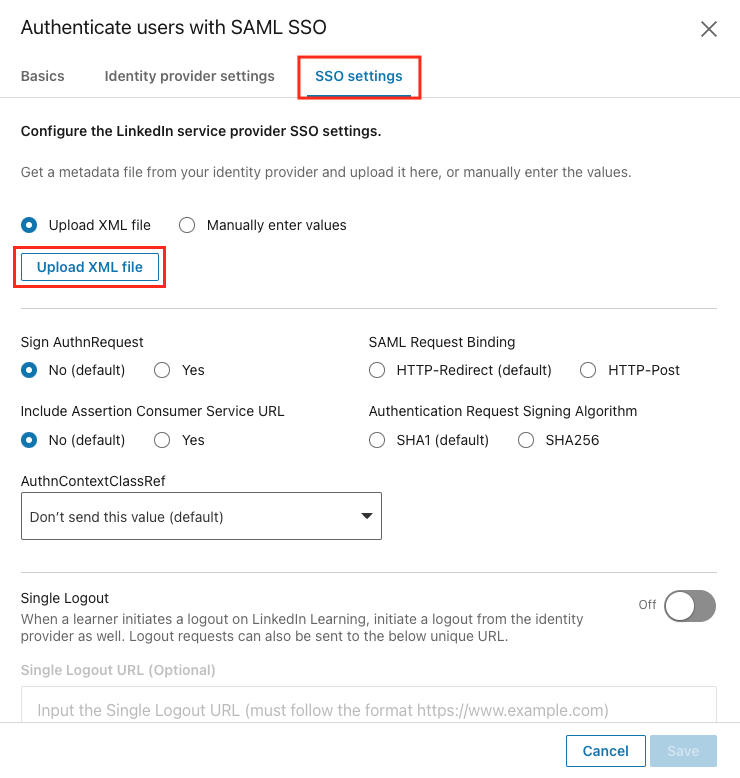
Back in the LinkedIn Learning admin portal, navigate to the LinkedIn Learning SSO settings tab. Click Upload XML file and upload the Federation Metadata XML file you downloaded from the Azure AD portal in the previous step. Click Save.
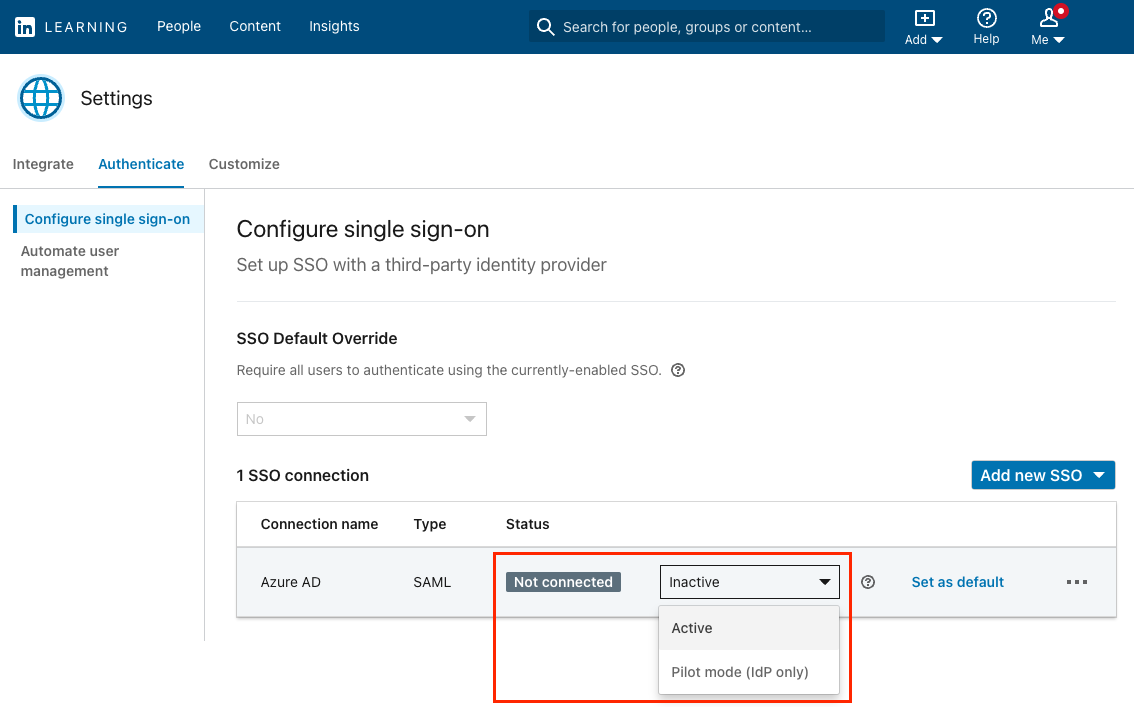
After completing your configuration, enable SSO in LinkedIn Learning by selecting "Active" from the Status drop down.
Verify your SSO
To validate your SSO configuration and invite learners, take the following steps:
In the LinkedIn Learning admin interface, click on the People tab.
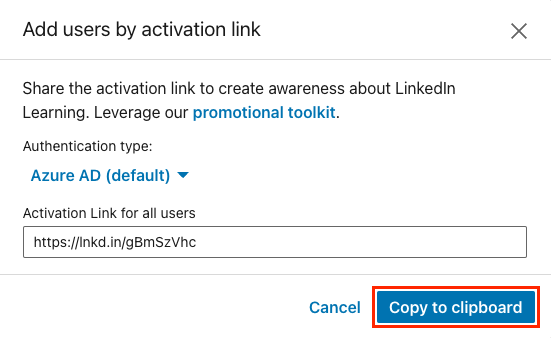
Click on Add new users and select Add users by activation link.
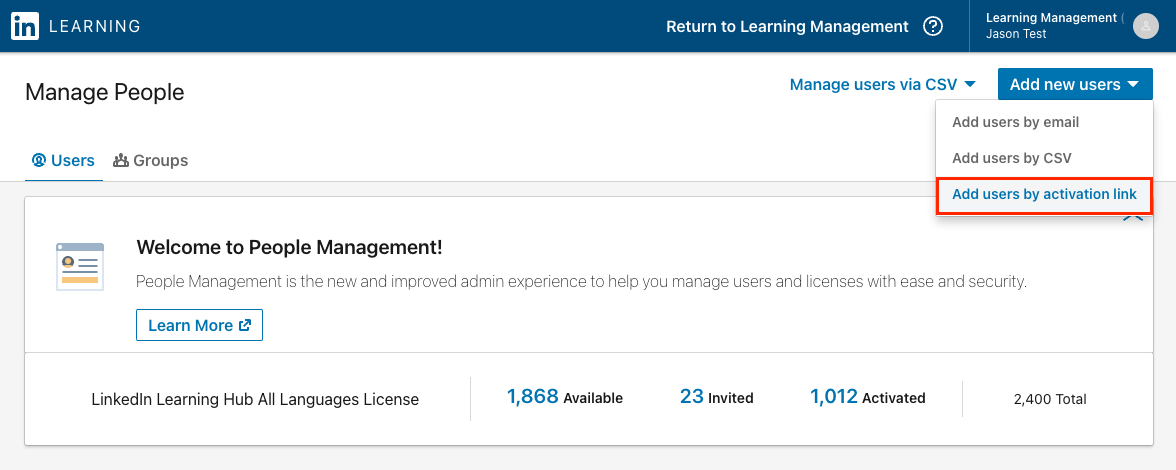
Copy the activation link and paste it into your browser. This will trigger a Service Provider-initiated authentication flow. This link can be sent to anyone who has been provisioned the LinkedIn Learning application in Azure.
Connecting your LinkedIn profile to Learning
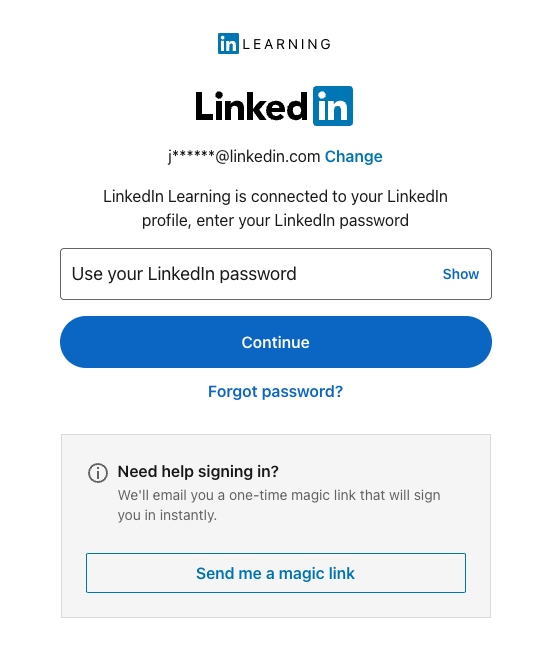
LinkedIn Learning allows learners to connect their personal LinkedIn profile to their organization's LinkedIn Learning account. This step, known as profile binding, allows LinkedIn Learning to surface content that aligns with your learners' goals and interests.
If you see the below login screen while testing SSO, it does not mean SSO is broken. It simply means you need to re-login to LinkedIn.com with your personal profile credentials, separate from your organization SSO.
Congratulations! Your learners now can access LinkedIn Learning via their Azure AD SSO instance.
Configure Automatic User Provisioning
Azure Active Directory allows for automated provisioning in LinkedIn Learning to automate management of LinkedIn Learning licenses, user attributes and user group membership(s). Provisioning can be configured in the same Azure AD Single Sign-On application you just created. To configure automatic provisioning, follow the instructions in this document: Azure AD Automated Provisioning.
When enabling provisioning, it is very important to make sure the Unique User Identifier matches the identifier you configured when enabling SSO. This value is User Principle Name by default but should be changed to user.employeeid if UPN values have the potential to change in your organization (ex: name changes). If you have any doubts about which identifier to use, please reach out to your LinkedIn Learning account team for guidance.
If you are new to LinkedIn Learning and have not launched to your user base yet, make sure to only provision the application to the administrators and/or test group who should have access prior to your official launch.
Support
Below you can find supporting documentation and other resources.
Supporting Documentation
Troubleshooting
If your users encounter the following error, it is because they have not been provisioned the LinkedIn Learning application in Azure AD and will need to be resolved by your Azure administrator.
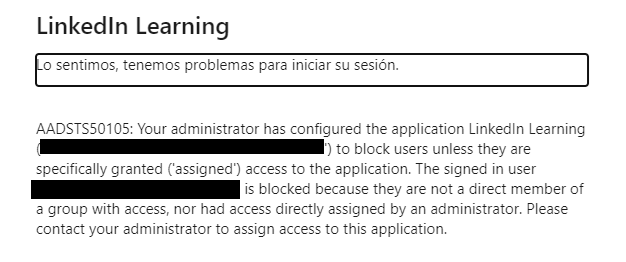
To correct this error, the Azure AD admin must do one of the following:
Adjust provisioning for the application to allow all users to access.
Assign the affected user(s) to the application.
Configure automated provisioning for the application to allow access to the appropriate users/groups.
Technical Issues
If you have technical issues with the SSO setup, contact your account team or application support team through the LinkedIn Learning Help Center.
LinkedIn's Privacy and Data Security Policy
https://www.linkedin.com/legal/privacy-policy
LinkedIn Security Contacts
If you have any security questions or you would like to report a security issue, write to us at security@linkedin.com.
Feedback
Coming soon: Throughout 2024 we will be phasing out GitHub Issues as the feedback mechanism for content and replacing it with a new feedback system. For more information see: https://aka.ms/ContentUserFeedback.
Submit and view feedback for