Get started by clicking the Launch Project button
Use this tutorial to learn how to open and close DevTools by clicking the Launch Project button, to run Demo To Do on a localhost web server and store the URL for the webpage in launch.json.
We'll use the demo-to-do app to demonstrate the Launch Project button after pointing that button to a localhost URL, such as http://localhost:8080. The Launch Project button starts DevTools in debug mode. This is the main way to open DevTools when your webpage requires running on a web server. As a preliminary step, we'll creating a launch.json file and edit the URL in it to point to localhost serving out the demo-to-do example app.
You don't always need to use this approach, because in many cases, right-clicking an HTML file works. However, many webpages use APIs which require the webpage to be running on a web server, so here are specific steps you can follow.
Step 1: Install DevTools and prerequisites
- If you haven't already, do the steps in Installing the DevTools extension for Visual Studio Code, and then continue below.
Step 2: Start the web server
This section is in support of clicking the Launch Project button.
These steps explain how to start http-server by using the cross-platform git bash shell, which is part of git. Although you could use Visual Studio Code > View > Terminal to start the server, it's better to start the server from a command prompt that's outside of Visual Studio Code, so that the server remains running even if you close and reopen Visual Studio Code or the folder.
If you haven't already, set up and start a web server for the first time, serving out the demo-to-do app from the Demos repo. To do this, see Step 6: Set up a localhost server in Installing the DevTools extension for Visual Studio Code.
Open git bash. For example, on Windows, press Start and then enter git bash.
cdinto the the specific folder you want to serve via http,Demos\demo-to-do\:In git bash, use forward slashes for file paths. For example:
cd C:/Users/username/Documents/GitHub/Demos/demo-to-doEnter the command
npx http-server. A local webserver starts on port 8080.npx http-server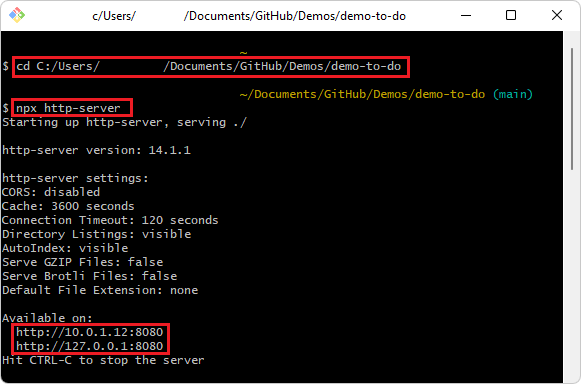
Information about the server and localhost URL is displayed, such as:
Starting up http-server, serving ./

Available on:
http://10.0.1.8:8080
http://127.0.0.1:8080
Hit CTRL-C to stop the server
The displayed URLs are usually equivalent to the common standard URL,
http://localhost:8080.
Step 3: Set up launch.json
This section is in support of clicking the Launch Project button.
In Visual Studio Code, select File > Open Folder. Select your project directory that contains
index.htmlfor the cloned demo-to-do sample in the Demos repo, such asC:\Users\username\Documents\GitHub\Demos\demo-to-do\.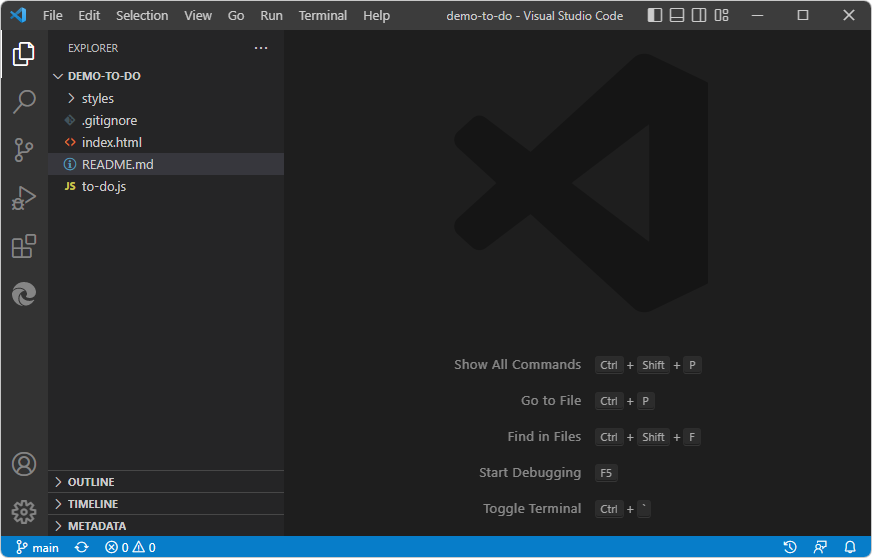
Just like in the repo's demo-to-do folder, initially there's no
.vscodefolder, and nolaunch.jsonfile in that folder.In the Activity Bar, click Microsoft Edge Tools (
 ). The Microsoft Edge Tools pane opens.
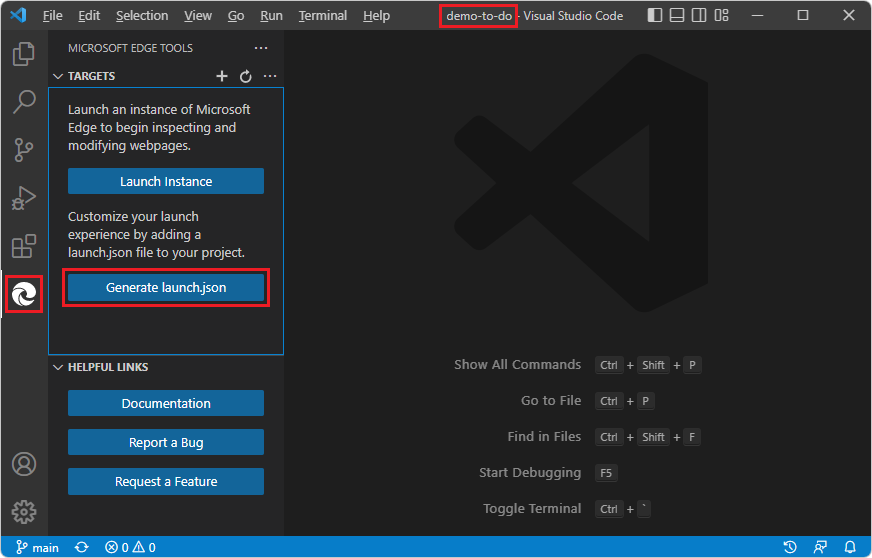
Click the Generate launch.json button:
The new
launch.jsonfile opens.In several places in the
launch.jsonfile, on each of the"url"lines, scroll to the right , and note the comment, "Provide your project's url":"url": "c:\\Users\\username\\.vscode\\extensions\\ms-edgedevtools.vscode-edge-devtools-2.1.1\\out\\startpage\\index.html", // Provide your project's url to finish configuringIn a web browser, go to the
http://localhost/URL where the demo-to-do.htmlfile is on the server, such as the common standard URL,http://localhost:8080.Copy the URL from the address bar.
In
launch.json, in each URL string, paste the URL for your cloned copy of the demo-to-do app, such as:http://localhost:8080. Paste the path inside the quoted path string in one of the"url"strings. For example:"url": "http://localhost:8080", // Provide your project's url to finish configuringCopy and paste the modified URL line to the other places in the
launch.jsonfile.Tip: To modify all instances at the same time, you can copy an updated URL string, then select an instance of the initial URL string, press Ctrl+Shift+L to select all instances, and then paste the updated string.
Save the
launch.jsonfile.
Step 4: Click the Launch Project button
In Visual Studio Code, in the Activity Bar, click the Microsoft Edge Tools (
) button. The Microsoft Edge Tools pane opens, now containing a Launch Project button but not a Generate launch.json file button: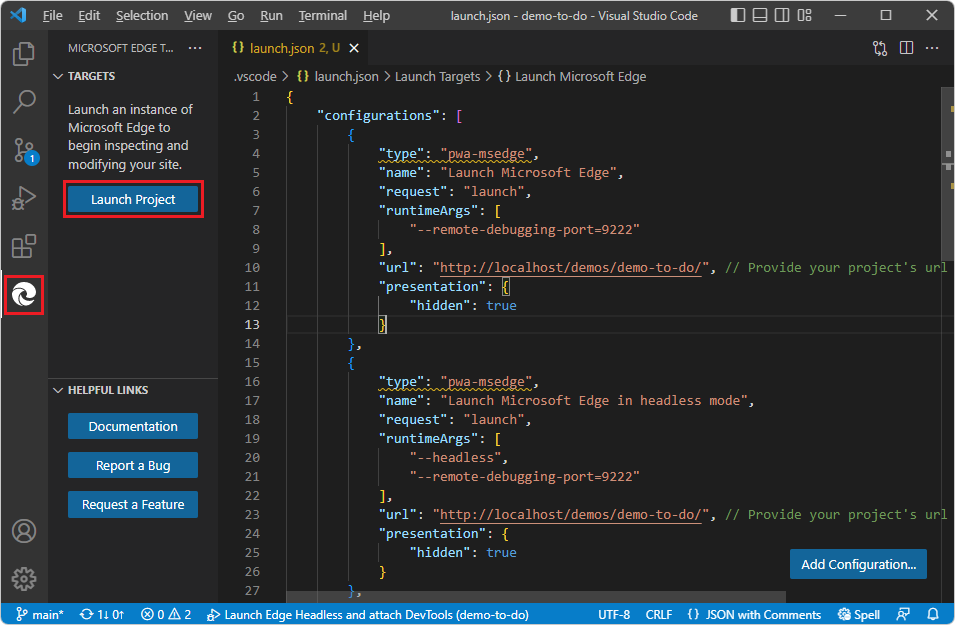
Click the Launch Project button.
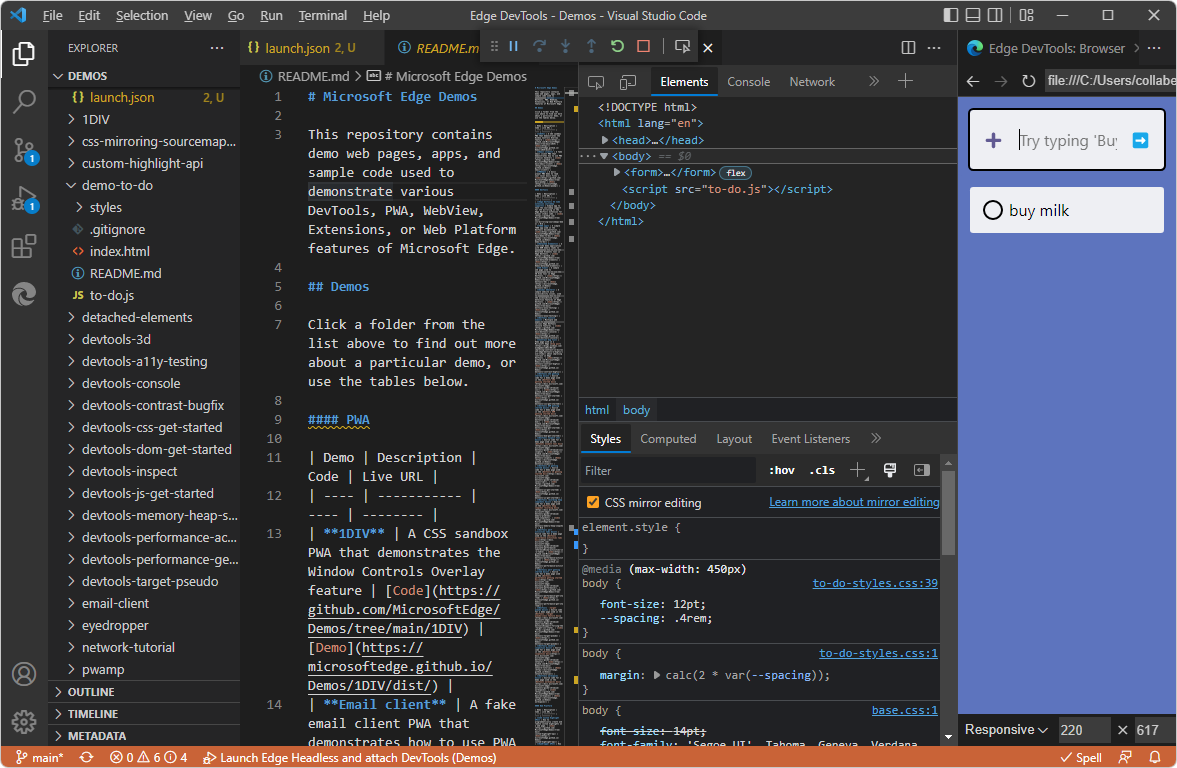
The Edge DevTools tab and the Edge DevTools: Browser tab open in separate panes, showing the demo-to-do web app:
At this point, you could work with CSS edits or step through code in the debugger. See these sections of the tutorial Get started by right-clicking an HTML file:
- Step 4: Edit CSS in DevTools, updating the .css file automatically
- Step 5: Step through JavaScript code in the Debugger
Step 5: Close DevTools
To end debugging and close the Edge DevTools tabs:
In the Debug toolbar, click the Stop (Shift+F5) button:
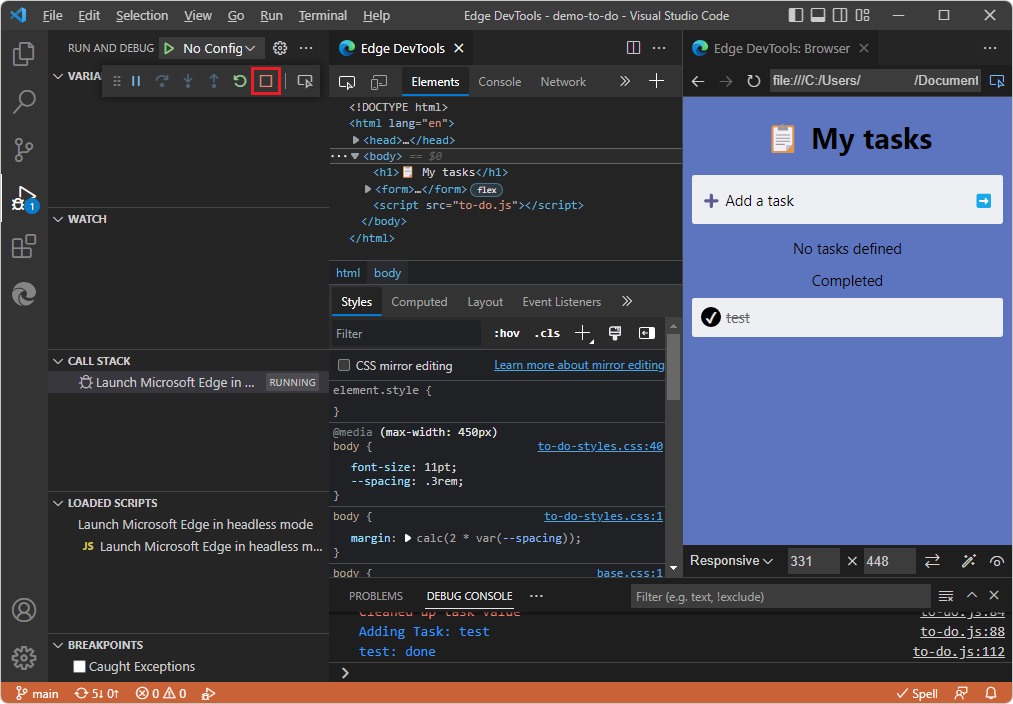
Or, on the Run menu, select Stop Debugging. Or, close the two DevTools tabs. The Debug toolbar closes.
See also:
- Closing DevTools in Opening DevTools and the DevTools browser.
You've finished the tutorial "Get started by clicking the Launch Project button". It's recommended that you also do the other tutorials; see Get started using the DevTools extension for Visual Studio Code.
See also
GitHub:
- demo-to-do - the demo web app running on the
github.ioserver. - Source code for demo-to-do
- MicrosoftEdge/Demos repo
Feedback
Coming soon: Throughout 2024 we will be phasing out GitHub Issues as the feedback mechanism for content and replacing it with a new feedback system. For more information see: https://aka.ms/ContentUserFeedback.
Submit and view feedback for