Get started with WebView2 in WPF apps
This article covers how to set up your development tools and create an initial WebView2 app for Windows Presentation Foundation (WPF), and learn about WebView2 concepts along the way.
In this tutorial, you use the WPF Application or WPF App (.NET Framework) project template to create a WPF app, and then install the WebView2 SDK for the project to add WebView2.
Completed project
A completed version of this tutorial project is available in the WebView2Samples repo:
- Sample name: WPF_GettingStarted
- Repo directory: WPF_GettingStarted
- Solution file: WPFSample.sln
Step 1 - Install Visual Studio with .NET support
This tutorial requires Microsoft Visual Studio, not Microsoft Visual Studio Code. This article mainly describes using Visual Studio 2022.
Install Visual Studio. Install .NET desktop development support, to get the needed project templates, as follows.
If you're at the Visual Studio startup screen, scroll to the bottom of the Create a new project dialog and click the link Open without code. Visual Studio opens.
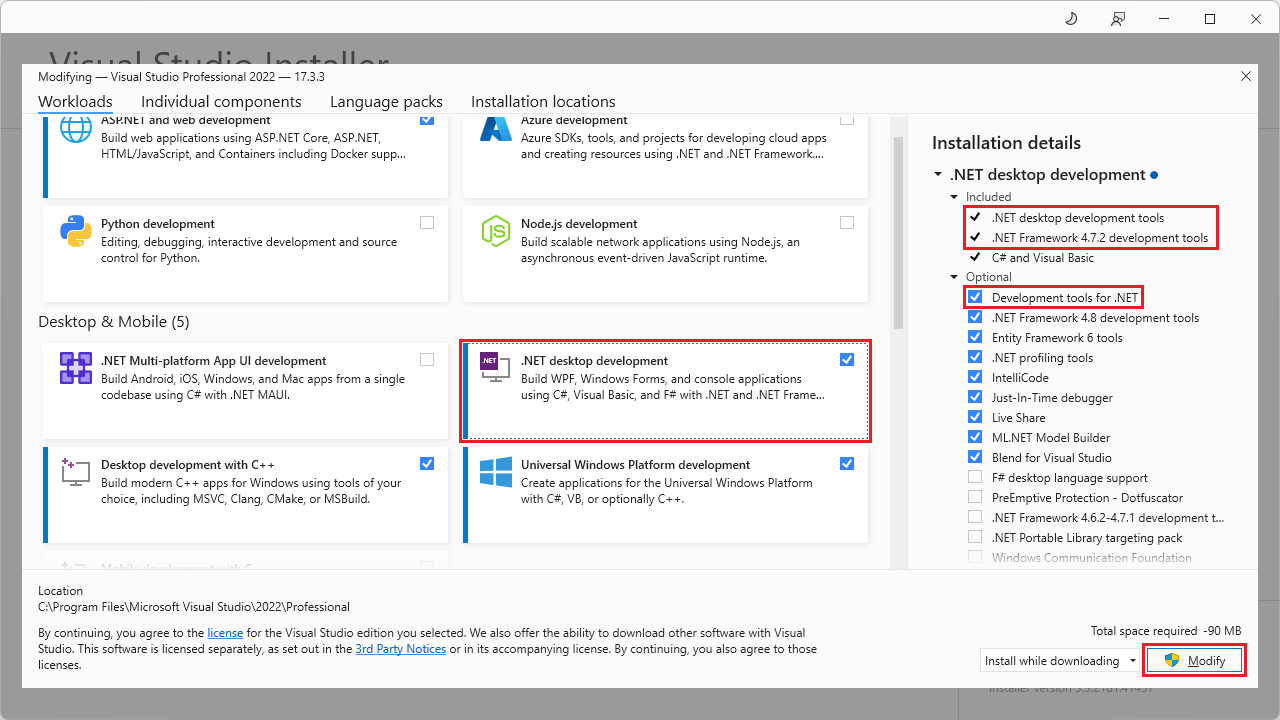
In Visual Studio, select Tools > Get Tools and Features. The Visual Studio Installer window opens, and the Modifying dialog opens over it.
Select the .NET desktop development workload so there's a checkmark on it.
In the section Installation details > .NET desktop development > Included on the right, make sure .NET desktop development tools and .NET Framework 4.7.2 development tools are listed, with a checkmark next to them.
In the section Installation details > .NET desktop development > Optional on the right:
- If you're using Visual Studio 2022, make sure Development tools for .NET is selected:
- If you're using Visual Studio 2019, make sure .NET development tools is selected:
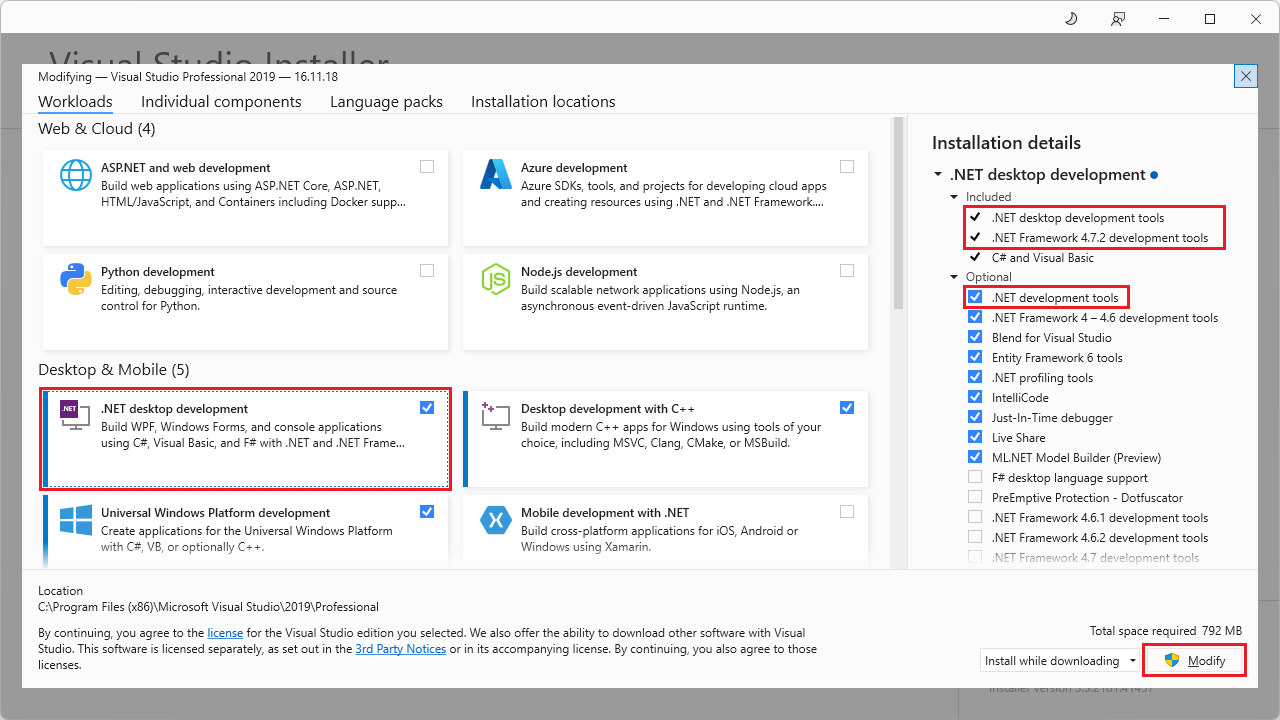
Click the Modify button.
This tutorial also works with Visual Studio 2017. See Visual Studio older downloads. Install .NET support, to get the needed project templates, similar to the above steps.
Step 2 - Install a preview channel of Microsoft Edge
Download any Microsoft Edge preview channel (Beta, Dev, or Canary) on a supported operating system:
- Windows 10
- Windows 11
To do this, go to Become a Microsoft Edge Insider. The preview channels are also called Insider channels.
We recommend using the Canary channel of Microsoft Edge. The minimum required version is 82.0.488.0.
Step 3 - Create a single-window WebView2 app
Start by creating a basic desktop project that contains a single main window.
Decide whether to create a .NET Core/5/6 project (newer), or a WPF App (.NET Framework) project (older). For more information, see:
- .NET history in What is .NET? Introduction and overview.
- .NET at Wikipedia.
Follow the applicable section below.
Creating a .NET Core/5/6 project
If you are creating a .NET Core/5/6 project, do the following steps. Otherwise, skip to Creating a WPF App (.NET Framework) project.
Open Microsoft Visual Studio, such as Visual Studio 2022.
In the opening panel, click Create new project. Or, in the main Visual Studio window, select File > New > Project. The Create a new project dialog opens.
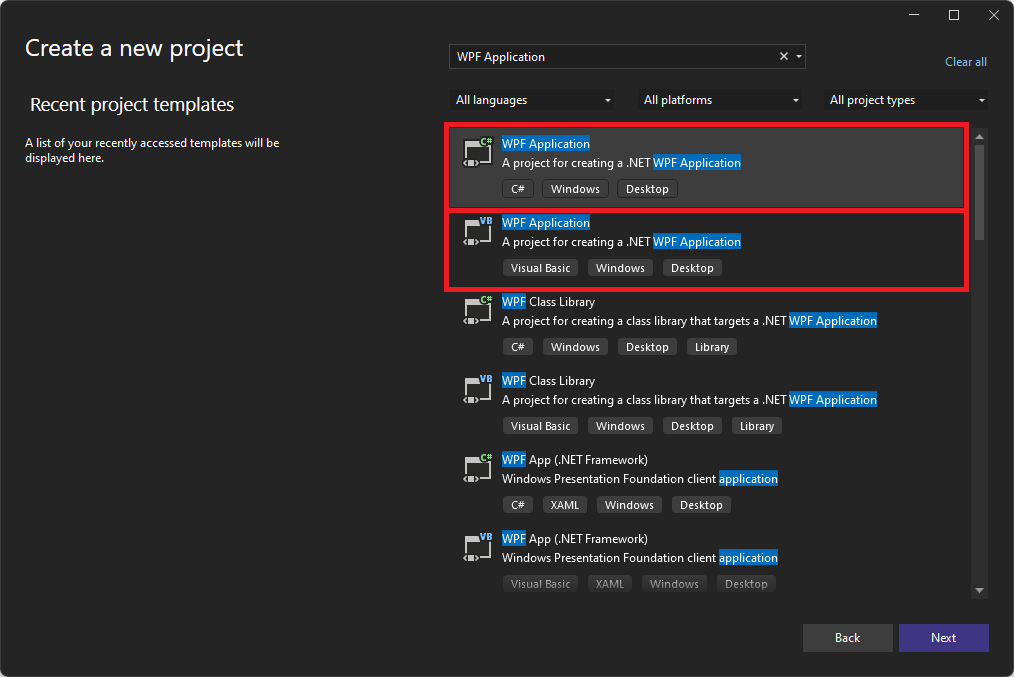
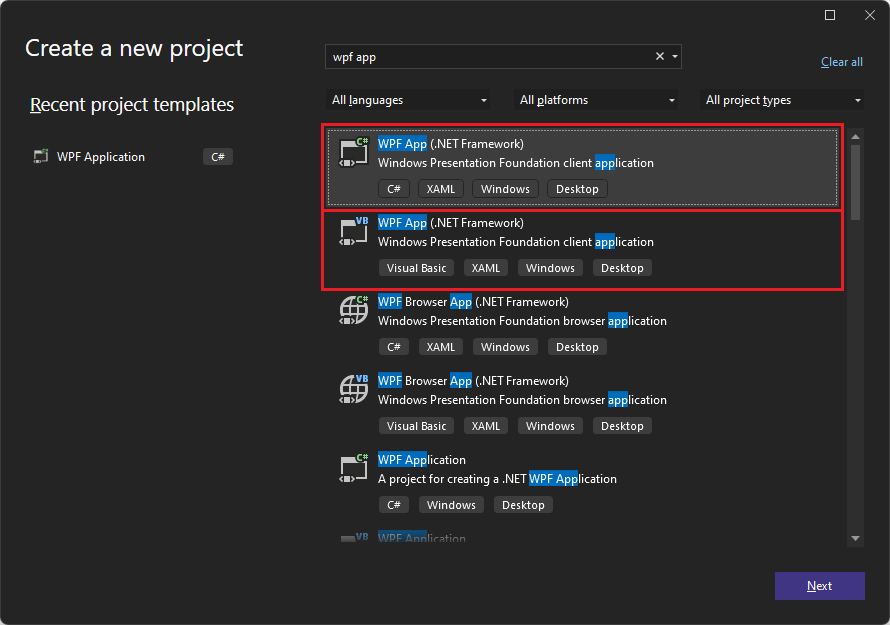
In the Search for templates text box, type
WPF Application. The Create a new project panel shows the installed project templates that match your entered text. This article shows the C# rather than VB dialogs; both languages are supported for WebView2.If you're using Visual Studio 2022, click a project template that has the title WPF Application and the description text A project for creating a .NET WPF Application:
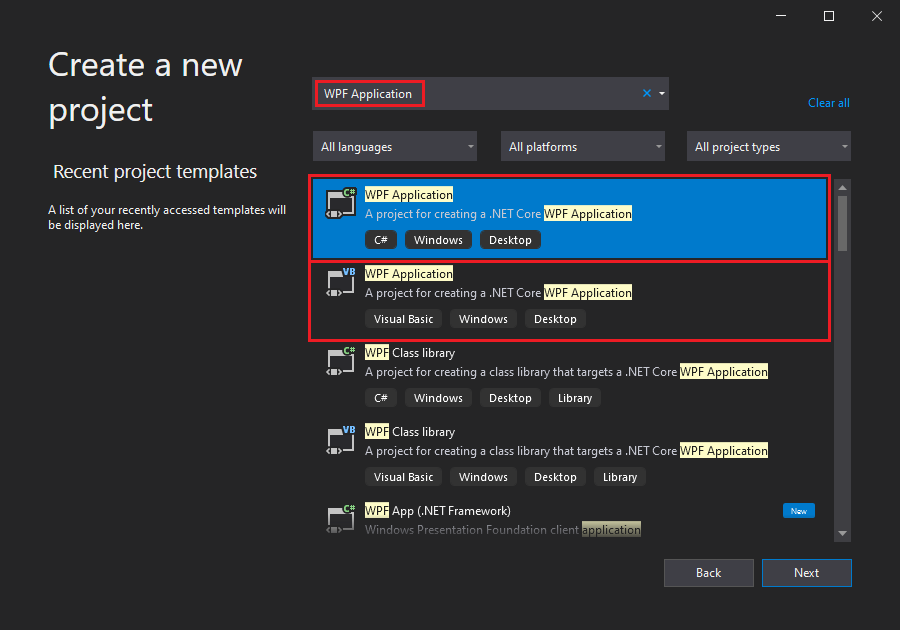
If you're using Visual Studio 2019, click a project template that has the title WPF Application and the description text A project for creating a .NET Core WPF Application:
If the above project template isn't listed, see Step 1 - Install Visual Studio with .NET support above, to install .NET desktop development tools.
Click the Next button.
The Configure your new project: WPF Application dialog opens:
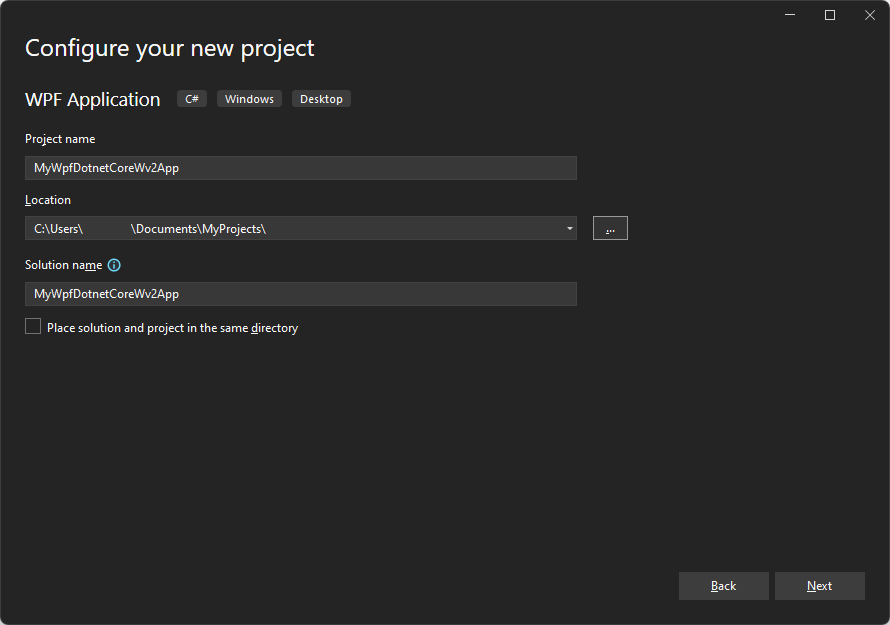
In the Project name text box, enter a project name, such as MyWpfDotnetCoreWv2App.
In the Location text box, select a path on your local drive, such as
C:\Users\myusername\Documents\MyProjects, and then click the Next button.The Additional information dialog appears, with a Target Framework dropdown list:
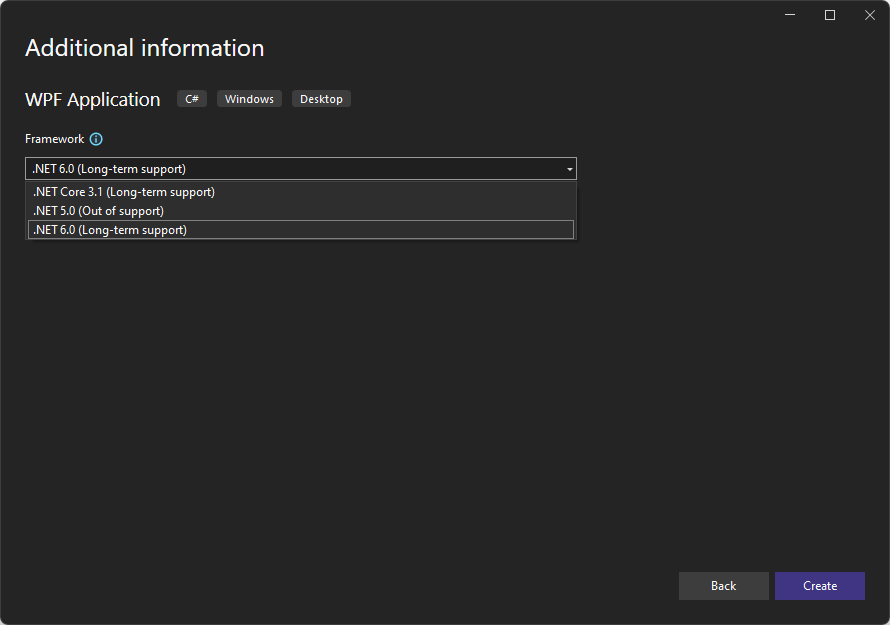
Select .NET Core 3.1 or later, such as .NET 6.0. (Don't select .NET Core 3.0.) Then click the Create button.
The initial .NET Core WPF Application project opens in Visual Studio:
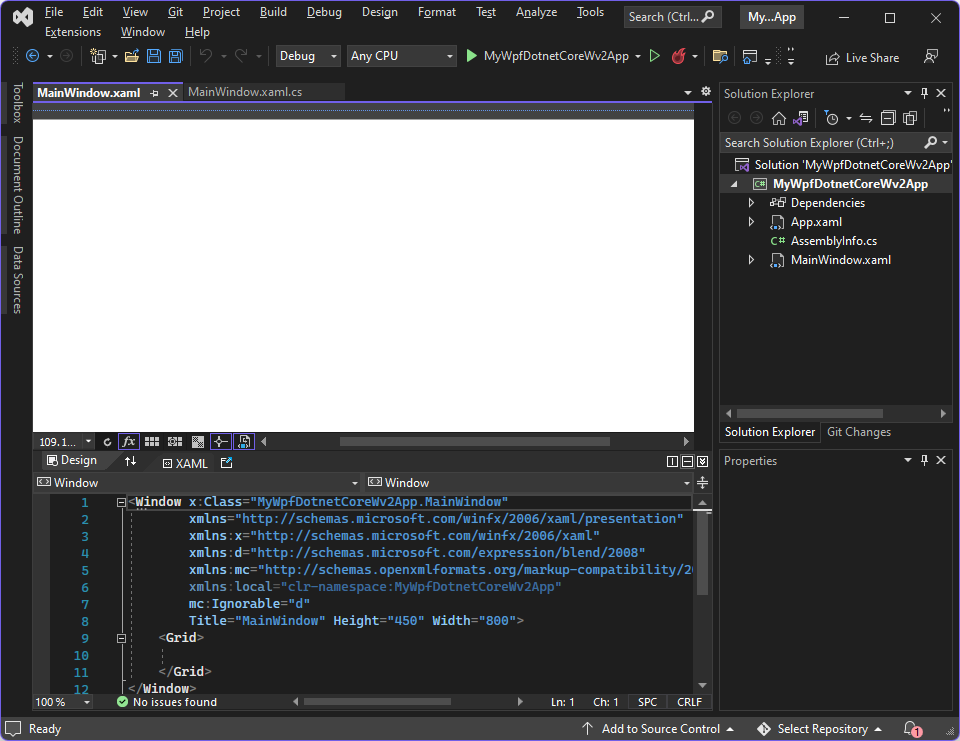
Skip to Step 4 - Build and run the initial project without WebView2 below.
Creating a WPF App (.NET Framework) project
If you are creating a WPF App (.NET Framework) project, do the following steps. Otherwise, skip to Step 4 - Build and run the initial project without WebView2.
Open Microsoft Visual Studio, such as Visual Studio 2022.
In the opening panel, click Create new project. Or, in the main Visual Studio window, select File > New > Project. The Create a new project dialog opens.
In the Search for templates text box, type
WPF App. The Create a new project panel shows the installed project templates that match your entered text. This article shows the C# rather than VB dialogs; both languages are supported for WebView2.Click a project template that has the title WPF App (.NET Framework) and the description text Windows Presentation Foundation client application:
If the above project template isn't listed, see Step 1 - Install Visual Studio with .NET support above, to install .NET desktop development tools.
Click the Next button.
The Configure your new project: WPF App (.NET Framework) dialog opens:
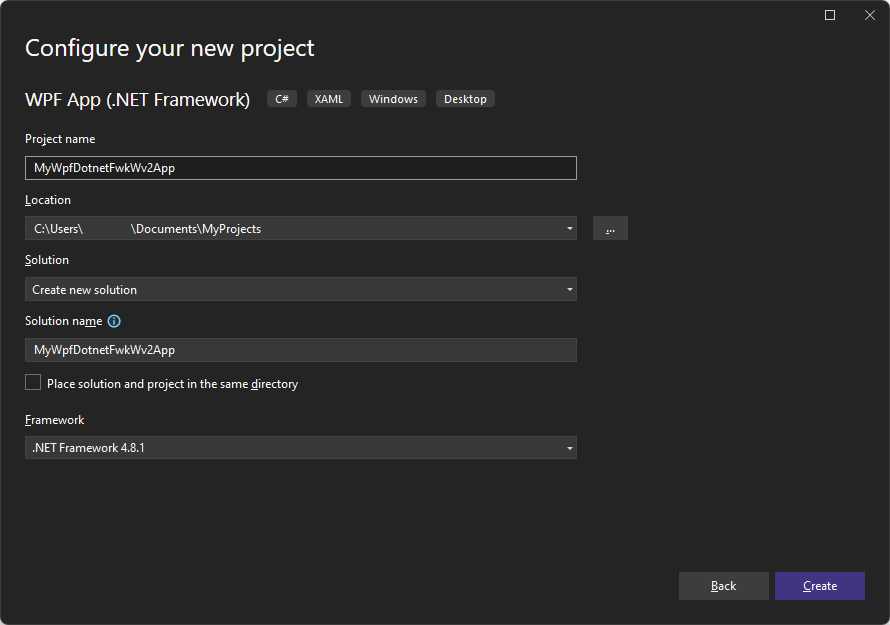
In the Project name text box, enter a project name, such as MyWpfDotnetFwkWv2App.
In the Location text box, select a path on your local drive, such as
C:\Users\myusername\Documents\MyProjects.In the Framework dropdown list, select .NET Framework 4.6.2 or later.
Click the Create button.
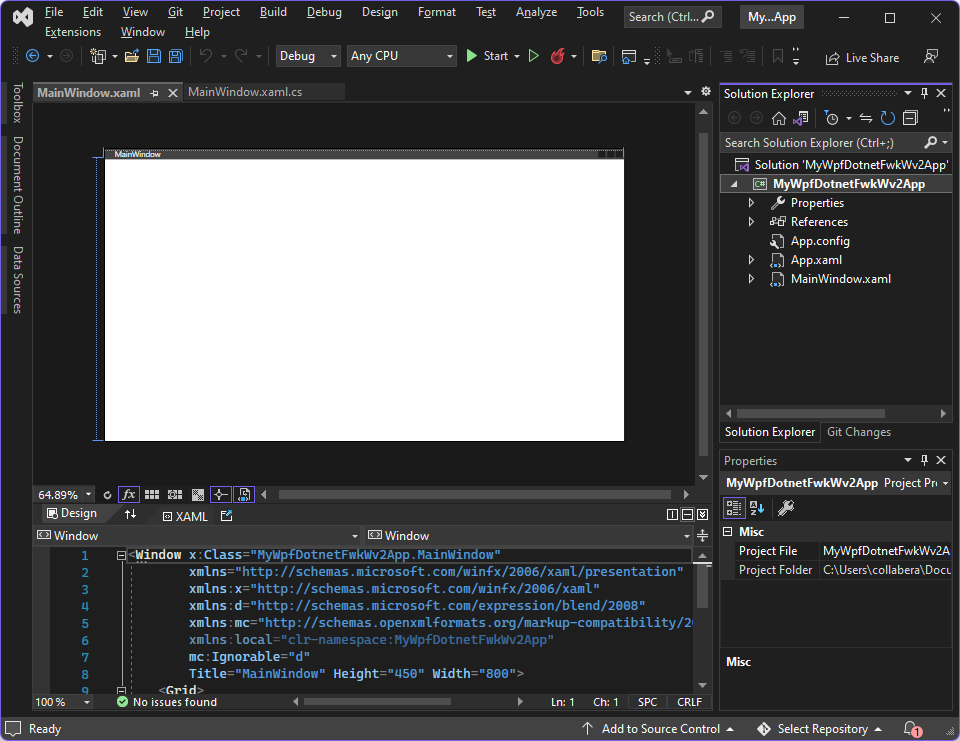
The initial WPF App (.NET Framework) project opens in Visual Studio:
Step 4 - Build and run the initial project without WebView2
Select File > Save All to save the project.
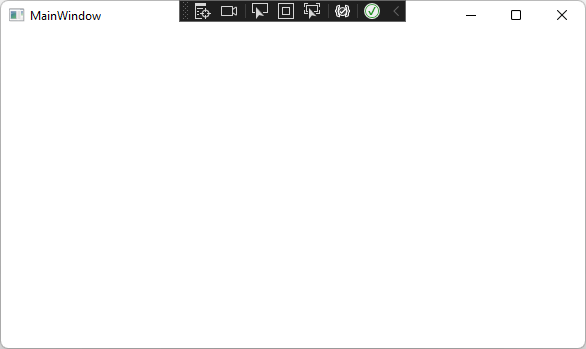
Press F5 to build and run the project.
The project runs, and displays an empty window:
You might need to install the selected .NET Framework version, as follows.
If the app doesn't open, select Debug > Start Without Debugging.
If you haven't installed the selected version of .NET Framework, you might get the following dialog: "This application could not be started. The application requires one of the following versions of the .NET Framework: .NETFramework,Version=v4.8.1 - Do you want to install this .NET Framework version now?"
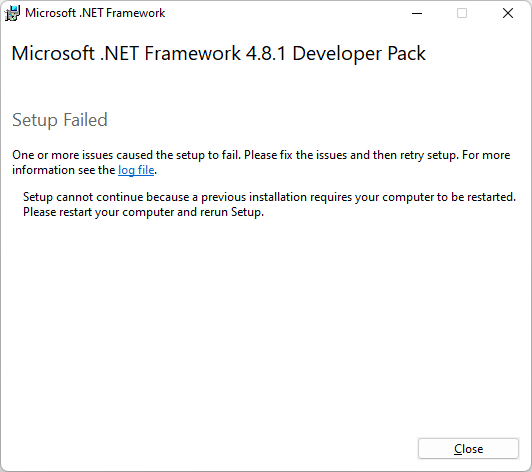
If you get such a dialog, go to Download .NET Framework and download and then install the needed version of the Developer Pack (not the Runtime). For example, download
ndp481-devpack-enu.exetoC:\Users\username\Downloads, and then double-click the file to install it.If prompted, restart your computer:
Go to the downloaded file, such as
ndp481-devpack-enu.exeinC:\Users\username\Downloads, and again double-click the downloaded file to install the .NET Framework Developer Pack. A Success dialog appears: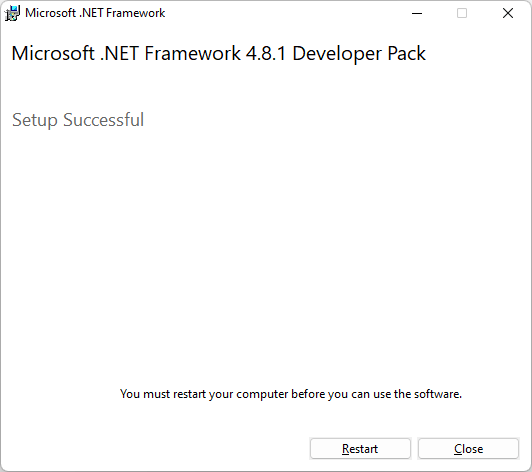
If prompted, restart the computer again.
Open Visual Studio, and open the solution you created.
Press F5 to run the initial app (shown above), not yet including the WebView2 SDK.
Close the initial app.
Step 5 - Install the WebView2 SDK
In Visual Studio, use NuGet Package Manager to add the WebView2 SDK to the project, as follows:
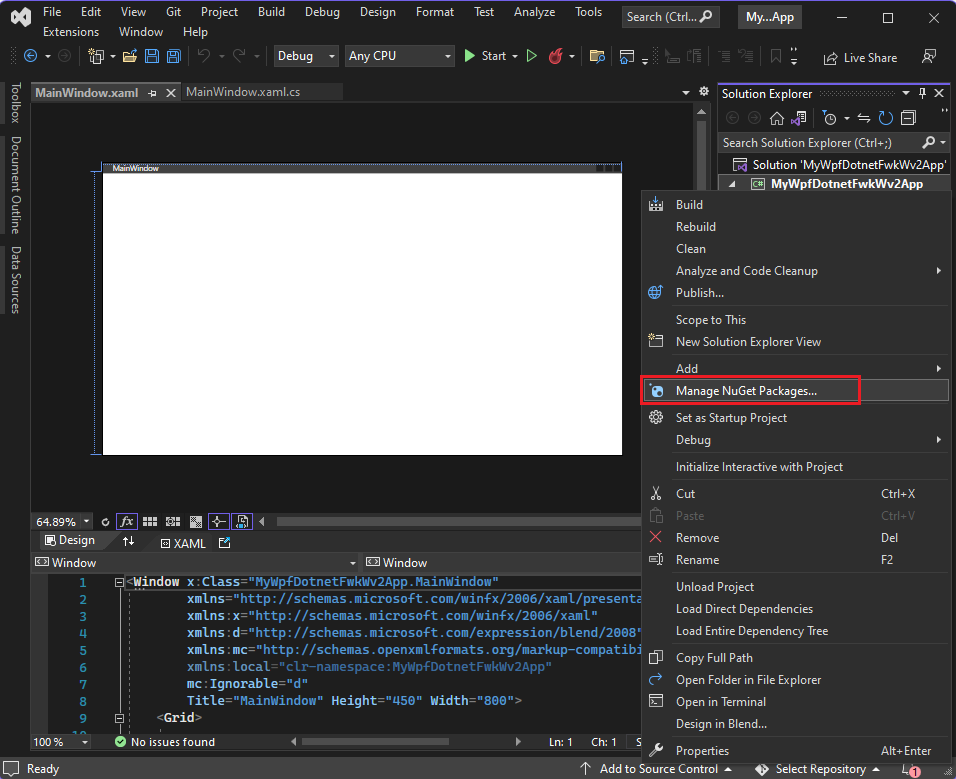
In Solution Explorer, right-click the project name (based on either the .NET (Core) or .NET Framework project template), and then select Manage NuGet Packages:
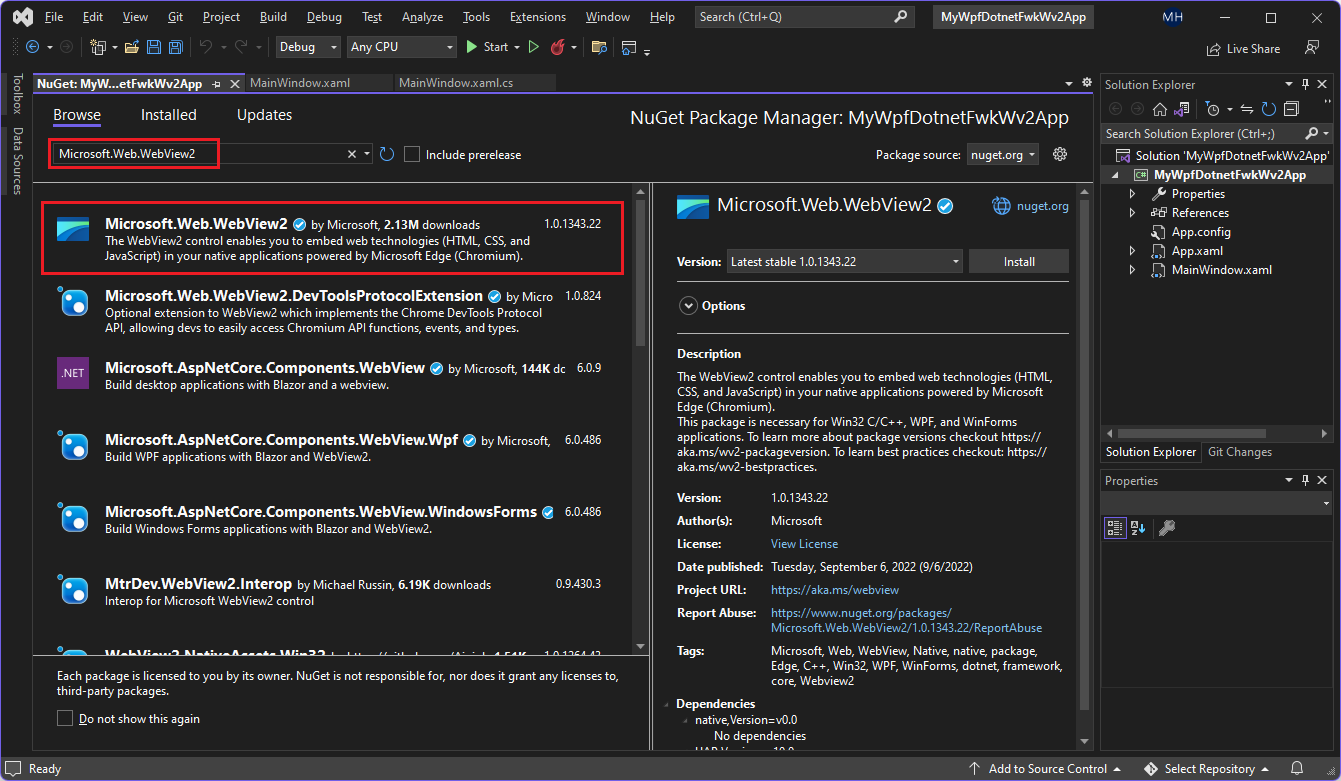
In the upper left, click the Browse tab. In the search bar, type
Microsoft.Web.WebView2, then click the Microsoft.Web.WebView2 package.The NuGet package manager dialog displays search results, including a Microsoft.Web.WebView2 package. The dialog has a version number and Install button.
Accept the default version, and then click the Install button.
In the Preview Changes dialog, click the OK button.
Select File > Save All to save the project.
Press F5 to build and run the project.
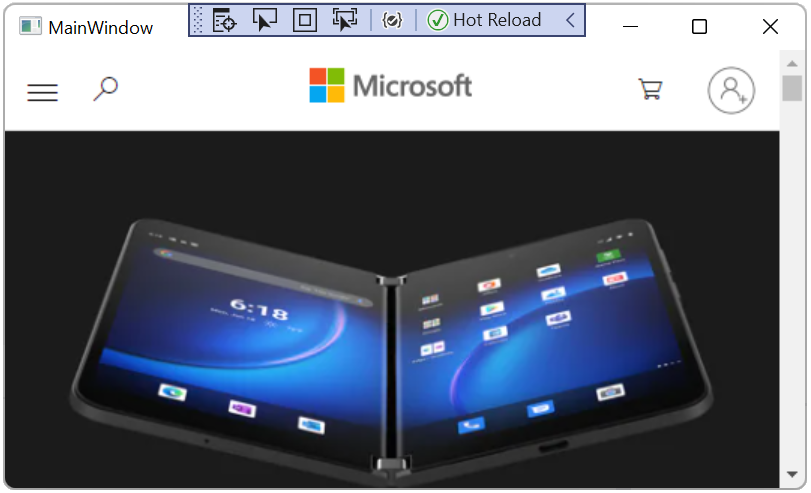
The project runs, and displays an empty window. This verifies that WebView2 is installed and working, although WebView2 has no content to display yet:

Close the app.
Step 6 - Create a single WebView2 control
Add a WebView2 control to your app.
In the
MainWindow.xamlfile, to add the WebView2 XAML namespace, insert the following line inside the<Window/>tag:xmlns:wv2="clr-namespace:Microsoft.Web.WebView2.Wpf;assembly=Microsoft.Web.WebView2.Wpf"Make sure the code in
MainWindow.xamllooks like the following code:<Window x:Class="WPF_Getting_Started.MainWindow" xmlns="http://schemas.microsoft.com/winfx/2006/xaml/presentation" xmlns:x="http://schemas.microsoft.com/winfx/2006/xaml" xmlns:d="http://schemas.microsoft.com/expression/blend/2008" xmlns:mc="http://schemas.openxmlformats.org/markup-compatibility/2006" xmlns:local="clr-namespace:{YOUR PROJECT NAME}" xmlns:wv2="clr-namespace:Microsoft.Web.WebView2.Wpf;assembly=Microsoft.Web.WebView2.Wpf" mc:Ignorable="d" Title="MainWindow" Height="450" Width="800" > <Grid> </Grid> </Window>To add the WebView2 control, replace the
<Grid>tags with the following code. TheSourceproperty sets the initial URI displayed in the WebView2 control.<DockPanel> <wv2:WebView2 Name="webView" Source="https://www.microsoft.com" /> </DockPanel>Select File > Save All to save the project.
Press F5 to build and run the project.
Make sure your WebView2 control displays https://www.microsoft.com:
Step 7 - Navigation
Enable users to change the URL that the WebView2 control displays, by adding an address bar to the app.
In the
MainWindow.xamlfile, add an address bar by copying and pasting the following code inside the<DockPanel>that contains the WebView2 control. Keep the existing code below the new snippet.<DockPanel DockPanel.Dock="Top"> <Button x:Name="ButtonGo" DockPanel.Dock="Right" Click="ButtonGo_Click" Content="Go" /> <TextBox Name="addressBar"/> </DockPanel>Make sure the
<DockPanel>section of theMainWindow.xamlfile matches the following code:<DockPanel> <DockPanel DockPanel.Dock="Top"> <Button x:Name="ButtonGo" DockPanel.Dock="Right" Click="ButtonGo_Click" Content="Go"/> <TextBox Name = "addressBar"/> </DockPanel> <wv2:WebView2 Name = "webView" Source = "https://www.microsoft.com" /> </DockPanel>In
MainWindow.xaml.cs, to add theCoreWebView2namespace, insert the following code at the top of the file:using Microsoft.Web.WebView2.Core;In the
MainWindow.xaml.csfile, copy the following code to create theButtonGo_Clickmethod. This code navigates the WebView2 control to the URL entered in the address bar.private void ButtonGo_Click(object sender, RoutedEventArgs e) { if (webView != null && webView.CoreWebView2 != null) { webView.CoreWebView2.Navigate(addressBar.Text); } }Paste the code directly after the
Public MainWIndowdeclaration, as shown in the following code:namespace WpfApp1 { /// <summary> /// Interaction logic for MainWindow.xaml /// </summary> public partial class MainWindow : Window { public MainWindow() { InitializeComponent(); } void ButtonGo_Click(object sender, RoutedEventArgs e) { if (webView != null && webView.CoreWebView2 != null) { webView.CoreWebView2.Navigate(addressBar.Text); } } } }Select File > Save All to save the project.
Press F5 to build and run the project.
Type a new URL in the address bar and choose Go. For example, type
https://www.bing.com.Make sure the WebView2 control opens the URL you entered.
Make sure you enter a complete URL in the address bar. The app generates an
ArgumentExceptionif the URL doesn't start withhttp://orhttps://.The sample app displays the Bing website with the URL
https://www.bing.comin the address bar: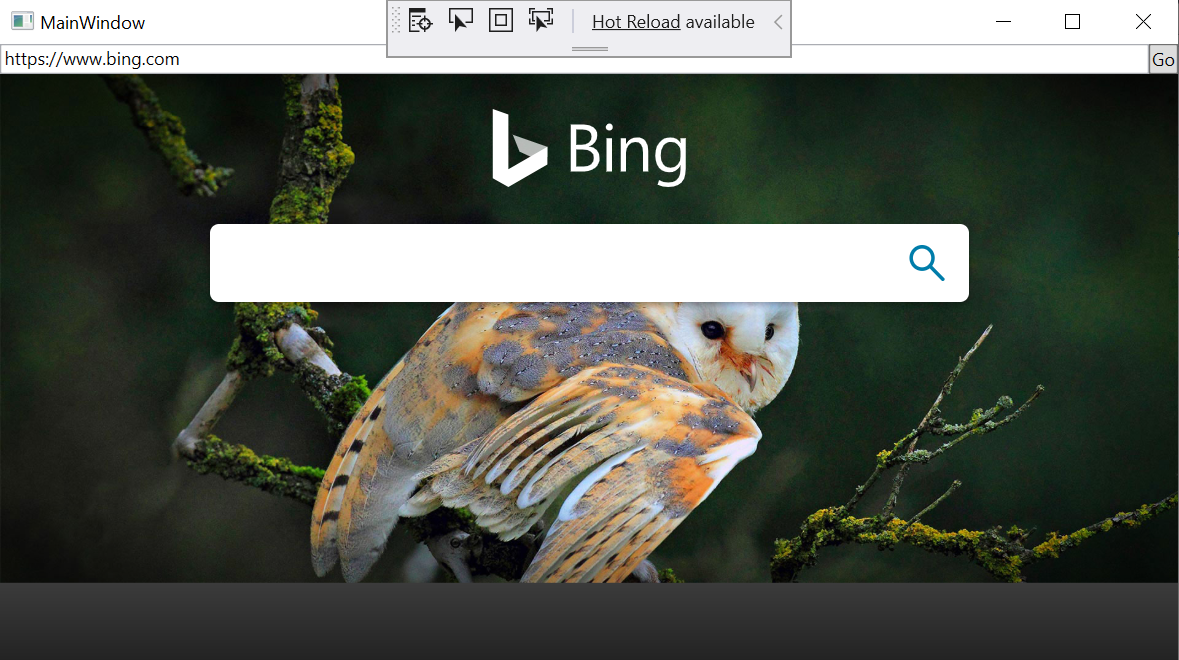
Step 8 - Navigation events
During webpage navigation, the WebView2 control raises events. The app that hosts WebView2 controls listens for the following events:
NavigationStartingSourceChangedContentLoadingHistoryChangedNavigationCompleted
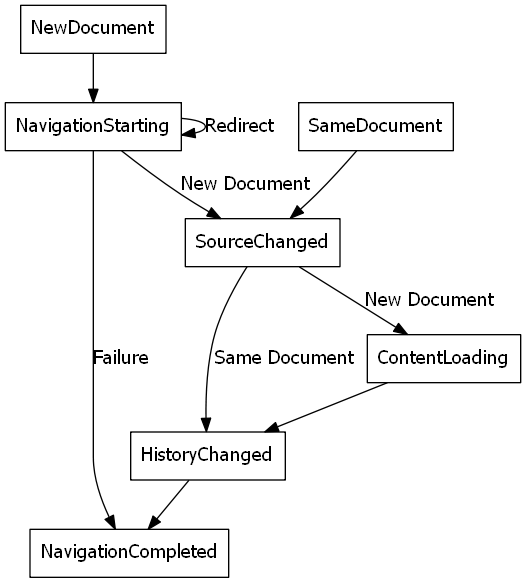
The above diagram shows the event sequence. Navigation events start with a new document.
Success path
A successful path includes the full sequence of events:
- Navigation starting.
- Source changed, with possible input from the same document.
- Content loading.
- History changes.
- Navigation completed.
For more information, see Navigation events for WebView2 apps.
Failure path
If theres a failure, the failure path proceeds directly from navigation starting, to navigation completed, skipping the intervening events.
When an error occurs, the following events are raised, and may depend on navigation to an error webpage:
SourceChangedContentLoadingHistoryChanged
Redirection
If an HTTP redirect occurs, there are multiple NavigationStarting events in a row.
Example demonstrating navigation events
To demonstrate how to use the events, register a handler for NavigationStarting that cancels any non-HTTPS requests, as follows.
In the
MainWindow.xaml.csfile, modify the constructor to match the top part of the following code. Below the constructor, add theEnsureHttpsfunction:public MainWindow() { InitializeComponent(); webView.NavigationStarting += EnsureHttps; } void EnsureHttps(object sender, CoreWebView2NavigationStartingEventArgs args) { String uri = args.Uri; if (!uri.StartsWith("https://")) { args.Cancel = true; } }In the constructor,
EnsureHttpsis registered as the event handler on theNavigationStartingevent on the WebView2 control.Select File > Save All to save the project.
Press F5 to build and run the project.
Attempt to open an HTTP site. Make sure the WebView2 control remains unchanged.
Attempt to open an HTTPS site. The WebView2 control allows you to open HTTPS sites.
Step 9 - Scripting
You can use host apps to inject JavaScript code into WebView2 controls at runtime. You can task WebView2 to run arbitrary JavaScript or add initialization scripts. The injected JavaScript applies to all new top-level documents and any child frames until the JavaScript is removed.
The injected JavaScript is run with specific timing:
- Run it after the creation of the global object.
- Run it before any other script included in the HTML document is run.
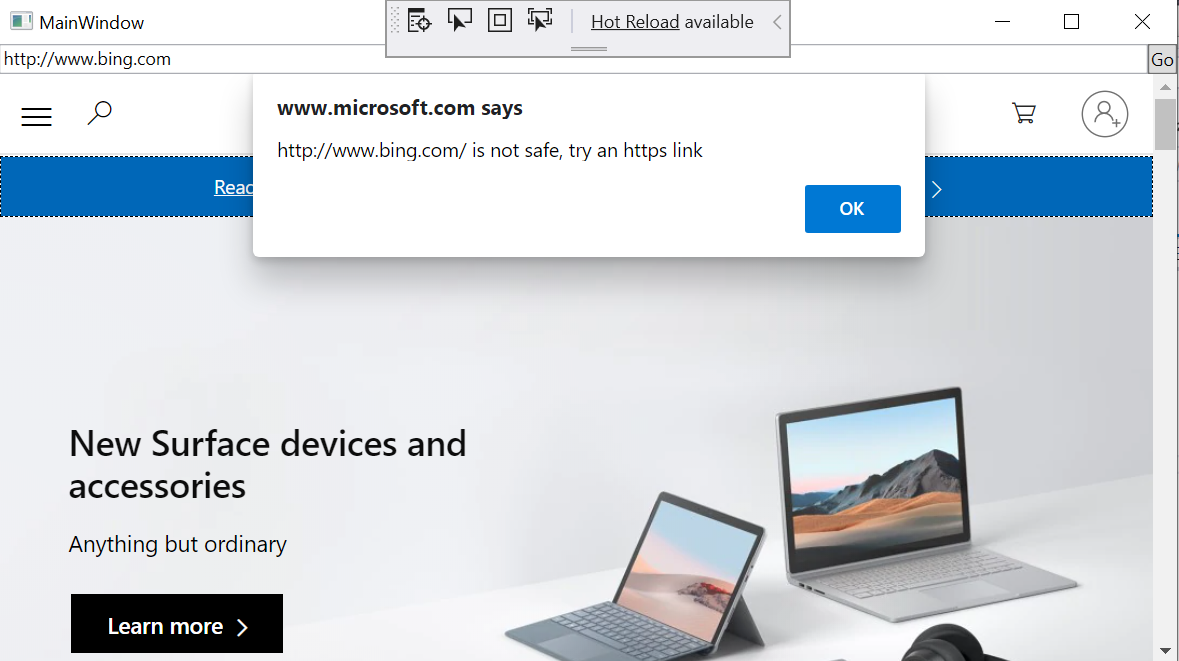
For example, add scripts that send an alert when a user navigates to non-HTTPS sites, as follows:
Modify the
EnsureHttpsfunction to inject a script into the web content that uses ExecuteScriptAsync method.void EnsureHttps(object sender, CoreWebView2NavigationStartingEventArgs args) { String uri = args.Uri; if (!uri.StartsWith("https://")) { webView.CoreWebView2.ExecuteScriptAsync($"alert('{uri} is not safe, try an https link')"); args.Cancel = true; } }Select File > Save All to save the project.
Press F5 to build and run the project.
Make sure the app displays an alert when you navigate to a website that doesn't use HTTPS.
Step 10 - Communication between host and web content
The host and web content can communicate in the following ways using postMessage:
Web content in a WebView2 control can post a message to the host using
window.chrome.webview.postMessage. The host handles the message using any registeredWebMessageReceivedon the host.Hosts post messages to web content in a WebView2 control using
CoreWebView2.PostWebMessageAsStringorCoreWebView2.PostWebMessageAsJSON. The messages are caught by handlers added towindow.chrome.webview.addEventListener.
The communication mechanism passes messages from web content to the host using native capabilities.
In your project, when the WebView2 control navigates to a URL, it displays the URL in the address bar and alerts the user of the URL displayed in the WebView2 control.
In
MainWindow.xaml.cs, update your constructor and create anInitializeAsyncfunction to match the following code. TheInitializeAsyncfunction awaits EnsureCoreWebView2Async, because the initialization ofCoreWebView2is asynchronous.public MainWindow() { InitializeComponent(); webView.NavigationStarting += EnsureHttps; InitializeAsync(); } async void InitializeAsync() { await webView.EnsureCoreWebView2Async(null); }After CoreWebView2 is initialized, register an event handler to respond to
WebMessageReceived. InMainWindow.xaml.cs, updateInitializeAsyncand addUpdateAddressBarusing the following code:async void InitializeAsync() { await webView.EnsureCoreWebView2Async(null); webView.CoreWebView2.WebMessageReceived += UpdateAddressBar; } void UpdateAddressBar(object sender, CoreWebView2WebMessageReceivedEventArgs args) { String uri = args.TryGetWebMessageAsString(); addressBar.Text = uri; webView.CoreWebView2.PostWebMessageAsString(uri); }For the WebView2 control to send and respond to the web message, after
CoreWebView2is initialized, the host does the following:- Injects a script to the web content that registers a handler to print message from the host.
- Injects a script to the web content that posts the URL to the host.
In
MainWindow.xaml.cs, updateInitializeAsyncto match the following code:async void InitializeAsync() { await webView.EnsureCoreWebView2Async(null); webView.CoreWebView2.WebMessageReceived += UpdateAddressBar; await webView.CoreWebView2.AddScriptToExecuteOnDocumentCreatedAsync("window.chrome.webview.postMessage(window.document.URL);"); await webView.CoreWebView2.AddScriptToExecuteOnDocumentCreatedAsync("window.chrome.webview.addEventListener(\'message\', event => alert(event.data));"); }Select File > Save All to save the project.
Press F5 to build and run the project.
When you open a new URI, the WebView2 control displays the URI in the address bar.
The sample app displays the URI in the address bar and the Microsoft website, https://www.microsoft.com:
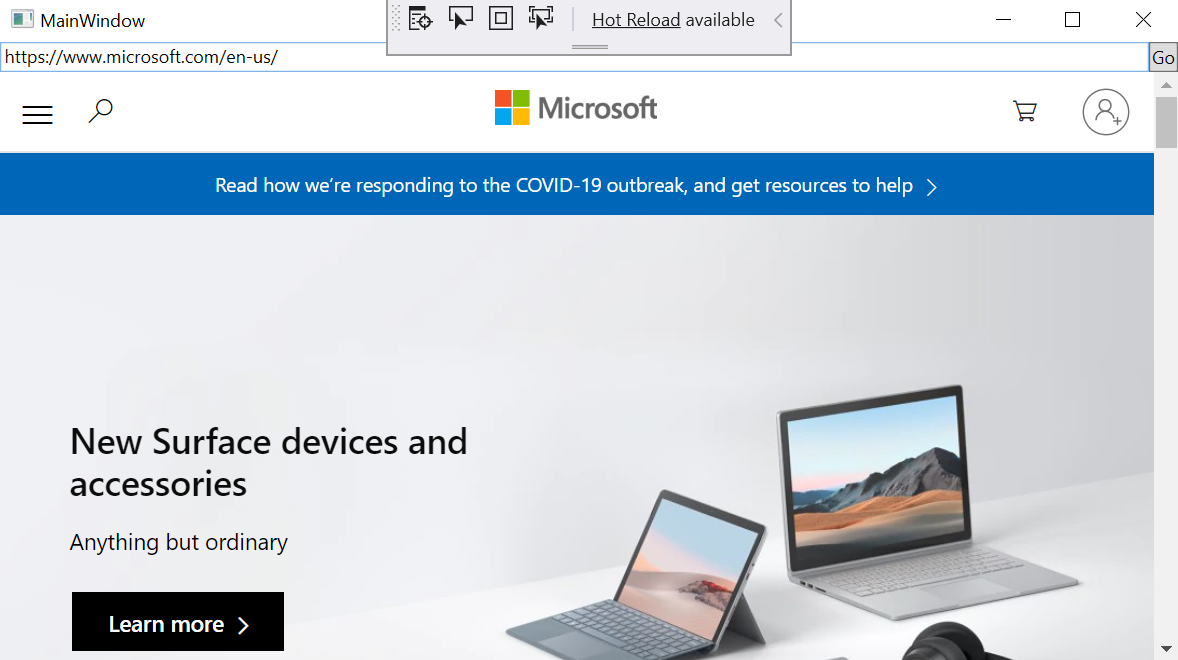
Congratulations, you built your first WebView2 app!
See also
developer.microsoft.com:
- Microsoft Edge WebView2 - initial introduction to WebView2 features at developer.microsoft.com.
Local pages:
- WPF sample app
- Manage user data folders
- Sample Code for WebView2 - a guide to the
WebView2Samplesrepo. - Development best practices for WebView2 apps
GitHub:
Feedback
Coming soon: Throughout 2024 we will be phasing out GitHub Issues as the feedback mechanism for content and replacing it with a new feedback system. For more information see: https://aka.ms/ContentUserFeedback.
Submit and view feedback for