Power Automate
Warning
The Collaboration controls for model-driven applications are set to retire by May 2024. Retirement will be carried out in two phases to ensure a smooth transition. Following table details the timeline of the retirement process and its impacts:
| Timeframe | Action | Impact |
|---|---|---|
| February 2024 | Collaboration controls will no longer be available to install from AppSource. | - New deployments of the collaboration controls in Power Apps environments aren't possible. - Existing installations aren't affected. |
| May 2024 | The internal service that powers the controls will be retired. | - The controls will stop supporting integration with Microsoft 365 and will return errors to users. Data generated and managed through the controls won't be impacted. For more information, see the table later in this article. |
Artifacts created and managed through the controls will continue to exist after the service is retired.
| Control | Impact |
|---|---|
| Approvals | Approvals created in the Approvals control will remain in the Approvals app but will no longer be accessible in the Approvals control. |
| Files | Files managed in the Files control will remain in SharePoint but will no longer be accessible in the Files control. |
| Meetings | Meetings created in the Meeting control will remain in Outlook and Teams calendars but will no longer be accessible in the Meetings control. |
| Notes | Notes created in the Notes control will remain in the Dataverse notes table. |
| Tasks | Tasks created in the Task control will remain in Planner but will no longer be accessible in the Task control. |
We recommend removing the Collaboration controls and Collaboration connector from all Power Apps solutions and prepare users for the upcoming Collaboration controls retirement.
Power Automate can be used to automate workflows around your Collaboration Manager application. For example, automatically create tasks when a new record is created.
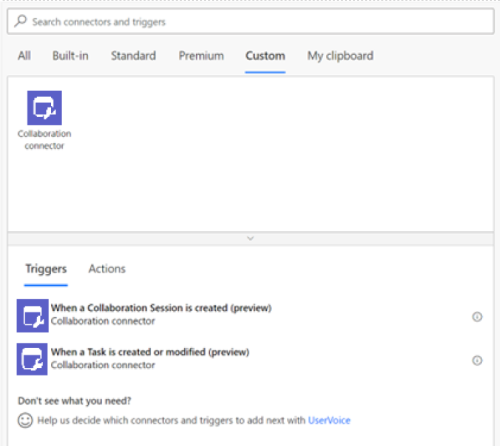
Collaboration control connector enables developers to access Collaboration control APIs by triggers or actions in automated workflows in Microsoft Power Automate, Microsoft Power Apps, and Azure Logic apps. Collaboration controls are available only in public developer preview.
In this version, the connector enables makers to set up triggers:
- When a Collaboration session is created.
- When a planner task is created or modified.
It also includes a set of Collaboration controls APIs and tasks that can be invoked with a flow. The connector actions are found in workflow step selections. The connector itself would be found on Custom connectors with configurable options. To use the connector in your solution, it’s necessary to create an Azure App trusted by your environment to execute the flows.
Create an Azure App
In the Azure portal for Microsoft Entra management, sign in to your account with adequate permissions to add a user application to your environment with the following steps:
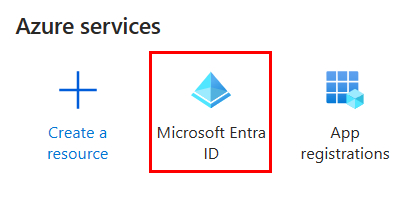
In the home page of Azure portal, select Microsoft Entra ID.
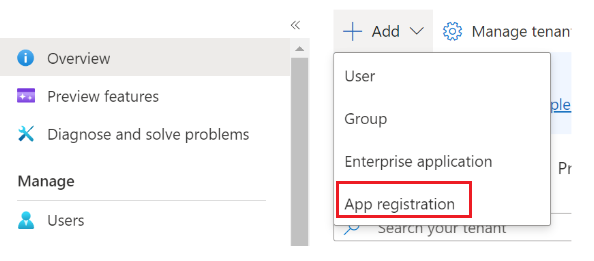
Select +Add dropdown and then select App registration.
In the app registration, set your application name and add the Web redirect URI to
https://global.consent.azure-apim.net/redirect.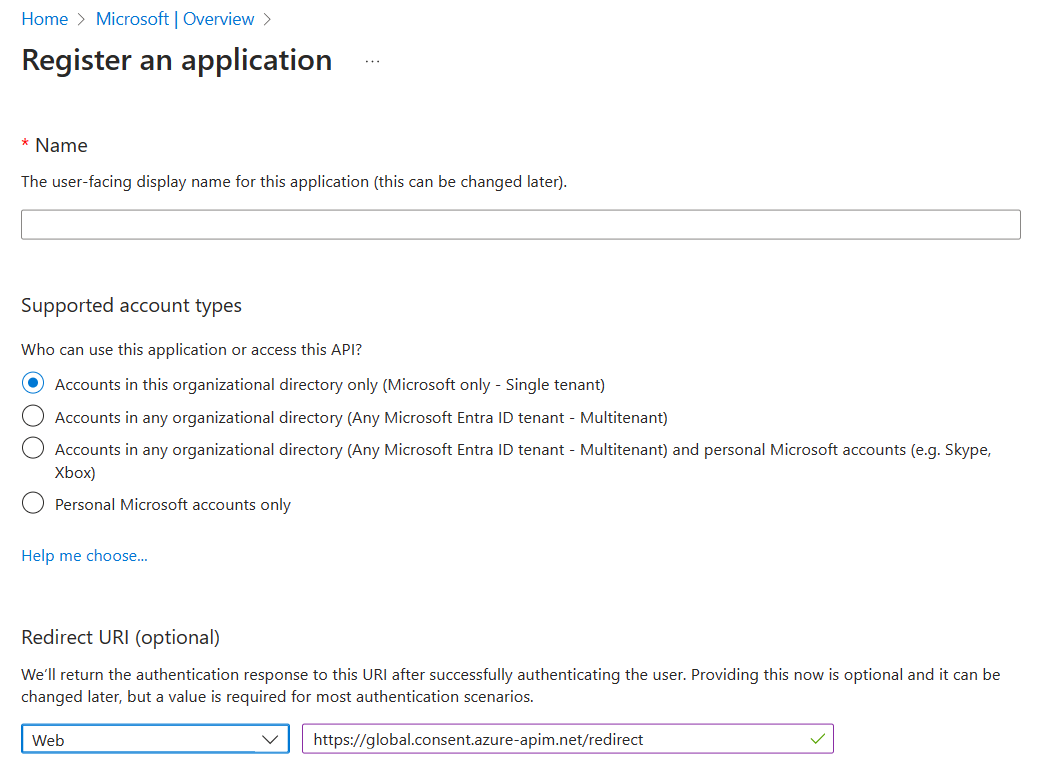
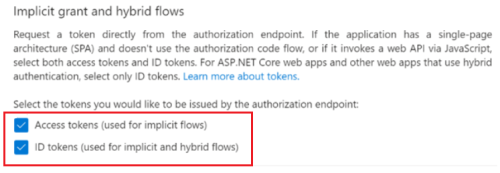
In the Implicit Grant and hybrid flows section, select both Access Tokens and ID tokens.
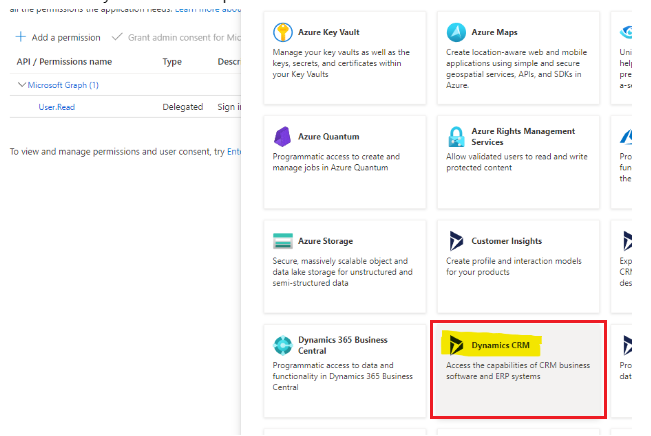
Select API Permission in the left pane and select Add a permission, and then search for Dynamic CRM permission.
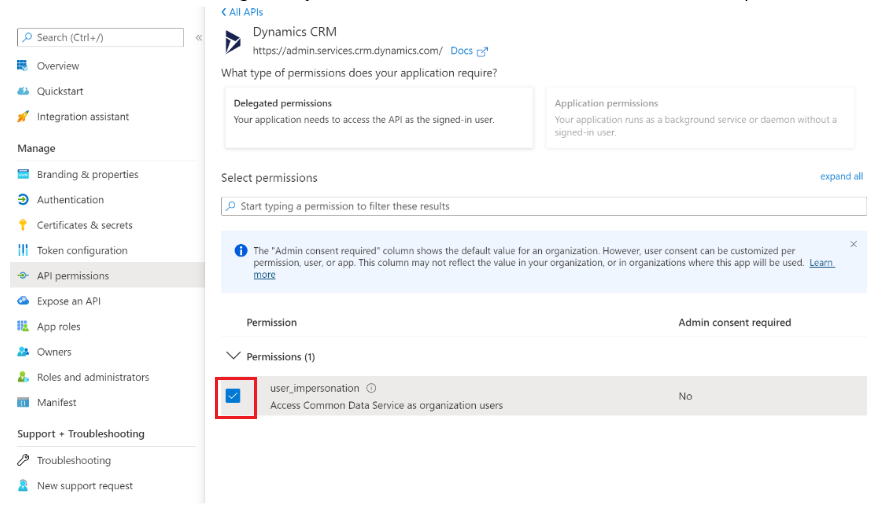
Ensure to select user_impersonation in Permissions after selecting the Dynamics CRM.
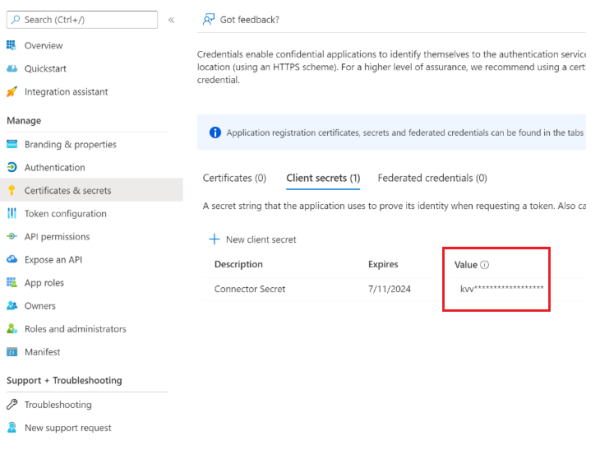
In the Certificates & Secrets page, add a New client secret and save the value for later use while setting up the connector security.
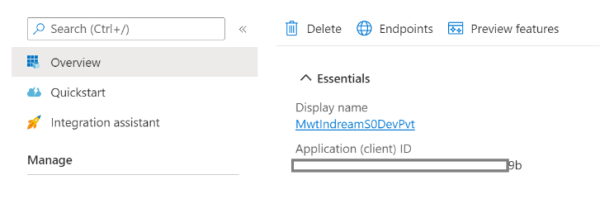
In the application Overview page, copy the Application (client) ID and save it for later use while setting up the connector security.
Now your Azure app is all set and you need to add it as a user application in your environment.
Add Azure app to Power Automate environment
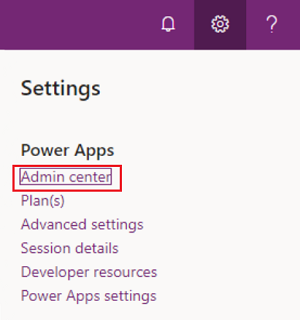
Open Power Apps portal, in the upper right corner select settings and open Admin center.
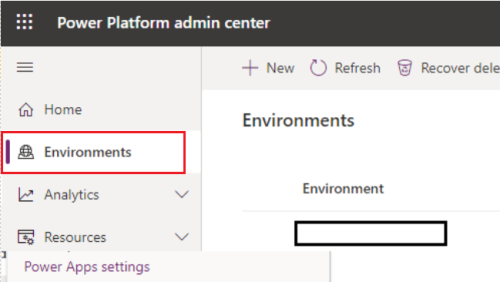
In the admin center, select Environment from the left pane and select your environment in the list that you want to add the connector app.
In the environment details page, select Settings.

In the settings details page, select Users + permissions section and select Application users.

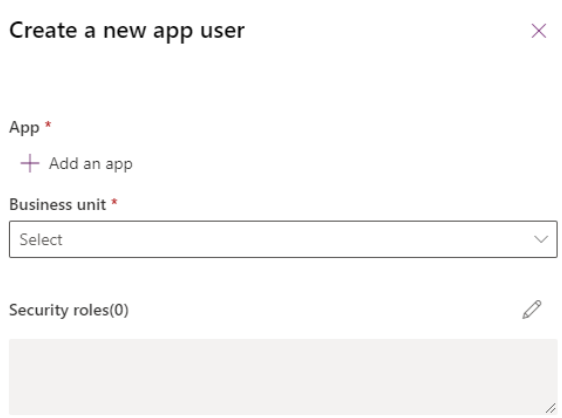
In the App users page, select the + New app user. Create a new app user window appears.

Select + Add an app.
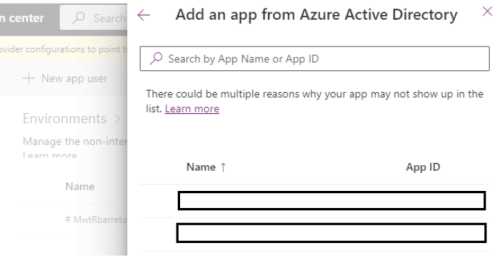
Select your app from the search box and select add again.
After the app is added, set the Business unit and Security Roles to your connector application. Select Create and your app is in the list. With the app user set in the environment, we can proceed to custom connector configuration.
Custom connector configuration
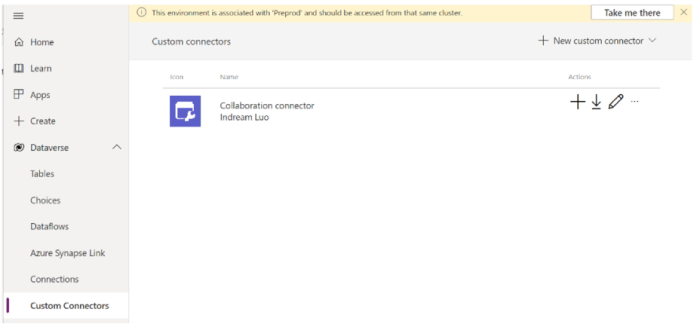
Open PowerApps or Power Automate and select the Custom Connectors menu. Select edit for the Collaboration connector.
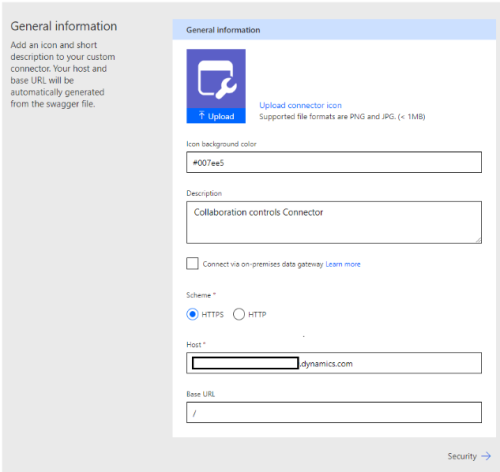
In the General Information tab, enter the host with the address of Dynamic 365 instance domain (without the https://).
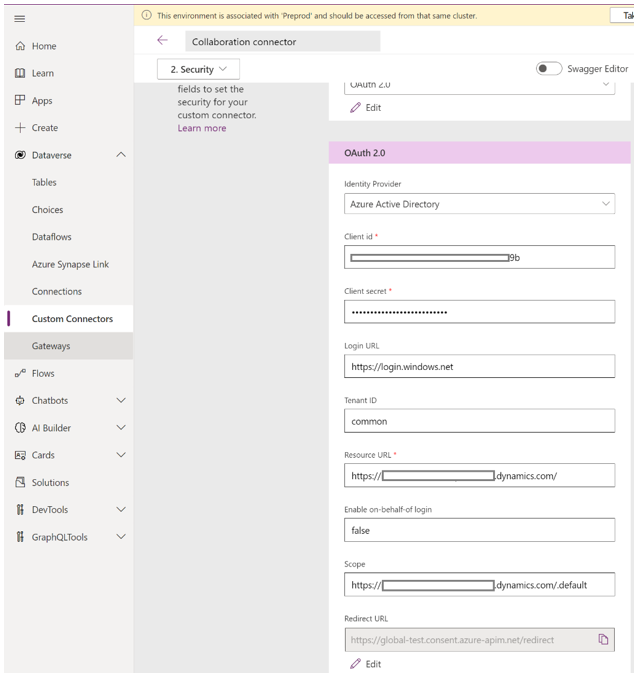
In the Security tab, enter the following inputs:
- Client secret: Use your saved app secret value in the input.
- Client id: Your Azure app (Client ID).
- Resource URL: The URL of your Dynamic 365 instance (
https://org.crm.dynamics.com/). - Scope: Same as the resource URL with a
.defaultsuffix (https://org.crm.dynamics.com/.default).
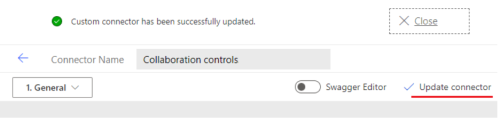
Select Update connector to save the changes and allow your flow to establish connections.
How to invoke the connector
Triggers and actions are pre-defined with configurable input and output as a workflow step. Adding the workflow step to the proper workflow position with correct input and output configuration to define when the trigger or action is to be invoked.
Triggers and actions supported with connector
The following triggers and actions are supported within a flow:
Triggers
When a Collaboration Session is created.
Scope: A scope to limit, which rows can trigger the flow.
Run as: The running user for steps where invoker connections are used.
When a Task is created or modified.

By default, the trigger Planner task is disabled and won't trigger. To enable it, the tenant admin must follow the steps:
- Create a support ticket under the path Power Apps/Collaboration controls/Settings.
- Request that your environment is enabled for the Collaboration connector and provides your Environment URL (preferred) or Organization ID.
- You can add the following sample text to your support request: "Enable Environment URL:
urlfor the Collaboration connector". - To open a support ticket, see Get Help + Support.
Actions
Begin Collaboration session
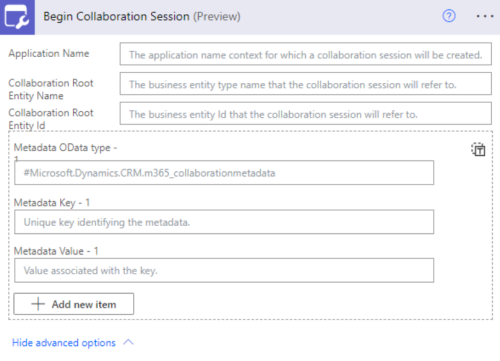
This step action creates a new collaboration session for your Dataverse business entity:
- Application Name: Name of the associated application, for example, could be “Collaboration Manager for Loans” or “Collaboration Manager for Closed Loan Auditing”.
- Collaboration Root Entity Name: Type of application record (table name) for example, could be “msfi_loanapplication” for a Collaboration Manager for Loans application.
- Collaboration Root Entity ID: ID of the associated application record, e.g.could be the ID of a Loan Application record.
Advanced options
Metadata (Advanced): Adds metadata for a collaboration session.
- OData Type: This field needs to be provided if the other key/value is set and needs to match exactly #Microsoft.Dynamics.CRM.m365_collaborationmetadata.
- Key: Key associated with the metadata attribute.
- Value: Value associated with the metadata attribute.
Retrieve Collaboration session
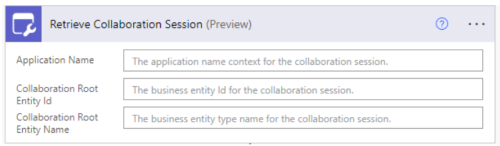
This step action returns the collaboration session that matches the provided inputs:
- Application Name: The application name context for the collaboration session.
- Collaboration Root Entity ID: The business entity ID for the collaboration session.
- Collaboration Root Entity Name: The business entity type for the collaboration session.
Update Collaboration session
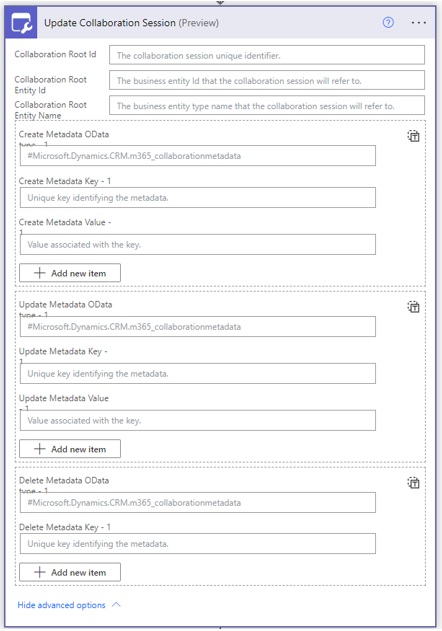
This step action updates an existing collaboration session:
- Collaboration Root ID: The GUID for the target collaboration session/root record.
- Collaboration Root Entity ID: The business entity ID that the collaboration session refers to.
- Collaboration Root Entity Name: The business entity type name that the collaboration session refers to.
Advanced options:
Create Metadata (Advanced): Adds more metadata to a collaboration session record.
- OData Type: This field needs to be provided if the other key/value is set and needs to match exactly #Microsoft.Dynamics.CRM.m365_collaborationmetadata.
- Key: Key associated with the metadata attribute.
- Value: Value associated with the metadata attribute.
Update Metadata (Advanced): Updates existing metadata on a collaboration session record.
- OData Type: This field needs to be provided if the other key/value is set and needs to match exactly #Microsoft.Dynamics.CRM.m365_collaborationmetadata.
- Key: Key associated with the metadata attribute to update.
- Value: Value associated with the metadata attribute.
Delete Metadata (Advanced): Removes any existing metadata on a collaboration session record.
- OData Type: This field needs to be provided if the other key/value is set and needs to match exactly #Microsoft.Dynamics.CRM.m365_collaborationmetadata.
- Key: Key associated with the metadata attribute to remove.
Associate Collaboration Map (external)
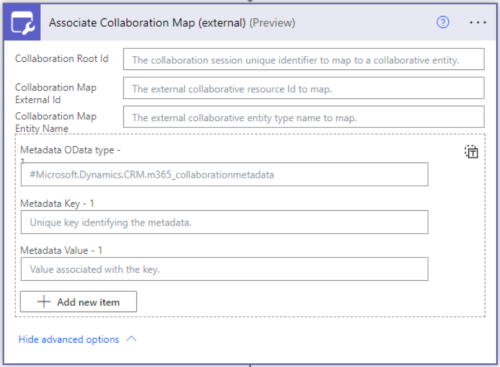
This step action creates a mapping of an external collaboration entity (outside Dataverse) with your collaboration session:
- Collaboration Root ID: The collaboration session unique identifier to map to a collaborative entity.
- Collaboration Map External ID: The external collaborative resource ID to map.
- Collaboration Map Entity Name: The external collaborative entity type name to map.
Advanced options:
Metadata: Add metadata for a collaboration map.
- OData Type: This field needs to be provided if the other key/value is set and needs to match exactly #Microsoft.Dynamics.CRM.m365_collaborationmetadata.
- Key: Key associated with the metadata attribute.
- Value: Value associated with the metadata attribute.
Associate Collaboration Map (internal)
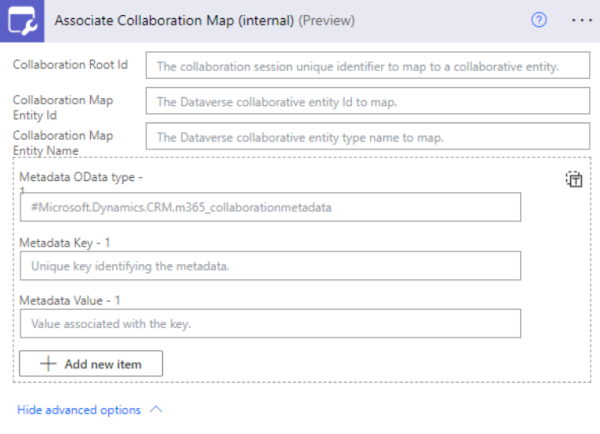
This step action creates a mapping of a collaboration entity (Dataverse table) with your collaboration session. Internal are intended to create mappings between internal Dataverse entities or tables only.
- Collaboration Root ID: The collaboration session unique identifier to map to a collaborative entity.
- Collaboration Map Entity ID: The Dataverse collaborative entity ID to map.
- Collaboration Map Entity Name: The Dataverse collaborative entity type name to map.
Advanced options:
Metadata (Advanced) Add metadata for a collaboration map.
- OData Type: This field needs to be provided if the other key/value is set and needs to match exactly #Microsoft.Dynamics.CRM.m365_collaborationmetadata
- Key: Key associated with the metadata attribute
- Value: Value associated with the metadata attribute
Update Collaboration Map
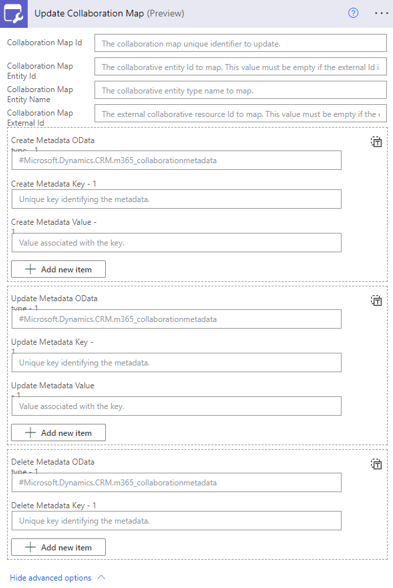
This step action updates an existing collaboration map:
- Collaboration Map ID: The collaboration map unique identifier to update.
- Collaboration Map Entity ID: The collaborative entity ID to map. This value must be empty if the external ID is Provided
- Collaboration Map Entity Name
- Collaboration Map External ID: The external collaborative resource ID to map. This value must be empty if the entity ID is provided.
Advanced options:
Create Metadata: Adds more metadata to a collaboration map record.
- OData Type: This field needs to be provided if the other key/value is set and needs to match exactly #Microsoft.Dynamics.CRM.m365_collaborationmetadata.
- Key: Key associated with the metadata attribute.
- Value: Value associated with the metadata attribute.
Update Metadata: Updates existing metadata on a collaboration map record.
- OData Type: This field needs to be provided if the other key/value is set and needs to match exactly #Microsoft.Dynamics.CRM.m365_collaborationmetadata
- Key: Key associated with the metadata attribute to update
- Value: Value associated with the metadata attribute
Delete Metadata: Removes any existing metadata on a collaboration map record.
- OData Type: This field needs to be provided if the other key/value is set and needs to match exactly #Microsoft.Dynamics.CRM.m365_collaborationmetadata.
- Key: Key associated with the metadata attribute to remove.
Get Collaboration Metadata
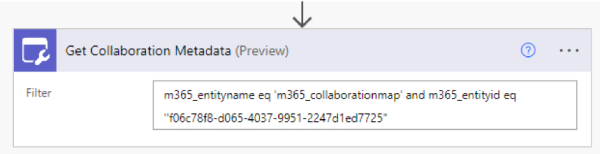
This step action lists all metadata matching the specified filter.
Filter: A filter to apply to the metadata query. Example retrieving all metadata related to a collaboration map entity ID
m365_entityname eq 'm365_collaborationmap' and m365_entityid eq 'GUID'Create Planner Task
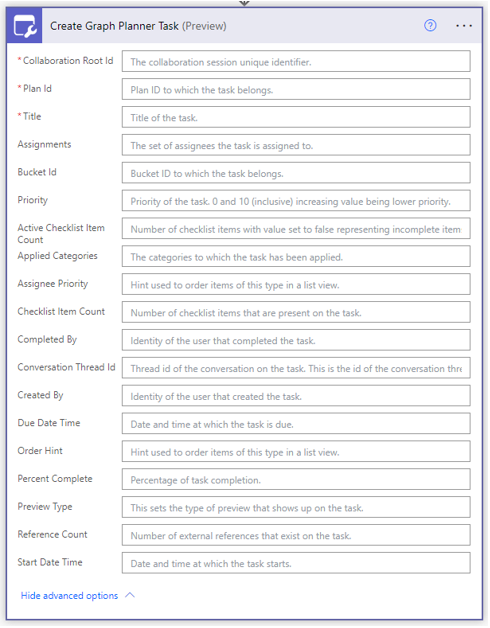
This step action creates a Graph Planner Task using Collaboration controls Planner task virtual table:
- Collaboration Root ID (Required): Collaboration session unique identifier
- Plan ID (Required): Plan ID that the task belongs
- Title (Required): Title of the task
- Assignments: A json formatted object that represents all the assignments of a Task. See, plannerAssignments resource type
- Bucket ID: Bucket ID to which the tasks belong.
- Priority: Priority of the task. 0 and 10 (inclusive) increasing value being lower priority.
Advanced options:
- Active Checklist Item Count (Advanced): Number of checklist items with value set to false representing incomplete items.
- Applied Categories: A json formatter object that represents all the categories to apply for the task. See, plannerAppliedCategories resource type.
- Assignee Priority: String value hints used to order items of this type in a list view. See, using order hints in Planner
- Checklist Item Count: Number of checklist items that are present on the task.
- Completed By: A json formatted object that represents the identity of the user that completed the task. See, identitySet resource type
- Conversation Thread ID: Thread ID of the conversation on the task. This is the ID of the conversation thread object created in the group.
- Created By: A json formatted object that represents the identity of the user that created the task. See, identitySet resource type
- Due Date Time: Date and time at which the task is due. The Timestamp type represents date and time information using ISO 8601 format and is always in UTC time. For example, midnight UTC on January 1, 2014 is 2014-01-01T00:00:00Z.
- Order Hint: Hint used to order items of this type in a list view. The format is defined as outlined in using order hints in Planner.
- Percent Complete: Percentage of task completion (0-100)
- Preview Type: This sets the type of preview that shows up on the task. The possible values are: automatic, noPreview, checklist, description, reference.
- Reference Count: Number of external references that exist on the task.
- Start Date Time: Date and time at which the task starts. The Timestamp type represents date and time information using ISO 8601 format and is always in UTC time. For example, midnight UTC on January 01, 2014 is 2014-01-01T00:00:00Z.
Get Planner Task

This step action returns a Planner Task data using Collaboration controls Planner task virtual table:
Task ID (Required): Task unique identifier
Update Planner Task
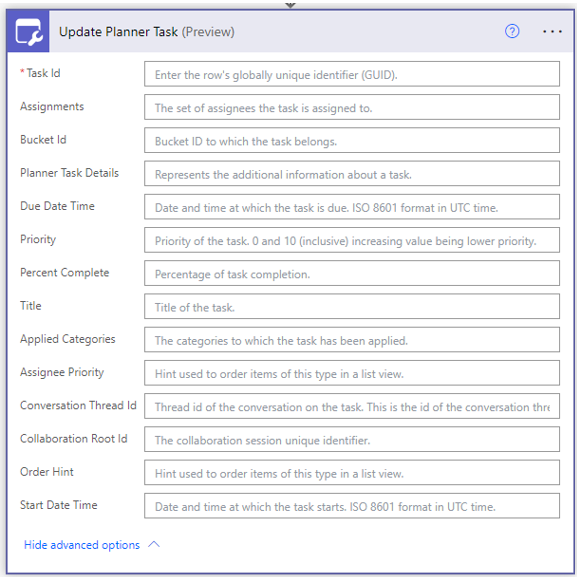
This step action updates a planner task record using Collaboration controls planner task virtual table.
- Task ID (Required): Task unique identifier.
- Assignments: A json formatted object that represents all the assignments of a Task. See plannerAssignments resource type - Microsoft Graph v1.0 | Microsoft Docs.
- Bucket ID: Bucket ID to where the task belongs.
- Planner Task Details: Represents the additional information about a task.
- Due Date Time: Date and time at which the task is due. The Timestamp type represents date and time information using ISO 8601 format and is always in UTC time. For example, midnight UTC on January 01, 2014 is 2014-01-01T00:00:00Z.
- Priority: Priority of the task. 0 and 10 (inclusive) increasing value being lower priority.
- Percent Complete: Percentage of task completion (0-100).
- Title: Title of the task.
Advanced options:
- Applied Categories: A json formatted object that represents all the categories to apply for the task. See, plannerAppliedCategories resource type.
- Assignee Priority: String value hints used to order items of this type in a list view. See, using order hints in Planner.
- Conversation Thread ID: Thread ID of the conversation on the task. This is the ID of the conversation thread object created in the group.
- Collaboration Root ID: The collaboration session unique identifier.
- Order Hint: Hint used to order items of this type in a list view. The format is defined as outline here.
- Start Date Time: Date and time at which the task starts. The Timestamp type represents date and time information using ISO 8601 format and is always in UTC time. For example, midnight UTC on January 1, 2014 is 2014-01-01T00:00:00Z.
Example Flow Scenario
The following are examples of flows:
Getting a response from Microsoft forms, creating a Collaboration session and a task associated.
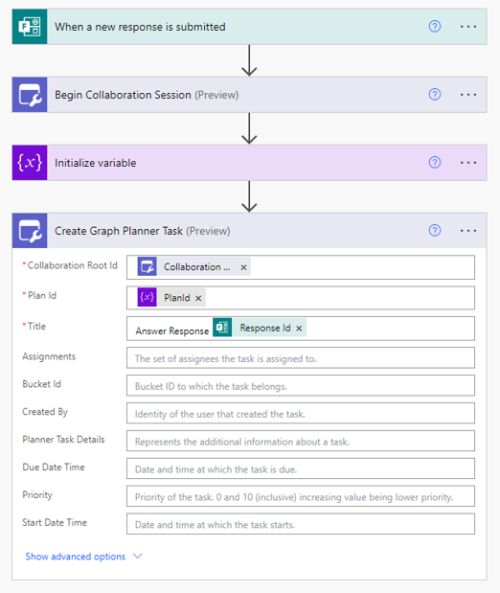
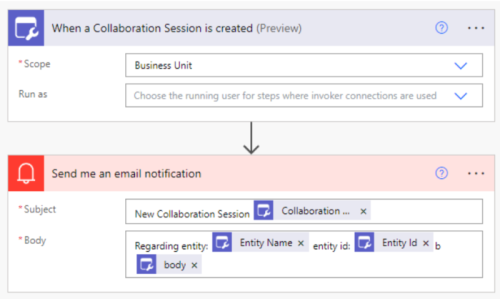
Every time a collaboration session is created, capture the details and send an e-mail notification.
Note
Multiple flows could be triggered in this way to perform different actions, using data from the response of the Collaboration session creation.
See also
Platform Docs
Feedback
Coming soon: Throughout 2024 we will be phasing out GitHub Issues as the feedback mechanism for content and replacing it with a new feedback system. For more information see: https://aka.ms/ContentUserFeedback.
Submit and view feedback for