Automate webpages
Power Automate offers several actions under the browser automation group to enable users to interact with web browsers. Browser automation is a special case of UI automation used for interacting with web elements.
Apart from the built-in Automation browser, four web browsers are currently supported:
- Microsoft Edge
- Microsoft Internet Explorer
- Google Chrome
- Mozilla Firefox
Important
Before automating webpages, you need to install the appropriate browser extension and configure the browser accordingly. To find more information regarding the supported browsers and the required extensions, go to Install Power Automate browser extensions.
To automate a webpage, you must launch or attach to one of the supported browsers, and then deploy browser automation actions. Browser automation actions enable you to interact with webpages and emulate events, such as clicking, using JavaScript scripts. You can develop the flow manually or using the recorder.
Note
Web automation in Power Automate for desktop has a behavior where it can't open with a different system user or attach to any browser that was opened with a different system user other than the one used to open Power Automate for desktop. This behavior occurs for security reasons.
By default, browser automation actions don't move the mouse pointer on the screen. As a result, they can run even when the web browser is minimized, or the target tab isn't the focused tab. This functionality allows you to perform other activities on your machine while a browser automation flow is running.
However, some actions like Click link on web page and Populate text field on web page support physical interactions for cases where JavaScript events don't work as expected. If you enable physical interaction, the browser can't be minimized, and the target tab must be focused.
Use Internet Explorer vs Automation browser
Although Automation browser is based on Internet Explorer, it provides some features and limitations that increase automation effectiveness.
Automation browser works out of the box, while Internet Explorer requires extra configuration. Security configurations may be unwanted in organizations with strict security policies that prohibit manual changes.
The Click download link on web page action works with Automation browser whatever the Internet Explorer version. For the actual Internet Explorer, the action requires version 8 or below.
Automation browser suppresses all message dialog boxes that may pop up unhindered in the Internet Explorer. If this feature is undesirable, apply the ShowDialogs suffix at the end of the URL in the Launch new Internet Explorer action.
Automation browser doesn't support tabs or opening links in windows. When you select a link, the browser opens it in the same window/instance.
Automation browser has a small performance advantage because it doesn't load unnecessary elements and add-ons like the Internet Explorer does.
Automate browsers and web elements
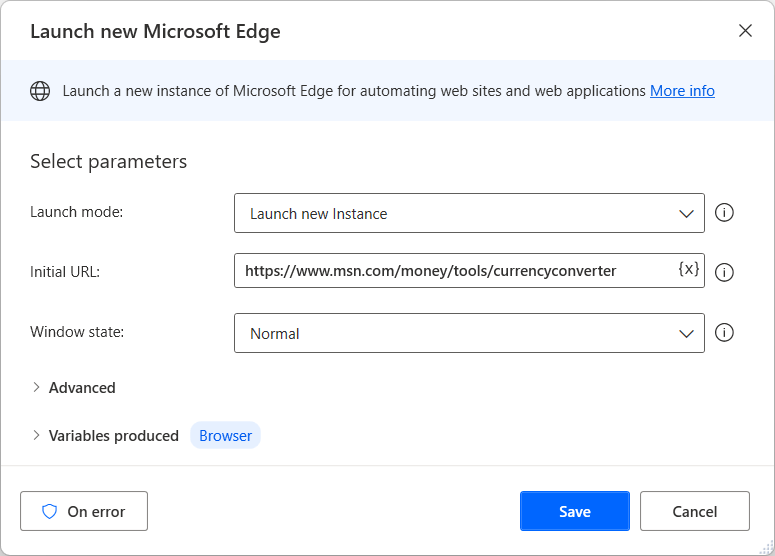
Before deploying any other browser automation actions, use one of the browser-launching actions to create a browser instance. You can start a new browser session or attach to an existing one.
- Launch new Microsoft Edge
- Launch new Internet Explorer
- Launch new Chrome
- Launch new Firefox
When a browser instance is available, you can deploy other browser automation actions to interact with webpages. The web form-filling actions focus on providing input to webpages, while the web data extraction actions draw data from webpages.
You can find a list with all the available browser automation actions in the Browser automation actions reference.
Apart from a browser instance, most browser automation actions require a UI element to interact with. Existing UI elements are visible in the UI element pane, while new ones can be added directly through the action's properties or the pane. To find more information about UI elements, go to Automate using UI elements.
Note
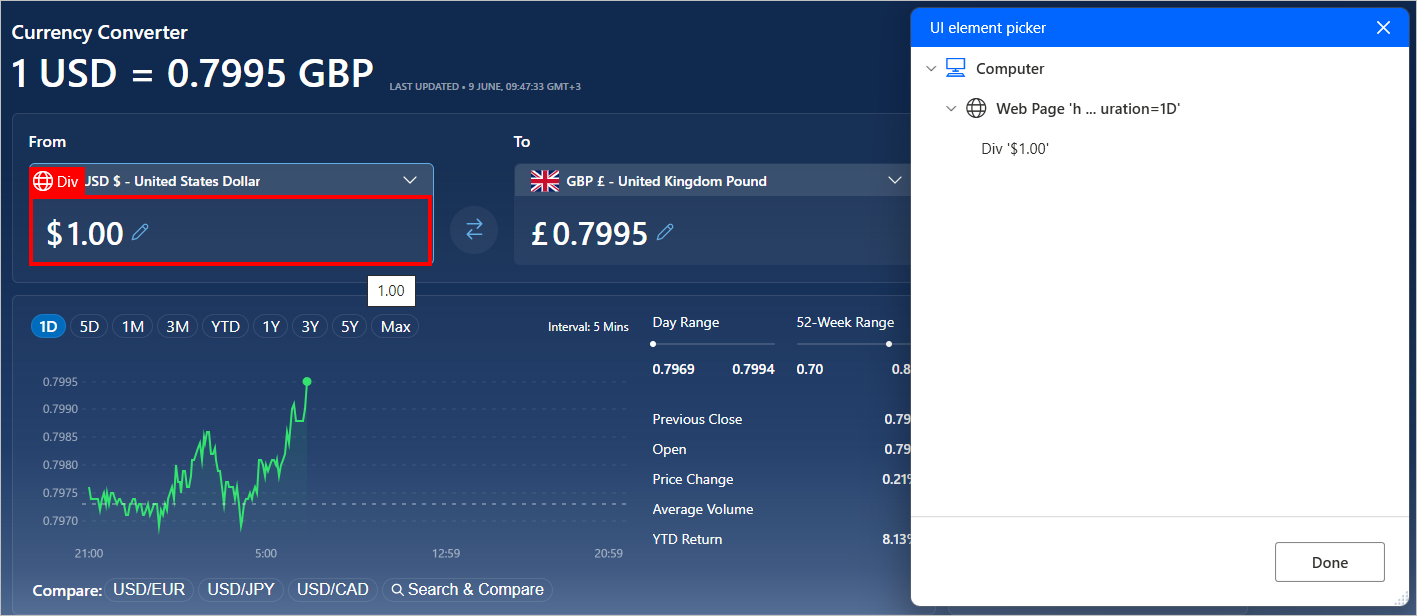
Browser automation actions accept exclusively UI elements captured from webpages. Therefore, UI elements captured from desktop applications aren't available in the browser automation actions.
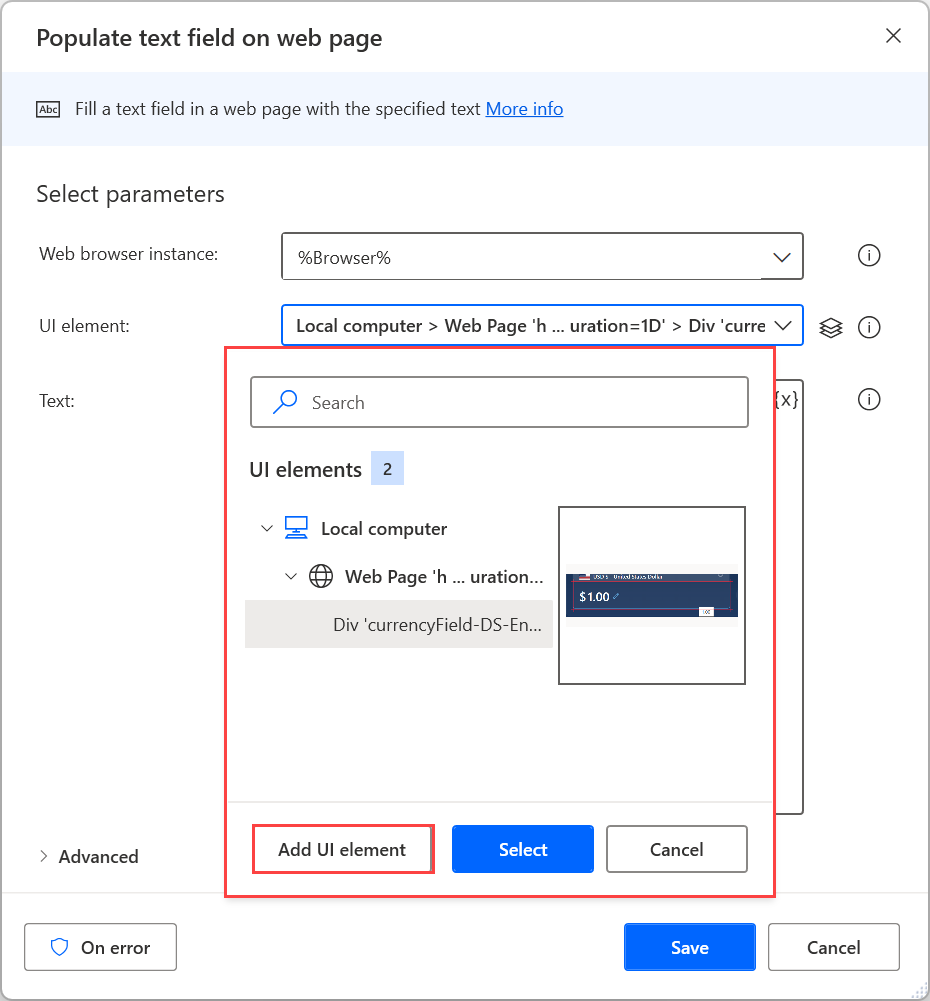
To add a new UI element, highlight the appropriate web element and press Ctrl + Left click. After adding all the required elements, select Done to save them.
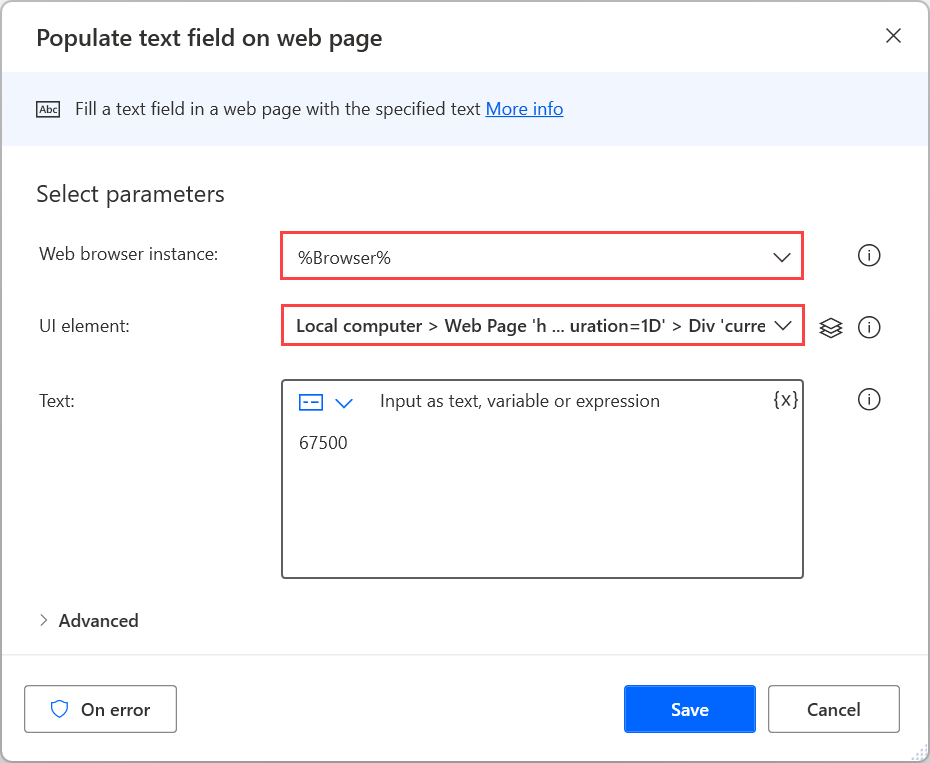
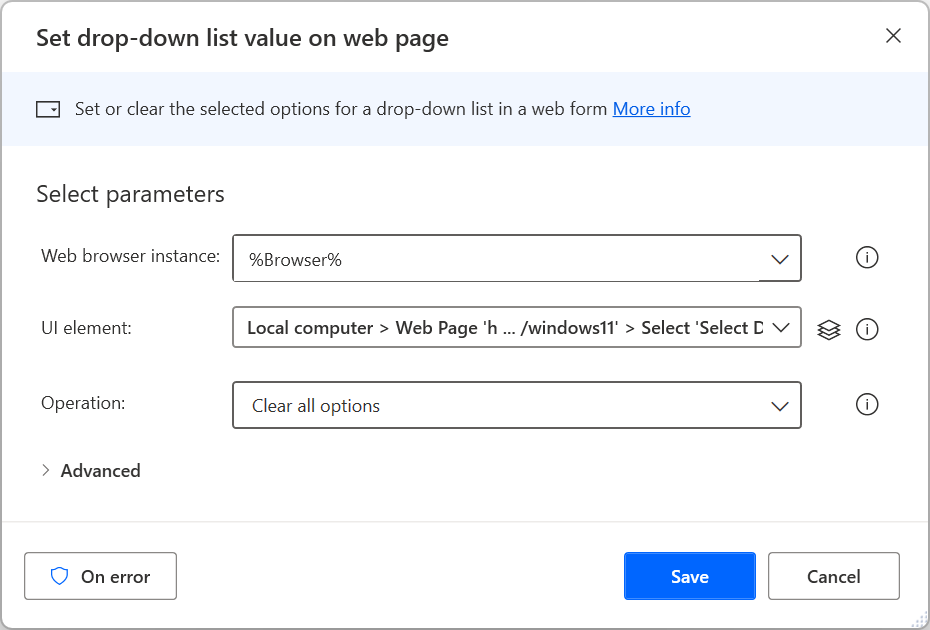
Enter data on webpages
To provide input to a webpage, select the appropriate web form-filling action depending on the nature of the element. For example, use the Set drop-down list value on web page action to select an item in a dropdown menu.
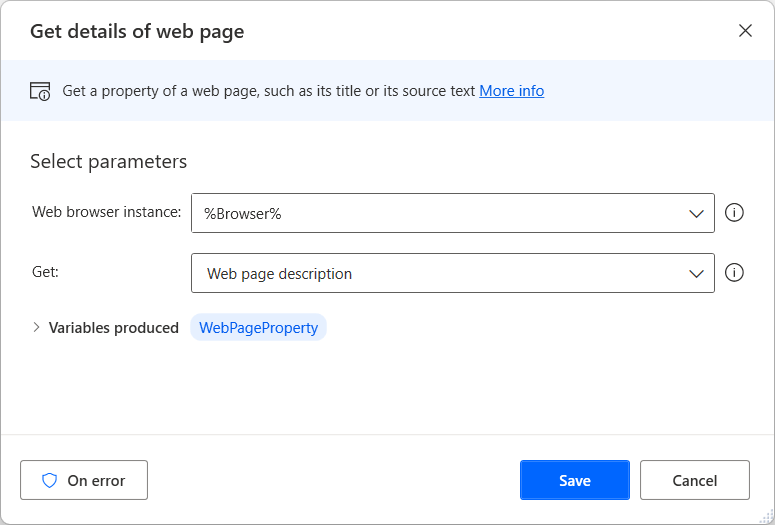
Extract data from webpages
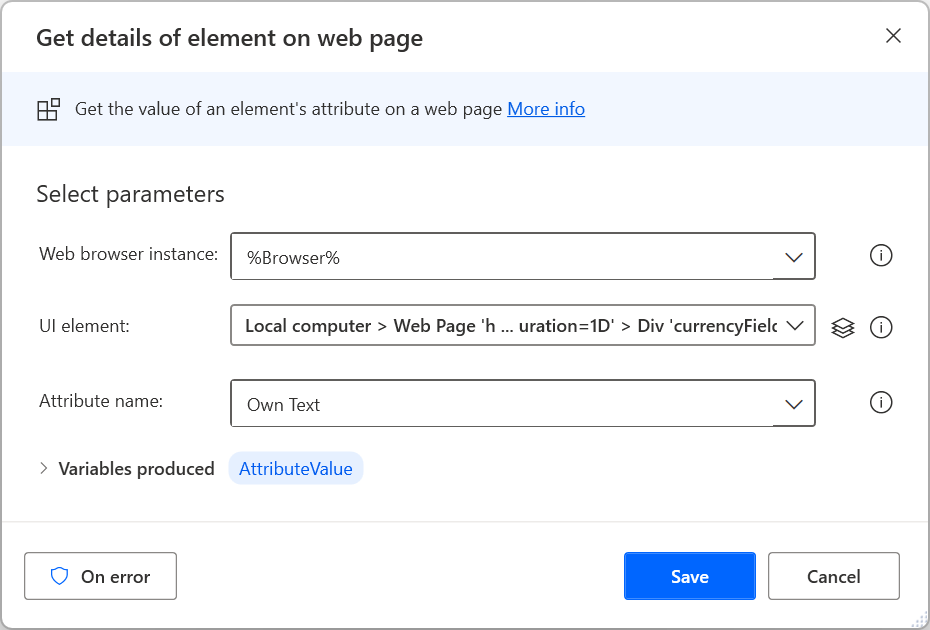
To extract a specific piece of data from a webpage, use the Get details of web page or the Get details of element on web page action, depending on whether the data in question concerns the entire webpage or an element inside it. To find more information regarding details extraction from webpages, go to Retrieve details from a webpage.
Apart from the pre-populated options, you can manually select to retrieve any HTML attribute the chosen web element may have.
Additionally, the Get details of element on web page action supports the waelementrectangle attribute that retrieves the top-left point and the dimensions of a web element. To find more information about this attribute, go to Get the coordinates and size of a web element.
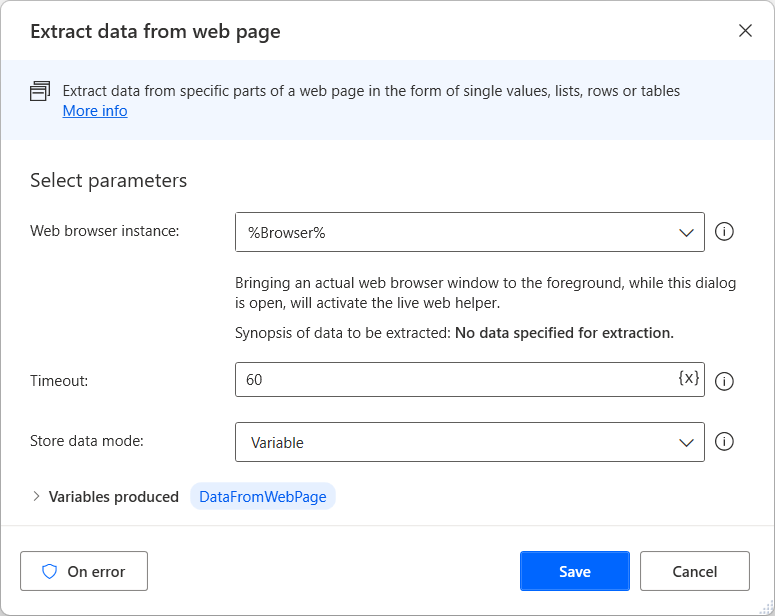
Extract structured data from webpages
To extract large amounts of structured data, use the Extract data from web page action. You can store the extracted data as single values, lists, and tables, or you can paste them into Excel worksheets.
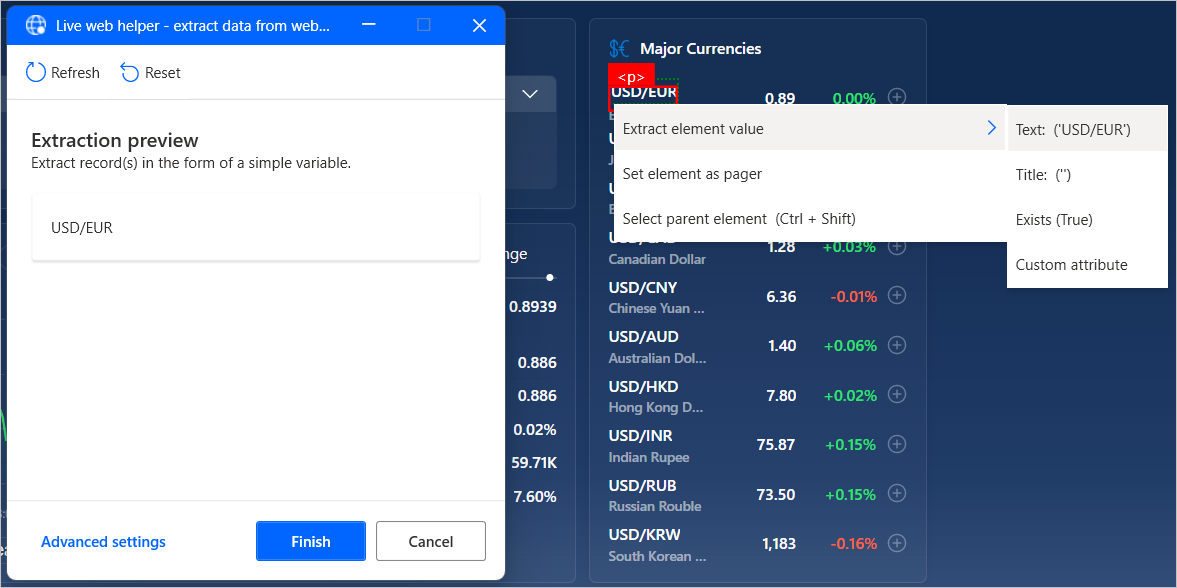
While the live web helper is open, select or right-click the target data to view the available extraction options. To extract a value, select Extract element value, and then choose the HTML attribute that you want to retrieve.
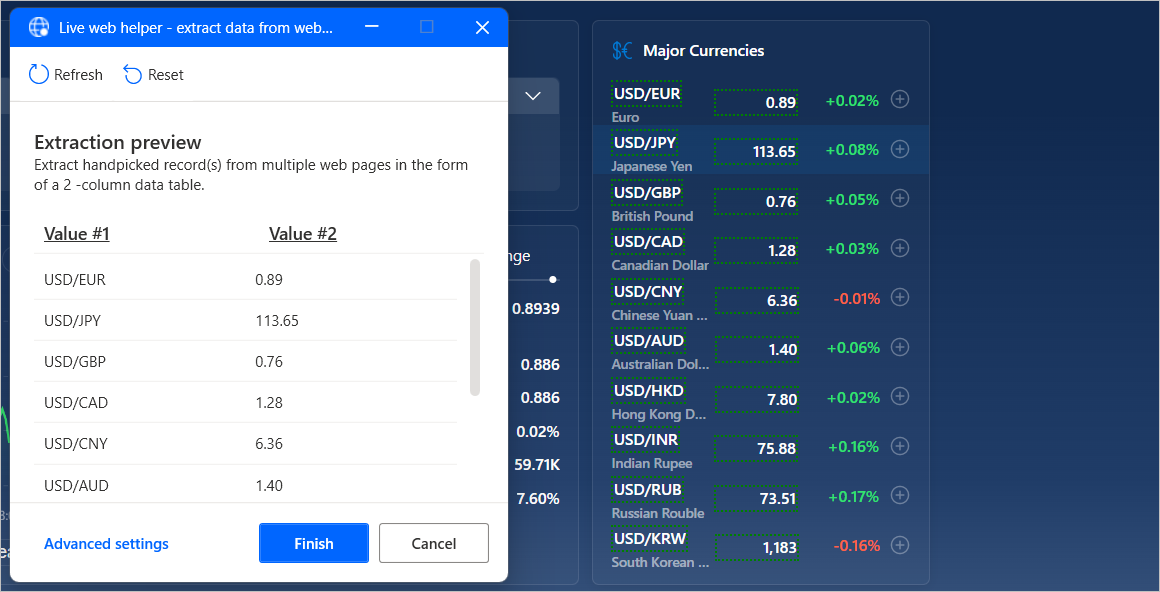
Power Automate automatically identifies lists or tables of data after selecting two or more of their elements for extraction.
Note
To extract an entire HTML table faster, select or right-click the table and select Extract entire HTML table. This option is available only for elements that Power Automate recognizes as HTML tables. If the data is structured as a table but isn't recognized as an HTML table, extract the first two of their elements, as previously described.
Alternatively, you can manually create or edit CSS selectors that pinpoint specific elements.
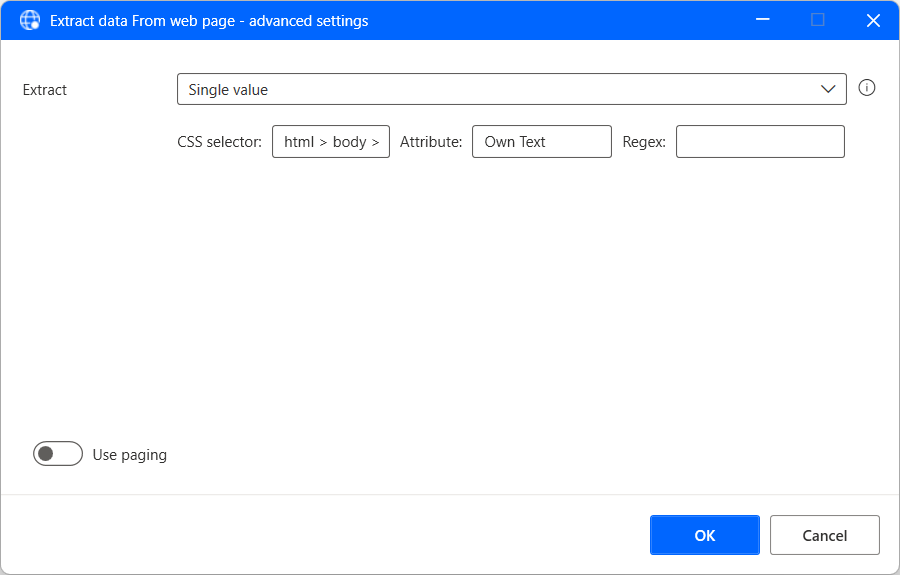
To create a CSS selector, select Advanced settings in the live web helper, and then choose the type of value you want to extract. You can choose to extract a single value, multiple handpicked values (a different selector defines each value), lists, tables, and entire HTML tables.
Each CSS selector consists of the tree structure of the HTML element, the attribute to extract from it, and optionally a regular expression to implement more advanced selection.
Extract structured data from multiple pages
If the information to extract is split between multiple pages with the same structure, you need to set the appropriate paging configuration.
Pagers are web elements that allow you to navigate between multiple pages. To set a pager for the data extraction, select or right-click the respective pager element and select Set element as pager.
Additionally, you can manually specify a pager through the Advanced settings of the live web helper.

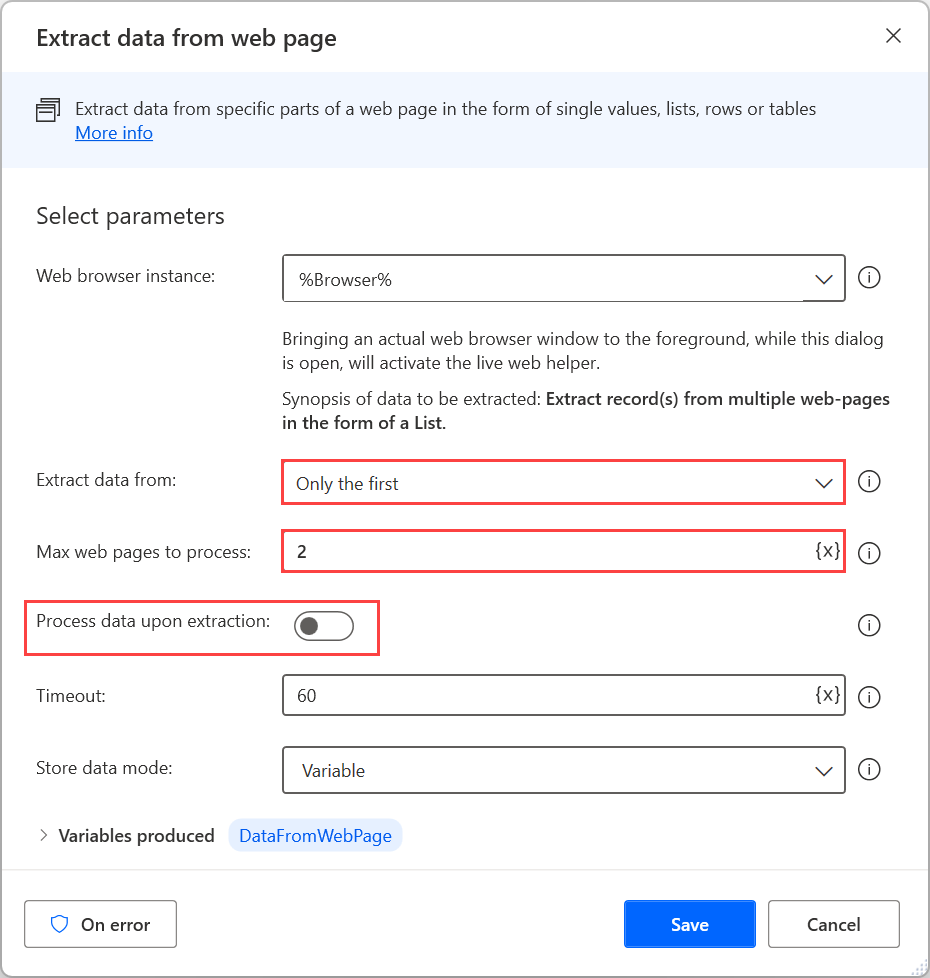
When data selection is complete, close the live web helper and configure the appropriate parameters in the Extract data from web page action. You can select between extracting data from all the available pages or a specific number of them.
Optionally, you can enable Process data upon extraction to let Power Automate process the extracted data in different ways, such as removing whitespaces and unwanted characters. However, this option may affect performance for large amounts of data.
Interact with web services
Power Automate provides various HTTP actions that enable you to communicate directly with web resources, such as webpages, files, and APIs, without needing a web browser. You can find a list with all the available HTTP actions in the HTTP actions reference.
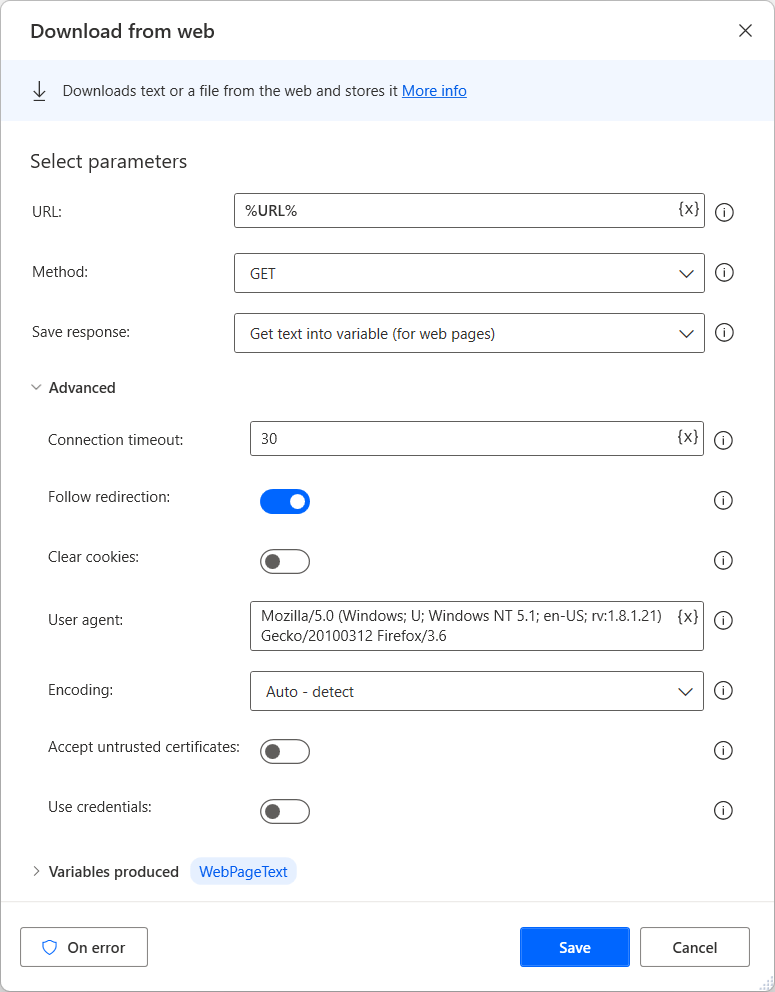
Download web resources
Use the Download from web action to directly download webpage content or files stored on the web.
Both the GET and POST methods can be used within this action. Files can be downloaded directly to the disk, while webpage contents are saved into variables.
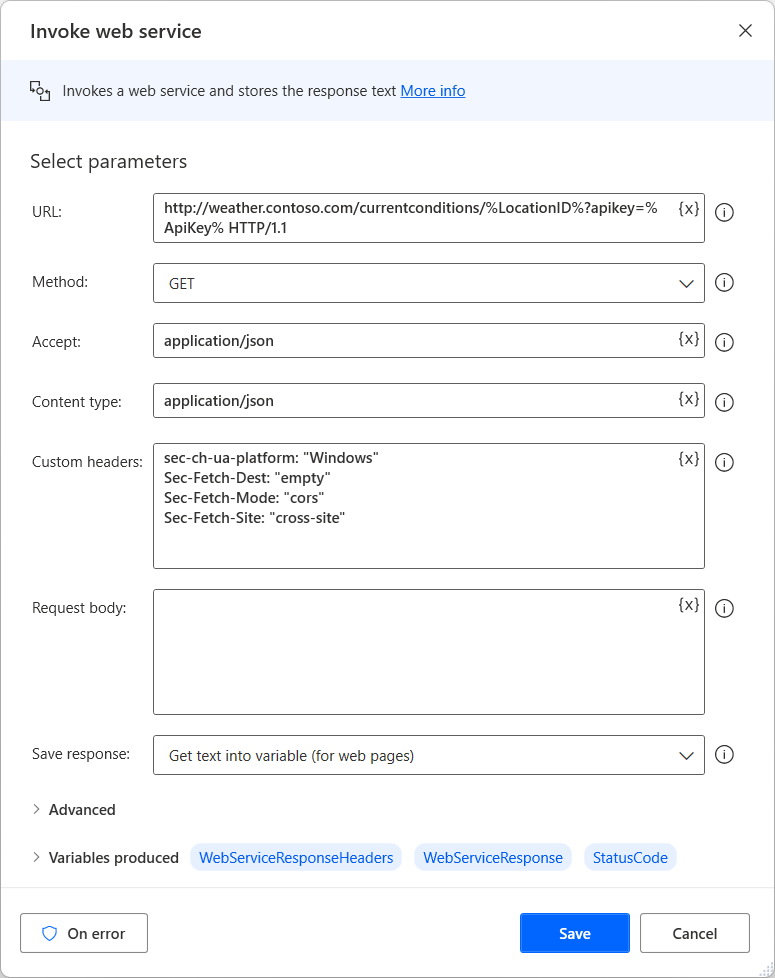
Access web APIs
Use the Invoke web service action to access web APIs. Various methods are compatible with this action, which is fully customizable in order to accommodate virtually any API.
Note
Before using the Invoke web service action, refer to the documentation page of the web service you want to use. The following example can't be applied to all scenarios, as each web service requires a different configuration and syntax.
Apart from the Invoke web service action, Power Automate provides the Invoke SOAP web service action to interact with SOAP web services.
Feedback
Coming soon: Throughout 2024 we will be phasing out GitHub Issues as the feedback mechanism for content and replacing it with a new feedback system. For more information see: https://aka.ms/ContentUserFeedback.
Submit and view feedback for