Add and configure controls in canvas apps
Add a variety of UI elements to your canvas app, and configure aspects of their appearance and behavior directly, from the toolbar, in the Properties tab, or in the formula bar. These UI elements are called controls, and the aspects that you configure are called properties.
Prerequisites
If you don't already have a Power Apps license, sign up, and then sign in.
Create a blank canvas app.
You can always take the tour later by selecting the question-mark icon near the upper-right corner of your screen and then selecting Take the intro tour.
Add and select a control
On the Insert tab, perform either of these steps:
- Select Label or Button to add one of those types of controls.
- Select a category of controls, and then select the type of control that you want to add.
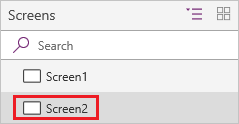
For example, select New screen, and then select Blank to add a blank screen to your app. (Screens are a type of control that can contain other types of controls.)

The new screen is named Screen2 and appears in the left navigation pane. This pane shows a hierarchical list of controls in your app so that you can easily find and select each control.
To demonstrate how this list works, select Label on the Insert tab. The new control appears under Screen2 in the hierarchical list.

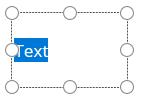
In the screen, a box with six handles surrounds the label by default. That type of box surrounds whichever control is selected. If you select the screen by clicking or tapping in it (but outside the label), the box disappears from the label. To select the label again, you can click or tap in it, or you can click or tap its name in the hierarchical list of controls.
Important
You must always select a control before you can configure it.
Rename a control
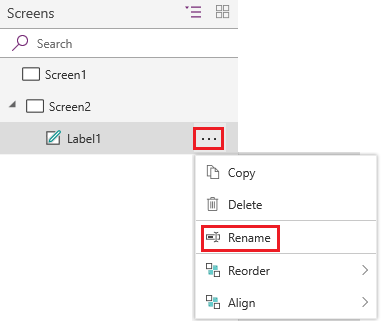
In the hierarchical list of controls, hover over the control that you want to rename, select the ellipsis button that appears, and then select Rename. You can then type a unique, memorable name to make building your app easier.
Delete a control
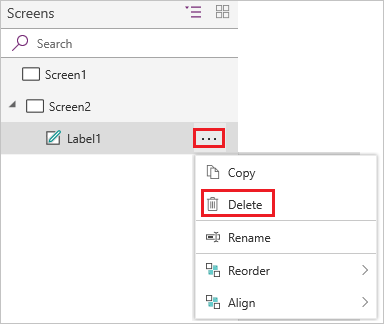
In the hierarchical list of controls, hover over the control that you want to delete, select the ellipsis button that appears, and then select Delete. To delete a control that isn't a screen, you can also select the control on the canvas, and then press the Delete key.
Reorder screens
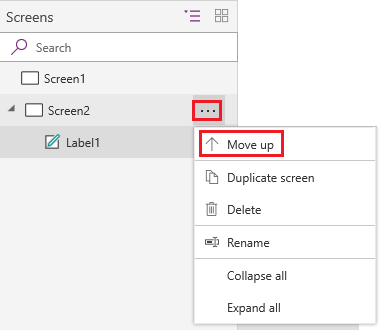
In the hierarchical list of controls, hover over a screen that you want to move up or down, select the ellipsis button that appears, and then select Move up or Move down.
Note
When the app is opened, the screen at the top of the hierarchical list of controls usually appears first. But you can specify a different screen by setting the OnStart property to a formula that includes the Navigate function.
Move and resize a control
To move a control, select it, hover over its center so that the four-headed arrow appears, and then drag the control to a different location.

To resize a control, select it, hover over any handle in the selection box so that the two-headed arrow appears, and then drag the handle.

Note
As this topic describes later, you can also move and resize a control by modifying any combination of its X, Y, Height, and Width properties in the formula bar.
Change the text of a label or a button
Select a label or button, double-click the text that appears in the control, and then type the text that you want.
Note
As this topic describes later, you can also change this text by modifying its Text property in the formula bar.
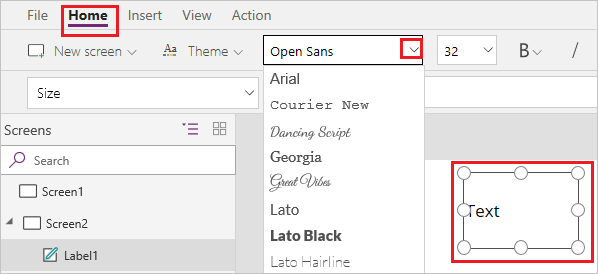
Configure a control from the toolbar
By configuring a control from the toolbar, you can specify a wider variety of options than you can by configuring a control directly.
For example, you can select a label, select the Home tab, and then change the font of the text in the label.
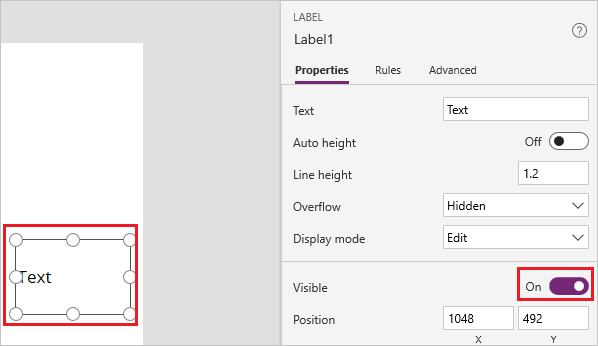
Configure a control from the Properties tab
By using the Properties tab, you can specify a wider variety of options than you can by configuring a control from the toolbar.
For example, you can select a control and then show or hide it by changing its Visible property.
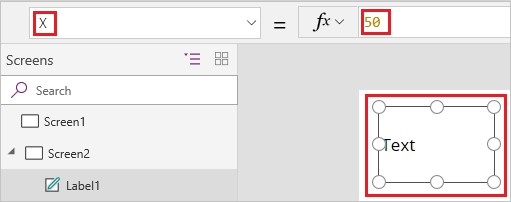
Configure a control in the formula bar
Instead of configuring a control directly, from the toolbar, or in the Properties tab, you can configure a control by selecting a property in the property list and then specifying a value in the formula bar. By taking this approach, you can search for a property alphabetically, and you can specify more types of values.
For example, you can select a label and then configure it in these ways:
Move it by selecting X or Y in the properties list and then specifying a different number in the formula bar.
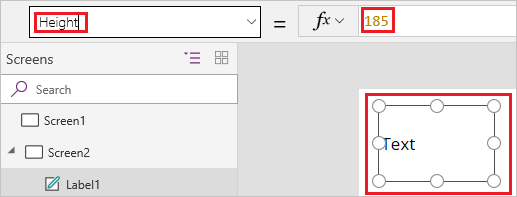
Resize it by selecting Height or Width in the properties list and then specifying a different number in the formula bar.
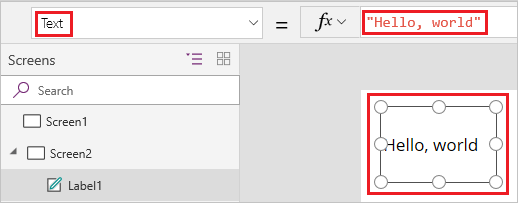
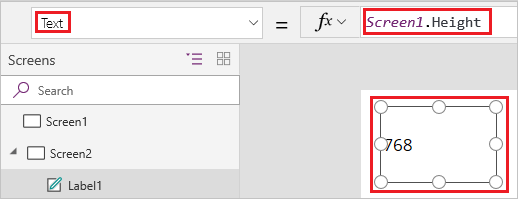
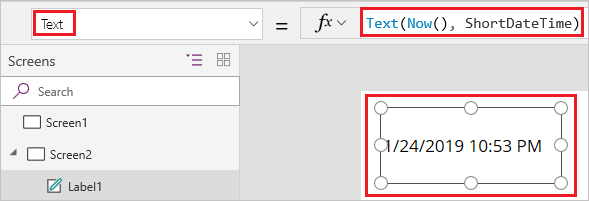
Change its text by selecting Text in the properties list and then specifying any combination of a literal string, an expression, or a formula in the formula bar.
A literal string is surrounded by quotation marks and appears exactly as you type it. "Hello, world" is a literal string.
An expression doesn't include a function and is often based on a property of another control. Screen1.Height is an expression that shows the height of Screen1.
A formula includes one or more functions. The Now function returns the current date and time in your local time zone, and the Text function formats values such as dates, times, and currency.
Formulas are usually much more complex than this example so that they can update data, sort it, filter it, and perform other operations. For more information, see the formula reference.
Next steps
Feedback
Coming soon: Throughout 2024 we will be phasing out GitHub Issues as the feedback mechanism for content and replacing it with a new feedback system. For more information see: https://aka.ms/ContentUserFeedback.
Submit and view feedback for