Using storage to share data between UI-less custom functions and the task pane
If you need to share data values between your UI-less custom functions and the task pane, you can use the OfficeRuntime.storage object. UI-less custom functions and task do not share the same runtime and cannot access the same data. OfficeRuntime.storage saves simple key/value pairs that you can access from both UI-less custom functions and the task pane.
This sample accompanies the article section Store and access data
Applies to
- UI-less custom functions on Excel desktop and online.
Note: Shared runtime is now recommended for most custom functions scenarios. This sample applies to UI-less custom functions only.
Prerequisites
To learn more about UI-less custom functions, see Authentication for UI-less custom functions. See Custom Functions requirement sets for a list of the platforms that support custom functions.
Solution
| Solution | Author(s) |
|---|---|
| Using storage to share data between UI-less custom functions and the task pane | Microsoft |
Version history
| Version | Date | Comments |
|---|---|---|
| 1.0 | May 1, 2019 | Initial release |
| 1.1 | May 26, 2021 | Update to use GitHub pages for hosting |
| 1.2 | July 28, 2022 | Update JavaScript variable declarations |
Sample: Sharing data between custom functions and the task pane
This sample code shows how to share data between UI-less custom functions and the task pane. The task pane allows the user to enter a key/value pair and save it to storage. Then in a UI-less custom function, the value can be retrieved using the GETVALUE(key) custom function. Or the user can use the STOREVALUE(key,value) custom function to store a value, and then retrieve it in the task pane.
Run the sample
You can run this sample in Excel in a browser. The add-in web files are served from this repo on GitHub.
- Download the manifest.xml file from this sample to a folder on your computer.
- Open Office on the web.
- Choose Excel, and then open a new document.
- Open the Insert tab on the ribbon and choose Office Add-ins.
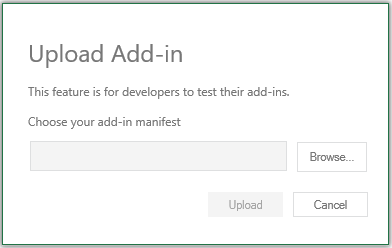
- On the Office Add-ins dialog, select the MY ADD-INS tab, choose Manage My Add-ins, and then Upload My Add-in.
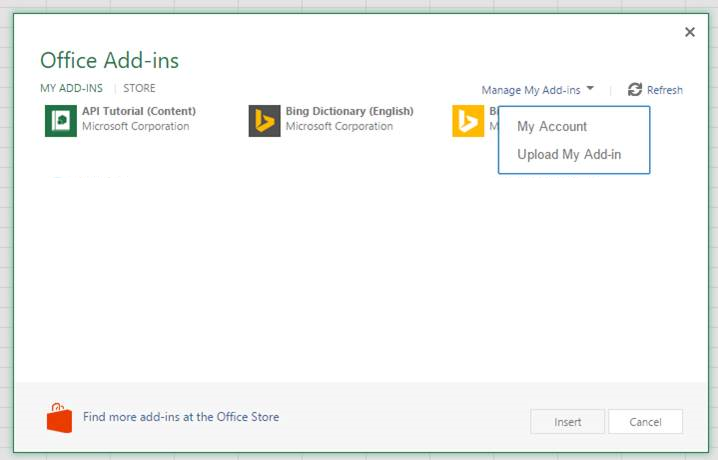
- Browse to the add-in manifest file, and then select Upload.
- Verify that the add-in loaded successfully. You will see a Show Taskpane button on the Home tab on the ribbon.
Once the add-in is loaded use the following steps to try out the functionality.
Open the task pane, and enter a value in the text box labeled Send token to custom function.
Choose Send.
In a cell, enter the following text to retrieve the value.
=CONTOSO.GETVALUE("token")When the cell is calculated you will see the value you entered from the task pane.
How the custom functions work with storage
The /src/functions/functions.js file contains two custom functions named StoreValue and GetValue.
StoreValue takes a key and value from the user and stores them by calling the OfficeRuntime.storage.setItem method as shown in the following sample code.
function StoreValue(key, value) {
  return OfficeRuntime.storage.setItem(key, value).then(function (result) {
      return "Success: Item with key '" + key + "' saved to storage.";
  }, function (error) {
      return "Error: Unable to save item with key '" + key + "' to storage. " + error;
  });
}
GetValue retrieves a value for a given key by calling the OfficeRuntime.storage.getItem method as shown in the following sample code.
function GetValue(key) {
  return OfficeRuntime.storage.getItem(key);
}
How the task pane works with storage
The /src/taskpane/taskpane.html has two JavaScript functions that are called from buttons on the UI. The SendTokenToCustomFunction function retrieves the key and token from text boxes on the task pane. Then it calls the OfficeRuntime.storage.setItem method to store the key/value pair as shown in the following sample code.
function SendTokenToCustomFunction() {
  const token = document.getElementById('tokenTextBox').value;
  const tokenSendStatus = document.getElementById('tokenSendStatus');
  const key = "token";
  OfficeRuntime.storage.setItem(key, token).then(function () {
    tokenSendStatus.value = "Success: Item with key '" + key + "' saved to Storage.";
  }, function (error) {
    tokenSendStatus.value = "Error: Unable to save item with key '" + key + "' to Storage. " + error;
  });
}
The ReceiveTokenFromCustomFunction function retrieves the key from a text box on the task pane. Then it calls the OfficeRuntime.storage.getItem method to get value for the key and display it on the page.
function ReceiveTokenFromCustomFunction() {
  const key = "token";
  const tokenSendStatus = document.getElementById('tokenSendStatus');
  OfficeRuntime.storage.getItem(key).then(function (result) {
    tokenSendStatus.value = "Success: Item with key '" + key + "' read from Storage.";
    document.getElementById('tokenTextBox2').value = result;
  }, function (error) {
    tokenSendStatus.value = "Error: Unable to read item with key '" + key + "' from Storage. " + error;
  });
}
Run the sample from Localhost
If you prefer to host the web server for the sample on your computer, follow these steps:
You need http-server to run the local web server. If you haven't installed this yet you can do this with the following command:
npm install --global http-serverUse a tool such as openssl to generate a self-signed certificate that you can use for the web server. Move the cert.pem and key.pem files to the root folder for this sample.
From a command prompt, go to the root folder and run the following command:
http-server -S --cors . -p 3000To reroute to localhost run office-addin-https-reverse-proxy. If you haven't installed this you can do this with the following command:
npm install --global office-addin-https-reverse-proxyTo reroute run the following in another command prompt:
office-addin-https-reverse-proxy --url http://localhost:3000Follow the steps in Run the sample, but upload the
manifest-localhost.xmlfile for step 6.
Copyright
Copyright (c) 2019 Microsoft Corporation. All rights reserved.
This project has adopted the Microsoft Open Source Code of Conduct. For more information, see the Code of Conduct FAQ or contact opencode@microsoft.com with any additional questions or comments.