Features in Configuration Manager technical preview version 1904
Applies to: Configuration Manager (technical preview branch)
This article introduces the features that are available in the technical preview for Configuration Manager, version 1904. Install this version to update and add new features to your technical preview site.
Review the technical preview article before installing this update. That article familiarizes you with the general requirements and limitations for using a technical preview, how to update between versions, and how to provide feedback.
The following sections describe the new features to try out in this version:
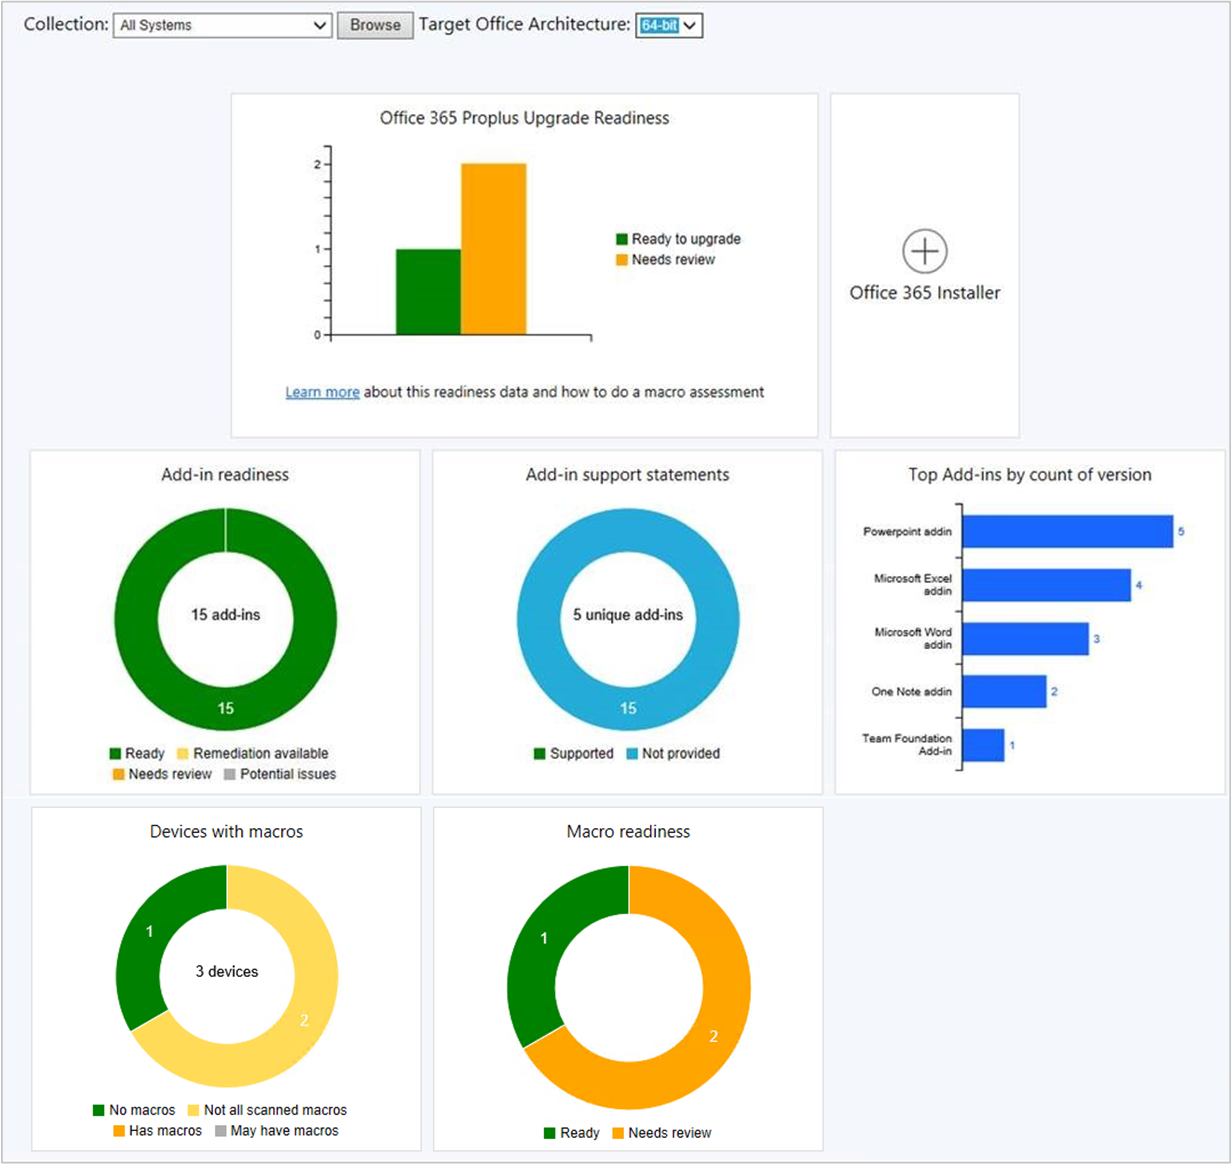
Office 365 ProPlus upgrade readiness dashboard
To help you determine which devices are ready to upgrade to Microsoft 365 Apps for enterprise, there's a new readiness dashboard. It includes the Office 365 ProPlus Upgrade Readiness tile that released in Configuration Manager current branch version 1902. The following new tiles on this dashboard help you evaluate Office add-in and macro readiness:
- Add-in readiness
- Add-in support statements
- Top add-ins by count of version
- Number of devices that have macros
- Macro readiness
In the Configuration Manager console, go to the Software Library workspace, expand Office 365 Client Management, and select the Office 365 ProPlus Upgrade Readiness node.
For more information on prerequisites and using this data, see Integration for Microsoft 365 Apps readiness.
Configure dynamic update during feature updates
Use a new client setting to configure dynamic updates for Windows 10 feature updates. Dynamic update can install language packs, features on demand, drivers, and cumulative updates during Windows setup. This setting changes the setupconfig file used during feature update installation. For more information about Dynamic Update, see The benefits of Windows 10 Dynamic Update.
Try it out!
Try to complete the tasks. Then send Feedback with your thoughts on the feature.
- Go to Administration > Overview > Client Settings.
- Double-click on either Default Client Settings or one of your custom client settings.
- Click on Software Updates.
- Change Enable Dynamic Update for feature updates to either Yes or No.
- Not Configured - The default value. No changes are made to the setupconfig file.
- Yes - Enable Dynamic Update.
- No - Disable Dynamic Update.
Community hub and GitHub
The IT Admin community has developed a wealth of knowledge over the years. Rather than reinventing Scripts and Reports from scratch, we've built a Configuration Manager Community Hub where IT Admins can share with each other. By using the work of others, you can save hours of work. The community hub fosters creativity by building on others work and having other people build on yours. GitHub already has industry-wide processes and tools built for sharing. Now, the community hub uses those tools directly in the Configuration Manager Console as foundational pieces for driving this new community.
Prerequisites
A GitHub account
- A GitHub account is only required to contribute and share content from the My Hub page.
- If you don't wish to share, you can use contributions from others without having a GitHub account.
- If you don't already have a GitHub account, you can create one before you join.
The device running the Configuration Manager console used to access the hub needs the following:
- Windows 10 build 17110 or higher
- .Net Framework version 4.6 or higher
To download reports, you'll need Full Administrator rights in Configuration Manager.
To download reports, you need to turn on the option Use Configuration Manager-generated certificates for HTTP site systems at the site you're importing into. For more information, see enhanced HTTP. This prerequisite is also needed in 1906 Technical Preview for updating hub objects.
- Go to Administration > Site Configuration > Sites.
- Select the site and choose Properties in the ribbon.
- On the General tab, select the option to Use Configuration Manager-generated certificates for HTTP site systems.
Try it out!
Try to complete the tasks. Then send Feedback with your thoughts on the feature.
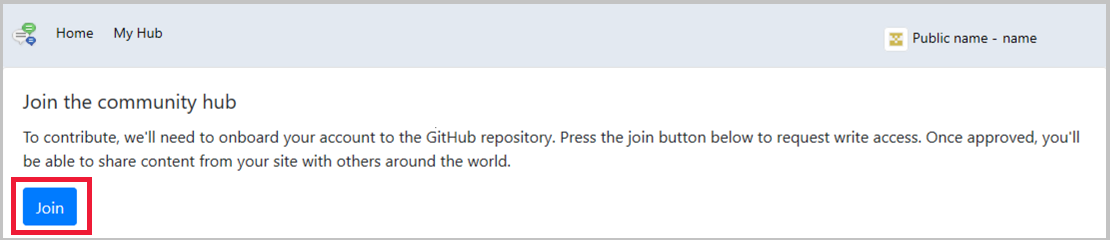
Join the community hub to contribute content
Go to the Hub node in the Community workspace.
Click on My Hub and you're prompted to sign into GitHub. If you don't have an account, you're redirected to GitHub where you can create one.
Once you've signed into GitHub, click the Join button to join the community hub.
After joining, you'll see your membership request is pending. Your account needs approval by the Configuration Manager Hub Content Curation team. Approvals are done once a day, so it may take up to 1 business day for your approval to be granted.
Once you're granted access, you'll get an email from GitHub. Open the link in the email to accept the invitation.
Contribute content
Once you've accepted the invitation, you can contribute content.
- Go to Community > Hub > My Hub.
- Click Add an Item to open the contribution wizard.
- Specify the settings for the object:
- Type:
- Report
- PowerShell script for Run Scripts use
- Name: Name of your object
- Description: The description of the object you're contributing.
- Type:
- Click Next to submit the contribution.
- Once the contribution is complete, you'll see the GitHub pull request (PR) link. The link is also emailed to you. You can paste the link into a browser to view the PR. Your PR goes through the standard GitHub merge process.
- Click Close to exit the contribution wizard.
- Once the PR has been completed and merged, the new item will show up on the community hub home page for others to see.
- Currently, the audience is limited to other IT admins who are looking at the community hub in the Tech Preview builds.
Use the contributions of others
You don't need to sign into GitHub to use contributions others have made.
- Go to the Hub node in the Community workspace.
- Select an item to download.
- You'll need appropriate permissions in your Configuration Manager site to download objects from the hub and import them into the site.
- To import a script: Create permission for SMS_Scripts class.
- To import a report: Full Administrator security role.
- Downloaded reports are deployed to a report folder called Hub on the reporting services point. Downloaded scripts can be seen in the Run Scripts node.
CMPivot standalone
You can now use CMPivot as a standalone app. Run it outside of the Configuration Manager console to view the real-time state of devices in your environment. This change enables you to use CMPivot on a device without first installing the console.
You can now share the power of CMPivot with other personas, such as helpdesk or security admins, who don't have the console installed on their computer. These other personas can use CMPivot to query Configuration Manager alongside the other tools that they traditionally use. By sharing this rich management data, you can work together to proactively solve business problems that cross roles.
Prerequisites
Set up the permissions needed to run CMPivot. For more information, see CMPivot.
Try it out!
Try to complete the tasks. Then send Feedback with your thoughts on the feature.
You'll find the CMPivot app in the following path: <site install path>\tools\CMPivot\CMPivot.exe. You can run it from that path, or copy the entire CMPivot folder to another location.
Run CMPivot from the command line using the following parameters:
-sms:Connection="<namespace>"(required): The connection path to the SMS Provider for the site. The format of the namespace is\\<ProviderServerFullName>\root\sms\site_<siteCode>. For example,\\prov01\root\sms\site_ABC.-sms:CollectionID="<CollectionID>"(required): The ID of the collection that the tool uses for queries. For example,ABC00014. To change the collection, close the tool, and restart it with a new collection ID.
The following command line is a complete example:
CMPivot.exe -SMS:Connection="\\prov01\root\sms\site_ABC" -SMS:CollectionID="ABC00014"
For more information on the benefits and use of CMPivot, see the following articles:
CMPivot (aka.ms/cmpivot)
Software Center infrastructure improvements
This release includes the following infrastructure improvements to Software Center:
Software Center now communicates with a management point for apps targeted to users as available. It doesn't use the application catalog anymore. This change makes it easier for you to remove the application catalog from the site.
Previously, Software Center picked the first management point from the list of available servers. Starting in this release, it uses the same management point that the client uses. This change allows Software Center to use the same management point from the assigned primary site as the client.
Improved control over WSUS Maintenance
You now have more granular control over the WSUS maintenance tasks that Configuration Manager runs to maintain healthy software update points. In addition to declining expired updates in WSUS, Configuration Manager can now add non-clustered indexes to the WSUS database.
The indexes improve the WSUS cleanup performance that Configuration Manager initiates. On each SUSDB used by Configuration Manager, indexes are added to the following tables:
- tbLocalizedPropertyForRevision
- tbRevisionSupersedesUpdate
Permissions
When the WSUS database is on a remote SQL Server, the site server's computer account needs the following SQL Server permissions:
- Creating an index requires
ALTERpermission on the table or view. The site server's computer account must be a member of thesysadminfixed server role or thedb_ddladminanddb_ownerfixed database roles. For more information about creating and index and permissions, see CREATE INDEX (Transact-SQL). - The
CONNECT SQLserver permission must be granted to the site server's computer account. For more information, see GRANT Server Permissions (Transact-SQL).
Note
If the WSUS database is on a remote SQL Server using a non-default port, then indexes might not be added. You can create a server alias using SQL Server Configuration Manager for this scenario. Once the alias is added and Configuration Manager can make a connection to the WSUS database, indexes will be added.
Try it out!
Try to complete the tasks. Then send Feedback with your thoughts on the feature.
In the Configuration Manager console, navigate to Administration > Overview > Site Configuration > Sites.
Select the site at the top of your Configuration Manager hierarchy.
Click Configure Site Components in the Settings group, and then click Software Update Point to open Software Update Point Component Properties.
In the WSUS Maintenance tab, select Add non-clustered indexes to the WSUS database.
Pre-cache driver packages and OS images
Task sequence pre-cache now includes additional content types. Pre-cache content previously only applied to OS upgrade packages. Now you can use pre-caching to reduce bandwidth consumption of OS images and driver packages.
Try it out!
Try to complete the tasks. Then send Feedback with your thoughts on the feature.
Create OS images for specific architectures and languages. Specify the Architecture and Language on the Data Source tab of the package. To determine which OS image it downloads during pre-caching, the client evaluates the architecture and language values.
Create driver packages for specific hardware models. Specify the Model on the General tab of the package. To determine which driver package it downloads during pre-caching, the client evaluates the model against the Win32_ComputerSystemProduct WMI property.
Create a task sequence with the following steps:
More than one Apply OS Image step with conditions for the different languages and architectures.
More than one Apply Driver Package step with conditions for the different models.
Tip
For an example of conditional steps with the Upgrade OS step, see Configure the pre-cache feature.
Deploy the task sequence. For the pre-cache feature, configure the following settings:
On the General tab, select Pre-download content for this task sequence.
On the Deployment settings tab, configure the task sequence as Available.
On the Scheduling tab, choose the currently selected time for the setting, Schedule when this deployment will be available. The client starts pre-caching content at the deployment's available time. When a targeted client receives this policy, the available time is in the past, thus pre-cache download starts right away. If the client receives this policy but the available time is in the future, the client doesn't start pre-caching content until the available time occurs.
On the Distribution Points tab, configure the Deployment options settings. If the content isn't pre-cached before a user starts the installation, the client uses these settings.
For more information on pre-caching behavior and functionality, see Configure pre-cache content.
Improvements to OS deployment
This release includes the following improvements to OS deployment:
Based on your feedback, the following two PowerShell cmdlets to create and edit the Run Task Sequence step:
New-CMTSStepRunTaskSequence
Set-CMTSStepRunTaskSequence
Based on your feedback, a new task sequence variable, SMSTSRebootDelayNext. Use this new variable with the existing SMSTSRebootDelay variable. If you want any later reboots to happen with a different timeout than the first, set SMSTSRebootDelayNext to a different value in seconds.
For example, you want to give users a 60-minute reboot notification at the start of a Windows 10 in-place upgrade task sequence. After that first long timeout, you want additional timeouts to only be 60 seconds. Set SMSTSRebootDelay to
3600, and SMSTSRebootDelayNext to60.
Next steps
For more information about installing or updating the technical preview branch, see Technical preview.
For more information about the different branches of Configuration Manager, see Which branch of Configuration Manager should I use?
Feedback
Coming soon: Throughout 2024 we will be phasing out GitHub Issues as the feedback mechanism for content and replacing it with a new feedback system. For more information see: https://aka.ms/ContentUserFeedback.
Submit and view feedback for