Capabilities in Technical Preview 1801 for Configuration Manager
Applies to: Configuration Manager (technical preview branch)
This article introduces the features that are available in the Technical Preview for Configuration Manager, version 1801. You can install this version to update and add new capabilities to your Configuration Manager technical preview site.
Review Technical Preview for Configuration Manager before installing this version of the technical preview. That article familiarizes you with the general requirements and limitations for using a technical preview, how to update between versions, and how to provide feedback.
Known Issues in this Technical Preview:
Update to a new preview version fails when you have a site server in passive mode. If you have a primary site server in passive mode, then you must uninstall the passive mode site server before updating to this new preview version. You can reinstall the passive mode site server after your site completes the update.
To uninstall the passive mode site server:
- In the Configuration Manager console, go to Administration > Overview > Site Configuration > Servers and Site System Roles, and then select the passive mode site server.
- In the Site System Roles pane, right-click on the Site server role, and then choose Remove Role.
- Right-click on the passive mode site server, and then choose Delete.
- After the site server uninstalls, on the active primary site server restart the service CONFIGURATION_MANAGER_UPDATE.
The following are new features you can try out with this version.
Create phased deployments
Phased deployments automate a coordinated, sequenced rollout of software without creating multiple deployments. In this Technical Preview version, the phased deployment wizard can be completed for task sequences in the admin console. However, deployments are not created.
Try it out!
Try to complete the tasks. Then send Feedback from the Home tab of the ribbon letting us know how it worked.
Create a phased deployment for a task sequence
- In the Software Library workspace, expand Operating Systems, and select Task Sequences.
- Right-click on an existing task sequence and select Create Phased Deployment.
- On the General tab, give the phased deployment a name, description (optional), and select Automatically create default pilot and production phases.
- Populate the Pilot collection and Production Collection fields. Select Next.
- On the Settings tab, choose one option for each of the scheduling settings and select Next when complete.
- On the Phases tab, edit any of the phases if needed then click Next.
- Confirm your selections on the Summary tab then click Next to proceed.
Co-management reporting
If you are using the co-management capabilities, you can now view a dashboard with information about co-management in your environment. In the Configuration Manager console, navigate to the Monitoring workspace, expand Upgrade Readiness, and select the Co-management dashboard. The dashboard includes the following tiles:
- Co-managed devices: the percentage of devices in your environment that you enabled for co-management
- OS distribution: the breakdown of operating systems (OS) by version. This chart uses the following groupings:
- Windows 7 & 8.x
- Windows 10 lower than 1709
- Windows 10 1709 and above
Note
Windows 10, version 1709 and later, is a prerequisite for co-management
- Co-management status: the breakdown of device success or failure in the following categories:
- Success, Microsoft Entra hybrid joined
- Success, Microsoft Entra joined
- Failure: Auto-enrollment failed
- Workload transition: a bar chart showing the number of devices that you transitioned to Microsoft Intune for the three available workloads:
- Compliance Policies
- Resource Access
- Windows Update for Business
Prerequisites
- The computer that runs the Configuration Manager console requires Internet Explorer 9 or later.
Improvements to automatic deployment rule evaluation schedule
Based upon your feedback, you can now schedule automatic deployment rule (ADR) evaluation to be offset from a base day. For example, an offset of two days after the second Tuesday of the month evaluates the rule on Thursday.
Try it out!
Try to complete the tasks. Then send Feedback from the Home tab of the ribbon letting us know how it worked.
Create a custom schedule that evaluates and ADR offset from a base day
- In the Software Library workspace, expand Software Updates, and select Automatic Deployment Rules.
- Right-click on Automatic Deployment Rules and choose Create Automatic Deployment Rule.
- Follow the prompts to complete the General, Deployment Settings, and Software Updates tabs.
- On the Evaluation Schedule tab, select Run the rule on a schedule and Customize.
- For the custom schedule, select Monthly and put in a base day such as the second Tuesday.
- Check Offset (days) and the number of days for the offset then OK when finished.
- Complete the rest of the Create Automatic Deployment Rule Wizard.
Reassign distribution point
Many customers have large Configuration Manager infrastructures, and are reducing primary or secondary sites to simplify their environment. They still need to retain distribution points at branch office locations to serve content to managed clients. These distribution points often contain multiple terabytes or more of content. This content is costly in terms of time and network bandwidth to distribute to these remote servers.
This feature lets you reassign a distribution point to another primary site without redistributing the content. This action updates the site system assignment while persisting all of the content on the server. If you need to reassign multiple distribution points, first perform this action on a single distribution point, and then proceed with additional servers one at a time.
Important
The site system server can only host the distribution point role. If the site system server hosts another Configuration Manager server role, such as the state migration point, you cannot reassign the distribution point. You cannot reassign a cloud distribution point.
This option is not functional with this release due to the Technical Preview limit of a single primary site. Consider the scenario, and then send Feedback from the Home tab of the ribbon, regarding the capabilities of this action.
- In the Configuration Manager console, go to the Administration workspace, and select the Distribution Points node.
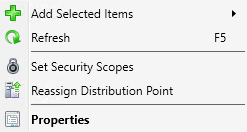
- Right-click the target distribution point, and select Reassign Distribution Point.
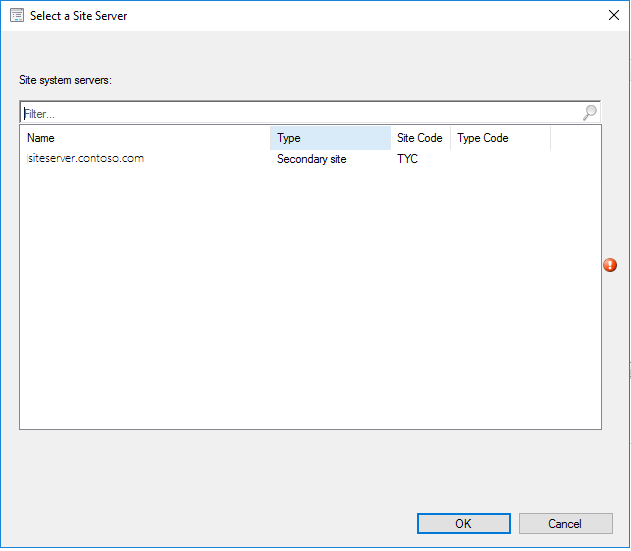
- Select the site server and site code to which you want to reassign this distribution point.
Improvements to hardware inventory
For newly added classes, string lengths greater than 255 characters can be specified for hardware inventory properties that are not keys.
Try it out!
Try to complete the tasks. Then send Feedback from the Home tab of the ribbon letting us know how it worked.
- In the Administration workspace, click on Client Settings highlight a client device setting to edit, right-click then select Properties.
- Select Hardware Inventory, then Set Classes, and Add.
- Click the Connect button.
- Fill in Computer Name, WMI namespace, select recursive if needed. Provide credentials if necessary to connect. Click Connect to view the namespace classes.
- Select a new class then click Edit.
- Change the Length of at least one property that is a string, other than the key, to be greater than 255. Click OK.
- Ensure that the edited property is selected for Add Hardware Inventory Class and click OK.
- Collect hardware inventory with the newly added class containing a property greater than 255 characters in length.
Improvements to client settings for Software Center
In this version of the Technical Preview, improvements have been made for Software Center customization under the client settings.
- The client settings for Software Center now have a Customize button.
- A preview has been added to show what the Software Center banner looks like.
- If a logo is not selected, the preview shows the company name text and color.
- If a logo is selected, the preview shows the logo and company name text.
- Hide unapproved applications in Software Center is a new setting for Software Center. When this option is enabled, user available applications that require approval are hidden in Software Center.
Try it out!
Try to complete the tasks. Then send Feedback from the Home tab of the ribbon letting us know how it worked.
- In the Administration workspace, click on Client Settings. Select a client device setting to edit. Right-click on it then select Properties then Software Center.
- Click on the Customize button. Try out the different customization settings including the preview.
- Enable the setting Hide unapproved applications in Software Center. Observe the changes in Software Center.
New settings for Windows Defender Application Guard
For Windows 10 version 1709 and later devices, there are two new host interaction settings for Windows Defender Application Guard.
- Websites can be given access to the host's virtual graphics processor.
- Files downloaded inside the container can be persisted on the host.
Improvements to Run Scripts
The Run Scripts feature now allows you to import and run signed PowerShell scripts.
- To keep the script integrity, signed scripts must be imported rather than using copy/paste.
- Imported signed scripts cannot be edited after import.
Important
In this Technical Preview, there are two temporary limitations.
- Scripts can only be imported in the Run Scripts feature and can't be edited directly from the console.
- Scripts imported with a non-Unicode encoding may display in the console incorrectly. The script will still execute as originally written.
Next steps
For information about installing or updating the technical preview branch, see Technical Preview for Configuration Manager.
Feedback
Coming soon: Throughout 2024 we will be phasing out GitHub Issues as the feedback mechanism for content and replacing it with a new feedback system. For more information see: https://aka.ms/ContentUserFeedback.
Submit and view feedback for