Sync Parents and Guardian Contacts in SDS
Overview
School Data Sync (SDS) supports the ingestion of various data elements for the primary purposes of provisioning Microsoft 365 objects and entities, and for enabling and enriching Insights. One of the data elements supported for synchronization in SDS is parent and guardian data. This document describes the parent and guardian sync process, and the various use cases and considerations for syncing this data set into Microsoft 365.
Why do schools ingest parent and guardian contact data?
Parents app provides educators a list of all parent and guardian contacts for each class team they manage and sync via SDS. Parents app allows educators to reach out and communicate directly in Teams with any of the parent and guardian contacts on file with the school.
When Weekly guardian email digest in assignments is enabled in Teams, the Assignments app sends emails each week to parents and guardians, containing a summary view of assignments from the previous week, and assignments for the upcoming week for each class.
Third-party app integrations: Parent and guardian contact data is available for third-party Applications via the relatedContacts API on MS Graph. Making the data available via Graph allows organizations to build and deliver their own experiences and use cases for the parent and guardian contact data.
Note
If your institution does not currentlly use SDS or have a way to supply parent and contacts data to SDS, Admins can enable educators with the capability of directly adding and updating parent information using the Parent App in Teams. See Set Up Parent Connectionin Teams for EDU for additional details on the Admin steps.
What parent and guardian data is supported?
SDS supports ingesting basic contact information about parents and guardians, including:
- First name
- Last name
- Email address
- Phone number
- ID
- Role of the related contact
- Related student ID
Where and how is the data stored in Entra ID?
- SDS writes the parent and guardian data ingested to Substrate within a hidden data store on each student’s user object.
- This basic contact data is NOT written as standard Mail Contacts in Exchange Online. This choice was to prevent all users in the tenant from seeing all parents and their related contact information upon SDS ingesting the data.
- The data is only made available to Teams in Microsoft 365 for the first two scenarios noted prior, and also made available to third-party applications via the relatedContacts API on MS Graph. The API requires app-only permissions granted by the admin, which means end users within the tenant aren't allowed to query into MS Graph to see or access any of the parent and guardian contact data, protecting the privacy of the parents and guardians.
How do I sync parent and guardian data?
Synchronizing parent and guardian data in SDS is easy. This section explains how to sync parents and guardians based on your starting point and the sync method you use:
SDS v1 CSV Files
If you're syncing data to SDS using the SDS v1 CSV format, you should include two extra csv files, user.csv and guardianrelationship.csv.
SDS v2.1 CSV files
If you're syncing data to SDS using the SDS v2.1 CSV format, you should include another csv file, relationships.csv.
- The userSourcedId in the relationships.csv corresponds to the sourcedId value of the related student within the users.csv. The relationshipUserSourcedId attribute corresponds to the related parent within the users.csv file.
- If you include phone number for parents and guardians, you should ingest the data within the E164 format, without any parenthesis or spaces, including the plus symbol at the front of the string. The E164 format ensures the phone number is supported by Parent App if the app introduces and includes SMS-based communication scenarios.
OneRoster API
We have communicated guidance for general OneRoster API support to all current providers. You can help by following up and asking your provider to include support for including contacts data as part of their data integration. Share Onboarding Guidance for OneRoster API Providers for SDS article with your provider so they can update support and work with the SDS Deployment Engineering team to validate support and update their Profile.
To ingest via OneRoster API, based on the supported optional data capabilities from your provider, you see the toggle selected On (default) to Include contacts data.
- If the toggle is Off and unavailable to turn on, means that the provider’s profile doesn't currently support providing the optional data.
- After support is added by your provider, you can edit your configuration to select the toggle to On to include the data on the subsequent run.
Sending contact data with the Student user object
To write the contact data forward with the student user objects, you need to ensure your Manage data configuration has the Student contacts associations toggle to _On) to include the data on the subsequent run.
Parent and guardian roles
SDS supports various roles for parents and guardians, as listed below. Only the roles of parent and guardian are supported for Parents app. If you ingest any users with the other roles in SDS, they are not available within Parents app. If you intend for the person to appear and be available within Parents app, use one of these roles:
- Guardian
- Relative
- Aide
- Doctor
- Administrator
- Other
Status- active versus inactive
When SDS adds each parent and guardian to related contact collection on each student user’s hidden substrate data store, each parent and guardian is marked as active. If you remove a parent or guardian from the CSV file import on the next sync, they'll then be marked as inactive. This status can be viewed within the people page for each student in SDS. Only parents and guardians with an active status is shown as available within Parents App. SDS doesn't automatically delete parent and guardian records if you stop sending data in subsequent syncs. See the next section for details on how to delete parents.

Deleting parents
SDS adds all parents and guardians to the related contact collection on each student’s user object when they're ingested. When the student’s user object is deleted, so are all corresponding contacts SDS has stored over time. If you need to remove a related contact without deleting the student’s user object, the SDS team has published a PowerShell script to assist with this process. If you need assistance running the PowerShell script, you may reach out to our support team at https://aka.ms/sdssupport. Once the contact has been successfully removed from Substrate, be sure to remove the same parent, or guardian from all subsequent uploads to avoid adding them back into the directory.
Removing parent and guardian data
Parent and Guardian data is stored in the Azure substrate store. This location is difficult to access, requires application permissions, and is also restricted so that you cannot remove a single entry. To remove a single Parent or Guardian that has been synced to a student, you must remove all records and then re-add the records that you want to associate with the student.
These steps help you to run the following script and remove Parent and Guardian data.
O365-EDU-Tools/SDS Scripts/Reset-Guardians.ps1 at master · OfficeDev/O365-EDU-Tools (github.com)
Important
This script uses the Microsoft.Graph PowerShell module. It will not run in PowerShell ISE.
Creating a certificate
To run the script, you need to first create an application in Microsoft Entra ID and provide a certificate to access the information. Find the steps, commands, and self-signed certificate details in this article on creating a self-signed public certificate to authenticate your application.
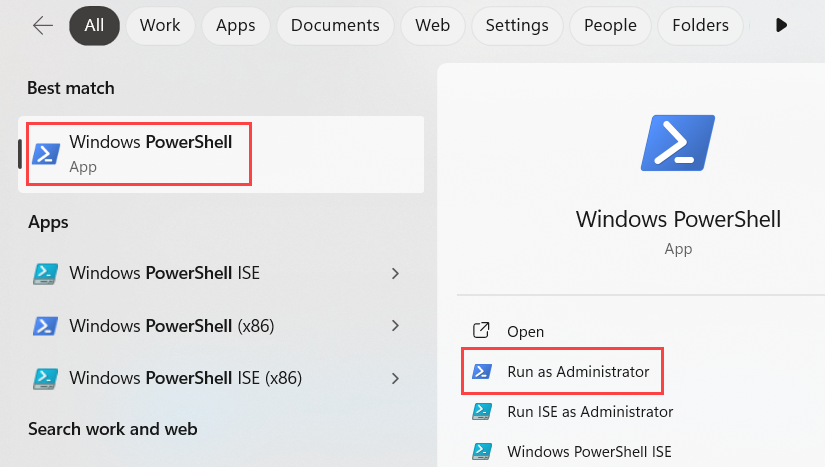
Open PowerShell in administrator mode.
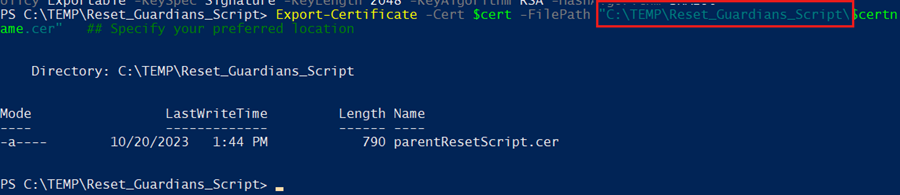
Navigate to the location you'll be working from. In this example, it's C:\TEMP\Reset_Guardians_Script.

Open the following page for steps on creating the command. Enter the first command, and remember to change the certificate name. We recommend using the Copy button to get the full command easier.

In this example, we set the certificate name to parentResetScript.

Change the folder location before running the command.

In this example, we'll use the same folder that we’re currently in.
Creating an application
The application is how we determine the permissions and access for the script.
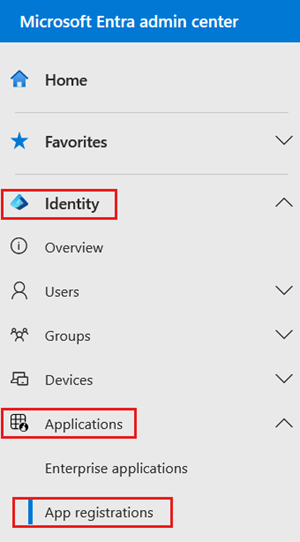
Navigate to the Microsoft Entra ID admin center and then Identity | Applications |App Registrations.
Select New registration to begin the creation process.

Enter a name for the application. In this example, it is Parent Reset Application. We don't need to fill out any other settings on this page.
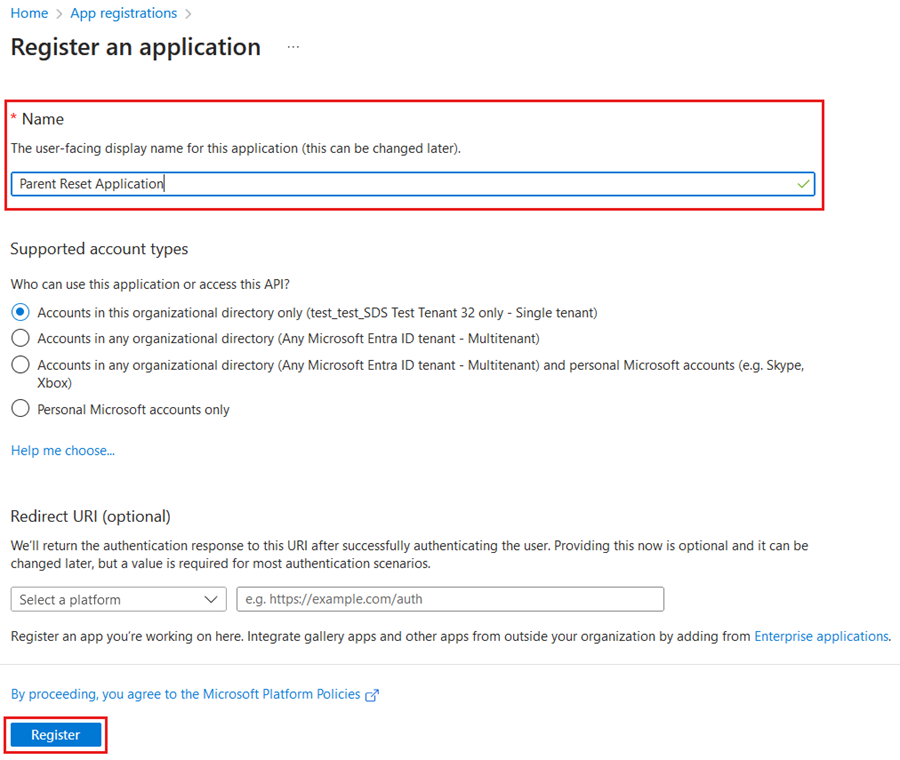
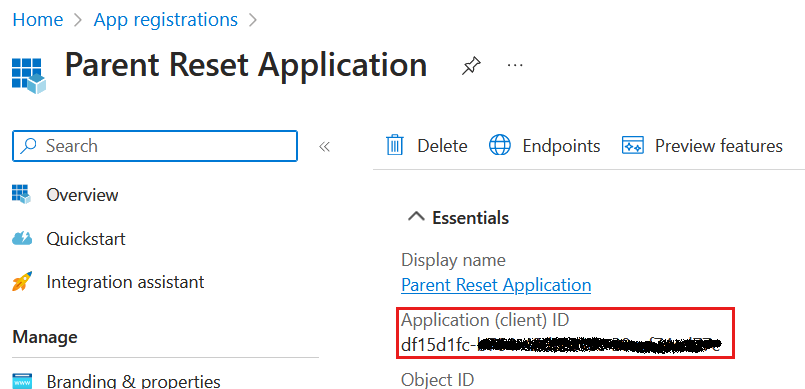
Copy and save the Application (client) ID. It will be used to run the script later.
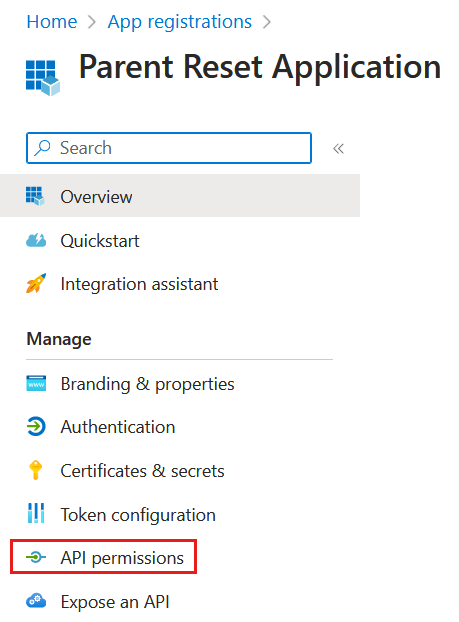
Select API permissions under Manage.
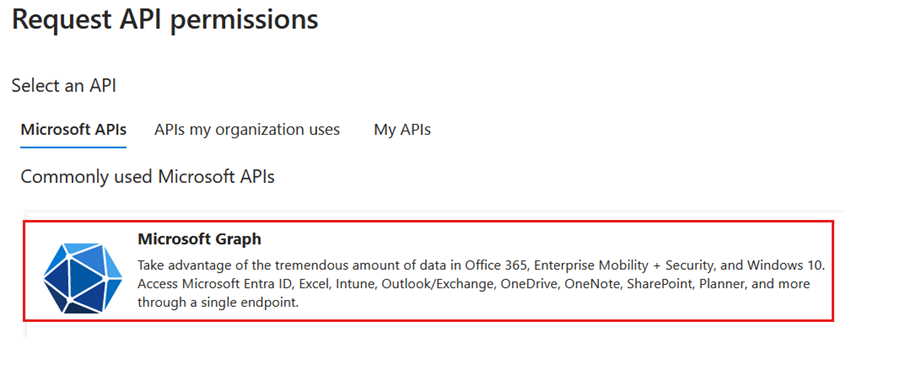
Select Add a permission.

Select Microsoft Graph.
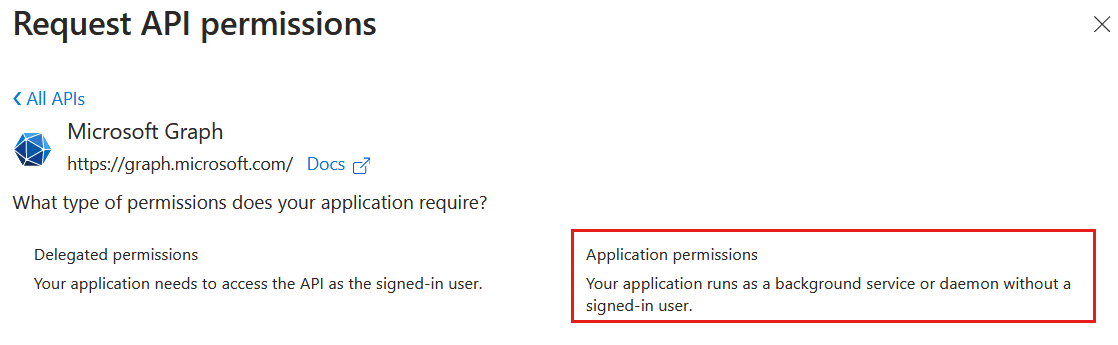
Select Application permissions.
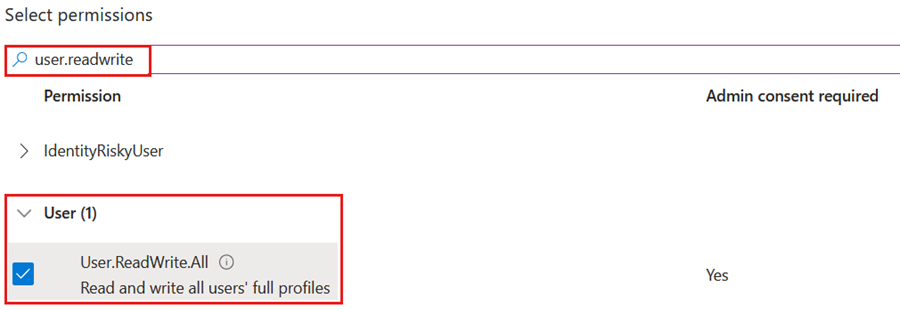
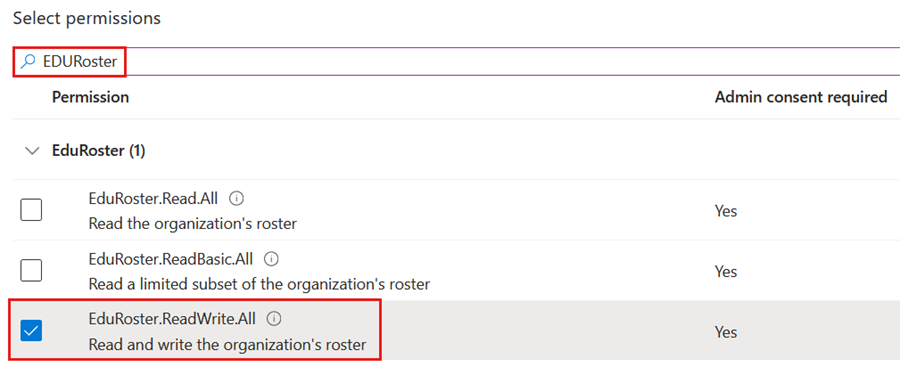
Search for and select user.ReadWrite.All and EDURoster.ReadWrite.All and select Add permissions at the bottom once both are selected.
Select Grant admin consent for (tenant name) and confirm.


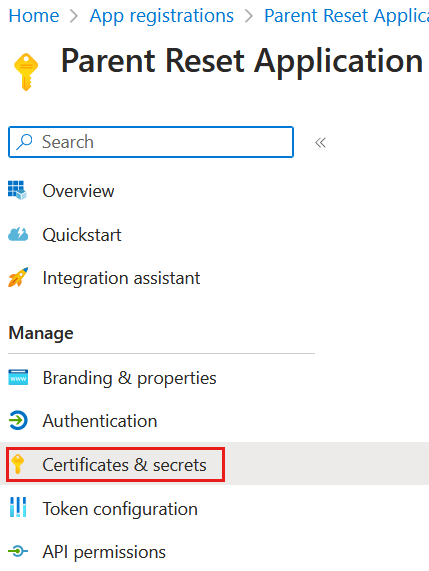
Navigate to Certificates & Secrets on the left side under Manage.
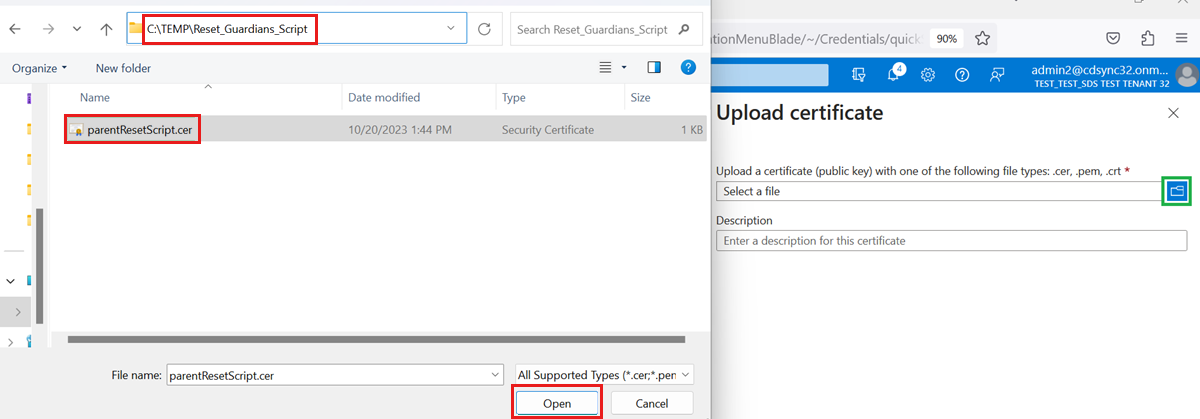
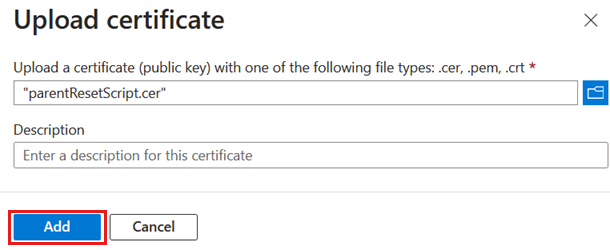
Select the Certificates tab and then Upload certificate.

Navigate to the certificate that we created in the first stage.
Select Add.
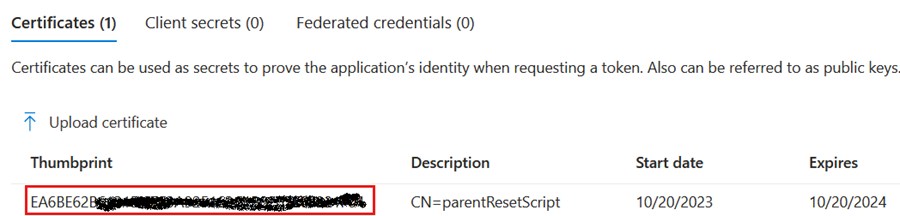
Lastly, copy the thumbprint.
Running the Reset_Guardians.ps1 script
To run the script, you need your tenant ID and the script that can be found here: O365-EDU-Tools/SDS Scripts/Reset-Guardians.ps1 at master · OfficeDev/O365-EDU-Tools (github.com)
To locate your Tenant ID, go to the Overview tab in Microsoft Entra ID.

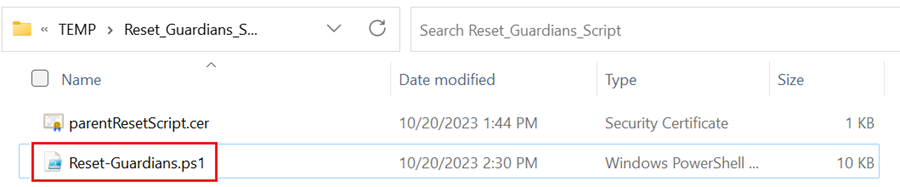
Open the GitHub repository and download the script. In this example, it is downloaded to the same folder that contains the certificate.
This script can be run in several ways. If you open the script using a text editor like Notepad, you can see the different methods that can be used. In this example, we'll run it against all students.

To run the script, you can copy the last example and replace the fields with our new application information and tenant ID.
\Reset-Guardians.ps1 -clientId "{Application (client) ID}" -certificateThumbprint "{Certificate Thumbprint}" -tenantId "{Tenant ID}" ## Replace the field including the { }
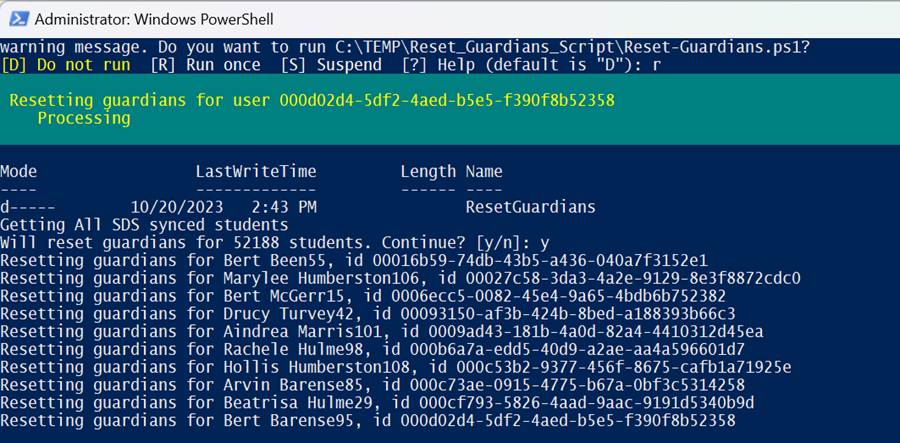
After you hit enter, type R and hit enter. If done correctly, the script connects to Graph and begin extracting the students and begin the removal process. The more students, the longer the script takes to run.
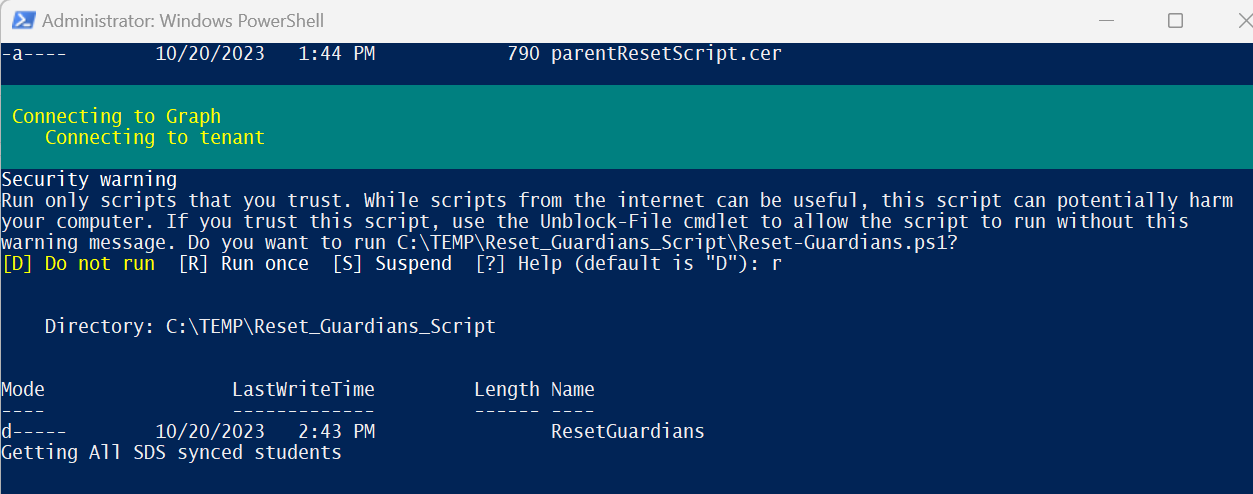
Once it’s extracted all the students, it asks to confirm the removal of the Parent and Guardian data. To proceed, type y.

Here is a sample of how the script appears when it is removing the data.