Exercise - Contribute to a Microsoft Learn documentation article
Let’s practice the contribution workflow. In this exercise, you make a small change to an open-source documentation article on Microsoft Learn. Then, you propose your changes by opening a pull request.
Edit the article
Sign into your GitHub account.
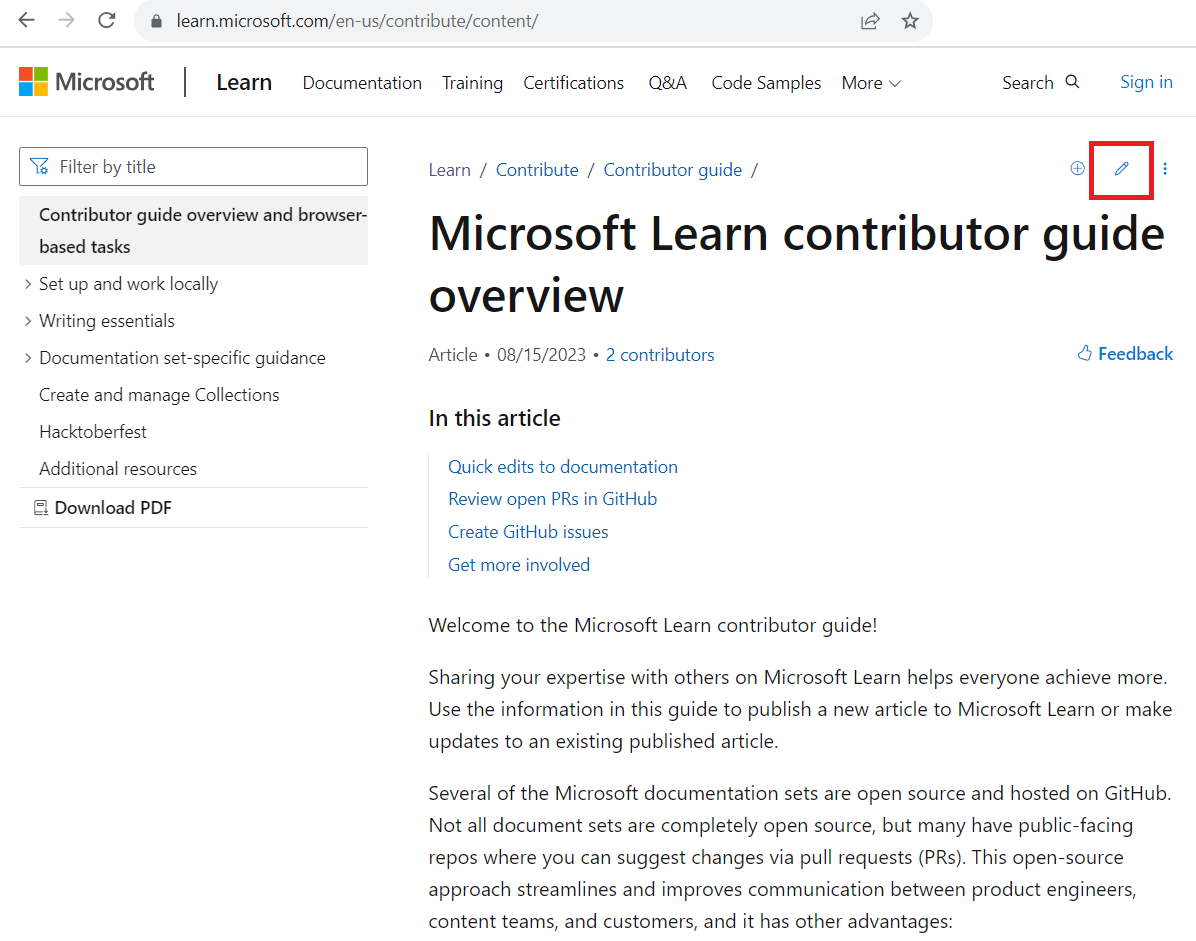
In a browser tab, navigate to learn.microsoft.com/contribute/content.
At the top of the article, select the Edit pencil icon.
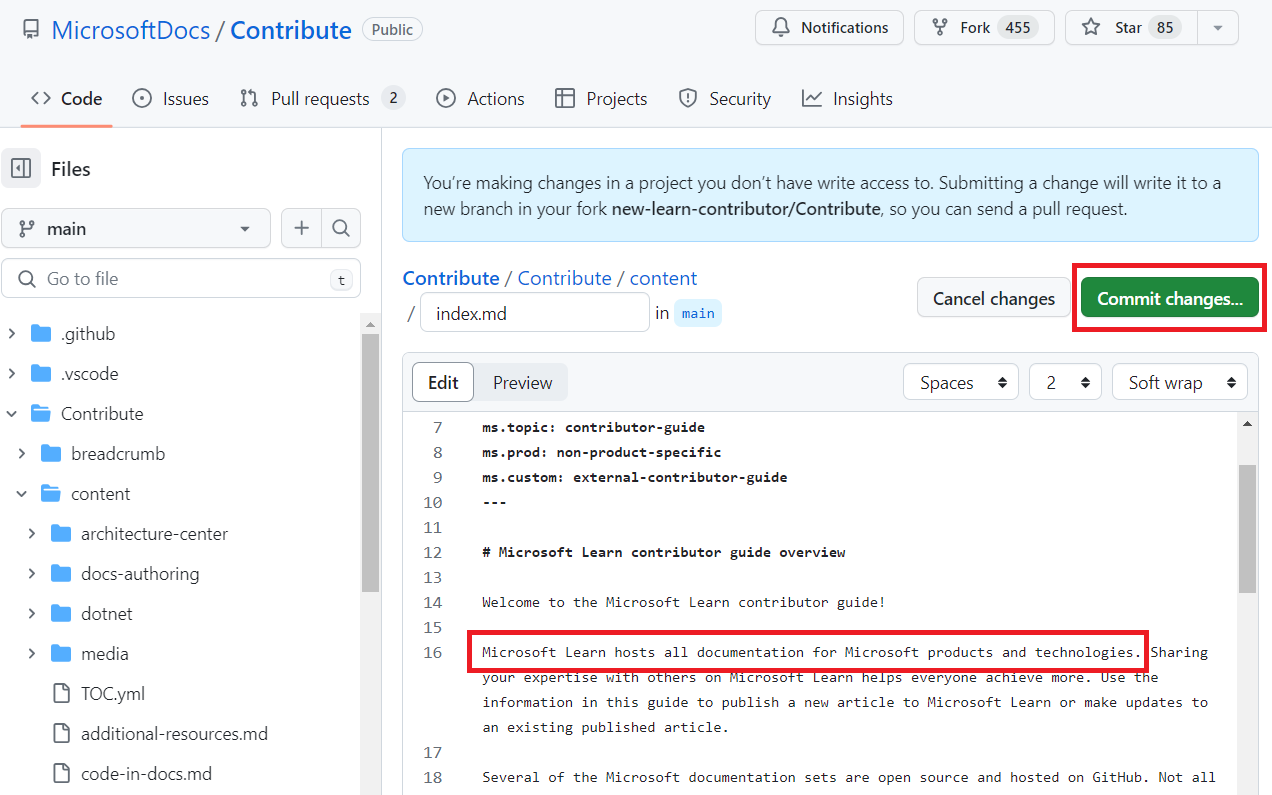
Select the pencil icon to Fork this repository and edit in your fork or Edit this file in your fork of this project.

If GitHub prompts you to fork the repository on the next page, select Fork the repository.
The Edit file pane opens. You need to add a new sentence to the beginning of this article. At the start of the second paragraph, add the following sentence: “Microsoft Learn hosts all documentation for Microsoft products and technologies.”
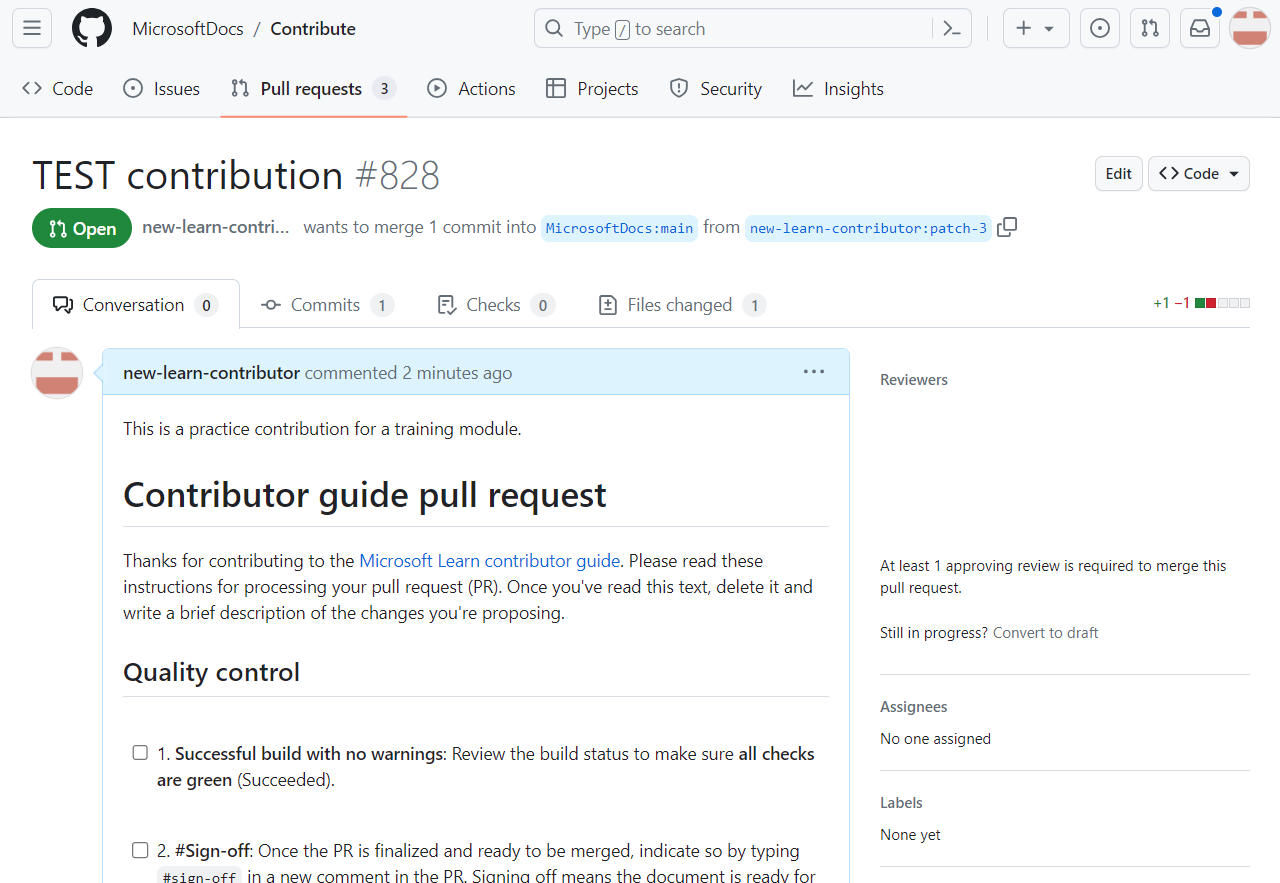
Open a PR
Preview your changes by selecting the Preview tab.
Once your changes are finalized, find and select Commit changes.
In the Commit message field, type “TEST contribution”.
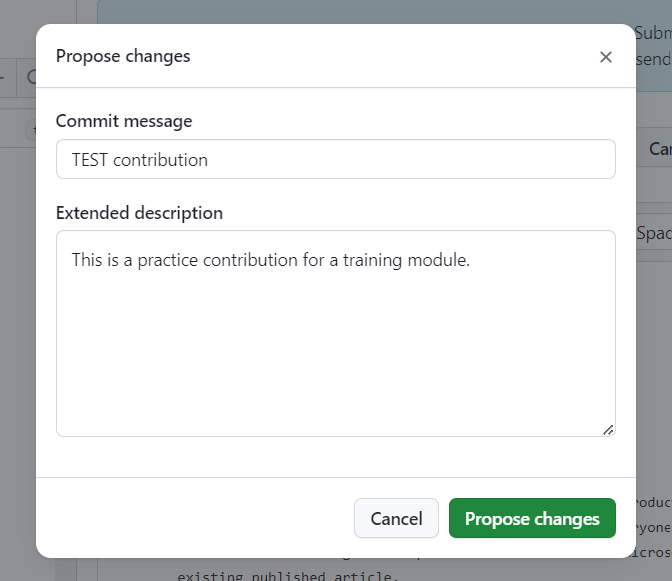
Select Propose changes.
On the Comparing changes page, verify that the base says
main. This means that your changes will be pulled into the main branch in the live repository.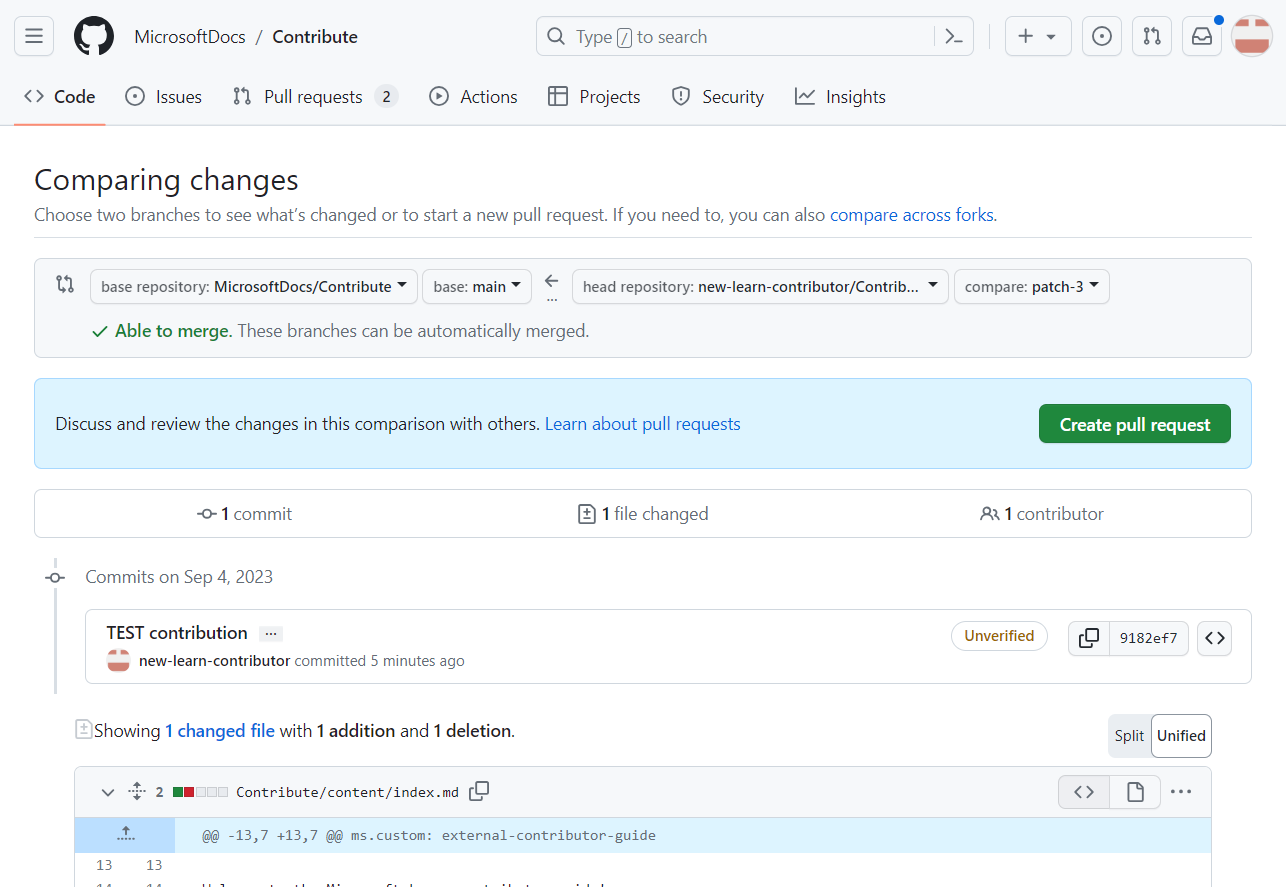
Note
If you don't see the
base repositoryandhead repositoryoptions on this page, select compare across forks. This will display the comparison options needed for this step.Select the Create pull request button.
This takes you to the Open a pull request page where you can preview your PR.
Confirm your PR and select Create pull request to open the PR.
Note
Because this is a practice exercise, your changes won’t be merged to the live website.
Congratulations on creating your PR! It’s not submitted yet, but you’ve finished the first major step in contributing. Leave the PR tab open in your browser. You come back to it in the next exercise.