Exercise - Create a Jupyter Notebook file in Visual Studio Code and run a simple program
Now that you've installed everything you need, you can create a Jupyter Notebook file and start coding.
Create a Jupyter Notebook file
To start, make a folder to easily organize all of the Jupyter files you'll create. Pick a location on your computer that's easily accessible, such as the documents folder or desktop, and create a folder named something like Jupyter files or Python.
Create a Jupyter Notebook file that will run your Python code:
- Open Visual Studio Code.
- Select File > New File (or type
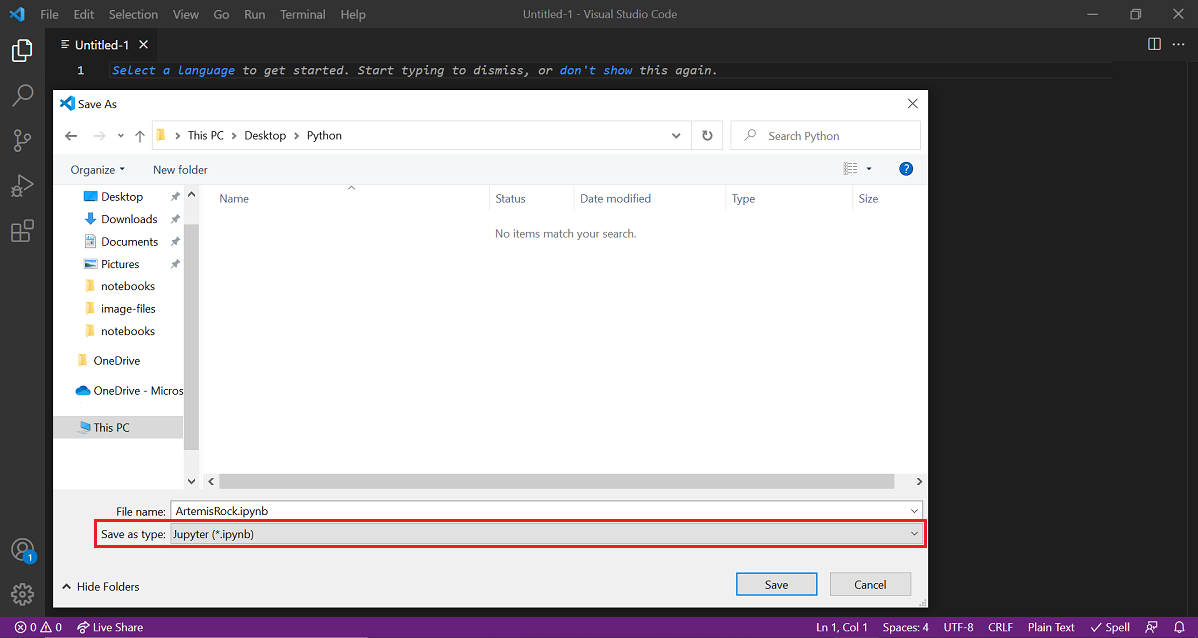
Ctrl-N). A blank file opens. - Save the file as a Jupyter file:
- Select File > Save (or type
Ctrl-S). - Give your file a name of your choosing.
- Select the Save As location to be the folder you just created.
- Change the file type to "Jupyter" from the drop-down menu. Or, you can add the file extension
.ipynb, which automatically changes the file type to "Jupyter".
- Select File > Save (or type
You'll know that it worked if you see the filename followed by ".ipynb" in the top left of the screen and your file displays cells instead of the solid editor view when you open it in Visual Studio Code.
Note
If your file doesn't display cells but is still showing the solid editor view instead, try closing VS Code and then open your .ipynb file by selecting Open with Code. Then, if Code indicates that the file is in "Restricted Mode", select the Restricted Mode box in the lower-left corner and then select Trust.
Configure Python environment
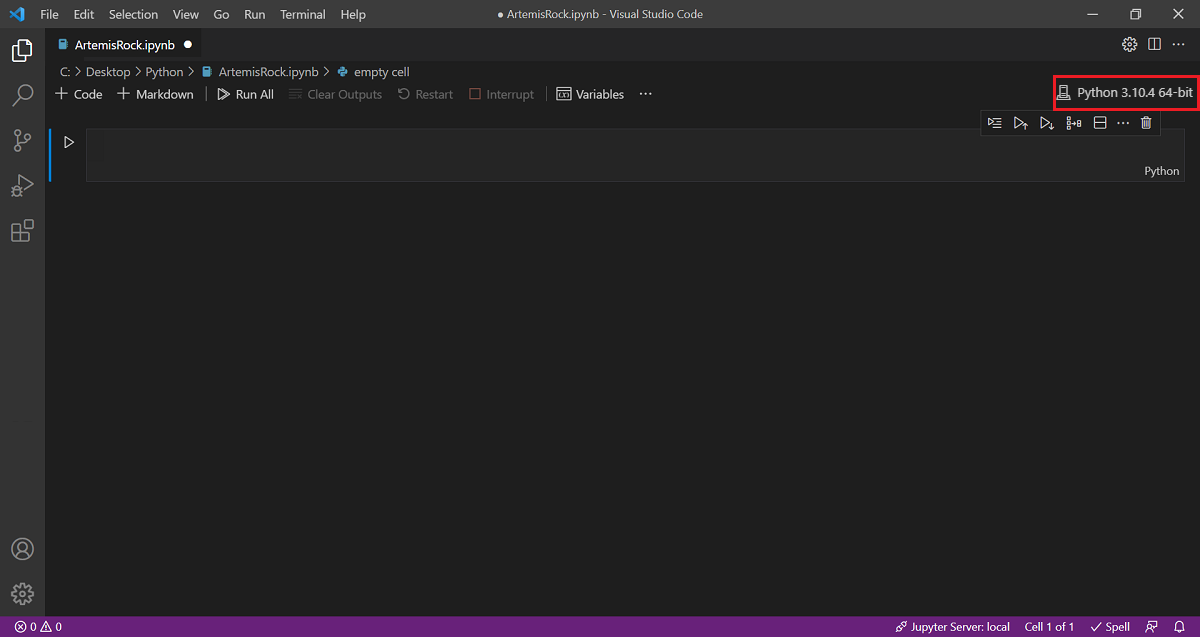
When you have a Jupyter Notebook file, you'll need to choose which Python environment you're using. Visual Studio Code might have recognized Python after you installed it. But if it doesn't, choose Select Kernel in the upper right corner of the screen and then select your Python environment.

VS Code now shows your selected Python version.
Next, you'll need to add Jupyter Notebooks to your path.
- Type "2+2" into the first line of the editor.
- Select the play button to the left of the cell. A window appears asking you to install Jupyter Notebooks.
- Select Install to start the installation. The install could take up to 5 minutes, so you may have to wait a while.

Now, Jupyter Notebooks should be installed on your computer. Before you continue, make sure that the Jupyter Notebook Kernel is also running with the right version of Python. You can see the version in the top right corner of Visual Studio Code. Make sure that when you select the play button once again, the program prints out "4".
Information about Jupyter Notebooks
Visual Studio Code Jupyter Notebooks has good documentation about how to use the environment. In Jupyter notebooks, you write code in cells.
- Select a plus button at the top of the file to create a new cell below the current cell. You can create a new Code cell or a Markdown cell.
- Select the garbage can above a cell to delete the selected cell.
- Drag the cell from the left-hand side to move the cell up or down in relation to the cells around it.
- Use the play button to the left of each cell to run that cell.
After you run a cell, a number will appear, surrounded by square brackets. This number helps you keep track of which cells you run. That's important because, as you'll remember, you can rerun cells within a Jupyter Notebook, which might change variables or program state.
If you look at the top of the file, you'll see you can select Run All to run every cell in your notebook at once. Finally, you can select the red Interrupt button to force stop the program at any time.
Write and run a simple program
Now you'll test your setup by writing a simple "Hello World" program. In your first cell, type the following code and then select the play button.
"Hello World"

Below the cell that you ran, there should be an output saying Hello World.
Congratulations! You've programmed a computer to output text. Next step: hacking the mainframe ... or maybe we'll start by learning more about Python fundamentals!