Exercise - Build a web app in Eclipse
After you have installed the Azure Toolkit for Eclipse, you have an environment you can use to build and deploy Java web apps to Azure.
In this exercise, you'll use Eclipse to create a Java web app that uses Java Server Pages (JSP) to generate dynamic content for a web page. The page will display the current date and time, together with the IP address of the client computer running the web browser that connects to the web app. You'll test the web app locally using the Apache Tomcat server.
Create a new web app
Start Eclipse if it isn't already running.
On the File menu, select New, and then click Dynamic Web Project.
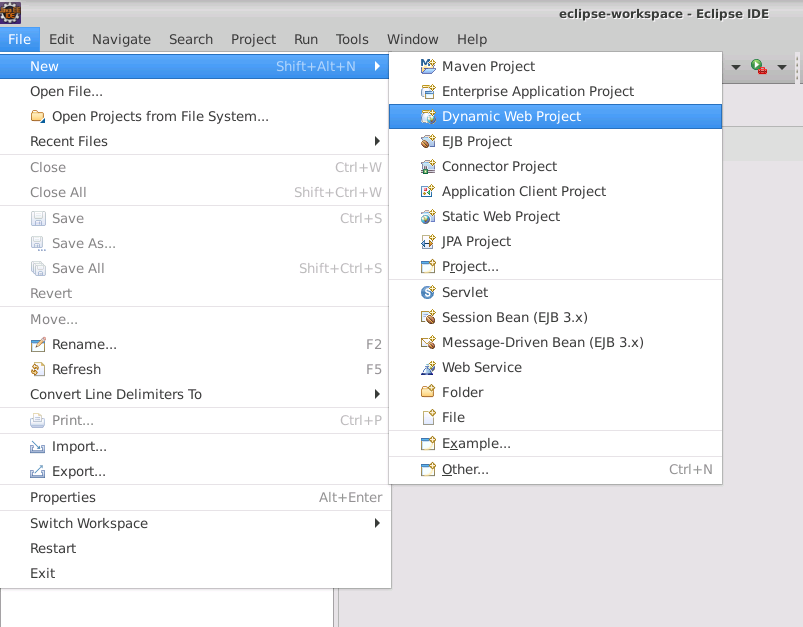
In the New Dynamic Web Project wizard, on the Dynamic Web Project page, enter SampleWebApp in the Project name box. Make sure the Target runtime is set to Apache Tomcat v8.0, and then click Finish.

Note
If the Apache Tomcat v8.0 runtime isn't listed, click New Runtime, and download it
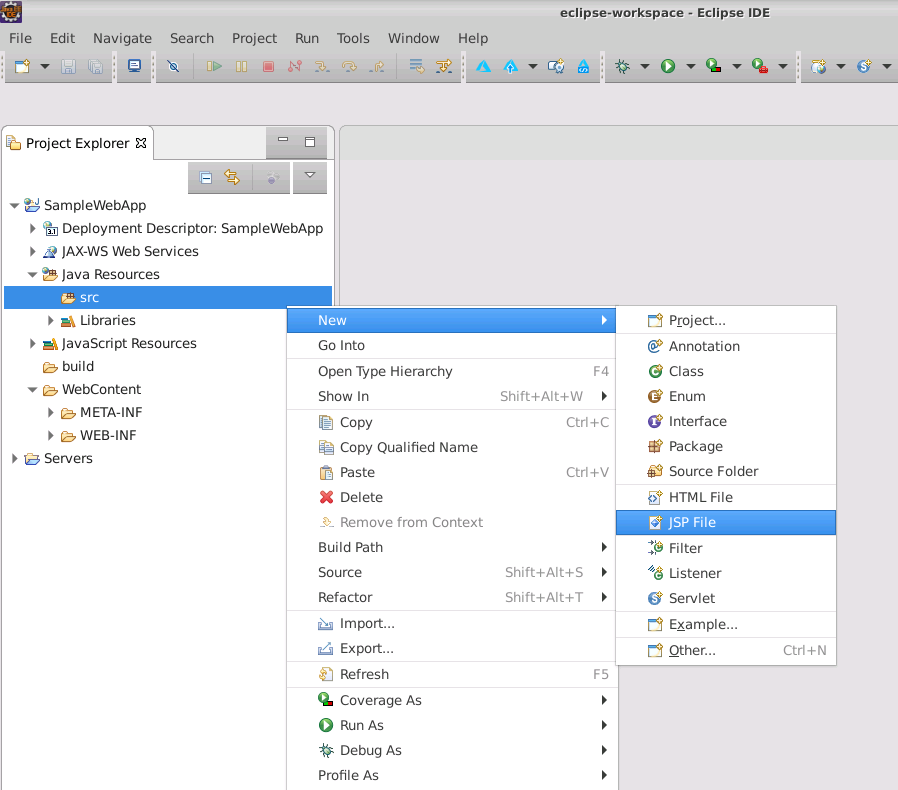
In the Project Explorer pane, expand SampleWebApp, expand Java Resources, right-click src, select New, and then click JSP File.
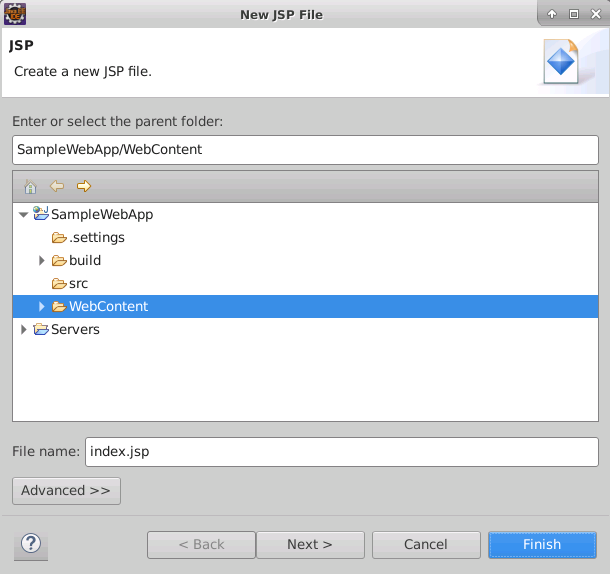
In the New JSP File wizard, on the JSP page, verify that the parent folder is set to SampleWebApp/WebContent. In the File name box, enter index.jsp, and then click Finish.
A code editor window appears, displaying the index.jsp file. In the head section of the page, change the HTML markup for the title to Sample Web App, as follows:
<head>
    <meta charset="UTF-8">
    <title>Sample Web App</title>
</head>
In the body section of the page, add the code shown below:
<body>
    <%! DateFormat fmt = new SimpleDateFormat("dd/MM/yy HH:mm:ss"); %>
    <p>Today's date is <%= fmt.format(new Date()) %></p>
    <p>Your IP address is <%= request.getRemoteAddr() %></p>
</body>
This code retrieves the current date then formats and displays it. The code also extracts the IP address of the client from the request message and prints it.
Near the top of the page, after the first @page directive that specifies the language and content type of the page, add the two @page directives shown in the following code:
<%@ page language="java" contentType="text/html; charset=UTF-8"
    pageEncoding="UTF-8"%>
<%@ page import ="java.util.*" %>
<%@ page import ="java.text.*" %>
These directives import the java.util and java.text libraries. The code in the body of the page uses these libraries.
The completed code should look like this:
<%@ page language="java" contentType="text/html; charset=UTF-8"
    pageEncoding="UTF-8"%>
<%@ page import ="java.util.*" %>
<%@ page import ="java.text.*" %>
<!DOCTYPE html>
<html>
<head>
<meta charset="UTF-8">
<title>Sample Web App</title>
</head>
<body>
    <%! DateFormat fmt = new SimpleDateFormat("dd/MM/yy HH:mm:ss"); %>
    <p>Today's date is <%= fmt.format(new Date()) %></p>
    <p>Your IP address is <%= request.getRemoteAddr() %></p>
</body>
</html>
On the File menu, click Save.
Test the web app locally
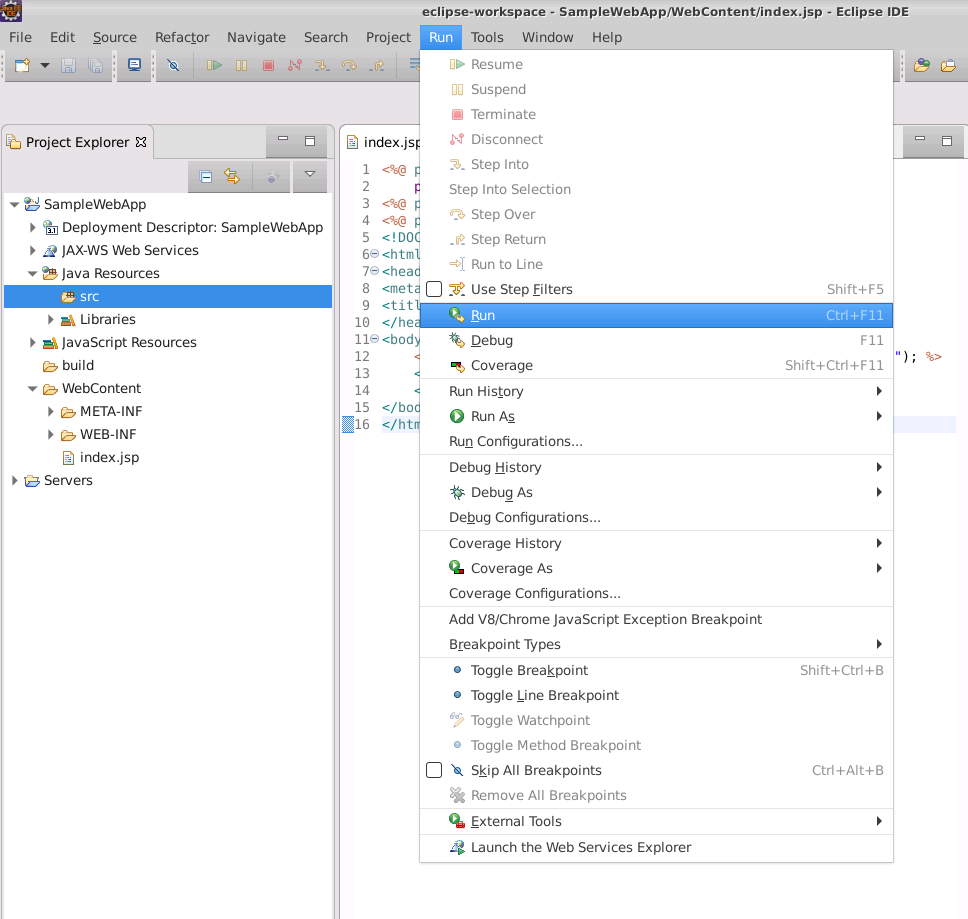
On the Run menu, click Run.
In the Run On Server wizard, select Tomcat v8.0 Server at localhost, and then click Finish.
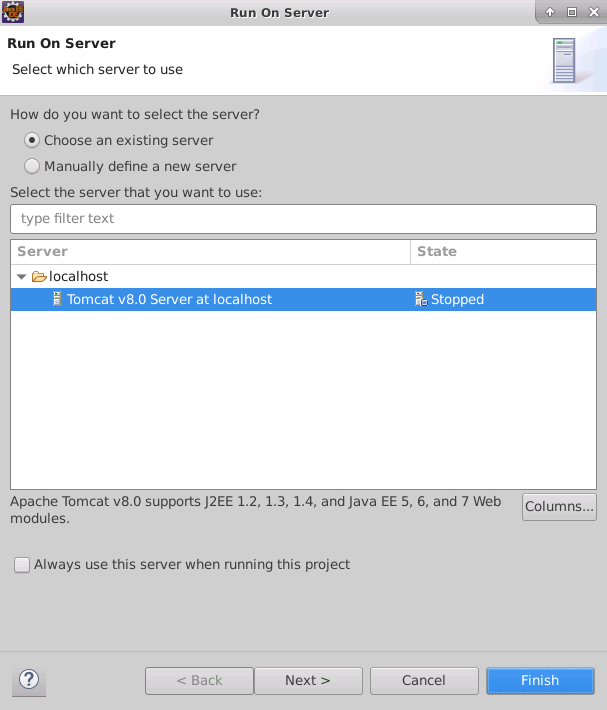
Note
If you have recently installed Tomcat, there might not be an existing server available. In this case, select Manually define a new server, and select Tomcat v8.0 Server.
You'll see a few messages appear as the Tomcat server starts running. Eclipse will show the output of the web application in a browser window inside the IDE, which should look similar to the image shown below.

Click the Go to the selected URL button – the green arrow next to the URL in the Sample Web App window – to refresh the page. You should see the time change as the page regenerated and the Java code executes again.
Congratulations! You've created a sample web app and deployed it locally using Eclipse. In the next exercise, you'll deploy the web app to Azure.