Tutorial: Create a customer database application
This tutorial creates a simple app for managing a list of customers. In doing so, it introduces a selection of basic concepts for enterprise apps in UWP. You'll learn how to:
- Implement Create, Read, Update, and Delete operations against a local SQL database.
- Add a data grid, to display and edit customer data in your UI.
- Arrange UI elements together in a basic form layout.
The starting point for this tutorial is a single-page app with minimal UI and functionality, based on a simplified version of the Customer Orders Database sample app. It's written in C# and XAML, and we're expecting that you've got a basic familiarity with both those languages.

Prerequisites
- Ensure you have the latest version of Visual Studio and the Windows SDK
- Clone or download the Customer Database Tutorial sample
After you've cloned/downloaded the repo, you can edit the project by opening CustomerDatabaseTutorial.sln with Visual Studio.
Note
This tutorial is based on the Customer Orders Database sample which has recently been updated to make use of WinUI and the Windows App SDK. Until this tutorial and code are updated, there will be differences between the two samples.
Part 1: Code of Interest
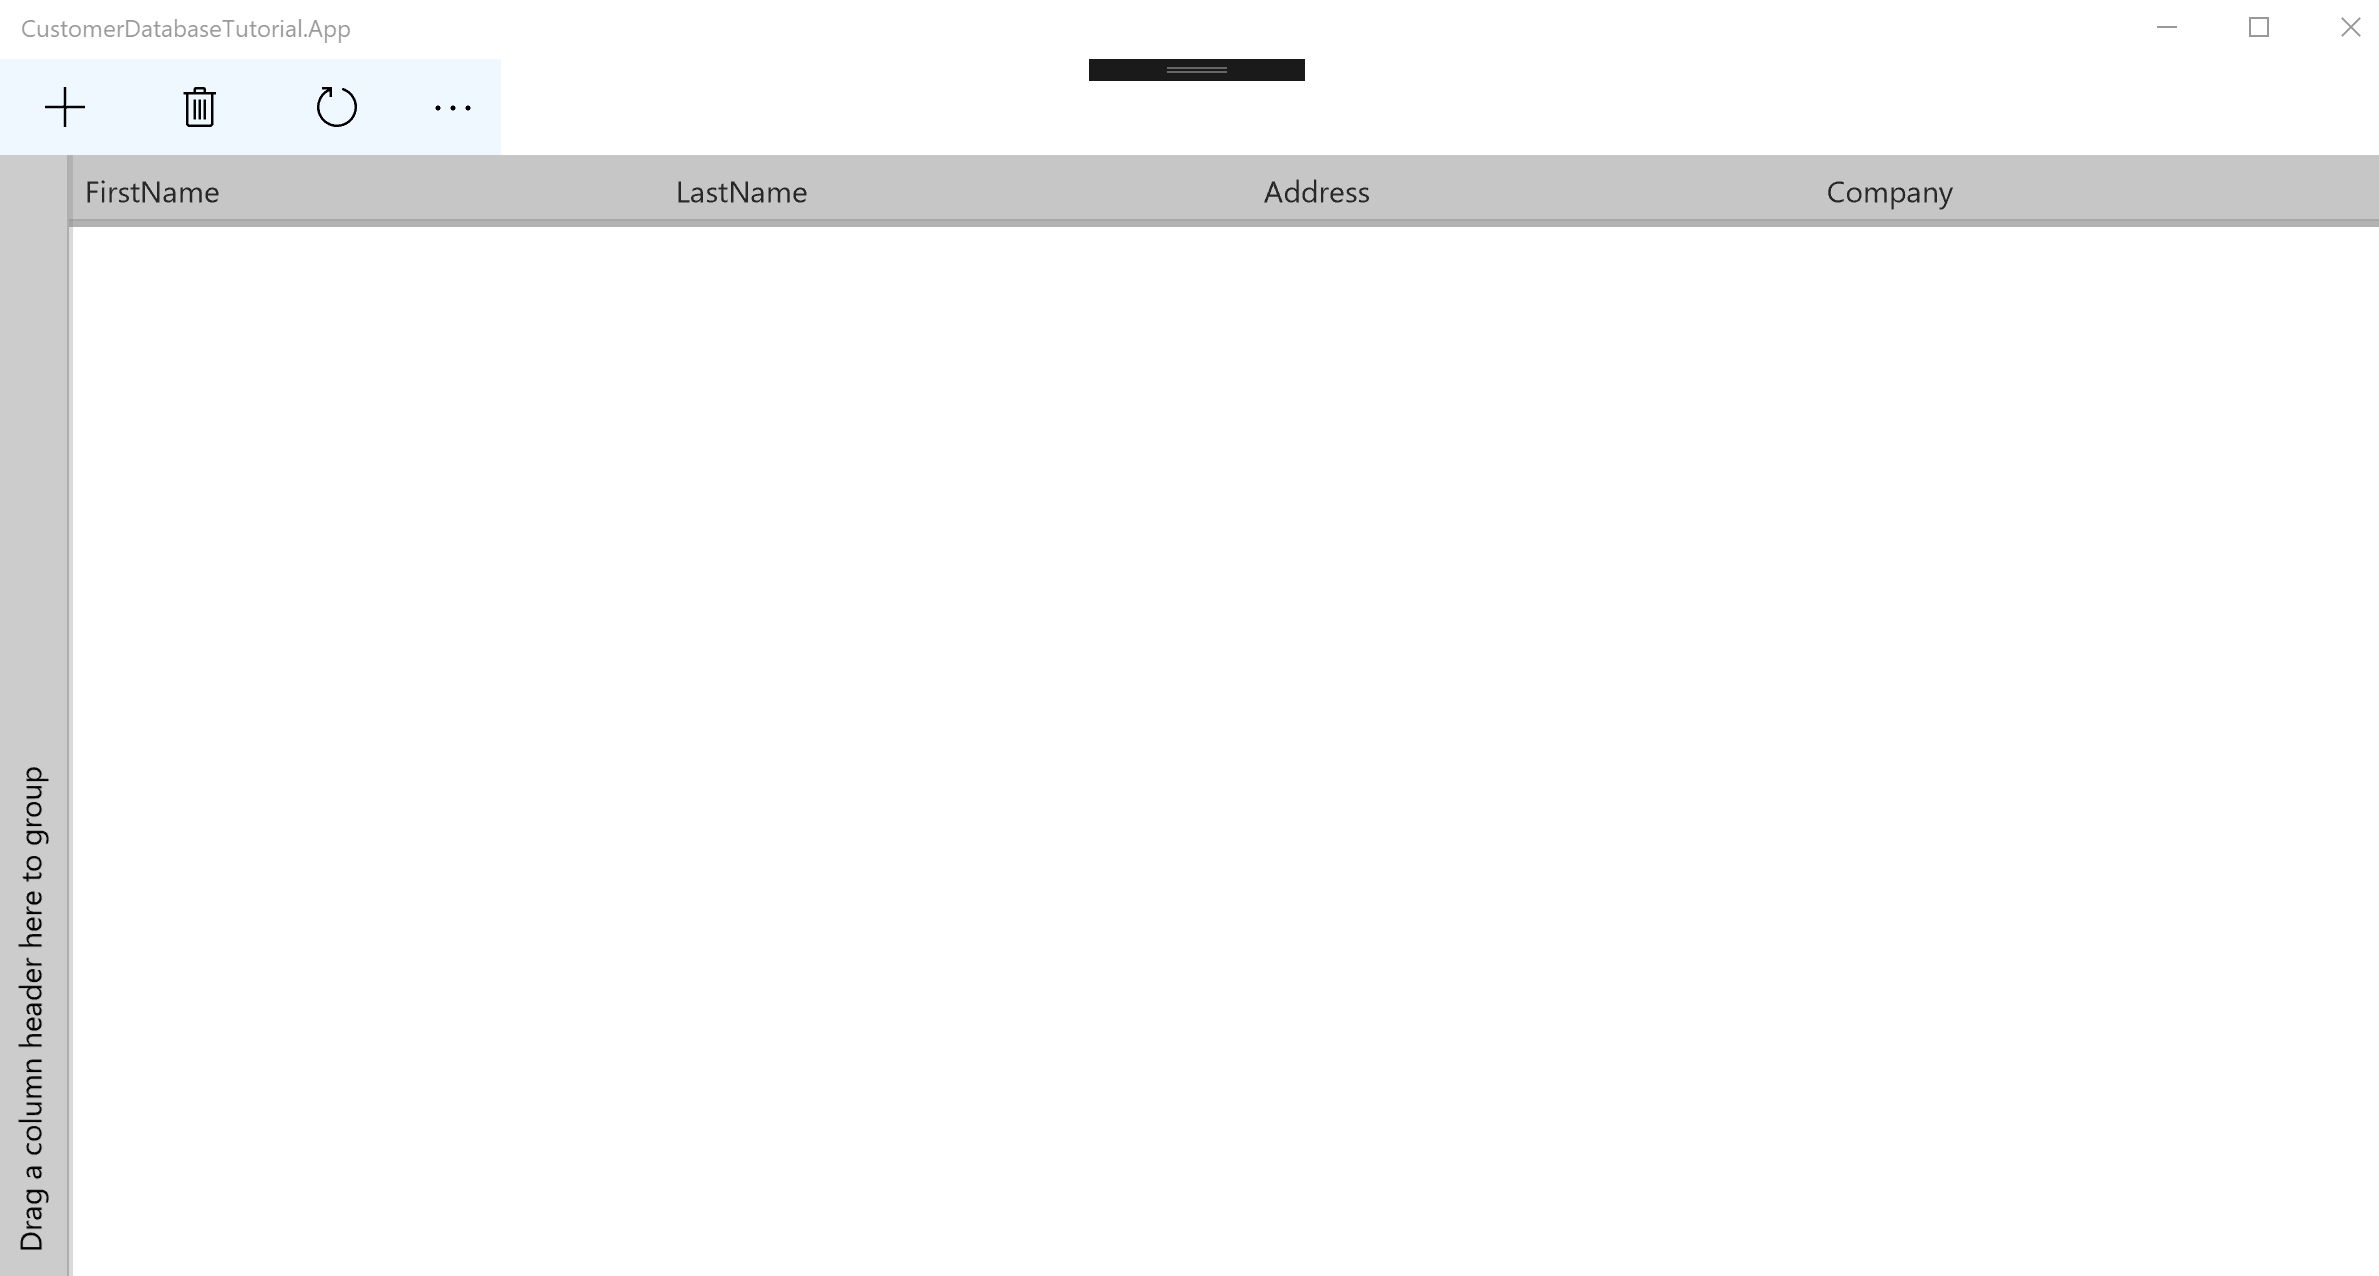
If you run your app immediately after opening it, you'll see a few buttons at the top of a blank screen. Though it's not visible to you, the app already includes a local SQLite database provisioned with a few test customers. From here, you'll start by implementing a UI control to display those customers, and then move on to adding in operations against the database. Before you begin, here's where you'll be working.
Views
CustomerListPage.xaml is the app's View, which defines the UI for the single page in this tutorial. Any time you need to add or change a visual element in the UI, you'll do it in this file. This tutorial will walk you through adding these elements:
- A RadDataGrid for displaying and editing your customers.
- A StackPanel to set the initial values for a new customer.
ViewModels
ViewModels\CustomerListPageViewModel.cs is where the fundamental logic of the app is located. Every user action taken in the view will be passed into this file for processing. In this tutorial, you'll add some new code, and implement the following methods:
- CreateNewCustomerAsync, which initializes a new CustomerViewModel object.
- DeleteNewCustomerAsync, which removes a new customer before it's displayed in the UI.
- DeleteAndUpdateAsync, which handles the delete button's logic.
- GetCustomerListAsync, which retrieves a list of customers from the database.
- SaveInitialChangesAsync, which adds a new customer's information to the database.
- UpdateCustomersAsync, which refreshes the UI to reflect any customers added or deleted.
CustomerViewModel is a wrapper for a customer's information, which tracks whether or not it's been recently modified. You won't need to add anything to this class, but some of the code you'll add elsewhere will reference it.
For more information on how the sample is constructed, check out the app structure overview.
Part 2: Add the DataGrid
Before you begin to operate on customer data, you'll need to add a UI control to display those customers. To do this, we'll be using a pre-made third-party RadDataGrid control. The Telerik.UI.for.UniversalWindowsPlatform NuGet package has already been included in this project. Let's add the grid to our project.
Open Views\CustomerListPage.xaml from the Solution Explorer. Add the following line of code within the Page tag to declare a mapping to the Telerik namespace containing the data grid.
xmlns:telerikGrid="using:Telerik.UI.Xaml.Controls.Grid"Below the CommandBar within the main RelativePanel of the View, add a RadDataGrid control, with some basic configuration options:
 <Grid
     x:Name="CustomerListRoot"
     Background="{ThemeResource ApplicationPageBackgroundThemeBrush}">
     <RelativePanel>
         <CommandBar
             x:Name="mainCommandBar"
             HorizontalAlignment="Stretch"
             Background="AliceBlue">
             <!--CommandBar content-->
        </CommandBar>
        <telerikGrid:RadDataGrid
             x:Name="DataGrid"
             BorderThickness="0"
             ColumnDataOperationsMode="Flyout"
             GridLinesVisibility="None"
             GroupPanelPosition="Left"
             RelativePanel.AlignLeftWithPanel="True"
             RelativePanel.AlignRightWithPanel="True"
             RelativePanel.Below="mainCommandBar" />
    </RelativePanel>
</Grid>
You've added the data grid, but it needs data to display. Add the following lines of code to it:
ItemsSource="{x:Bind ViewModel.Customers}"
UserEditMode="Inline"
Now that you have defined a source of data to display, RadDataGrid will handle most of the UI logic for you. However, if you run your project, you still won't see any data on display. That's because the ViewModel isn't loading it yet.
Part 3: Read customers
When it's initialized, ViewModels\CustomerListPageViewModel.cs calls the GetCustomerListAsync method. That method needs to retrieve the test Customer data from the SQLite database that's included in the tutorial.
In ViewModels\CustomerListPageViewModel.cs, update your GetCustomerListAsync method with this code:
 public async Task GetCustomerListAsync()
 {
     var customers = await App.Repository.Customers.GetAsync();
     if (customers == null)
     {
         return;
     }
     await DispatcherHelper.ExecuteOnUIThreadAsync(() =>
     {
         Customers.Clear();
         foreach (var c in customers)
         {
             Customers.Add(new CustomerViewModel(c));
         }
     });
 }
The GetCustomerListAsync method is called when the ViewModel is loaded, but before this step, it didn't do anything. Here, we've added a call to the GetAsync method in Repository/SqlCustomerRepository. This allows it to contact the repository to retrieve an enumerable collection of Customer objects. It then parses them into individual objects, before adding them to its internal ObservableCollection so they can be displayed and edited.
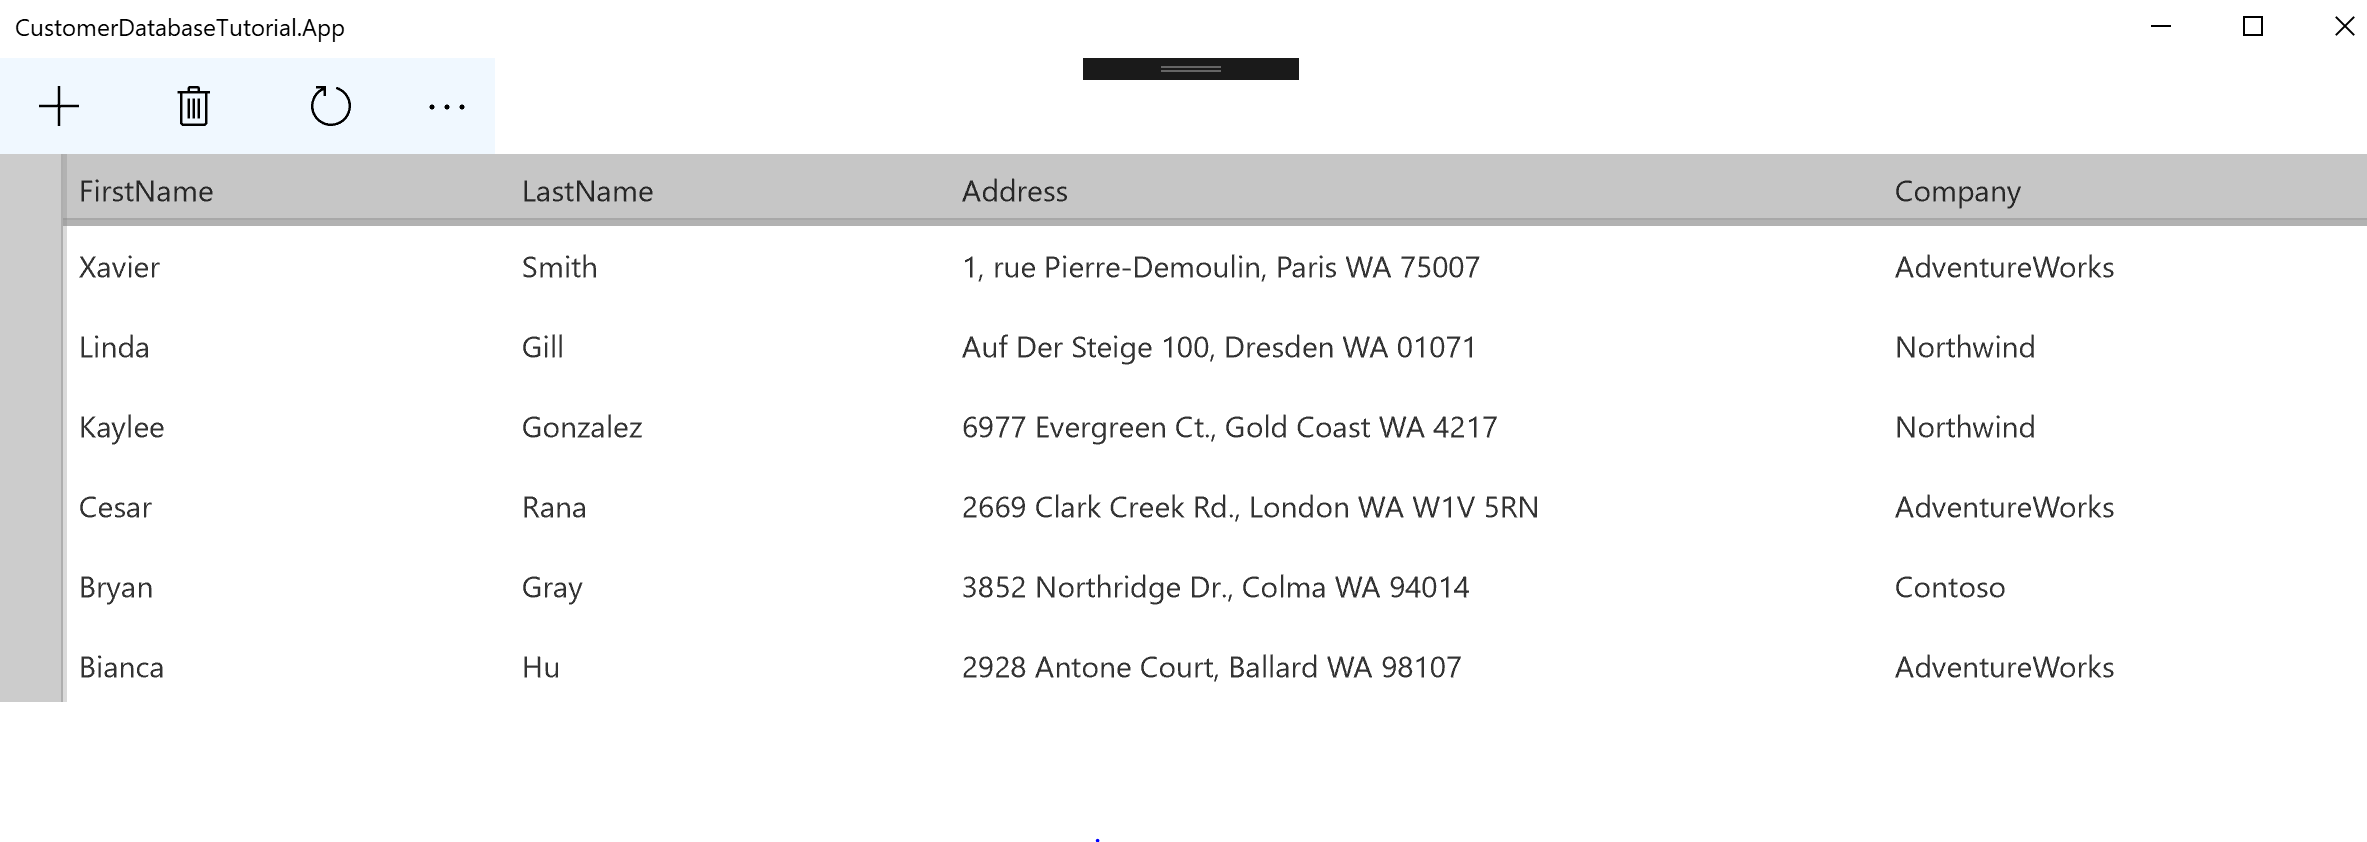
Run your app - you'll now see the data grid displaying the list of customers.
Part 4: Edit customers
You can edit the entries in the data grid by double-clicking them, but you need to ensure that any changes you make in the UI are also made to your collection of customers in the code-behind. This means you'll have to implement two-way data binding. If you want more information about this, check out our introduction to data binding.
First, declare that ViewModels\CustomerListPageViewModel.cs implements the INotifyPropertyChanged interface:
public class CustomerListPageViewModel : INotifyPropertyChangedThen, within the main body of the class, add the following event and method:
public event PropertyChangedEventHandler PropertyChanged;

public void OnPropertyChanged([CallerMemberName] string propertyName = null) =>
     PropertyChanged?.Invoke(this, new PropertyChangedEventArgs(propertyName));
The OnPropertyChanged method makes it easy for your setters to raise the PropertyChanged event, which is necessary for two-way data binding.
Update the setter for SelectedCustomer with this function call:
public CustomerViewModel SelectedCustomer
{
     get => _selectedCustomer;
     set
     {
        if (_selectedCustomer != value)
        {
             _selectedCustomer = value;
             OnPropertyChanged();
        }
     }
}
In Views\CustomerListPage.xaml, add the SelectedCustomer property to your data grid.
SelectedItem="{x:Bind ViewModel.SelectedCustomer, Mode=TwoWay}"This associates the user's selection in the data grid with the corresponding Customer object in the code-behind. The TwoWay binding mode allows the changes made in the UI to be reflected on that object.
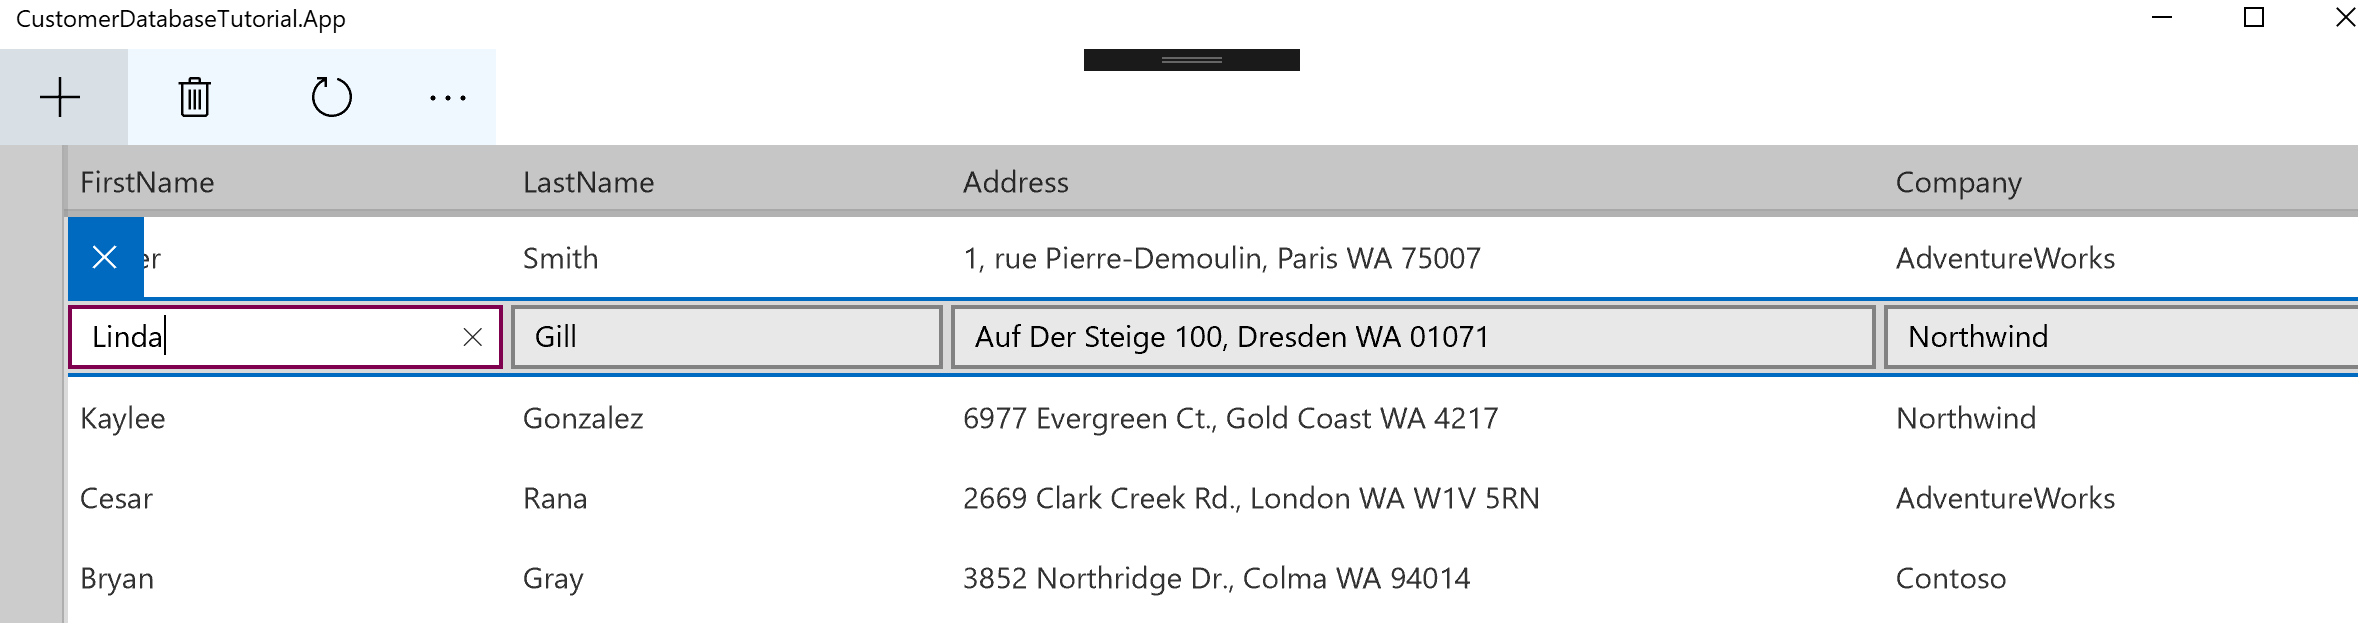
Run your app. You can now see the customers displayed in the grid, and make changes to the underlying data through your UI.
Part 5: Update customers
Now that you can see and edit your customers, you'll need to be able to push your changes to the database, and to pull any updates that have been made by others.
Return to ViewModels\CustomerListPageViewModel.cs, and navigate to the UpdateCustomersAsync method. Update it with this code, to push changes to the database and to retrieve any new information:
public async Task UpdateCustomersAsync()
{
     foreach (var modifiedCustomer in Customers
         .Where(x => x.IsModified).Select(x => x.Model))
     {
         await App.Repository.Customers.UpsertAsync(modifiedCustomer);
     }
     await GetCustomerListAsync();
}
This code utilizes the IsModified property of ViewModels\CustomerViewModel.cs, which is automatically updated whenever the customer is changed. This allows you to avoid unnecessary calls, and to only push changes from updated customers to the database.
Part 6: Create a new customer
Adding a new customer presents a challenge, as the customer will appear as a blank row if you add it to the UI before providing values for its properties. That's not a problem, but here we'll make it easier to set a customer's initial values. In this tutorial, we'll add a simple collapsible panel, but if you had more information to add you could create a separate page for this purpose.
Update the code-behind
Add a new private field and public property to ViewModels\CustomerListPageViewModel.cs. This will be used to control whether or not the panel is visible.
private bool _addingNewCustomer = false;

public bool AddingNewCustomer
{
     get => _addingNewCustomer;
     set
     {
        if (_addingNewCustomer != value)
        {
             _addingNewCustomer = value;
             OnPropertyChanged();
        }
     }
}
Add a new public property to the ViewModel, an inverse of the value of AddingNewCustomer. This will be used to disable the regular command bar buttons when the panel is visible.
public bool EnableCommandBar => !AddingNewCustomer;You'll now need a way to display the collapsible panel, and to create a customer to edit within it.
Add a new private fiend and public property to the ViewModel, to hold the newly created customer.
private CustomerViewModel _newCustomer;

public CustomerViewModel NewCustomer
{
    get => _newCustomer;
    set
    {
        if (_newCustomer != value)
        {
            _newCustomer = value;
            OnPropertyChanged();
        }
    }
}
Update your CreateNewCustomerAsync method to create a new customer, add it to the repository, and set it as the selected customer:
public async Task CreateNewCustomerAsync()
{
    CustomerViewModel newCustomer = new CustomerViewModel(new Models.Customer());
    NewCustomer = newCustomer;
    await App.Repository.Customers.UpsertAsync(NewCustomer.Model);
    AddingNewCustomer = true;
}
Update the SaveInitialChangesAsync method to add a newly-created customer to the repository, update the UI, and close the panel.
public async Task SaveInitialChangesAsync()
{
    await App.Repository.Customers.UpsertAsync(NewCustomer.Model);
    await UpdateCustomersAsync();
    AddingNewCustomer = false;
}
Add the following line of code as the final line in the setter for AddingNewCustomer:
OnPropertyChanged(nameof(EnableCommandBar));This will ensure that EnableCommandBar is automatically updated whenever AddingNewCustomer is changed.
Update the UI
Navigate back to Views\CustomerListPage.xaml, and add a StackPanel with the following properties between your CommandBar and your data grid:
 <StackPanel
     x:Name="newCustomerPanel"
     Orientation="Horizontal"
     x:Load="{x:Bind ViewModel.AddingNewCustomer, Mode=OneWay}"
     RelativePanel.Below="mainCommandBar">
 </StackPanel>
The x:Load attribute ensures that this panel only appears when you're adding a new customer.
Make the following change to the position of your data grid, to ensure that it moves down when the new panel appears:
RelativePanel.Below="newCustomerPanel"Update your stack panel with four TextBox controls. They'll bind to the individual properties of the new customer, and allow you to edit its values before you add it to the data grid.
<StackPanel
     x:Name="newCustomerPanel"
     Orientation="Horizontal"
     x:Load="{x:Bind ViewModel.AddingNewCustomer, Mode=OneWay}"
     RelativePanel.Below="mainCommandBar">
     <TextBox
         Header="First name"
         PlaceholderText="First"
         Margin="8,8,16,8"
         MinWidth="120"
         Text="{x:Bind ViewModel.NewCustomer.FirstName, Mode=TwoWay, UpdateSourceTrigger=PropertyChanged}"/>
     <TextBox
         Header="Last name"
         PlaceholderText="Last"
         Margin="0,8,16,8"
         MinWidth="120"
         Text="{x:Bind ViewModel.NewCustomer.LastName, Mode=TwoWay, UpdateSourceTrigger=PropertyChanged}"/>
     <TextBox
         Header="Address"
         PlaceholderText="1234 Address St, Redmond WA 00000"
         Margin="0,8,16,8"
         MinWidth="280"
         Text="{x:Bind ViewModel.NewCustomer.Address, Mode=TwoWay, UpdateSourceTrigger=PropertyChanged}"/>
     <TextBox
         Header="Company"
         PlaceholderText="Company"
         Margin="0,8,16,8"
         MinWidth="120"
         Text="{x:Bind ViewModel.NewCustomer.Company, Mode=TwoWay, UpdateSourceTrigger=PropertyChanged}"/>
</StackPanel>
Add a simple button to your new stack panel to save the newly-created customer:
<StackPanel>
    <!--Text boxes from step 3-->
    <AppBarButton
        x:Name="SaveNewCustomer"
        Click="{x:Bind ViewModel.SaveInitialChangesAsync}"
        Icon="Save"/>
</StackPanel>
Update the CommandBar, so the regular create, delete, and update buttons are disabled when the stack panel is visible:
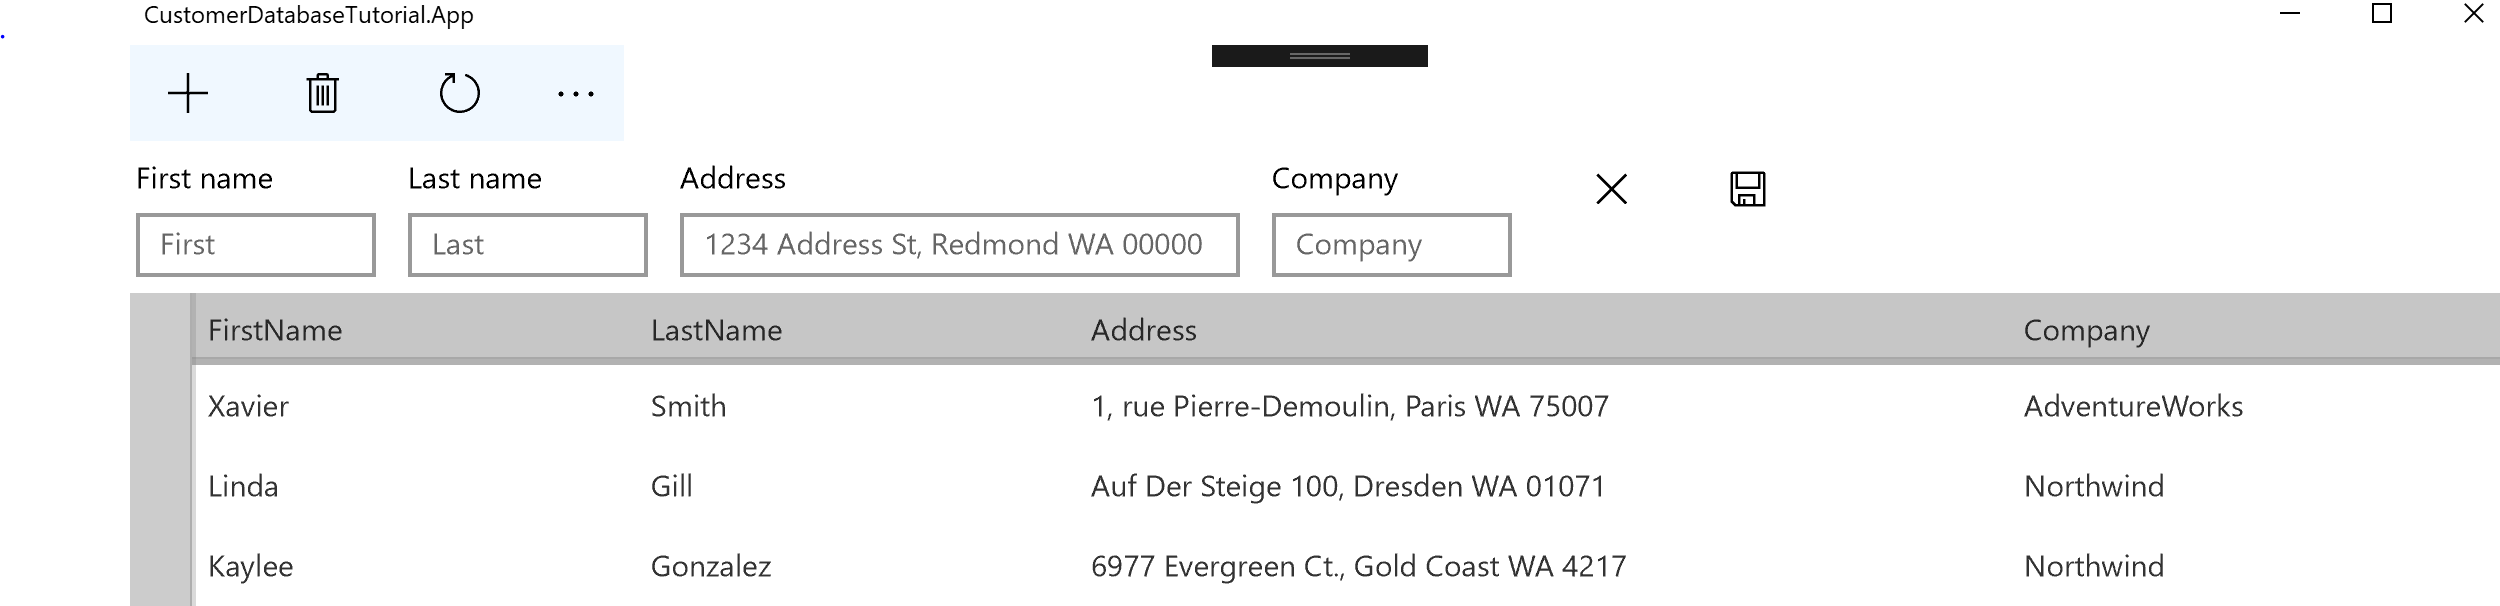
<CommandBar
    x:Name="mainCommandBar"
    HorizontalAlignment="Stretch"
    IsEnabled="{x:Bind ViewModel.EnableCommandBar, Mode=OneWay}"
    Background="AliceBlue">
    <!--App bar buttons-->
</CommandBar>
Run your app. You can now create a customer and input its data in the stack panel.

Part 7: Delete a customer
Deleting a customer is the final basic operation that you need to implement. When you delete a customer you've selected within the data grid, you'll want to immediately call UpdateCustomersAsync in order to update the UI. However, you don't need to call that method if you're deleting a customer you've just created.
Navigate to ViewModels\CustomerListPageViewModel.cs, and update the DeleteAndUpdateAsync method:
public async void DeleteAndUpdateAsync()
{
    if (SelectedCustomer != null)
    {
        await App.Repository.Customers.DeleteAsync(_selectedCustomer.Model.Id);
    }
    await UpdateCustomersAsync();
}
In Views\CustomerListPage.xaml, update the stack panel for adding a new customer so it contains a second button:
 <StackPanel>
     <!--Text boxes for adding a new customer-->
     <AppBarButton
         x:Name="DeleteNewCustomer"
         Click="{x:Bind ViewModel.DeleteNewCustomerAsync}"
         Icon="Cancel"/>
     <AppBarButton
         x:Name="SaveNewCustomer"
         Click="{x:Bind ViewModel.SaveInitialChangesAsync}"
         Icon="Save"/>
 </StackPanel>
In ViewModels\CustomerListPageViewModel.cs, update the DeleteNewCustomerAsync method to delete the new customer:
public async Task DeleteNewCustomerAsync()
{
    if (NewCustomer != null)
    {
        await App.Repository.Customers.DeleteAsync(_newCustomer.Model.Id);
        AddingNewCustomer = false;
    }
}
Run your app. You can now delete customers, either within the data grid or in the stack panel.
Conclusion
Congratulations! With all this done, your app now has a full range of local database operations. You can create, read, update, and delete customers within your UI, and these changes are saved to your database and will persist across different launches of your app.
Now that you're finished, consider the following:
- If you haven't already, check out the app structure overview for more information on why the app is built how it is.
- Explore the full Customer Orders Database sample to see the app this tutorial was based on.
Or if you're up for a challenge, you can continue onwards...
Going further: Connect to a remote database
We've provided a step-by-step walkthrough of how to implement these calls against a local SQLite database. But what if you want to use a remote database, instead?
If you want to give this a try, you'll need your own Azure Active Directory (AAD) account and the ability to host your own data source.
You'll need to add authentication, functions to handle REST calls, and then create a remote database to interact with. There's code in the full Customer Orders Database sample that you can reference for each necessary operation.
Settings and configuration
The necessary steps to connect to your own remote database are spelled out in the sample's readme. You'll need to do the following:
- Provide your Azure account client Id to Constants.cs.
- Provide the url of the remote database to Constants.cs.
- Provide the connection string for the database to Constants.cs.
- Associate your app with the Microsoft Store.
- Copy over the Service project into your app, and deploy it to Azure.
Authentication
You'll need to create a button to start an authentication sequence, and a popup or a separate page to gather a user's information. Once you've created that, you'll need to provide code that requests a user's information and uses it to acquire an access token. The Customer Orders Database sample wraps Microsoft Graph calls with the WebAccountManager library to acquire a token and handle the authentication to an AAD account.
- The authentication logic is implemented in AuthenticationViewModel.cs.
- The authentication process is displayed in the custom AuthenticationControl.xaml control.
REST calls
You won't need to modify any of the code we added in this tutorial in order to implement REST calls. Instead, you'll need to do the following:
- Create new implementations of the ICustomerRepository and ITutorialRepository interfaces, implementing the same set of functions through REST instead of SQLite. You'll need to serialize and deserialize JSON, and can wrap your REST calls in a separate HttpHelper class if you need to. Refer to the full sample for specifics.
- In App.xaml.cs, create a new function to initialize the REST repository, and call it instead of SqliteDatabase when the app is initialized. Again, refer to the full sample.
Once all three of these steps are complete, you should be able to authenticate to your AAD account through your app. REST calls to the remote database will replace the local SQLite calls, but the user experience should be the same. If you're feeling even more ambitious, you can add a settings page to allow the user to dynamically switch between the two.
Feedback
Coming soon: Throughout 2024 we will be phasing out GitHub Issues as the feedback mechanism for content and replacing it with a new feedback system. For more information see: https://aka.ms/ContentUserFeedback.
Submit and view feedback for